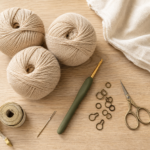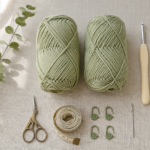
A triangle shawl looks much more complicated on your shoulders than it actually is on your hook.
For a beginner, the most useful way to learn this shape is to forget about decorative lace, complicated charts, and long stitch repeats at first. Learn the geometry instead: increase at both outside edges, increase around one center space, and repeat.
That simple idea is the foundation of this beginner crochet triangle shawl pattern.
This tutorial uses basic double crochet stitches and one easy row formula. You will begin at the upper center of the shawl, then work back and forth while the fabric becomes wider and deeper with every row. There is no seaming, no separate pieces, and no complicated shaping.
By the time the shawl is large enough to wear, you will have practiced turning chains, double crochet, chain spaces, stitch counting, increases, edge control, yarn tension, and blocking.
What You’ll Learn
- How to start a top-down crochet triangle
- How to make a center chain space
- How to increase at both outside edges
- How to make a symmetrical center increase
- How to identify the final stitch of every row
- How to keep the two sides of the shawl balanced
- How to adjust the finished size
- How to weave in ends and block a triangle shawl
Materials You’ll Need
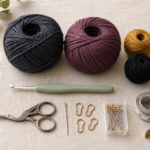
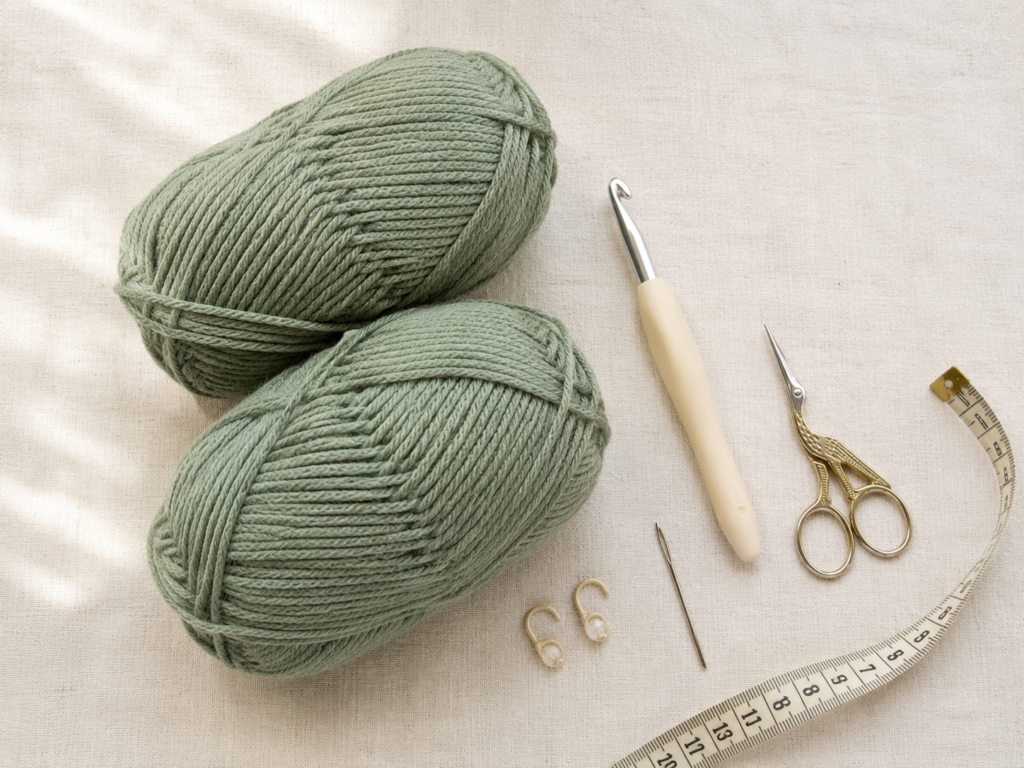
For an easy first shawl, use a yarn that allows you to see the individual stitches. Very dark yarn, fuzzy novelty yarn, and extremely thin yarn can make learning harder.
For the sample tutorial:
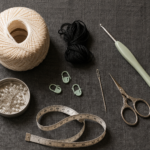
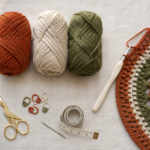
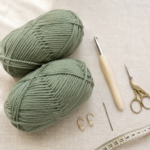
- Approximately 650–800 yards of #4 medium/worsted-weight yarn
- 6.0 mm crochet hook
- Scissors
- Blunt tapestry needle
- 1–3 removable stitch markers
- Measuring tape
- Blocking mats and rust-resistant pins if you plan to block the finished shawl
The Craft Yarn Council classifies worsted/aran yarn as category 4 medium yarn and lists a common crochet-hook range of approximately 5.5–6.5 mm, making a 6 mm hook a sensible starting point for this kind of fabric. Exact gauge still depends on the crocheter and yarn.
Crochet Abbreviations Used
This tutorial uses U.S. crochet terminology.
- ch = chain
- dc = double crochet
- st/sts = stitch/stitches
- sp = space
- ch-2 sp = chain-two space
- rep = repeat
The Craft Yarn Council’s standardized abbreviation list uses these same common U.S. abbreviations. It also notes that a U.S. double crochet corresponds to a U.K. treble crochet, so readers following U.K. terminology should account for that difference.
Finished Size
Work until the shawl is the size you want.
A useful medium-size target is approximately:
58 in / 147 cm wingspan × 28–30 in / 71–76 cm depth
The exact dimensions will change with your yarn, hook, tension, and number of rows.
Gauge and Tension
For a shawl, gauge is less critical than it would be for a fitted sweater. The fabric still needs to feel comfortable, however.
A reasonable starting gauge is approximately:
11–13 double crochet stitches × 7 rows = 4 in / 10 cm
Do not force yourself to match that number if you like your fabric.
If the shawl feels stiff, move up one hook size.
If the stitches are extremely loose and the fabric looks unstable, move down one hook size.
The Craft Yarn Council also recommends evaluating gauge and changing hook size when the finished swatch is too large or too small.
Before You Start
Learn to recognize the center space
The most important feature in this pattern is the ch-2 space in the exact center.
You will work the main increase into that space on every row.
A removable stitch marker can save a beginner a surprising amount of frustration. Clip one into the center ch-2 space and move it upward after every row.
Know where your final stitch is
The last stitch is another common trouble spot.
Your turning chain at the beginning of one row becomes the edge stitch that you must find when you return across the next row. If you accidentally skip it, one side becomes narrower.
Put a marker in the top of the beginning chain if you regularly lose it.
Count the two halves
You do not have to count hundreds of stitches on a full-size shawl.
Instead, periodically fold the triangle down the center line. The two halves should mirror one another closely.
If one side is obviously shorter, inspect the last several rows for a missed edge increase.
Watch your tension
Try to keep your center chains relaxed. Tight center chains can pull the middle of the shawl inward and make the point curl.
Do not intentionally loosen every other stitch. Aim for steady, comfortable tension.
Step-by-Step Crochet Tutorial
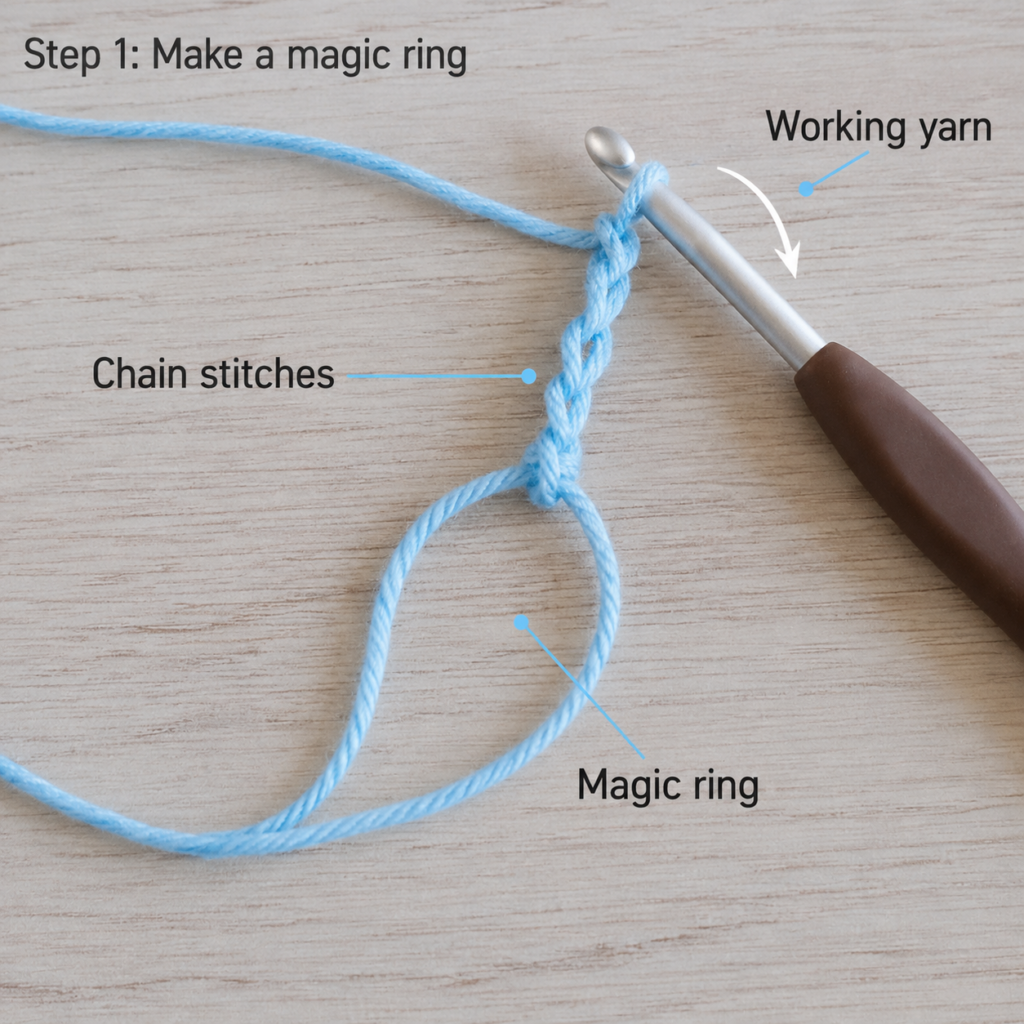
Step 1: Make the Starting Ring
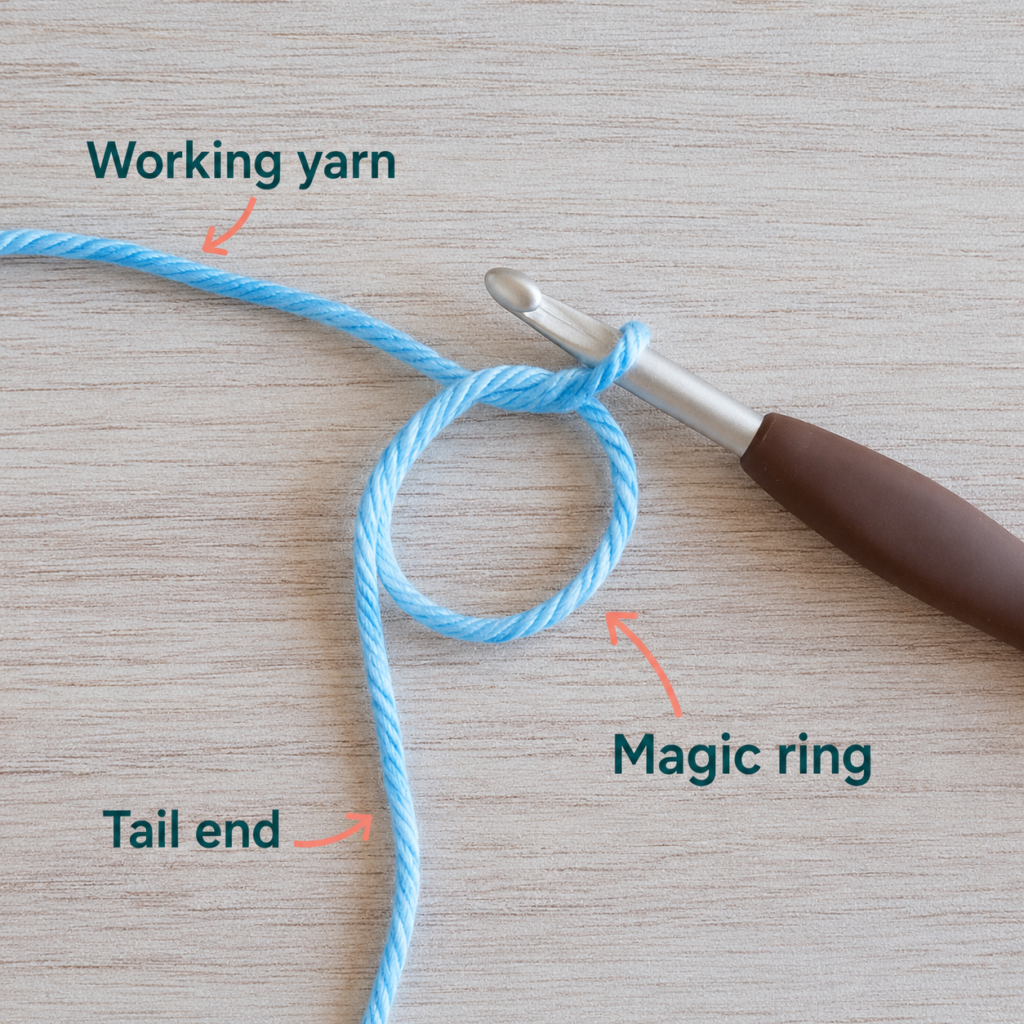
Begin with a magic ring.
Wrap the yarn to form an adjustable loop and place your crochet hook into the loop. Pull the working yarn through so you have an active loop on the hook.
Do not tighten the ring yet. You still need space to crochet your first stitches into it.
Beginner tip:
Keep the tail several inches long. A very short tail is difficult to weave in securely later.
Common mistake to avoid:
Do not confuse the working yarn with the tail. Your stitches should be formed with the yarn connected to the skein.
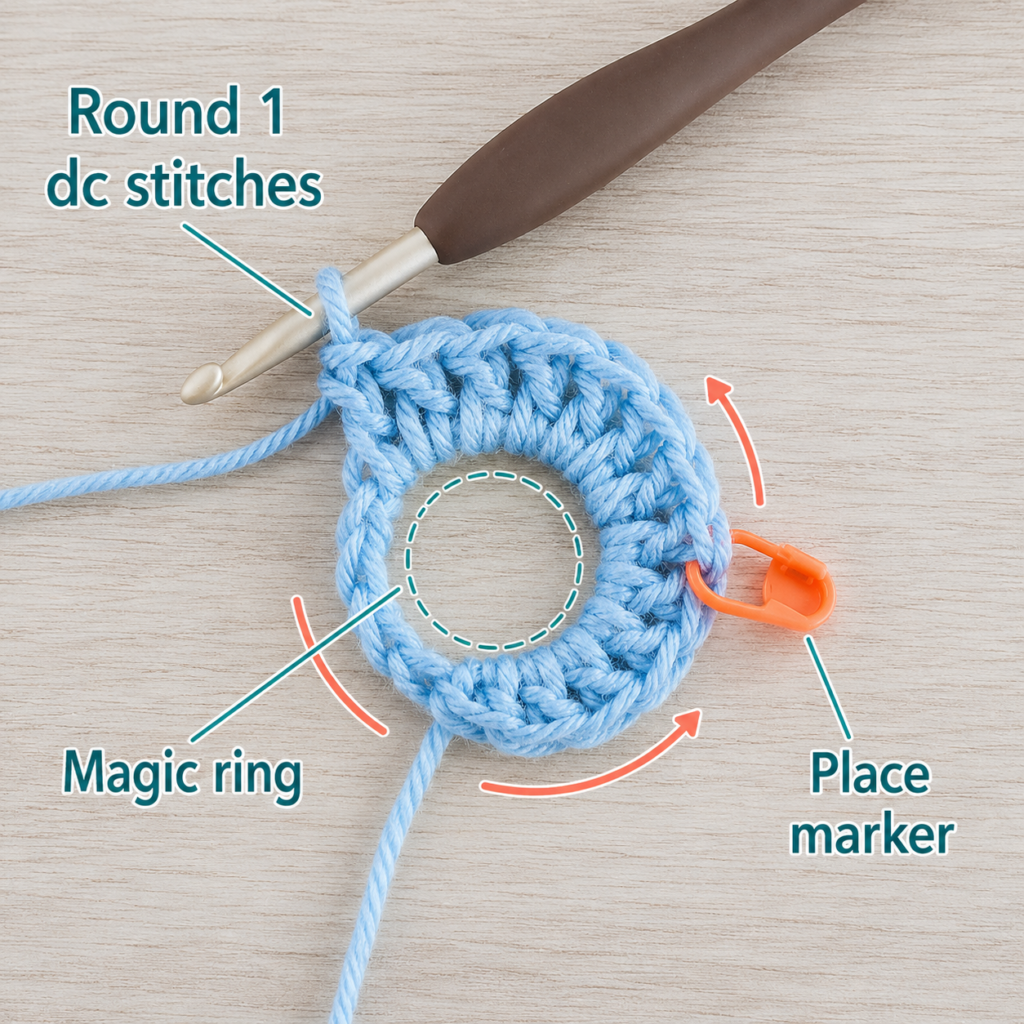
Step 2: Crochet the Setup Row
Chain 3. In this tutorial, the chain-3 counts as your first double crochet.
Work 2 double crochets into the magic ring.
Chain 2.
Work 3 more double crochets into the same magic ring.
You now have two equal groups separated by one ch-2 center space.
Pull the yarn tail gently to tighten the magic ring, but do not distort the stitches.
Turn your work.
The setup row can be written concisely as:
Row 1: Ch 3, 2 dc in ring, ch 2, 3 dc in ring. Tighten ring and turn.
You should have 6 dc and one ch-2 center space.
Beginner tip:
Count the chain-3 as one double crochet when checking the first side.
Common mistake to avoid:
Do not crochet into the ch-2 space while tightening the magic ring. The ch-2 space needs to remain open because it becomes your center increase point.
Step 3: Start the Repeat Row and Increase at the Edge
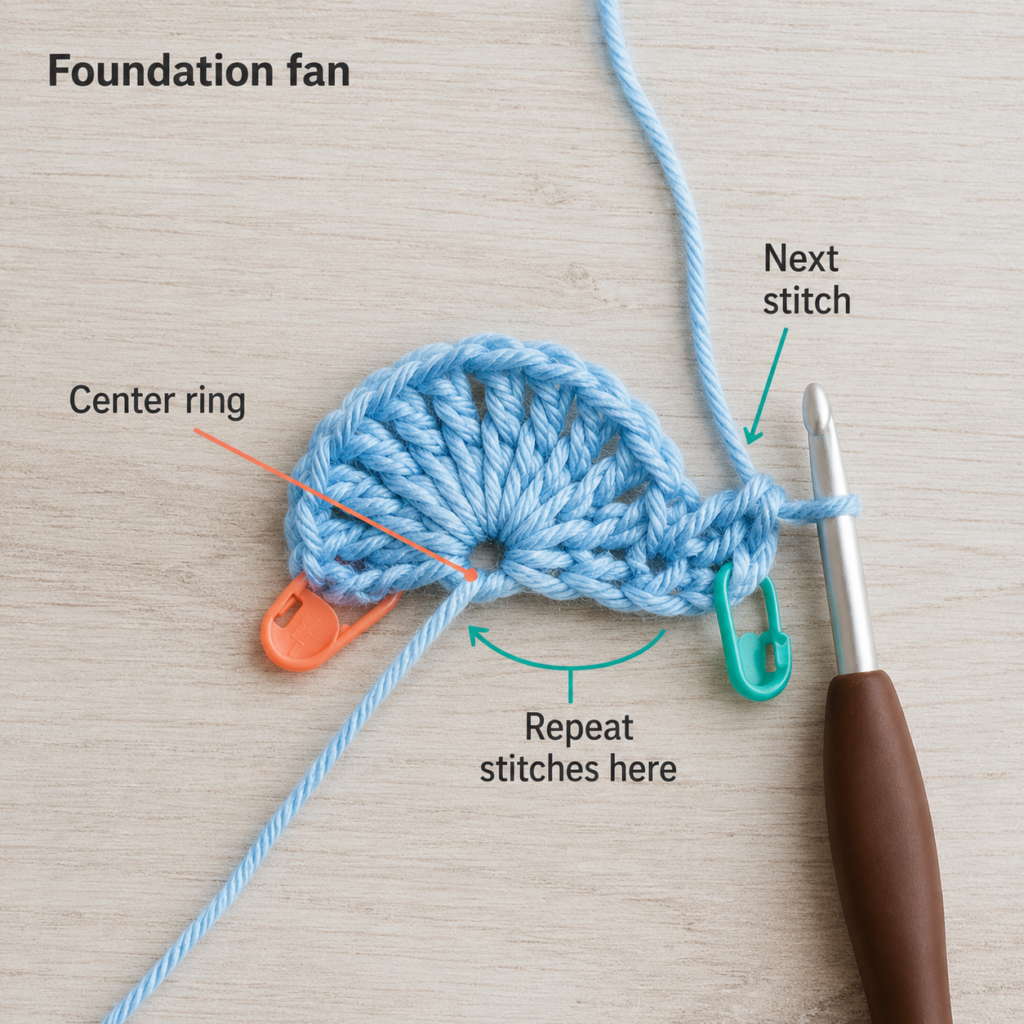
Every remaining row uses the same basic formula.
Turn the work.
Chain 3.
Now work 1 double crochet into the same first stitch.
Because the turning chain counts as one double crochet, adding another dc into that stitch expands the outside edge.
Continue with one double crochet in each stitch until you reach the center ch-2 space.
Beginner tip:
Place a marker in the first stitch before continuing. When you crochet back across the next row, that marker will show exactly where the final edge is located.
Common mistake to avoid:
Do not work only the chain-3 and immediately continue to the second stitch. You need the extra dc at the first edge.
Step 4: Crochet to the Center
Work one dc in each stitch until the center ch-2 space is directly in front of your hook.
Do not crochet into the individual chain stitches.
You are going to work around the chain and into the open space.
This distinction becomes much easier after several rows because the center openings form a visible vertical line running toward the shawl’s point.
Beginner tip:
Move your stitch marker into the newest center ch-2 space after completing every row.
Common mistake to avoid:
Do not accidentally treat the center chains as ordinary stitches. Working your increase directly into the open chain space gives the center enough room to expand.
Step 5: Crochet the Center Increase
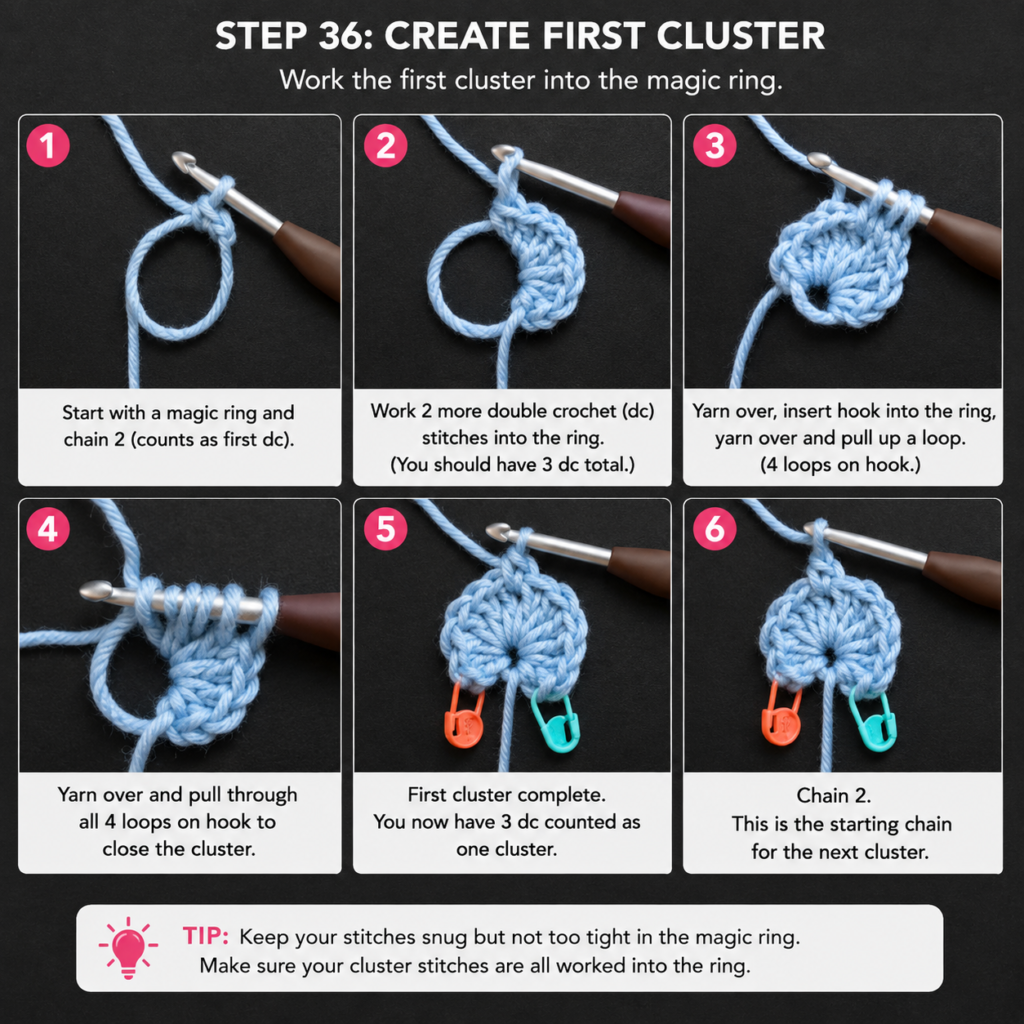
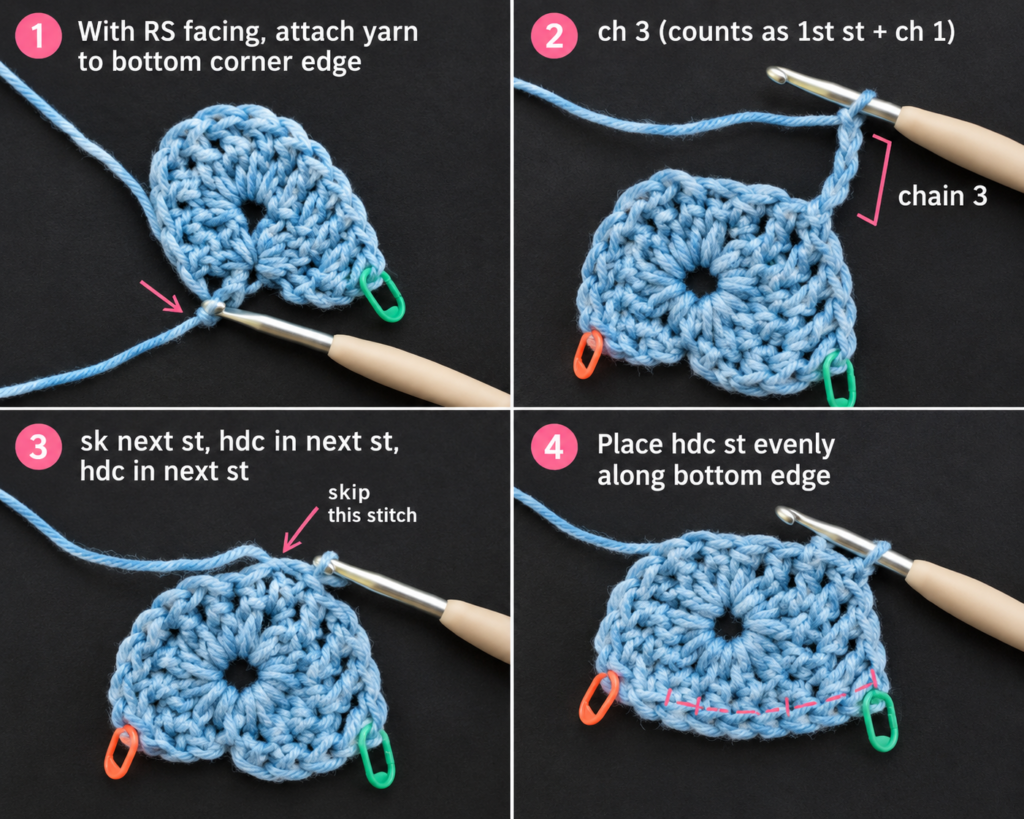
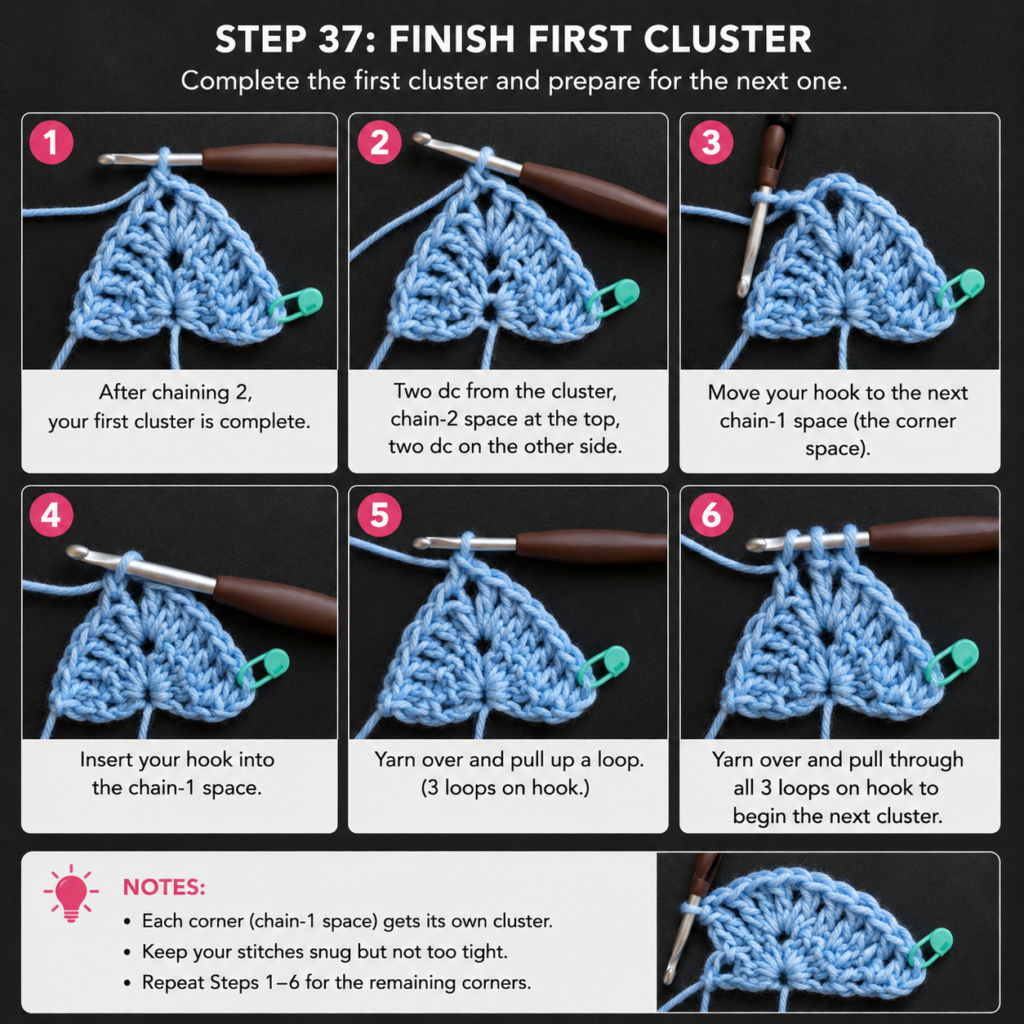
Into the center ch-2 space, work:
2 dc, ch 2, 2 dc
All four double crochets go into the same open space.
The two center chains create the new center space for the next row.
This increase is what allows the shawl to expand evenly around the middle.
After the center increase, crochet one dc in every stitch across the second half of the row.
Beginner tip:
After making the center increase, spread the fabric gently with your fingers. You should clearly see two dc, an open ch-2 space, and two dc on the other side.
Common mistake to avoid:
Forgetting the center ch-2 is one of the fastest ways to lose the pointed triangle shape. If you realize it immediately, undo the stitches back to the center and correct it.
Step 6: Make the Final Edge Increase
Continue working one dc in each stitch until you reach the final stitch.
The final stitch is the top of the turning chain from the previous row.
Work 2 dc into that final stitch.
Turn.
This balances the increase you made at the opposite edge.
Your repeating row is therefore:
Ch 3, dc in same first st, dc across to center ch-2 sp, (2 dc, ch 2, 2 dc) in center ch-2 sp, dc across, 2 dc in final edge st. Turn.
Repeat that row until the shawl reaches your desired size.
Stitch-count rule:
After the six-dc setup row, each repeat row adds six double crochet stitches overall: one additional stitch at each outer edge and four stitches around the center.
Therefore:
- Row 1 = 6 dc
- Row 2 = 12 dc
- Row 3 = 18 dc
- Row 4 = 24 dc
Continuing that logic makes checking your early rows easy.
You do not need to count every stitch once the shawl becomes large. Check symmetry and center placement instead.
Step 7: Repeat Until the Shawl Is Large Enough
Continue repeating the same row.
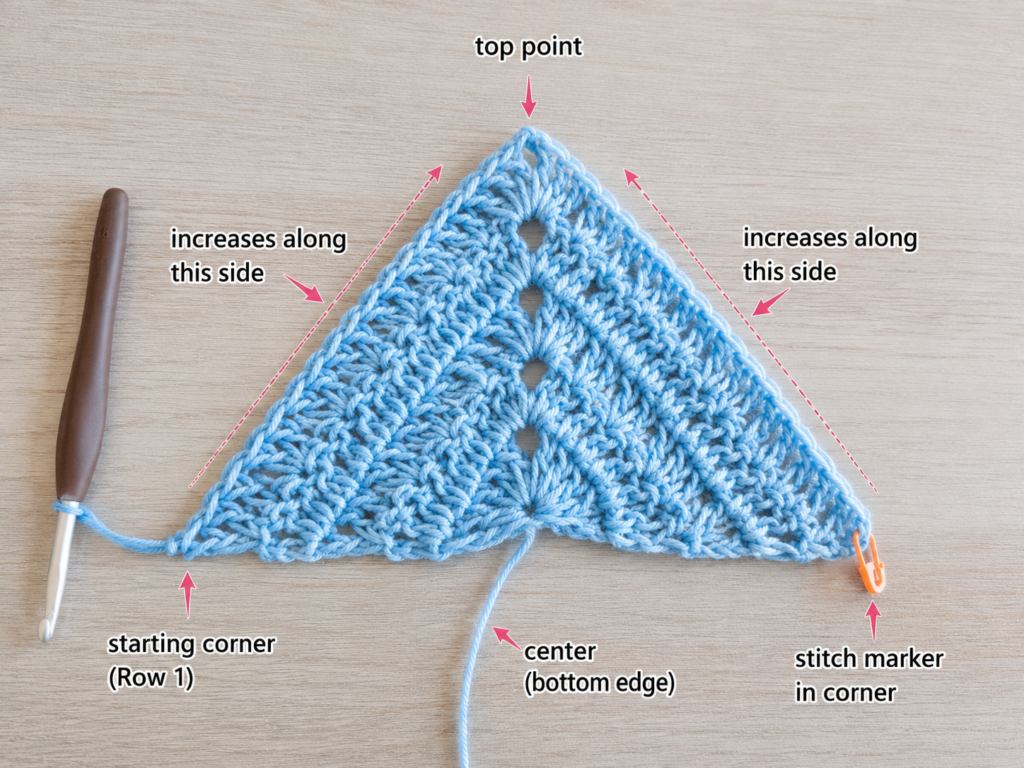
As the shawl grows, three visual features should become obvious:
- The upper edge becomes wider after every row.
- The center ch-2 spaces form a straight line down the middle.
- The lower center develops into a definite point.
For a scarf-size triangle, you can stop relatively early.
For a shoulder wrap, continue until the wings comfortably reach around your upper body.
For a large shawl, continue until the wingspan measures roughly 58–65 inches.
Do not choose the final row number before checking the actual fabric. Different yarns and crocheters produce different measurements.
Beginner tip:
Lay the shawl flat every six to eight rows. Check that the left and right halves appear balanced.
Common mistake to avoid:
Do not aggressively stretch the shawl while measuring. Place it flat and relaxed so you measure the fabric you will actually wear.
Pattern Notes or Stitch Notes
Turning chain
The beginning ch 3 counts as the first dc.
Because it counts as a stitch, remember to work into its top when you reach that edge on the following row.
Center repeat
Every row has exactly one center ch-2 space.
Into that space you work:
2 dc, ch 2, 2 dc
The newly created ch-2 becomes your center space for the following row.
Outside edges
Each row increases at both outside edges.
At the beginning, the chain-3 plus dc in the same stitch creates the increase.
At the opposite edge, work two dc in the final edge stitch.
Right side and wrong side
This shawl is worked back and forth, so rows alternate facing you.
Because ordinary double crochet is visually attractive from both sides, there is no critical public-facing right side for this basic project.
Size adjustment
The easiest size adjustment is simply to crochet more or fewer rows.
No recalculation is required as long as you maintain the edge and center increases.
Common Beginner Mistakes
1. Missing the final stitch
Problem: One side becomes noticeably shorter.
Fix: Place a removable marker in the first stitch of every row so you can recognize it when returning across the next row.
2. Forgetting the center increase
Problem: The triangle stops expanding correctly or the center pulls inward.
Fix: Mark the center ch-2 space and move the marker to the new space each row.
3. Working into the center chain stitches
Problem: The center feels cramped.
Fix: Insert your hook under the entire chain into the open ch-2 space rather than hunting for each tiny chain loop.
4. Making the center chains too tight
Problem: A ridge or puckered line develops down the center.
Fix: Relax your tension slightly when making the two center chains.
5. Accidental extra stitches along the sides
Problem: One side becomes wavy or wider than the other.
Fix: Work only one dc into each ordinary stitch between the designated increase locations.
6. Starting with fuzzy or extremely dark yarn
Problem: It becomes difficult to identify stitch tops and chain spaces.
Fix: For your first shawl, use smooth yarn in a medium or light color with visible stitch definition.
7. Judging the shape before blocking
Problem: The shawl appears slightly uneven and the crocheter assumes the pattern failed.
Fix: First verify the stitch structure. Minor irregularities often relax considerably after gentle blocking.
How to Customize This Crochet Project
Change the yarn weight
For a lighter spring shawl, try DK yarn with a hook appropriate to that yarn and your desired drape.
For a warmer winter wrap, use a soft worsted wool or acrylic/wool blend.
Changing yarn weight changes your gauge, dimensions, and yardage, so measure the shawl rather than relying on row count.
Use self-striping yarn
A top-down triangle works beautifully with gradual color changes because every new row becomes longer.
If you use self-striping yarn, allow the yarn to create the color placement naturally instead of cutting and joining at every change.
Create manual color stripes
Change color every four, six, or eight rows.
For a quieter design, choose three related shades.
For a stronger graphic effect, alternate light and dark colors.
Add a simple border
After reaching the desired size, you can finish immediately or add a decorative edge.
Beginner-friendly possibilities include:
- One round of single crochet
- Small picots along the two diagonal edges
- A scalloped shell border
- Short fringe along the bottom edges
- Tassels at all three points
If you add a border, avoid pulling the edges too tightly.
Make a triangle scarf
Stop much earlier and wrap the triangle around the neck with the point facing forward.
This uses less yarn and can be an excellent practice version before committing to a full shawl.
Make a prayer or comfort shawl
Choose a soft, washable yarn and extend the wingspan for more coverage.
Use cotton for warm weather
A cotton or cotton-blend version creates a cooler shawl, although cotton tends to behave differently from elastic wool or acrylic yarn. Make a small swatch first to confirm you like the drape.
Finishing Instructions
When the shawl reaches your preferred size, finish the final row completely.
Cut the yarn, leaving a tail approximately 6 inches long.
Pull the yarn through the final active loop.
Thread the tail through a blunt tapestry needle and weave it through several nearby stitches on the wrong side of the fabric.
Change direction once or twice rather than weaving only in a straight line.
Trim the remaining tail after it is secure.
Repeat for the starting tail.
Blocking
Blocking can make the center point sharper, relax slightly uneven edges, and improve the overall drape.
Check the care instructions on your yarn label before using water or heat.
For a washable acrylic or wool-blend project, wet blocking or gentle washing may be appropriate depending on the fiber.
Lay the shawl flat.
Shape the two upper wings so they are even.
Straighten the center line.
Gently shape the bottom point.
Pin only if necessary and allow the shawl to dry completely.
Do not aggressively stretch the piece. The goal is to settle the stitches, not permanently distort them.
Washing and Care
Always defer to the yarn manufacturer’s care label.
If you are giving the shawl as a gift, include the yarn’s washing instructions with it.
Quick Printable-Style Summary
Skill level: Beginner
Yarn: #4 medium/worsted-weight yarn, approximately 650–800 yards for a medium shawl
Hook: 6.0 mm
Stitches: Chain and double crochet
Starting method: Magic ring
Setup row:
Ch 3, 2 dc in ring, ch 2, 3 dc in ring. Tighten ring. Turn.
Main repeat:
Ch 3, dc in same first st, dc in every stitch to center ch-2 space, work 2 dc + ch 2 + 2 dc in center space, dc in every stitch across, 2 dc in final edge stitch. Turn.
Repeat:
Continue the same row until the shawl reaches the desired wingspan and depth.
Finishing:
Fasten off, weave in tails, gently block if appropriate for the yarn.
FAQ
Is a triangle shawl a good beginner crochet project?
Yes. A basic triangle shawl is particularly useful after you have learned chains and double crochet because it introduces increases without requiring garment assembly.
The main challenge is remembering three increase locations: the first edge, the center, and the final edge.
What is the easiest stitch for a crochet triangle shawl?
Double crochet is an excellent beginner choice. It is tall enough that the shawl grows fairly quickly while remaining easy to identify and count.
How does a crochet triangle shawl get wider?
This pattern increases in three areas.
You add width at each outside edge and add additional stitches around the center chain space. Repeating those increases causes both the wingspan and depth to grow.
Why is my crochet triangle shawl becoming crooked?
The most common cause is a missed edge stitch.
Check whether you worked the required increase into both outside edges and whether your center increase is still directly in the middle.
Using markers at the center and outside edges can make troubleshooting much easier.
How much yarn do I need for a beginner triangle shawl?
For a medium worsted-weight shawl, approximately 650–800 yards is a useful planning range.
Your exact requirement depends on yarn weight, hook size, tension, stitch pattern, and finished dimensions. Purchasing a little extra is preferable if you need a specific finished size.
Can I make the shawl bigger?
Yes.
Continue repeating the same increase row until the shawl is large enough.
Because the construction expands naturally, there is no complicated resizing calculation.
Do I need to block a crochet shawl?
Not always, but blocking can noticeably improve drape, center-point definition, and edge shape.
Use a blocking method appropriate for your yarn fiber and always check the yarn care label first.
Conclusion
A beginner crochet triangle shawl becomes much easier once you understand what is actually shaping it.
You are not memorizing dozens of rows. You are repeating one basic idea: widen the first edge, crochet toward the center, expand around the center chain space, then widen the opposite edge.
Use stitch markers generously while learning. After several rows, the center line and outside edges usually become easy to recognize without them.
Once you can crochet this basic version comfortably, you can use the same triangle-building concept as a foundation for striped shawls, lacy shawls, textured wraps, lightweight cotton scarves, and more decorative triangle patterns.
Save the tutorial so you can return to the center-increase photographs if you lose your place during your first shawl.