A crochet vest is one of the easiest ways to move from scarves and rectangles into handmade clothing without immediately tackling sleeves, complicated shaping or dozens of separate garment pieces.
This crochet boho vest pattern keeps the construction deliberately approachable. You will crochet one rectangular back panel and two narrower front panels, join them at the shoulders and sides, leave generous armholes and side slits, then finish the edges. If you want more festival-style detail, you can add fringe or a simple waist tie at the end.
The fabric is also designed for beginners. Instead of complicated lace charts, it alternates a simple open mesh row with a solid double-crochet row. The open rows give the vest that relaxed boho texture, while the solid rows make the fabric easier to handle and help stabilize the edges.
The sample instructions below produce a long open-front vest approximately 20 inches wide across the back and 30 inches long. Because everyone’s body and crochet tension are different, I will also show you how to adjust the measurements instead of depending blindly on one stitch count.
What You’ll Learn
- How to make a wearable crochet vest from simple rectangular panels.
- How to crochet an airy mesh fabric using basic stitches.
- How to keep long crochet edges straight.
- How to measure a garment while you work.
- How to adjust vest width and length.
- How to create comfortable armholes.
- How to leave decorative side slits.
- How to seam crochet panels neatly.
- How to block a lightweight crochet garment.
- How to add optional fringe or a waist tie.
Skill Level
Easy / adventurous beginner.
You should already be comfortable making a chain and working basic half double crochet and double crochet stitches. You do not need advanced garment-shaping experience.
Finished Size
Sample approximately:
- Back width: 20 in / 51 cm
- Each front panel: 8.5–9 in / 22–23 cm
- Length: 30 in / 76 cm
- Armhole depth: approximately 10 in / 25.5 cm
- Side slit: approximately 6 in / 15 cm
The open-front design is forgiving. The sample works especially well as a relaxed layering vest around a 34–40 inch bust, but the best approach is to adjust the panel measurements for your own body.
Estimated Time
Approximately 10–14 hours.
The repeating rows become much faster once you recognize the mesh/solid rhythm.
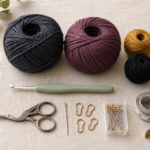
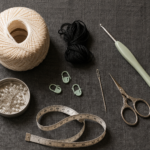
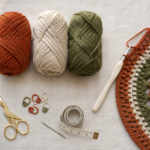
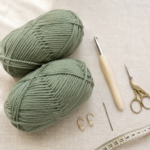
Materials You’ll Need
Yarn
Use approximately 850–950 yards of #3 Light/DK yarn for the sample size.
Good fiber choices include:
- cotton/bamboo;
- cotton/acrylic;
- cotton/linen blends;
- soft plant-fiber yarns designed for garments.
A lightweight fiber gives this vest better movement than a stiff, heavy acrylic. Cotton, linen and bamboo also help create the relaxed drape associated with summer and boho crochet garments.
Crochet Hook
5.0 mm H-8 hook, or whatever size produces the correct gauge and fabric.
The Craft Yarn Council places a 5 mm hook within the normal range used with light/DK yarn, but its standards are guidelines rather than a substitute for swatching.
Other Materials
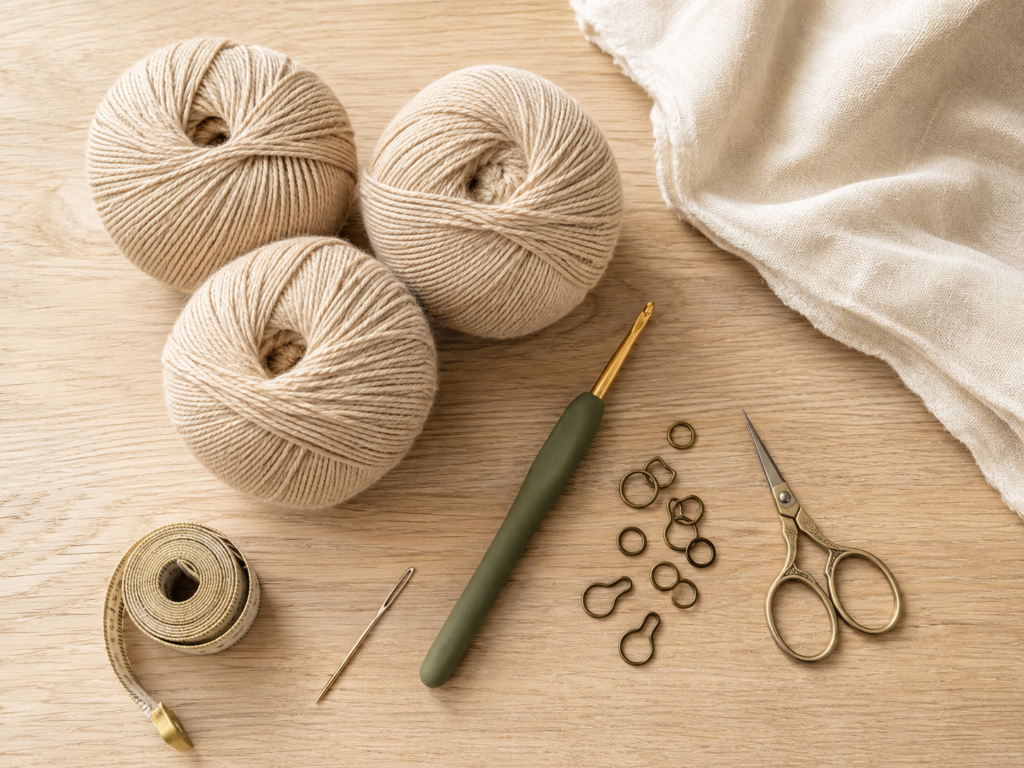
- scissors;
- tapestry/yarn needle;
- 4–8 stitch markers;
- flexible measuring tape;
- rust-resistant blocking pins;
- blocking mat or clean towel;
- optional extra yarn for fringe;
- optional beads for tassels, if desired.
Crochet Abbreviations Used
This tutorial uses US crochet terminology.
- ch = chain
- sc = single crochet
- hdc = half double crochet
- dc = double crochet
- sl st = slip stitch
- st / sts = stitch / stitches
- sp = space
- rep = repeat
- RS = right side
- WS = wrong side
The Craft Yarn Council’s crochet abbreviation list is useful if you encounter unfamiliar shorthand in other patterns.
US/UK Terminology Note
Be careful when using UK tutorials.
A US double crochet is called a UK treble crochet, while a US single crochet is a UK double crochet.
Before You Start
Gauge
Make a swatch at least 6 inches square in the alternating stitch pattern.
Aim for approximately:
14 stitches and 8 rows = 4 inches / 10 cm after light blocking.
Count every chain-one space as one stitch position when checking the width.
Your exact gauge is less important than producing fabric that:
- hangs rather than stands stiffly;
- has clearly visible mesh openings;
- does not stretch excessively;
- feels comfortable against clothing.
If your swatch is too narrow, try a larger hook.
If it is too wide, try a smaller hook.
How to Count the Stitches
The mesh row alternates:
1 chain space + 1 double crochet.
Do not ignore the chain spaces when counting the row. They replace stitches rather than being extras.
Placing a stitch marker in the first and last true stitch of each row is especially helpful while you are learning the repeat.
How to Keep the Edges Straight
Crochet rectangles usually become crooked because the crocheter accidentally:
- misses the final stitch;
- works an extra stitch into the side of the turning chain;
- treats the turning chain differently from one row to the next.
In this pattern, the turning chain counts as the first double crochet on the mesh and solid rows. Be consistent.
How to Avoid Curling
A slight curl during the first few rows is normal.
More serious curling usually means:
- your foundation chain is too tight;
- your hook is too small;
- your tension increased after the first row.
Make the starting chain loosely. If you naturally chain tightly, use a hook 0.5 mm larger just for the chain.
Choosing a Color
Light or medium solid colors make stitch counting much easier.
For a first garment, colors such as sand, sage, dusty rose, pale terracotta or oatmeal will reveal the mesh structure more clearly than black yarn.
Step-by-Step Crochet Tutorial
Step 1: Make the Foundation Chain for the Back Panel
For the sample back panel:
Ch 72 loosely.
This produces 71 stitches after the first row.
If you want to adjust the size, increase or decrease your chain by 2 chains at a time. The stitch pattern works best when the first row contains an odd number of stitches.
Do not judge the final width from the loose chain alone. Crochet several rows and then measure the relaxed fabric.
Beginner tip: Lay your chain flat every 15–20 chains so it does not twist while counting.
Common mistake to avoid: Pulling the chain tightly. A tight lower edge can cause the completed vest to flare above the hem or refuse to block square.
Step 2: Make the Stabilizing First Row
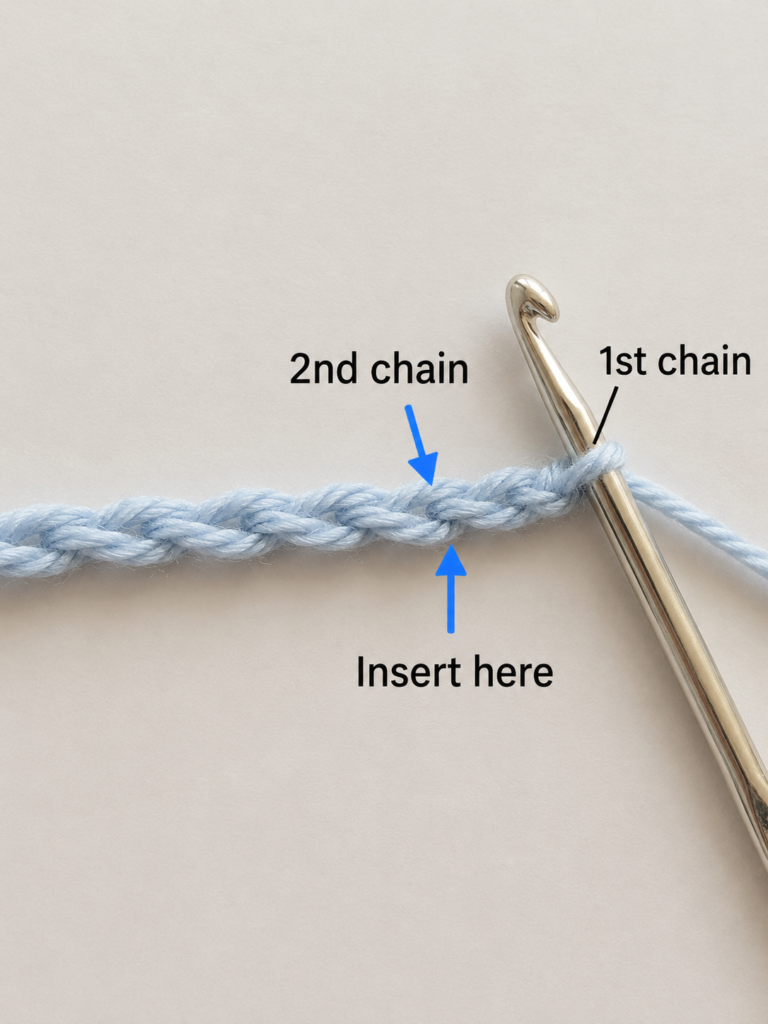
Row 1: Hdc in the second chain from the hook and in every chain across.
Stitch count: 71 hdc.
Turn.
This solid first row creates a stable lower edge before you begin the open mesh pattern.
Do not worry if it looks much denser than the later rows. That contrast helps keep the hem tidy.
Beginner tip: Stop and count now. Correcting a missing stitch is much easier after Row 1 than after twenty rows.
Common mistake to avoid: Working through only one tiny strand of the chain accidentally. You can use the top loops or back bumps depending on your preferred foundation edge, but be consistent.
Step 3: Crochet the First Open Mesh Row
Row 2: Ch 3 and turn. The ch-3 counts as the first dc.
Then:
*Ch 1, skip the next stitch, dc in the next stitch; rep from * across.
You should finish at the opposite edge without adding or losing a stitch position.
This row creates a sequence of small square openings.
The main thing to understand is that the chain-one space replaces the skipped stitch.
Beginner tip: After making a chain, point visually to the stitch you are skipping before inserting the hook into the next one.
Common mistake to avoid: Making ch 1 and then crocheting into the very next stitch. That creates an increase and gradually widens the panel.
Step 4: Fill the Mesh Spaces With a Solid Row
Row 3: Ch 3 and turn. The turning chain counts as the first dc.
Work 1 dc in each dc and 1 dc in each ch-1 space across, finishing neatly at the opposite edge.
The row should return to a visually solid strip.
Count again if necessary. You should still have the same effective stitch count as before.
This alternating structure gives the fabric a subtle stripe:
mesh → solid → mesh → solid.
It looks decorative without asking a beginner to memorize a complicated lace chart.
Beginner tip: Insert your hook under the entire chain-one space instead of trying to find an individual chain loop. It is faster and usually gives cleaner spacing.
Common mistake to avoid: Working one dc on each side of the same chain space. Each space receives only the stitch instructed for that position.
Step 5: Repeat the Two-Row Pattern
Row 4: Repeat Row 2.
Row 5: Repeat Row 3.
Continue alternating Rows 2 and 3 until the panel measures approximately 30 inches / 76 cm, or your preferred vest length.
For the sample gauge, this will be around 60 rows total, but measurement is more important than the row number.
Stop every 8–10 rows and inspect both edges.
They should remain nearly vertical.
Beginner tip: Write two letters on a small note beside your project:
- M = mesh
- S = solid
Move a stitch marker between the two letters after each row if you have trouble remembering which row comes next.
Common mistake to avoid: Measuring the panel while it is heavily stretched. Lay it flat and allow the stitches to relax before measuring.
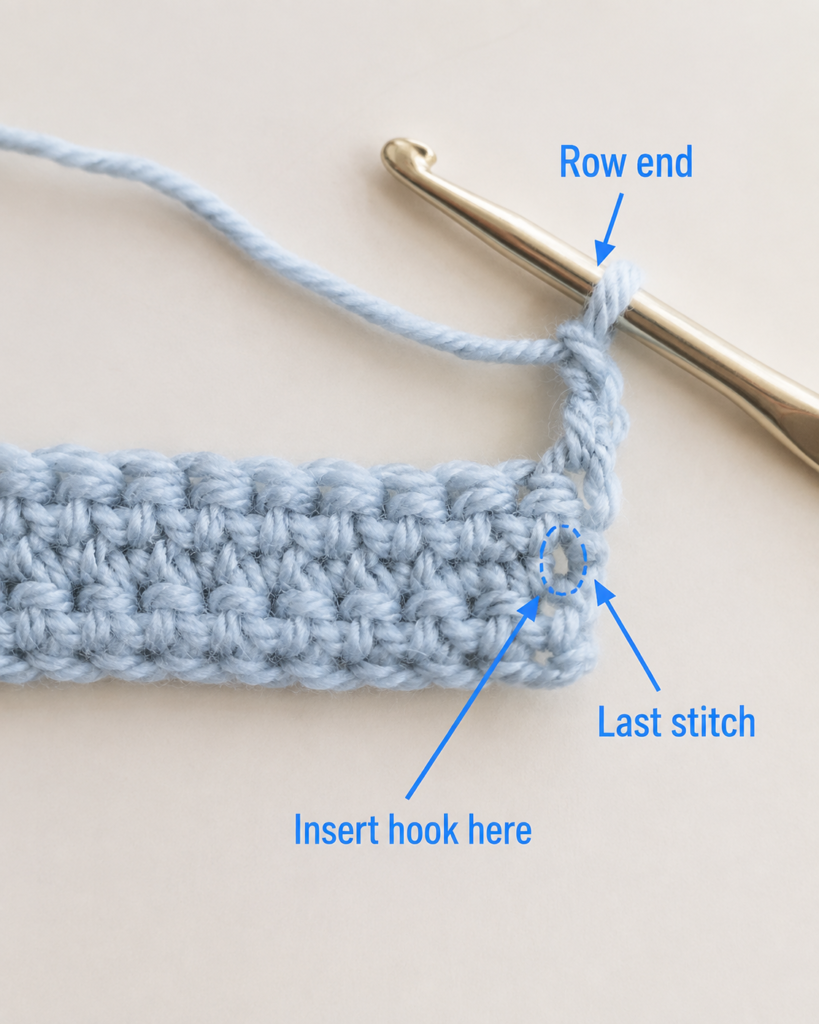
Step 6: Check the Last Stitch of Every Row
The row edge deserves its own step because it is where many first garments go wrong.
When you reach the end of a row, identify the actual final stitch or the top of the previous turning chain before inserting your hook.
Do not simply crochet into the largest visible hole at the edge.
If your vest gradually becomes narrower, you are probably missing the last stitch.
If it becomes wider, you are probably crocheting both into the correct last stitch and into an extra side loop.
Beginner tip: Put a locking stitch marker into the first and last stitch as soon as you complete each row. Move the marker upward as you work.
Common mistake to avoid: Trusting the appearance of the edge instead of counting. Open crochet fabric can make the edge stitch look farther away than it really is.
Step 7: Check Your Stitch Pattern After Several Rows
After approximately six rows, place the fabric flat.
You should see:
- a stable lower hdc row;
- an open mesh stripe;
- a solid dc stripe;
- another open stripe;
- another solid stripe.
The openings should line up in clean horizontal bands.
If one row suddenly contains noticeably more openings than the others, count before continuing.
Beginner tip: This is an excellent point to check drape. Hold the upper corners and let the swatch hang naturally. A vest fabric should move rather than stay rigid.
Step 8: Measure the Back Panel
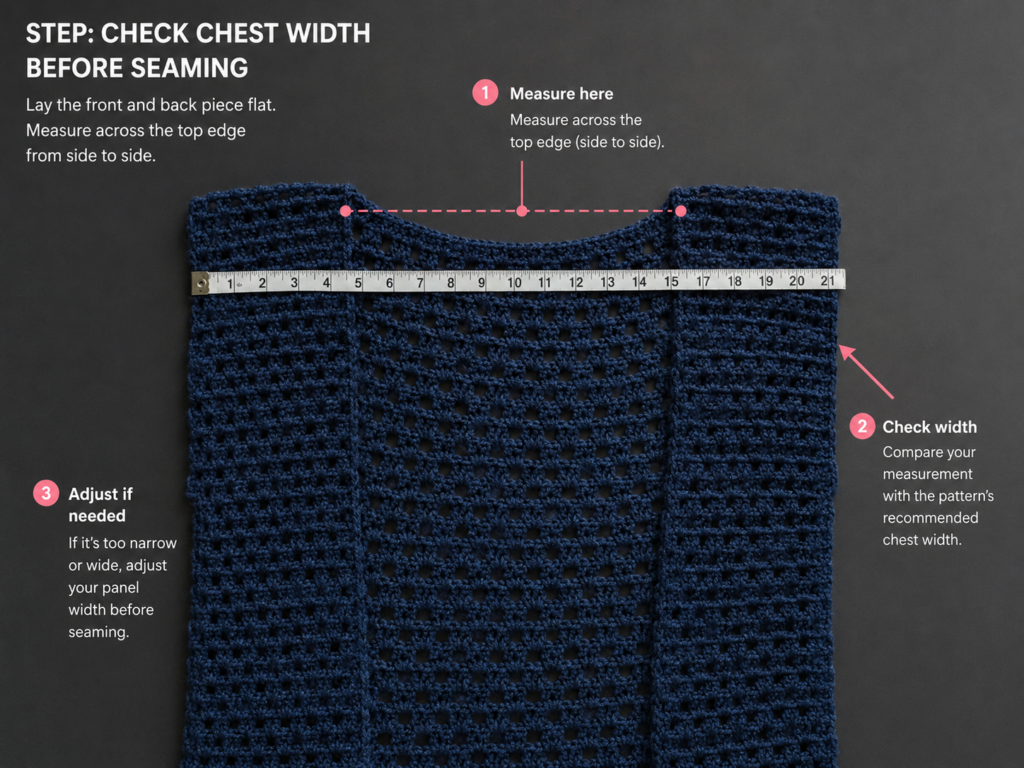
When the panel is around halfway complete, check the width again.
The target sample is approximately 20 inches / 51 cm after the fabric relaxes.
When the panel reaches approximately 30 inches long, finish after a solid row if possible. This produces a slightly sturdier shoulder edge.
Fasten off, leaving a tail approximately 8 inches long.
Do not block aggressively yet. A light preliminary block is fine, but save the final shaping until after assembly.
Step 9: Crochet Two Front Panels
For each sample front panel:
Ch 32.
Row 1
Hdc in the second chain from the hook and across.
31 hdc.
Row 2
Ch 3, turn.
*Ch 1, skip 1 st, dc in next st; rep across.
Row 3
Ch 3, turn.
Dc in the dc stitches and ch-1 spaces across.
Continue repeating Rows 2 and 3 until the front panel matches the exact length of the back panel.
Make two identical front panels.
The front width is about 8.5–9 inches in the sample.
For more front coverage, add chain stitches in increments of two.
For a more open festival vest, make the panels narrower.
Beginner tip: Place the first finished front panel beside the second one every 10 rows. Matching them visually is easier than discovering a length difference during assembly.
Step 10: Join the Shoulder Seams
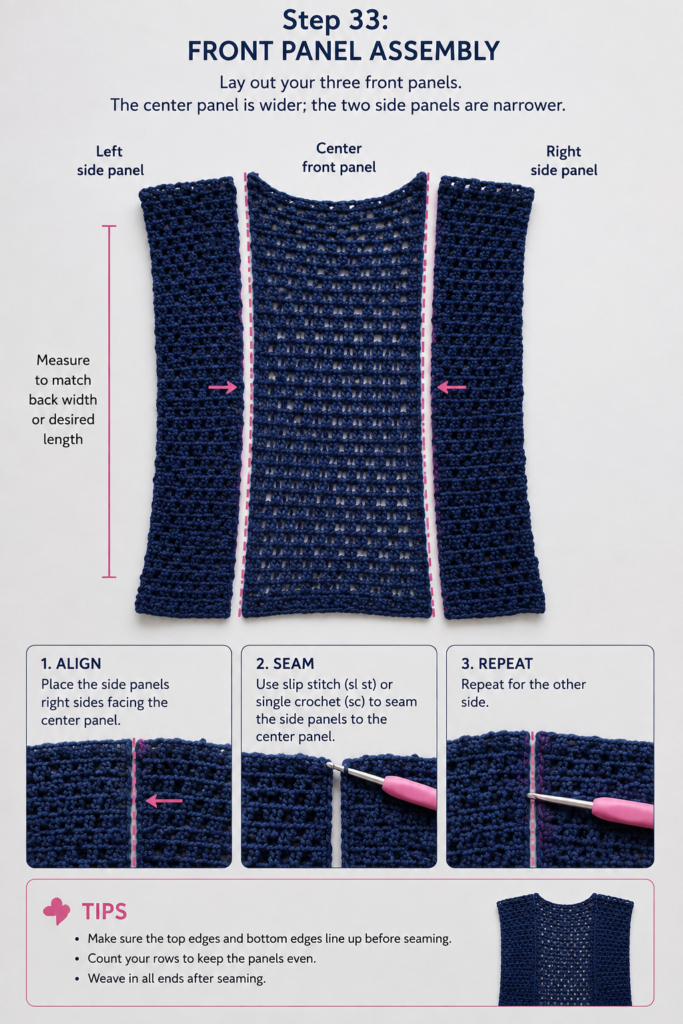
Lay the back panel flat.
Place one front panel on each side of the back with the top edges aligned.
Position them so:
- the outer front edges line up with the back edges;
- a neckline opening remains between the two front panels.
Using a yarn needle and matching yarn, seam the top edge of each front to the back.
A mattress-style seam or simple whipstitch works well.
Do not pull the seam tightly. It should remain flexible.
Right Side / Wrong Side
This stitch pattern is fairly reversible, but choose the side you prefer as the RS before assembly and keep all three panels oriented consistently.
Step 11: Create the Armholes and Side Slits
Put the vest flat with front panels aligned over the back.
Measure down approximately 10 inches / 25.5 cm from each shoulder.
Place a stitch marker there.
That marks the bottom of the armhole.
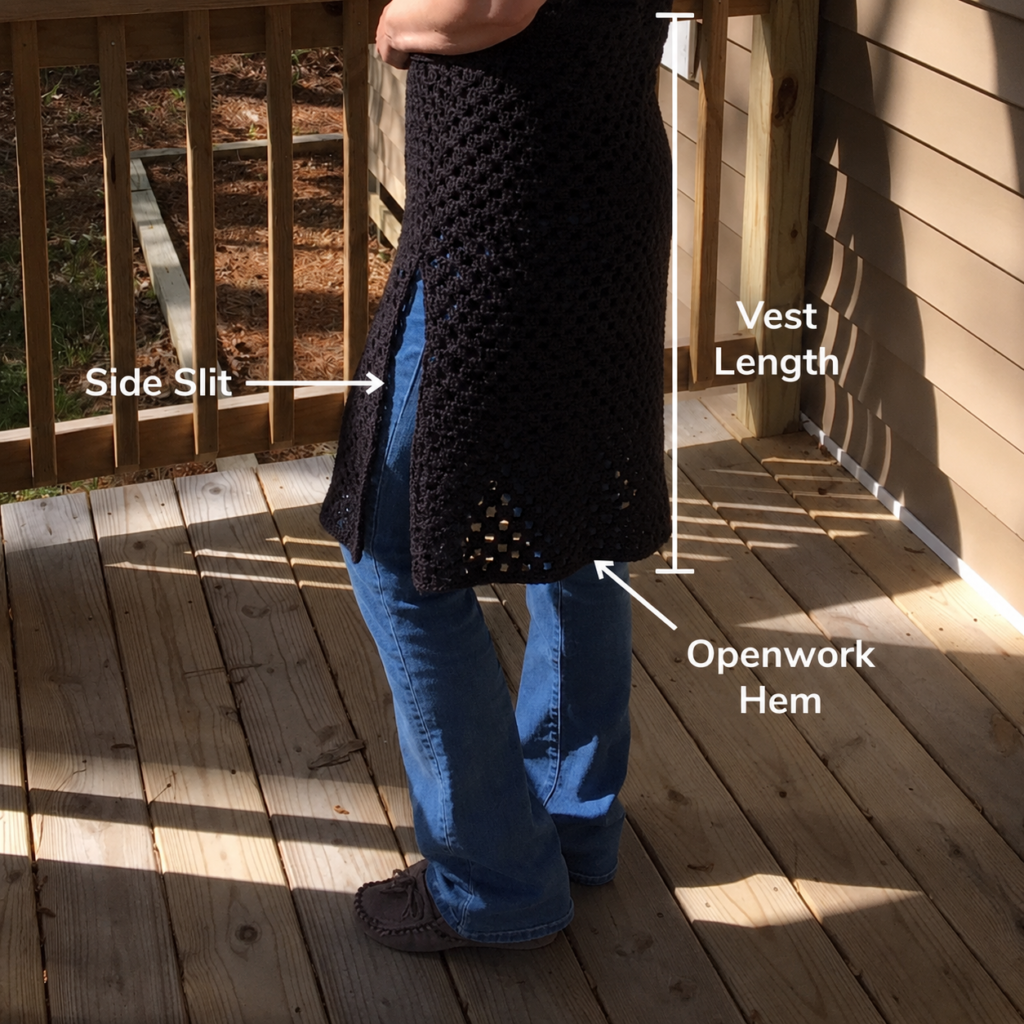
Next, measure approximately 6 inches / 15 cm upward from the lower hem.
Place another marker.
That marks the top of the side slit.
Seam only between those two markers.
Repeat on the opposite side.
You now have:
shoulder → open armhole → joined side seam → open side slit → hem.
Try the vest on before securing the final seam tails.
If the armhole feels tight, open another inch of seam.
If it hangs too widely below your arm, extend the seam upward slightly.
Step 12: Add an Optional Edge
The vest can be worn immediately after seaming, but a simple edge makes it look more finished.
With the RS facing, join yarn near the lower front corner.
Work sc evenly:
- up one front edge;
- around the back neckline;
- down the opposite front edge.
Fasten off.
You can also add one round of sc around each armhole.
Avoid Wavy Borders
Do not place too many stitches along row ends.
A useful method is:
- work evenly;
- stop every few inches;
- lay the garment flat;
- remove stitches if the border begins to ripple.
Pattern Notes or Stitch Notes
Turning Chain Rules
- The ch-3 counts as the first dc on mesh and solid dc rows.
- Do not add another dc into the same edge position unless specifically needed to maintain your count.
Stitch Count
Sample:
- Back Row 1: 71 hdc
- Front Row 1: 31 hdc each
Your working count should remain stable throughout each panel.
Repeat Pattern
After Row 1:
- Mesh Row
- Solid Row
- Repeat those two rows.
Right Side / Wrong Side
The stitch texture is almost reversible.
Choose whichever side looks cleaner to you as the RS, then keep that side consistent during assembly.
Size Adjustment Notes
To make the vest wider
Increase the back or front foundation chains in increments of 2 chains.
To make the vest narrower
Remove chains in increments of 2.
To make it longer
Add more pattern rows.
To make it shorter
Stop earlier, preferably after a solid row.
For more front coverage
Make each front panel 1–3 inches wider.
For larger armholes
Leave a longer section unseamed below the shoulder.
Common Beginner Mistakes
1. Accidentally Increasing on the Mesh Row
Problem: The vest becomes wider every few rows.
Cause: You made ch 1 but did not skip a stitch.
Fix: Remember the rhythm:
chain one → skip one → double crochet.
2. Missing the Last Stitch
Problem: The panel gradually becomes triangular.
Cause: The turning chain is easy to overlook.
Fix: Place a marker in both row-edge stitches.
3. Tight Foundation Chain
Problem: Bottom hem is narrower than the body.
Fix: Remake the chain loosely or chain with a larger hook.
4. Front Panels Are Different Lengths
Problem: Shoulder seams will not line up.
Fix: Compare the second panel with the first every several rows rather than relying only on row counts.
5. Armholes Are Too Small
Problem: Vest pulls underneath the arm.
Fix: Undo a short portion of the side seam and increase the armhole depth by 1–2 inches.
6. Side Seams Look Gathered
Problem: Fabric puckers along the sides.
Cause: Seaming yarn was pulled too tightly.
Fix: Loosen the sewing tension. The seam should flex as easily as the crochet fabric.
7. The Vest Feels Stiff
Problem: It looks more like a mat than clothing.
Fix: Try a larger hook or lighter yarn before making the full project.
Garment drape is more important than producing an extremely tight stitch.
How to Customize This Crochet Project
Change the Yarn
For warmer weather, try:
- bamboo;
- cotton;
- linen blends.
For autumn layering, try:
- soft cotton/acrylic;
- lightweight wool blends.
Avoid extremely fuzzy yarn for your first version because the mesh spaces become harder to see.
Change the Color
A solid neutral keeps the project simple.
For a more bohemian finish, consider:
- terracotta;
- desert sage;
- dusty turquoise;
- cream;
- natural tan;
- muted mustard.
You could also change color every four rows to create broad horizontal stripes.
Change the Size
Use panel measurements rather than blindly copying stitch counts.
Measure a vest or cardigan that already fits you and compare:
- back width;
- shoulder-to-hem length;
- armhole depth;
- desired front coverage.
Add Fringe
Cut yarn strands approximately 8–12 inches long.
Fold two or three strands in half.
Pull the folded loop through a hem stitch, pass the loose ends through the loop, and tighten gently.
Space the fringe evenly rather than placing it into every stitch if you want a lighter look.
Add Tassels
Instead of full fringe, attach one tassel at each lower front corner.
This gives a boho effect without adding much weight.
Add a Belt
Crochet a long chain that wraps comfortably around your waist and ties in front.
Work one row of sc back across it for extra strength.
Add a Different Border
Possible finishes include:
- one row of sc;
- crab stitch;
- small picots;
- simple shell edging.
For a beginner, the plain sc border is the easiest to keep neat.
Gift or Use Ideas
A handmade boho vest works especially well as:
- summer layering piece;
- beach cover-up;
- festival outfit;
- lightweight travel layer;
- handmade birthday gift;
- transitional spring/autumn vest.
Finishing Instructions
Fasten Off
After your final edging stitch, cut the yarn leaving approximately 6 inches.
Pull the yarn completely through the final loop.
Weave In Ends
Use a tapestry needle.
Weave the yarn through several stitches in one direction, reverse direction, then trim the excess.
Avoid cutting directly beside the knot or final loop.
Block the Vest
Blocking is particularly useful because the project contains open mesh.
Lay the garment flat and gently shape:
- front edges;
- side slits;
- shoulders;
- lower hem.
Pin only where necessary.
For steam blocking, never press a hot iron directly onto the yarn. The appropriate blocking method ultimately depends on the fiber content.
Washing and Care
Always check your yarn label first.
For many cotton and bamboo garments:
- use cool or lukewarm water;
- avoid aggressive wringing;
- reshape while damp;
- dry flat when possible.
The weight of a wet long vest can stretch the crochet fabric significantly, so avoid hanging it while saturated.
Quick Printable-Style Summary
Project: Easy openwork crochet boho vest
Skill level: Easy / adventurous beginner
Yarn: #3 Light/DK cotton, bamboo or cotton blend
Hook: 5.0 mm
Sample yardage: Approximately 850–950 yd
Stitches: ch, hdc, dc, optional sc
Sample back starting chain: Ch 72
Back Row 1: 71 hdc
Sample front starting chain: Ch 32 for each panel
Front Row 1: 31 hdc
Main repeat:
Mesh row → solid dc row → repeat
Sample length: Approximately 30 in
Armhole: Approximately 10 in left open
Side slit: Approximately 6 in left open
Construction: One back rectangle + two front rectangles
Finishing: Seam shoulders, seam sides between markers, weave in ends, optionally edge, block.
FAQ
Is a crochet boho vest a good beginner project?
Yes, particularly when the construction uses rectangles rather than shaped armholes and necklines. You still learn important garment skills such as gauge, measuring, seaming and blocking without needing advanced shaping.
What yarn is best for a crochet boho vest?
A lightweight yarn with drape is usually the safest choice. DK cotton, bamboo, linen blends and soft cotton-acrylic yarns work especially well for an open summer vest.
The Craft Yarn Council classifies DK/light-worsted yarn in the Light category and provides general hook ranges, although the yarn label and your gauge swatch should ultimately guide hook selection.
How much yarn do I need for a crochet vest?
For this long open-front sample, plan approximately 850–950 yards.
A shorter vest may require significantly less. Wider sizes, longer lengths and heavy fringe will require more.
Buy an extra skein if your yarn comes from a dye lot that may be difficult to match later.
Can I make this boho vest shorter?
Yes.
Stop the back and both front panels at your preferred length.
A hip-length version is often faster and uses less yarn.
Can I add fringe?
Yes. Fringe works particularly well with the simple rectangular hem.
Finish, seam and block the vest first. Add fringe last so the strands remain even.
How can I make the front close more?
Make both front panels wider.
Add foundation chains in increments of two until each front reaches your preferred width.
You can also add a crochet belt.
Why is my crochet vest getting wider?
You are probably adding stitches on the mesh rows or along the turning edge.
Check that every ch 1 is followed by a skipped stitch and that you are not crocheting twice into the row edge.
Final Result
Once blocked, the open mesh stripes relax into a light, drapey fabric while the solid rows provide enough structure for the vest to hang cleanly.
The simple three-panel construction also gives you room to experiment. Make the next one cropped, extend it into a long duster, add tassels instead of fringe, or use multiple earthy colors.
[IMAGE SLOT 12]
Source page URL: Primary source — finished vest
Reference image URL only — do not republish unless you own rights: Finished-front reference image
Consistency note: Final generated image keeps the sand-beige vest and neutral daylight photography established from Image 1.
Midjourney prompt: Use Image 12 prompt.
Alt text: Finished warm sand crochet boho vest styled over a simple neutral outfit.
Suggested file name: easy-crochet-boho-vest-finished.jpg
Conclusion
This crochet boho vest pattern is designed to make a first handmade garment feel manageable rather than intimidating.
You only need three rectangular panels, a repeating two-row fabric, a few measurements and straightforward seams. At the same time, you still get the details that make a boho vest interesting: openwork texture, a long relaxed shape, side slits and the option to add fringe or tassels.
The most important habit throughout the project is to measure as you crochet. Stitch counts give you a useful starting point, but the fit of a garment ultimately depends on your yarn, tension and preferred amount of coverage.
Save the tutorial before starting, make a small gauge swatch, and keep the front panels beside one another as you work so the finished vest stays symmetrical.