A crochet doily does not have to look formal or old-fashioned. Add a few floating ghosts and a spiderweb-style center, and suddenly that traditional lace technique becomes perfect Halloween décor.
This crochet ghost doily pattern is designed as a manageable introduction to decorative thread crochet. Instead of shaping several complicated ghosts directly into one continuously worked doily, you will crochet a simple circular lace center first. Then you will make five small flat ghost motifs and attach them around the outside.
That construction gives beginners several advantages. You can concentrate on one technique at a time, redo a single ghost without unraveling the entire doily, and easily see where every motif should be positioned.
The finished piece works beautifully under a candle holder, centered on a Halloween table, displayed on a sideboard, or even hung as lightweight wall décor.
The original pattern below is not a transcription or modification of the researched reference tutorial. The Captain Crochet source is used only to study useful instructional photography and the visual progression of a ghost doily.
What You’ll Learn
By the end of this tutorial, you will know how to:
- Crochet a flat circle from a magic ring.
- Build open lace with chains and double crochets.
- Count repeating sections around a round.
- Crochet five matching flat ghost motifs.
- Make facial openings using chains and skipped stitches.
- Create a decorative scalloped ghost tail.
- Space motifs evenly around a circular doily.
- Sew crochet pieces together invisibly.
- Block cotton crochet so the lace opens neatly.
Materials You’ll Need
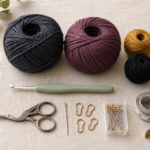
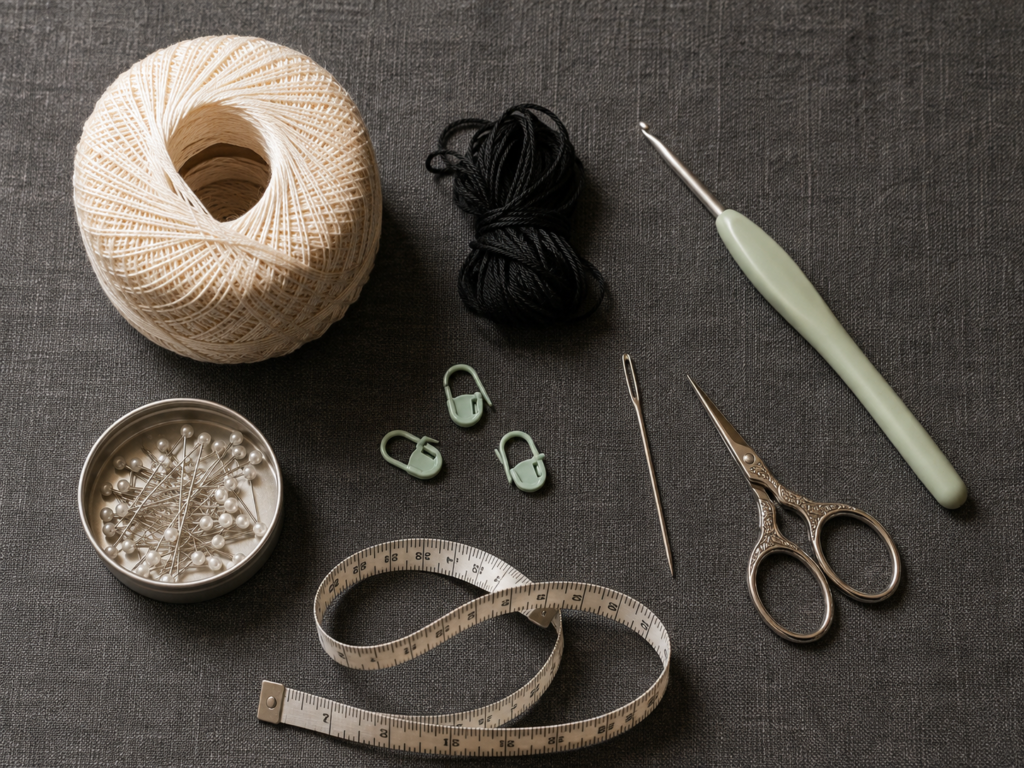
For the beginner version shown in this tutorial, use slightly thicker thread than a traditional fine doily. It makes every stitch easier to identify.
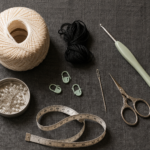
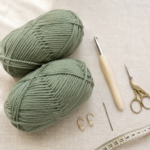
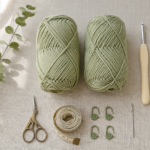
- Size 3 mercerized cotton crochet thread, approximately 150–200 yards
- 2.5 mm crochet hook
- Tapestry needle
- Small sharp scissors
- 5 locking stitch markers
- Measuring tape
- Rust-resistant blocking pins
- Blocking mat or folded clean towel
- Optional black cotton embroidery thread if you prefer stitched eyes rather than open holes
Traditional ghost doilies are often made with finer size 10 thread. The Craft Yarn Council places 10-count crochet thread in the lace-weight category and notes that very fine thread is commonly used with small steel hooks.
Crochet Abbreviations Used
This tutorial uses US crochet terminology.
- ch = chain
- dc = double crochet
- sc = single crochet
- sl st = slip stitch
- st/sts = stitch/stitches
- sp = space
- sk = skip
- inc = work 2 stitches into one stitch
- rep = repeat
- RS = right side
The Craft Yarn Council’s standard abbreviation guide confirms commonly used abbreviations including ch, sc, dc, sl st and st. It also provides US/UK terminology comparisons.
US/UK terminology note
The most important difference here is that a US single crochet is called a UK double crochet, while a US double crochet is called a UK treble crochet.
Before You Start
Gauge and tension
Exact gauge is not critical because this is decorative rather than wearable. What matters is whether the lace lies flat.
If your circular center begins forming a bowl, your chains may be too tight. Relax your chain tension or move up one hook size.
If the center develops strong waves or ruffles, your tension may be too loose. Try a slightly smaller hook.
Count sections instead of individual stitches
The lace center contains 10 repeating sections.
After every round, stop and count the groups or chain spaces rather than trying to count dozens of individual loops.
Placing a marker in the first section makes this much easier.
Turning chains
For this tutorial:
- Beginning ch 3 counts as the first dc in circular rounds.
- Beginning ch 1 on ghost rows does not count as a stitch.
Yarn choice
Mercerized cotton works particularly well because it:
- Produces crisp stitch definition.
- Holds blocked shapes well.
- Shows openwork clearly.
- Does not create the fuzzy halo common with some acrylic yarns.
Beginners who find crochet thread difficult can substitute a light fingering cotton and increase the hook to approximately 3 mm.
Step-by-Step Crochet Tutorial
Step 1: Crochet the Center Ring
Begin with a magic ring.
Round 1
Ch 3. This counts as your first dc.
Work 9 more dc into the magic ring.
Pull the ring closed and join with a sl st to the top of the beginning ch 3.
You should have 10 dc.
The small center may look surprisingly dense. That is intentional. The open spiderweb effect begins in the next round.
Beginner tip: Pull the magic-ring tail until the hole almost disappears, but do not weave the tail yet. Wait until several rounds are finished so you can readjust it if necessary.
Common mistake to avoid: Do not accidentally count the joining slip stitch as a crochet stitch.
Step 2: Open the Spiderweb Center
Round 2
Ch 4. The first three chains count as your dc; the fourth creates the first ch-1 space.
Work:
dc in next dc, ch 1
Repeat around.
Join to the third chain of the beginning ch 4.
You should now have:
- 10 dc
- 10 ch-1 spaces
Round 3
Sl st into the first ch-1 space.
Ch 3, then work 1 dc into that same space. Ch 2.
Work:
2 dc in next ch-1 sp, ch 2
around the circle.
Join.
You now have 10 groups of 2 dc separated by 10 ch-2 spaces.
The piece should still lie completely flat.
Round 4
Move into the first ch-2 space with a sl st.
Ch 3 and work 2 additional dc into the same space. Ch 3.
Continue:
3 dc in next ch-2 sp, ch 3
around.
Join.
The open sections should now be obvious.
Beginner tip: When instructions say to work “in the space,” insert your hook beneath the entire chain rather than trying to find one tiny chain loop.
Common mistake to avoid: Do not accidentally crochet into the tops of the dc groups when the instructions specify a chain space.
Step 3: Finish the Lace Center
Round 5
Sl st into the next ch-3 space.
In that space work:
2 dc, ch 4, 2 dc
Repeat that sequence in every ch-3 space around.
Join.
You should have 10 shell sections.
Round 6
Move into the first ch-4 space.
Ch 1 and work:
sc, ch 6, sc
in the same space.
Ch 3.
In the next ch-4 space work another:
sc, ch 6, sc
then ch 3.
Repeat around.
Join to the first sc.
Round 7
Sl st into the first large ch-6 arch.
Work:
sc, ch 5, sc
in that arch.
Ch 2.
Repeat sc, ch 5, sc in each large ch-6 arch, placing ch 2 between sections.
Join and fasten off.
You now have 10 prominent outer ch-5 arches. Five of these will hold your ghost motifs.
Lay the piece flat.
Place a stitch marker into every other large arch. You should have exactly five markers evenly distributed around the circle.
Beginner tip: If your last marker lands next to the first instead of leaving one unmarked arch between them, recount the 10 arches before continuing.
Step 4: Crochet the First Ghost
The ghosts are made separately. This means you can practice one motif until you are satisfied before making the remaining four.
Ch 5.
Ghost Row 1
Starting in the second ch from the hook, sc across.
4 sc
Row 2
Ch 1 and turn.
2 sc in first st, sc in next 2 sts, 2 sc in last st.
6 sts
Row 3
Ch 1 and turn.
2 sc in first st, sc in next 4 sts, 2 sc in last st.
8 sts
Row 4
Ch 1, turn and sc evenly across.
8 sts
This gradual widening creates the rounded upper portion of the ghost.
Do not worry if it looks more like a tiny trapezoid than a ghost yet. The facial openings and scalloped lower edge will change the silhouette considerably.
Step 5: Create the Eyes and Mouth
This is where the little piece suddenly starts looking spooky.
Row 5 — Eyes
Ch 1 and turn.
Work:
sc in next 2 sts, ch 1, sk 1 st, sc in next 2 sts, ch 1, sk 1 st, sc in final 2 sts
You have created two small openings.
Row 6 — Mouth
Ch 1 and turn.
Sc in the first 3 sts.
Ch 2 and skip the next 2 stitch positions.
Sc across the final 3 sts.
This creates a slightly larger center opening for the mouth.
Row 7
Ch 1 and turn.
Work sc across, placing stitches into the chain spaces so the row returns to 8 stitch positions.
Beginner tip: Before completing Row 7, gently stretch the motif sideways. You should clearly see two eye openings and one larger mouth opening.
Common mistake to avoid: Tight chains can cause the face to pucker. Make the eye and mouth chains slightly more relaxed than your normal foundation chain.
Step 6: Shape the Ghost Body and Tail
Row 8
Ch 1 and turn.
Work 2 sc into the first stitch.
Sc in the next 6 stitches.
Work 2 sc into the final stitch.
10 sts
Row 9
Ch 1 and turn.
Sc across.
10 sts
Row 10 — Scalloped Tail
Ch 1 and turn.
Repeat the following five times:
sl st in next st, 4 dc in next st
Fasten off.
You should now have five soft rounded bumps along the bottom edge.
Do not panic if they curl toward you. Cotton scallops often look uneven before blocking.
Leave a yarn tail approximately 8 inches long. You can use it during assembly.
Step 7: Make Four More Ghosts
Repeat Steps 4–6 four more times.
You need five ghosts total.
Before attaching anything, place all five motifs beside each other.
Check:
- Are the eye openings approximately equal?
- Do all five have the same number of tail scallops?
- Is one ghost dramatically wider or shorter?
Minor differences are part of handmade crochet, but correcting a large counting error now is much easier than discovering it after assembly.
A useful trick is to keep your first successful ghost beside you and compare each new motif against it every two rows.
Step 8: Attach the Ghosts Around the Doily
Return to the five marked ch-5 arches around the lace center.
Position the first ghost so:
- Its head sits against one marked outer arch.
- Its face points upward.
- Its tail points away from the center.
Using the long yarn tail and a tapestry needle, sew the upper back of the ghost to the marked arch.
Use approximately four small whip stitches.
Avoid sewing across the facial openings.
Move to the next marked arch and repeat.
Because you marked every other arch, the five ghosts should automatically be evenly spaced.
Once all five are attached, place the doily on a flat surface and rotate it slowly.
Adjust a motif before securing the yarn if one ghost points noticeably sideways.
Beginner tip: Attach each ghost loosely first. After all five are positioned correctly, return and tighten the sewing stitches.
Common mistake to avoid: Do not sew the ghosts through several layers of the lace center. Attach them only at the outer arch so the web remains open.
Pattern Notes and Stitch Notes
Stitch count
The central lace is based on 10 repeating sections.
Round 7 gives you 10 large attachment areas.
Attach a ghost to every second area for a finished total of five ghosts.
Turning chains
The ch 1 used at the beginning of ghost rows is for height only and does not count as a stitch.
Right side and wrong side
The center is worked entirely from the right side because you continue around in joined rounds.
The ghosts are worked back and forth, so you alternate right-side and wrong-side rows.
After blocking, the difference is subtle.
Adjusting the size
The easiest way to enlarge this project is not to randomly add stitches to the ghost pattern.
Instead, change yarn and hook together.
For example:
- Fine size 10 thread + approximately 1.75–1.8 mm hook = delicate traditional doily.
- Size 3 thread + approximately 2.5 mm hook = beginner-friendly doily.
- Fingering cotton + approximately 3 mm hook = larger centerpiece.
- Sport cotton + approximately 3.5 mm hook = placemat-sized Halloween decoration.
The Craft Yarn Council cautions that yarns within the same nominal weight are not necessarily perfectly interchangeable, so watch your fabric and tension when substituting.
Common Beginner Mistakes
1. The center starts cupping
Cause: Chain spaces are too tight or your hook is too small.
Fix: Relax the chains or increase hook size slightly.
Do not compensate by randomly adding extra stitches; that usually creates a new problem several rounds later.
2. The center becomes wavy
Cause: Excessively loose tension or accidental extra stitches.
Fix: First count the 10 repeating sections. If the count is correct, try a smaller hook.
3. The ghost eyes disappear
Cause: The chain spaces are too tight.
Fix: Make the eye chains slightly taller and looser than your normal chains.
Blocking will also open them.
4. One ghost is much wider
Cause: An accidental increase was probably added on a straight row.
Fix: Count at the end of every ghost row. Row 4 should have 8 stitch positions; Row 8 increases to 10.
5. The tail scallops curl
This is usually not an error.
Several double crochets worked into one stitch naturally push the fabric outward. Blocking will flatten the scallops.
6. The ghosts are not evenly spaced
Cause: Motifs were attached without marking the lace first.
Fix: Count all 10 outer arches and mark every second one before sewing.
7. The magic ring opens after finishing
Cause: The center tail was trimmed before it was securely woven.
Fix: Weave the center tail back and forth through several stitch posts before trimming.
How to Customize This Crochet Project
Try a vintage cream ghost doily
Natural, ecru or tea-stained-looking cotton creates an antique Halloween aesthetic that pairs beautifully with wooden tables and brass candle holders.
Crochet it in black
Black thread creates a dramatically different result.
The drawback is visibility while crocheting. Work under strong lighting and place a pale towel beneath your project so each stitch is easier to identify.
Add colored faces
If the open eyes are too subtle, outline them with a small amount of black embroidery thread after blocking.
For a playful Halloween palette, try purple or orange eyes instead.
Make alternating ghost colors
Instead of five identical ghosts, use:
- Ivory
- Pale gray
- Muted lavender
- Soft orange
- Sage green
Keep the center one neutral color so the design does not become visually crowded.
Turn it into a wall hanging
After blocking, attach transparent nylon thread or fine cotton to one outer lace arch.
Because this doily is lightweight, it can become simple seasonal wall décor.
Make a placemat-sized version
Use sport-weight cotton and a larger hook.
The resulting piece will be substantially bigger, so use it as decorative table décor rather than expecting the measurements in this article to remain identical.
Finishing Instructions
Fasten off securely
After all five ghosts are attached, weave every tail through the wrong side.
Run the yarn through several nearby stitches, reverse direction once, then trim.
Cotton thread can be slippery, so avoid simply passing the tail straight through a single row.
Block the doily
Blocking transforms this project more than almost any other finishing step.
First, check the yarn label for washing instructions.
For washable cotton:
- Dampen the doily evenly with cool or lukewarm water.
- Gently press out excess water using a clean towel.
- Place it flat on a blocking surface.
- Pin the circular center first.
- Pin each ghost so the five motifs sit at equal angles.
- Pin the individual tail scallops open.
- Adjust the eye and mouth spaces gently with your fingers.
- Allow the project to dry completely before removing the pins.
Do not pull aggressively. Blocking should organize the lace, not stretch individual stitches out of proportion.
Washing and Care
Cotton crochet can generally be reshaped after washing, but always follow the instructions printed on your specific thread.
For delicate seasonal décor:
- Hand washing is the safest approach.
- Avoid twisting or wringing.
- Reshape while damp.
- Dry flat.
- Store flat or loosely rolled rather than sharply folded.
Quick Printable-Style Summary
Skill level: Advanced beginner
Finished size: Approximately 11–12 inches depending on yarn, hook and tension
Yarn: Size 3 mercerized cotton crochet thread
Hook: 2.5 mm
Construction: One circular lace center + five separately crocheted ghost motifs
Main stitches: ch, sc, dc, sl st
Starting method: Magic ring
Center repeat: 10 repeating lace sections
Ghost count: 5
Ghost placement: Attach to every second outer arch
Ghost face: Two small chain spaces for eyes and one larger chain space for mouth
Finishing: Weave ends and wet-block flat
FAQ
Is a crochet ghost doily suitable for beginners?
A complete beginner who has never made chains or double crochets may find thread crochet frustrating. However, someone comfortable with basic crochet stitches should be able to follow this simplified construction.
Using size 3 thread instead of extremely fine traditional doily thread makes the project much easier to see.
What yarn is best for a ghost doily?
Cotton thread is the strongest choice for crisp openwork.
Mercerized cotton is especially useful because the individual stitches remain defined and the finished lace responds well to blocking.
Can I use regular yarn instead of crochet thread?
Yes.
Fingering or sport-weight cotton will make a substantially larger project. Choose a hook appropriate for the yarn and judge your tension by whether the center lies flat.
Why is my crochet doily curling?
Slight curling before blocking is normal.
Strong cupping usually indicates tight chains or insufficient expansion. Strong rippling usually indicates excessive expansion or loose tension.
Always verify stitch counts before changing hook size.
Do I have to block a crochet ghost doily?
Technically no, but blocking is strongly recommended.
Without blocking, chain spaces may remain closed, ghost tails can curl and the entire circular shape may appear uneven.
Can I make the ghosts separately in different colors?
Yes. Because this pattern uses separately crocheted motifs, color customization is particularly easy.
Just keep all five ghosts in the same yarn weight so they remain approximately equal in size.
Can I make six ghosts instead of five?
You could, but the placement system in this tutorial is designed specifically around 10 outer sections and five alternating attachment points.
For six evenly spaced ghosts, the center construction would need to use a repeat count divisible by six rather than ten.
Finished Crochet Ghost Doily
Once blocked, the small imperfections that seemed obvious while you were crocheting usually disappear into the overall lace pattern. The circular web opens, the ghost faces become clearer and the scalloped tails start to look intentional rather than curled.
That transformation is one of the most satisfying parts of working with crochet thread.
Conclusion
A ghost doily looks intricate when finished, but it becomes much less intimidating when you separate the construction into three jobs: crochet the lace center, make the ghost motifs, then assemble and block everything.
If this is your first thread-crochet project, concentrate on clean counting rather than speed. A consistent set of 10 center sections and five matching ghosts matters far more than finishing the project quickly.
Once you have made one, the same construction can become the basis for pumpkins, bats, skulls, spiders or other seasonal motifs around a simple crochet lace center.