A handmade basket becomes much more useful when it is large enough to handle everyday laundry. This crochet laundry hamper pattern turns basic single crochet into a tall floor basket with a wide circular base, dense walls, and built-in carrying handles.
The construction is much simpler than the finished hamper looks. You will begin with a flat circle, increase until it reaches the required diameter, crochet one special transition round, and then stop increasing completely. That simple change makes the fabric travel upward instead of outward. The last few rounds create two reinforced openings that become the handles.
This version is designed specifically as a laundry hamper rather than a small tabletop storage basket. The finished size is approximately 18–19 inches across and 22 inches tall, making it suitable for clothing, towels, nursery linens, blankets, or general bedroom storage.
The pattern below is an original design. The research source listed earlier is being used only to plan the visual teaching sequence; its written pattern and stitch counts have not been reproduced.
What You’ll Learn
By the end of this project, you will know how to:
- crochet a large flat circle with predictable increases;
- recognize whether a crochet base is ruffling or cupping;
- work continuously in a spiral;
- use a back-loop-only round to create a defined bottom edge;
- build straight cylindrical sides without shaping;
- position two handles evenly;
- create a handle by chaining across skipped stitches;
- reinforce the handle area without changing the stitch count;
- adjust the diameter or height for a custom-sized hamper.
Materials You’ll Need
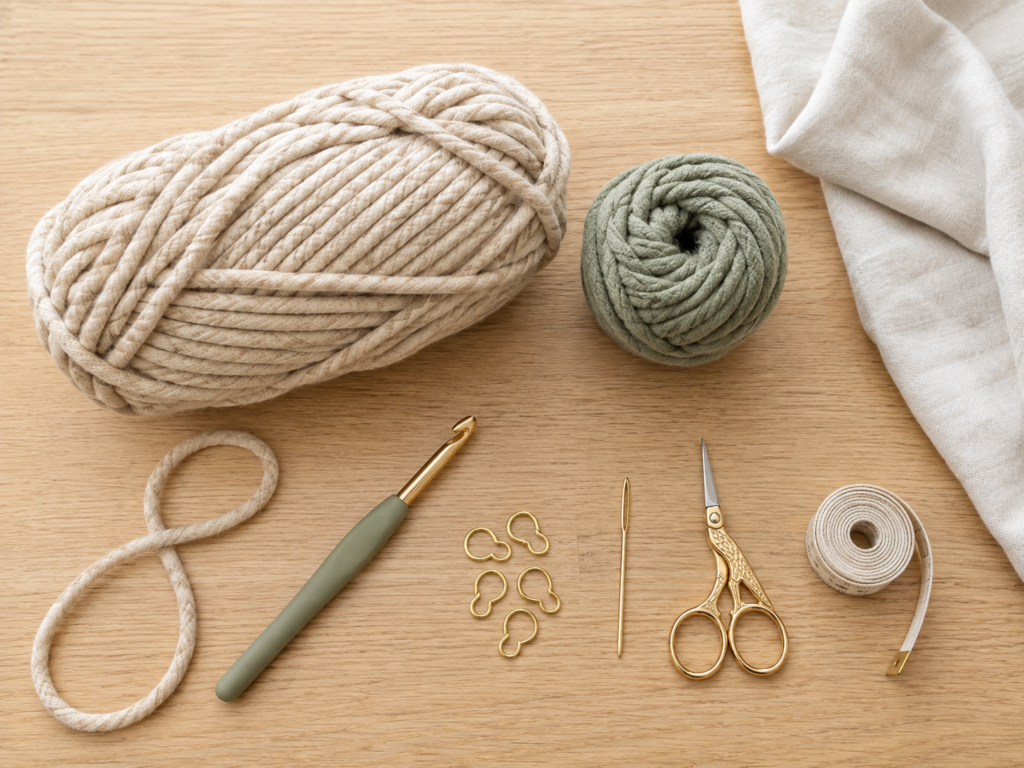
For the sample hamper, use approximately 500–650 yd / 460–595 m of super bulky, firm cotton tube yarn or recycled T-shirt yarn.
A low-stretch yarn is preferable here because a laundry hamper benefits from structure. Extremely soft blanket yarn will crochet quickly, but its drape can allow the sides to collapse more easily.
You will also need:
- 10 mm crochet hook;
- locking stitch markers;
- blunt yarn needle large enough for bulky yarn;
- sharp scissors;
- flexible measuring tape;
- optional contrasting yarn for the handle band.
For the tutorial photography, the sample is imagined in warm oatmeal with a muted sage green top band.
Crochet Abbreviations Used
This tutorial uses US crochet terminology, consistent with the terminology standardized in the Craft Yarn Council abbreviation resources.
- ch = chain
- sc = single crochet
- sl st = slip stitch
- st / sts = stitch / stitches
- rep = repeat
- BLO = back loop only
- inc = increase; work 2 sc in one stitch
- rnd = round
In UK terminology, US single crochet corresponds to UK double crochet.
Before You Start
Gauge and tension
Aim for approximately:
8 sc × 8 rounds = 4 in / 10 cm
The fabric should feel noticeably firmer than fabric you would make for a scarf or garment.
Gauge is especially useful for this project because the relationship between the stitch count and finished base diameter determines the hamper size. A different cord or tube yarn may produce a substantially different result even if the label places both yarns in the same general weight category.
If your stitches feel loose and floppy, move down to a 9 mm hook.
If crocheting is physically difficult and the hook cannot enter the stitches comfortably, move up to an 11 or 12 mm hook.
[IMAGE SLOT 2]
Source page URL:https://mypoppet.com.au/makes/crochet-basket-scrap-yarn-projects/
Reference image URL only — do not republish unless you own rights:https://mypoppet.com.au/makes/mp-content/uploads/2020/08/scrap-yarn-basket_12.jpg
Consistency note: Same basket fabric shown through the primary-source tutorial.
Midjourney prompt: Use Image 2 prompt from the Image Plan.
Alt text: Close-up of firm oatmeal single crochet stitches for a sturdy laundry hamper.
Suggested file name: crochet-laundry-hamper-single-crochet-gauge.jpg
How to count your rounds
This hamper is worked in a continuous spiral, so you do not join each round.
Place a marker in the first stitch of every round. When you reach the marker again, move it into the first stitch of the next round.
That simple habit prevents one of the most frustrating beginner mistakes: losing track of where a round begins.
How to keep the base flat
During the increase section, put the circle on a table every few rounds.
A good base should relax into a flat disk.
If the outer edge develops waves or ruffles, you probably have too many stitches for your yarn and tension.
If the base begins looking like a bowl before the wall section starts, your tension may be too tight or your circle may need additional increases.
Correct the problem while the base is still small instead of expecting the tall walls to hide it.
Right side and wrong side
The project is not turned.
Keep the right side facing outward as the walls grow. Your working hook should travel around the top edge in the same direction throughout the project.
Step-by-Step Crochet Tutorial
Step 1: Start the Circular Base
Make a magic ring using the main oatmeal yarn.
Round 1: Work 6 sc into the magic ring. Do not join. Place a marker in the first stitch.
Round 2: Work 2 sc in every stitch around. You now have 12 sts.
Round 3: Repeat (1 sc in next st, 2 sc in next st) around. You now have 18 sts.
Round 4: Repeat (1 sc in each of next 2 sts, 2 sc in next st) around. You now have 24 sts.
At this stage, the center should already resemble a small flat disk.
Beginner tip: Pull the center tail firmly after completing the first couple of rounds. With thick tube yarn, a tiny central hole is normal and usually disappears when the yarn relaxes.
Common mistake to avoid: Do not accidentally work into the slip-like strand underneath a stitch. Insert your hook under both top loops unless the pattern specifically says BLO.
Step 2: Continue Increasing the Base
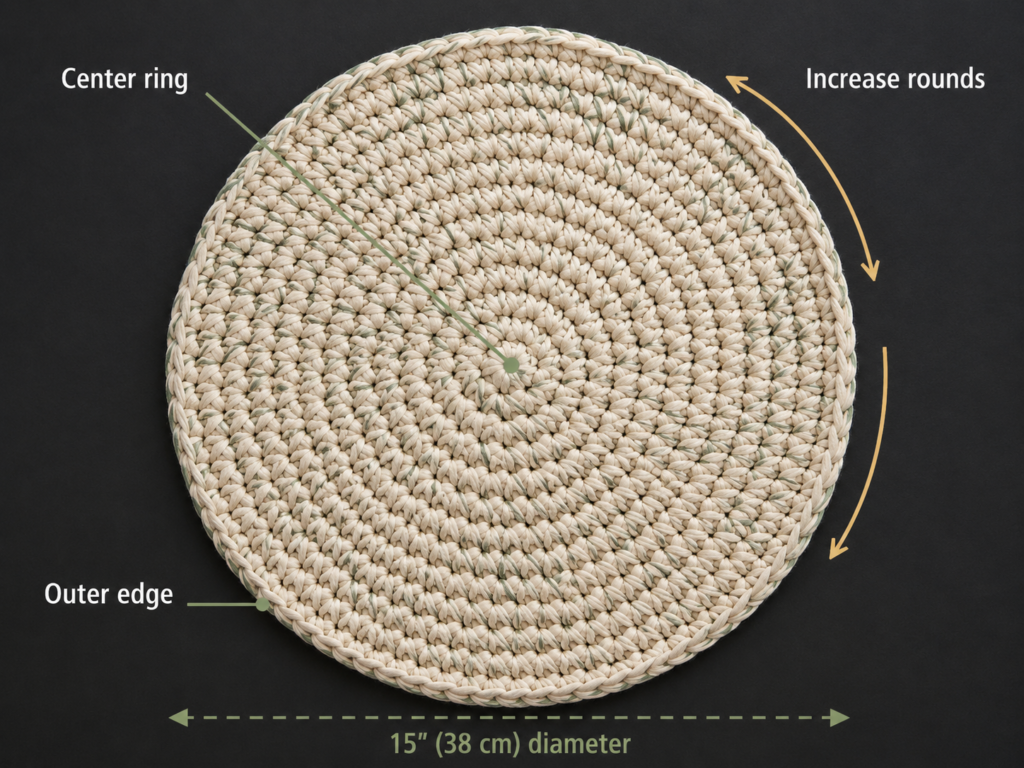
From this point forward, add six stitches per round.
The repeat becomes easy to remember:
- Round 5: (3 sc, inc) six times = 30 sts
- Round 6: (4 sc, inc) six times = 36 sts
- Round 7: (5 sc, inc) six times = 42 sts
Continue in the same manner.
For Round N, work N − 2 regular single crochets between increases and repeat the section six times.
Therefore:
Round 18: Repeat (16 sc, inc) six times = 108 sts.
At the listed gauge, the base should measure approximately 18 inches across.
Do not rely on the round number alone. Measure your actual circle.
If you reach 18 inches before Round 18, stop increasing there. If you are significantly smaller, check whether your gauge is tighter than expected before adding unnecessary rounds.
Beginner tip: Move your stitch marker every round, even if you feel sure you know where the round begins.
Common mistake to avoid: Missing one increase can make the base begin cupping. Accidentally adding an extra increase can create a ruffle. Count each completed round while the project is still manageable.
Step 3: Measure and Correct the Base
Place the circle on a completely flat surface.
Measure across the center from edge to edge.
The target is approximately 18 inches / 46 cm.
The exact measurement can vary by half an inch without affecting the project.
What matters more is the shape.
A flat base gives the hamper a predictable footprint and helps the walls sit naturally above it.
If your base ruffles noticeably, unravel one or two rounds and correct your increases or reduce the hook size slightly.
If it cups, check for missed increases or overly tight tension.
[IMAGE SLOT 5]
Source page URL:https://mypoppet.com.au/makes/crochet-basket-scrap-yarn-projects/
Reference image URL only — do not republish unless you own rights:https://mypoppet.com.au/makes/mp-content/uploads/2020/08/scrap-yarn-basket_3.jpg
Consistency note: Same project fabric and inside surface from the selected tutorial.
Midjourney prompt: Use Image 5 prompt from the Image Plan.
Alt text: Measuring the flat 18-inch crochet base before beginning the laundry hamper walls.
Suggested file name: crochet-laundry-hamper-base-diameter.jpg
Step 4: Create the Base-to-Wall Turn
Now stop increasing.
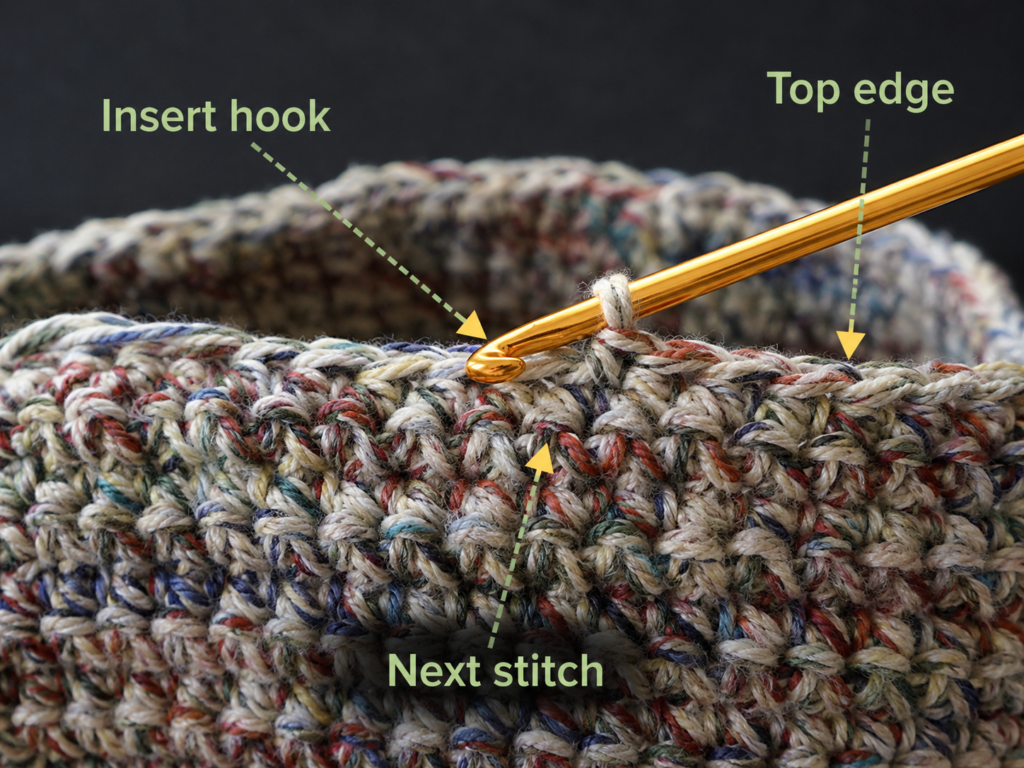
For the next round, work only into the back loop of each stitch.
Round 19: BLO sc in each stitch around. 108 sts.
The unused front loops form a subtle ridge around the base.
More importantly, changing from an expanding circle to an even round encourages the fabric to change direction.
Do not worry if the wall does not stand perfectly upright immediately. The shape becomes much more obvious after several additional rounds.
Beginner tip: Look at the top of the stitch before inserting the hook. You will see two loops forming a sideways V. Use only the loop farthest from you.
Common mistake to avoid: Do not continue increasing in this round. Every stitch now receives exactly one sc.
Step 5: Crochet the Tall Hamper Walls
Return to working through both loops.
Rounds 20–59: Sc in each stitch around. 108 sts per round.
That is the entire wall pattern.
No increasing.
No decreasing.
No turning.
Continue until the wall measures approximately 20 inches from the base ridge.
Because you are making a functional hamper rather than a decorative mini basket, take time to check the structure every six to eight rounds.
If the fabric is becoming dramatically wider toward the top, recount your stitches. You may be accidentally working twice into stitches near the marker.
If the wall leans slightly or the opening looks somewhat oval while you are holding it, that is normal. Dense crochet fabric will relax when the hamper is shaped.
Beginner tip: Place a second removable marker every ten rounds. It makes recounting your height much easier.
Common mistake to avoid: Avoid pulling the working yarn progressively looser as the project gets heavy. Supporting the hamper on your lap or table instead of allowing it to hang from the hook helps maintain consistent tension.
Step 6: Find the Handle Centers
Keep the working yarn attached.
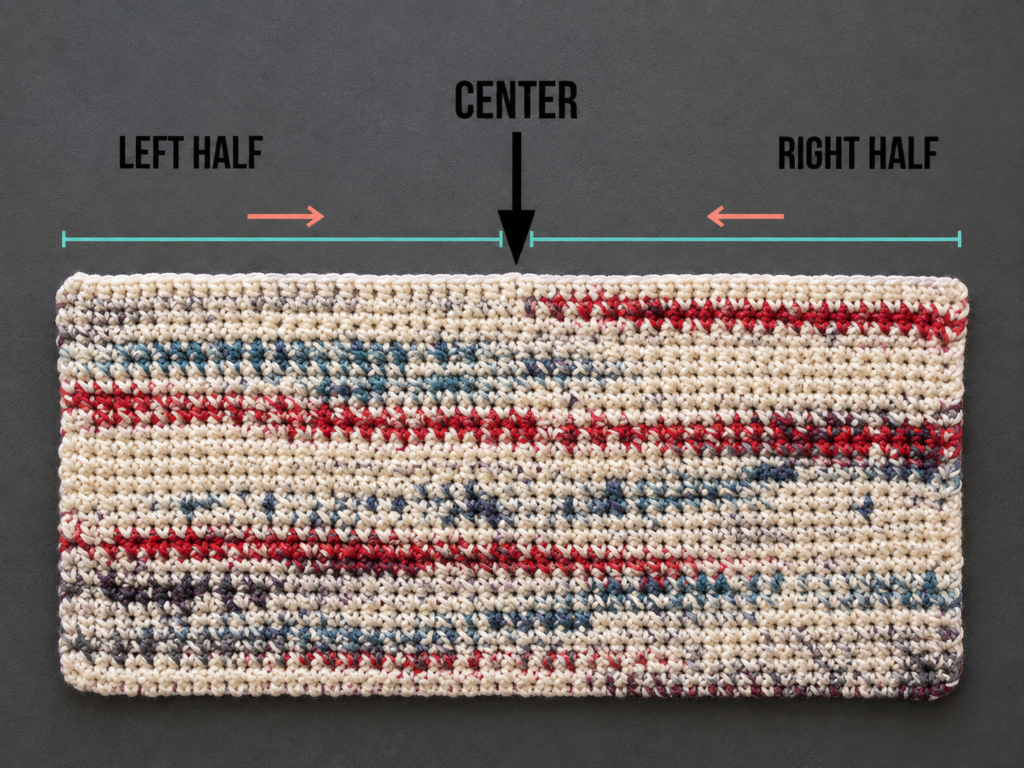
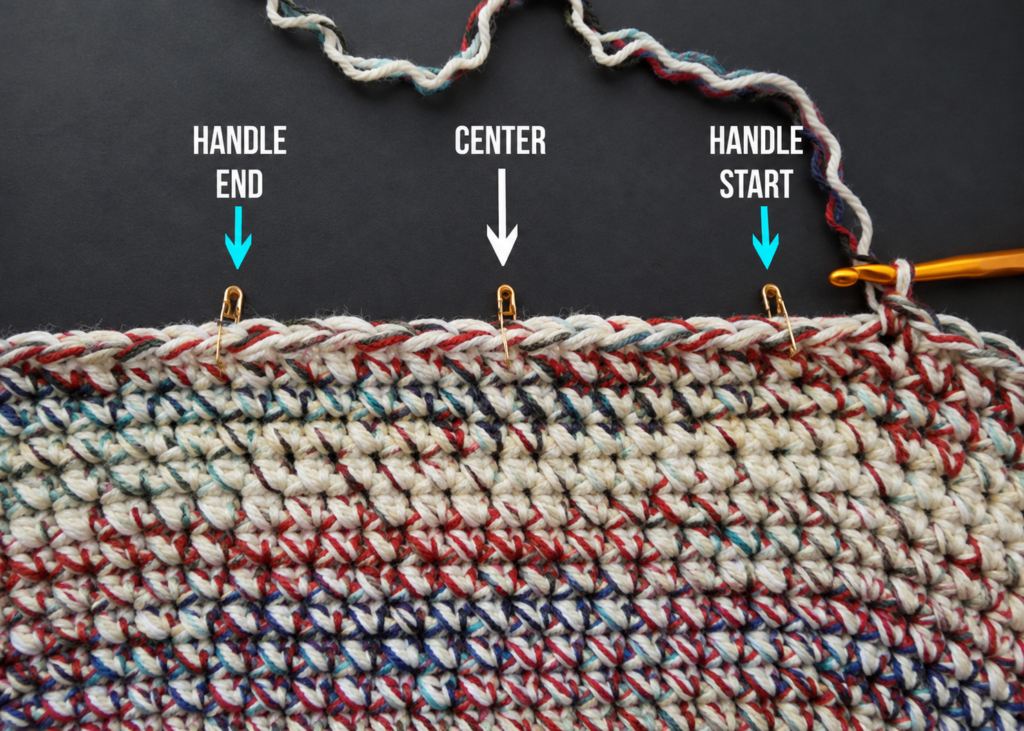
Place the hamper upright, then gently flatten the upper section so the front and back top edges align.
Mark the center stitch of the front.
Turn the hamper around and mark the center stitch directly opposite it on the back.
The exact location of your spiral’s beginning no longer matters. Symmetry matters more.
Step 7: Mark Two 12-Stitch Handle Openings
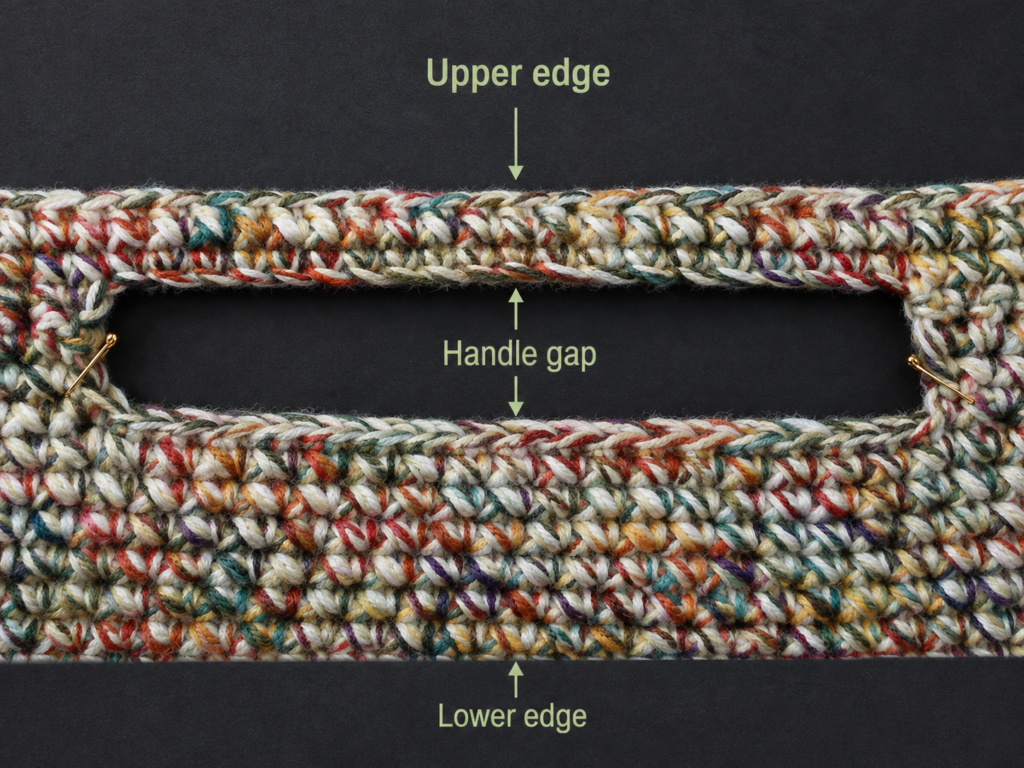
Each handle will replace a span of 12 stitches.
Center a 12-stitch section around the marker on the front.
Place a marker at each end of that section.
Repeat directly opposite on the back.
With a 108-stitch circumference, the finished layout is:
12 handle sts + 42 side sts + 12 handle sts + 42 side sts = 108 sts
Count the 42-stitch side sections before crocheting the handle round.
That check prevents a crooked second handle.
If using the sage accent color, change color immediately before the handle-opening round.
Step 8: Crochet the Handle Openings
Round 60:
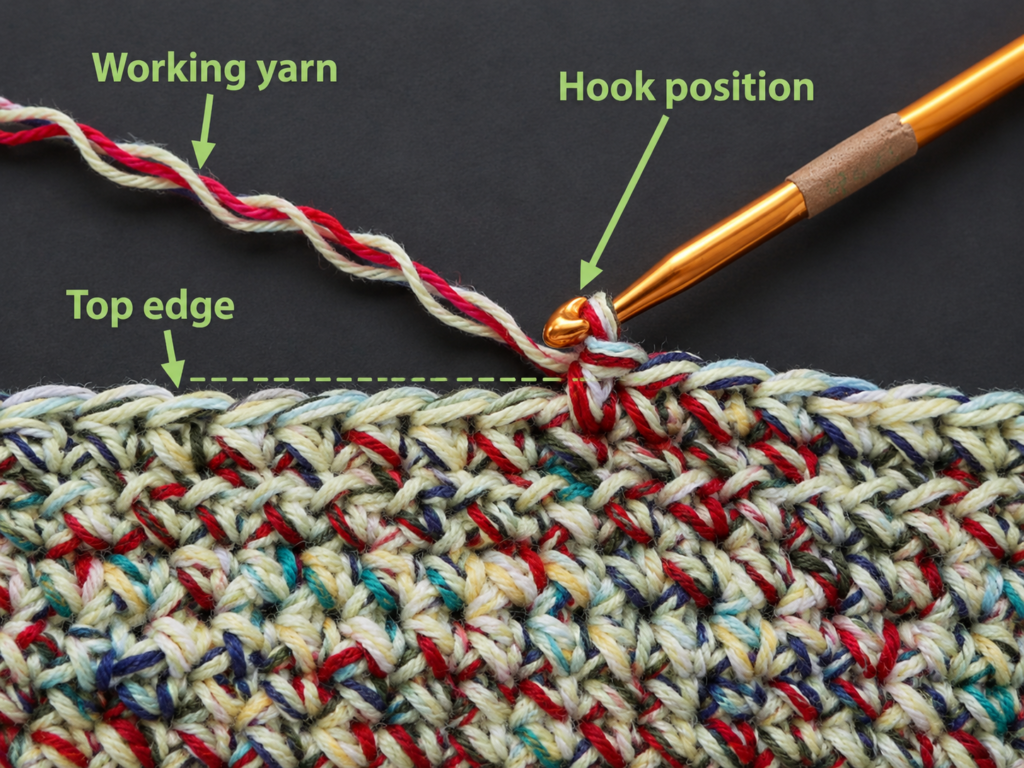
Sc until you reach the first handle marker.
Ch 12. Skip the 12 marked stitches.
Work sc across the next 42 stitches.
At the second handle, ch 12 and skip the next 12 stitches.
Sc across the remaining 42 stitches.
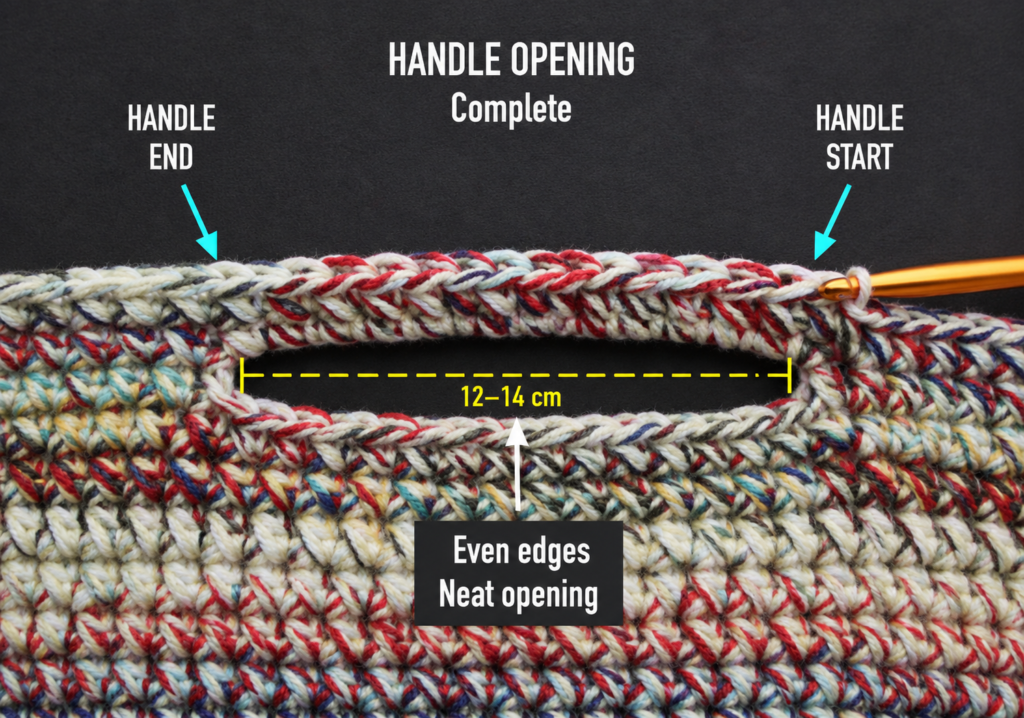
You have created two openings directly opposite one another.
The two ch-12 sections count as part of the round, so your effective stitch count remains 108.
Do not pull the handle chains unusually tight. They need enough length to arch naturally across the opening.
Beginner tip: Before continuing, put one hand through each opening and lift the empty hamper gently. This is the easiest stage to correct the handles if one feels noticeably smaller.
Common mistake to avoid: Do not crochet into the skipped wall stitches beneath the chain. Those stitches remain untouched and form the lower edge of the handle opening.
Pattern Notes or Stitch Notes
Turning chain
There is no turning chain because the hamper is crocheted continuously in the round.
Main stitch count
The original sample reaches 108 stitches after the circular base is complete.
Once the base has reached the desired diameter, preserve that stitch count through the wall and handle sections.
Base repeat
Each increase round adds six stitches.
With the standard increase formula used here:
6 × round number = stitch count
Therefore Round 18 contains 108 stitches.
Wall repeat
Work one single crochet in every stitch.
No shaping is used during the main wall section.
Right side and wrong side
The right side remains facing outward.
The wrong side is the interior of the hamper.
Place yarn joins and woven tails toward the interior whenever possible.
Size adjustment
To make the hamper wider, continue the base increase sequence before beginning the BLO transition.
Every additional increase round adds six stitches.
To adjust the handle spacing after changing the stitch count, use:
Total stitches − two handle widths = remaining side stitches
Divide that number by two.
For example, if you had 120 stitches and kept two 12-stitch handle openings:
120 − 24 = 96
96 ÷ 2 = 48 stitches between each handle opening.
To make the hamper taller or shorter, simply add or remove straight wall rounds before the handle section.
Common Beginner Mistakes
1. The circular base ruffles
Cause: Too many increases, loose tension, or a yarn/hook combination that grows faster than the pattern gauge.
Fix: Check your stitch count first. If the count is correct but the fabric still waves, try a slightly smaller hook or pause the increase sequence for one round before evaluating again.
2. The base becomes a bowl too early
Cause: Missing increases or overly tight tension.
Fix: Count the round carefully. If the stitch count is correct, move up one hook size rather than struggling through tight stitches.
3. The hamper widens toward the top
Cause: Accidental increases in the wall section.
Fix: Every wall round should contain the same number of stitches as the completed base. Count immediately if you notice the circumference changing.
4. The sides collapse
A crochet hamper is naturally softer than a rigid plastic basket, but it should still have enough body to stand when empty.
Fix: Use firmer cotton-based yarn, reduce the hook size slightly, and keep the stitches compact. You can also add a removable fabric liner with lightweight interfacing if you want more structure.
5. The handles are not opposite each other
Cause: Handle locations were estimated visually without counting.
Fix: Flatten the hamper and identify the front and back centers first. Then count both handle spans and both side sections.
6. One handle is larger
Cause: Different chain lengths or different stitch counts when reinforcing the chains.
Fix: Both openings should use exactly the same chain count and the same number of reinforcing stitches.
7. The top edge stretches after use
Cause: Heavy loads concentrate pressure near the handles.
Fix: Add one or two extra single-crochet reinforcement rounds or work a loose slip-stitch edging around the handle openings.
How to Customize This Crochet Project
Change the yarn
T-shirt yarn creates a contemporary, slightly flexible hamper.
Cotton tube yarn tends to produce a smoother and more polished finish.
A firm super-bulky synthetic yarn can also work, but test a swatch first to determine whether the fabric is sufficiently structured.
Add color blocking
For a minimalist hamper, crochet the entire base and lower wall in oatmeal and switch to sage for only the handle band.
For stronger color blocking, change colors halfway up the wall.
Two broad color sections usually look cleaner on a large basket than numerous narrow stripes.
Make it larger
Continue increasing the circular base before beginning the wall.
Remember that a significantly larger diameter also increases the amount of yarn required for every subsequent wall round.
Make it taller
Add additional straight single-crochet rounds before creating the handles.
This is useful for a bedroom laundry hamper where vertical capacity is more important than floor space.
Add a top border
A simple contrasting single-crochet round creates a clean edge.
A loose slip-stitch round can also add subtle firmness, but avoid pulling those stitches tightly or the opening may contract.
Change the texture
Beginners should keep the first hamper in single crochet.
After you understand the construction, you can experiment with alternating loops, surface crochet, subtle stripes, or a textured accent section while maintaining the same stitch count.
Other uses
The same construction works as:
- nursery blanket storage;
- stuffed-animal storage;
- a towel basket;
- yarn storage;
- dorm-room organization;
- a large toy basket;
- a handmade housewarming gift.
Finishing Instructions
After Round 63, work one loose slip stitch into the next stitch to soften the end of the spiral.
Cut the yarn leaving approximately an 8-inch tail.
Pull the tail completely through the final loop.
Using a blunt yarn needle, weave the tail through several stitches on the inside of the hamper. Change direction at least once before trimming the excess.
Repeat for any color-change tails.
Shape the hamper by hand. Push the circular base flat and gently smooth the walls upward.
Because this is thick cotton-based fabric, aggressive blocking should not normally be necessary.
If your yarn allows washing, follow the care information printed on its label rather than assuming all cotton tube yarns have identical care requirements. The Craft Yarn Council’s care-symbol guidance similarly recommends retaining yarn-label information so the finished handmade item can be cared for correctly.
For a laundry hamper, allow the basket to dry completely after washing.
Avoid leaving saturated towels or wet clothing inside for extended periods. A washable removable liner is a useful option if the hamper will regularly hold heavily soiled laundry.
Quick Printable-Style Summary
Skill level: Easy beginner / confident beginner
Finished size: Approximately 18–19 in diameter × 22 in tall
Yarn: Approximately 500–650 yd / 460–595 m firm super-bulky cotton tube or T-shirt yarn
Hook: 10 mm
Gauge: Approximately 8 sc × 8 rounds = 4 in
Stitches: Magic ring, sc, inc, BLO sc, ch, sl st
Starting method: Magic ring with 6 sc
Base: Increase six stitches per round to approximately 108 sts and 18 in diameter
Transition: 1 BLO sc round with no increases
Walls: Sc evenly with no increases until approximately 20 in high
Handles: Two centered 12-stitch openings separated by 42 stitches on either side
Handle opening: Ch 12 and skip 12 sts
Reinforcement: 3 sc rounds above the handle openings
Finishing: Slip stitch, fasten off, weave ends inside, shape by hand
FAQ
Can a beginner crochet a laundry hamper?
Yes. The project is large, but the stitch vocabulary is small. Most of the hamper consists of ordinary single crochet. The main skills to learn are working in a spiral, making increases, counting stitches, and creating two chain openings for the handles.
A smaller practice basket can help if you have never crocheted in the round before.
What yarn is best for a crochet laundry hamper?
A thick, low-stretch yarn is generally the most practical choice.
Recycled cotton tube yarn and T-shirt yarn work particularly well because they create dense fabric without requiring multiple strands of thinner yarn.
Do not choose by weight category alone. Two super-bulky yarns may behave very differently, which is why checking the actual gauge and fabric firmness matters.
How do I make my crochet hamper stiff?
Start with dense stitches.
If the fabric is floppy, use a smaller hook, a firmer yarn, or both.
A fabric liner with interfacing can provide additional structure without changing the visible crochet exterior.
Remember that a handmade crochet hamper will still be somewhat flexible. That flexibility makes it easy to carry and store.
Can I use regular worsted-weight yarn?
Yes, but one strand will usually be too thin for a floor-sized hamper.
You can hold several strands together until the combined thickness creates a dense, super-bulky fabric.
Swatch before committing to the project because the resulting gauge determines the finished dimensions and yarn requirements.
How much yarn does a crochet laundry hamper need?
For the original 18–19-inch-wide version described here, plan for approximately 500–650 yd / 460–595 m of very thick yarn.
Treat that amount as a planning estimate rather than a universal number. T-shirt yarn, cotton cord, and hollow tube yarn can have dramatically different weights and yardages for the same visual thickness.
Buying a little extra from the same batch is safer than running short during the final handle rounds.
Can I make the hamper without a magic ring?
Yes.
Chain 2 and work the first six single crochet stitches into the second chain from the hook.
Continue with the same increase sequence.
The center may look slightly different, but the overall construction remains unchanged.
Can I wash a crochet laundry hamper?
That depends on the yarn.
Check the manufacturer’s yarn label before washing. Care recommendations can differ even among yarns that look similar. The Craft Yarn Council provides standardized care-symbol guidance for interpreting yarn and textile care information.
When washing is permitted, reshape the hamper while damp and allow the thick fabric to dry completely.
Conclusion
A large storage project does not need a complicated stitch pattern to be satisfying.
The strength of this crochet laundry hamper pattern comes from a straightforward construction: a broad circular foundation, dense single-crochet walls, and handles that are built directly into the upper edge.
Once you understand how the base increases and where the wall shaping begins, the same method can be resized into almost any round storage basket you need.
The oatmeal-and-sage version keeps the stitches easy to see while giving the final hamper a clean home-decor look, but the structure is flexible enough for solid colors, bold color blocking, recycled yarn, or scrap-based versions.





