A plain gym bag is practical, but it does not have to look like everyone else’s.
This crochet gym bag charm pattern turns a small amount of leftover yarn into a soft mini bunny you can clip onto a duffel bag, backpack, dance bag or everyday tote. Because the project is tiny, it is also an excellent introduction to amigurumi: you can practice working in continuous rounds, increasing, decreasing, stuffing and sewing pieces together without committing to a large stuffed toy.
The tutorial is designed for beginners who already know how to make a chain and single crochet. You do not need perfect tension. You do not need a large yarn collection. Most importantly, each construction stage is small enough that you can stop, inspect your stitches and correct a mistake before it grows.
The result should be approximately 2½–3 inches / 6–8 cm tall, excluding the clasp, depending on yarn and tension.
What You’ll Learn
- How to start small amigurumi with an adjustable ring
- How to crochet in continuous spiral rounds
- How increases create width
- How straight rounds add depth
- How invisible decreases create a smooth closing shape
- How much stuffing a small charm actually needs
- How to crochet simple bunny ears
- How to sew tiny crochet components neatly
- How to reinforce the attachment point for bag hardware
- How to convert the project into a durable gym bag charm
Materials You’ll Need
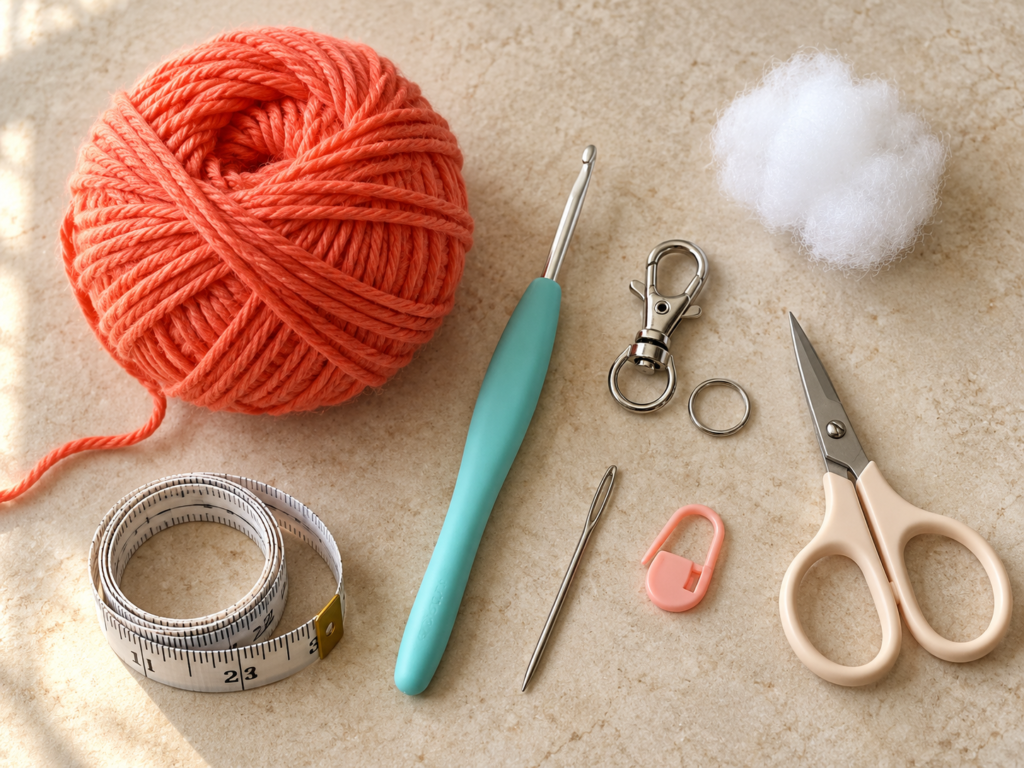
For one charm, gather:
- Approximately 15–20 g DK or light-worsted cotton/cotton-blend yarn
- 3.25 mm crochet hook
- Small amount of polyester fiberfill
- Locking stitch marker
- Tapestry needle
- Scissors
- Two sewing pins
- Silver split ring or jump ring
- Small lobster clasp
- Jewelry pliers if using a jump ring
- Small amount of dark embroidery yarn for the face
Cotton is particularly practical for a bag charm because it gives the stitches definition and does not become overly fuzzy after rubbing against a bag.
The Craft Yarn Council classifies DK/light-worsted as category 3 yarn and gives general hook guidance for this yarn category, although amigurumi frequently benefits from using a hook that creates a denser-than-normal fabric.
Crochet Abbreviations Used
This tutorial uses US crochet terminology.
- ch = chain
- sc = single crochet
- sl st = slip stitch
- st/sts = stitch/stitches
- inc = increase; work 2 sc into one stitch
- dec = invisible single-crochet decrease
- rep = repeat
- MR = magic ring
- rnd = round
The Craft Yarn Council confirms that US sc corresponds to UK dc, so UK readers should keep that terminology difference in mind. Craft Yarn Council
Before You Start
Gauge
Exact gauge is not critical for a charm, but fabric density is.
Stretch a few stitches between your fingers. If you can easily see large openings, use a slightly smaller hook. Stuffing should not poke through the finished head.
Keep track of the round
This project is crocheted in a spiral rather than joining every round.
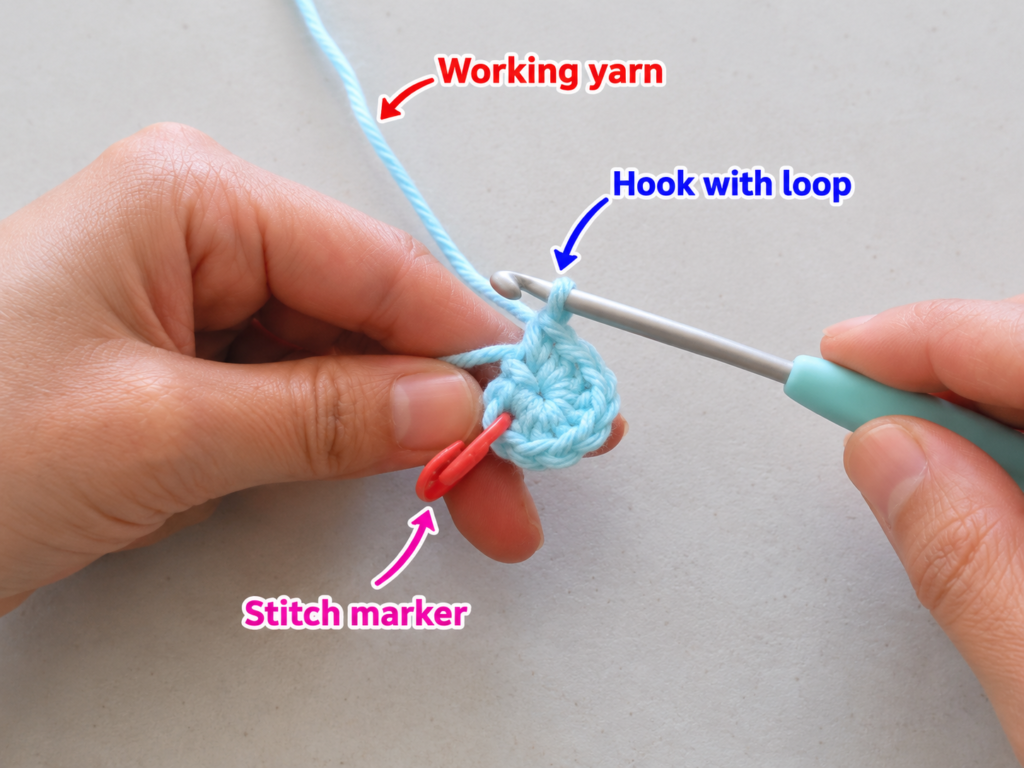
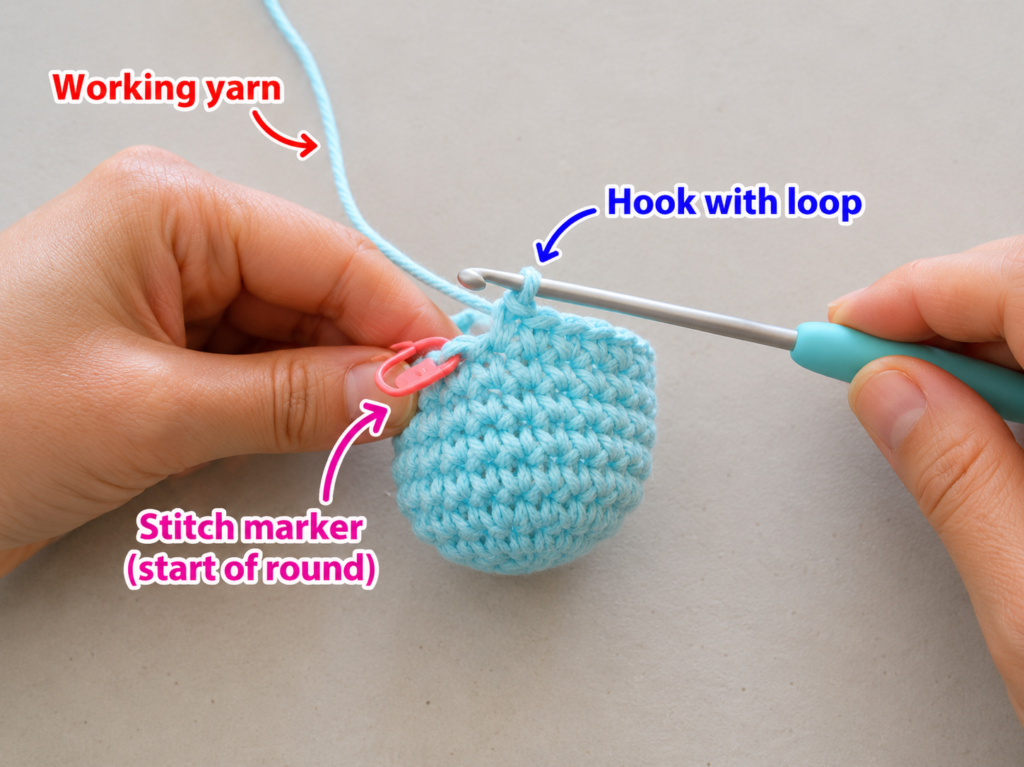
Clip your stitch marker into the first stitch of every round and move it upward as you work. This simple habit prevents most beginner counting problems.
Tension
Aim for firm, comfortable stitches rather than pulling every loop as tightly as possible. Excessive tension makes decreases difficult and can hurt your hands.
Face choice
For a bag charm, embroidery is my preferred beginner option. It stays lightweight and avoids loose plastic components.
If an item could reach a small child, embroidered facial features are the safer choice over detachable decorative components.
Step-by-Step Crochet Tutorial
Step 1: Make the Adjustable Starting Ring
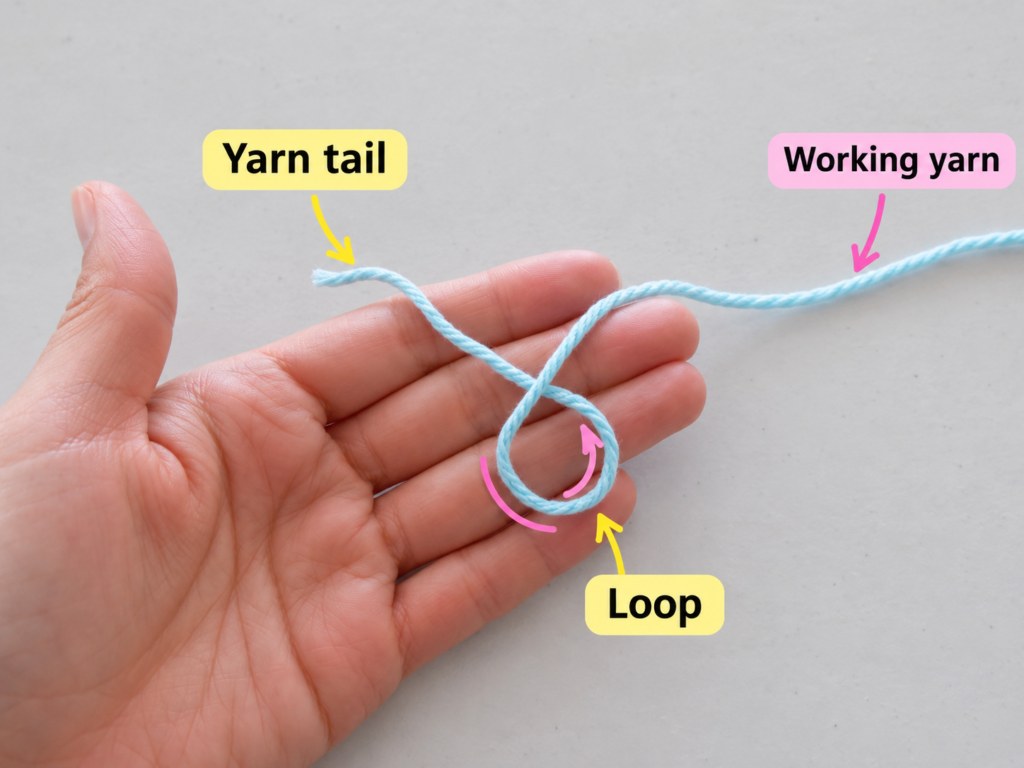
Create a magic ring with your coral yarn.
Work 6 single crochet stitches into the ring. Pull the yarn tail gradually until the center closes.
Do not yank the tail immediately. First check that your six stitches are sitting neatly around the loop.
Place the stitch marker in the first single crochet.
Beginner tip:
Count the actual V-shaped stitches around the ring, not the loop currently sitting on your hook.
Common mistake to avoid:
Do not work into the starting chain by accident. Your first real stitch is the first single crochet.
Step 2: Expand the Center
Now increase around the first round.
Round 2: Work 2 sc into every stitch around. You should have 12 stitches.
The piece will still be tiny, so stop after the round and locate each stitch before continuing.
Round 3: Repeat 1 sc, inc around. You should finish with 18 stitches.
The little disk should lie reasonably flat.
A slight curve is fine because we are about to turn it into a three-dimensional head.
Beginner tip:
An increase simply means placing two stitches into the same stitch from the previous round.
Step 3: Add the Final Increase Round
For the next round, repeat:
2 sc, inc
Work that sequence around the piece. You should finish with 24 stitches.
This becomes the widest section of our bunny head.
Do not continue increasing after this point. If you keep increasing, the project becomes a flat disk rather than a three-dimensional charm.
How to recognize the stitches
Look directly at the upper edge. Each stitch has a small V shape.
Insert the hook under both loops of that V unless the instructions specifically tell you otherwise.
Common mistake:
Beginners sometimes crochet into the gaps between stitches. This can make the fabric loose and distort the stitch count.
Step 4: Build the Sides of the Bunny Head
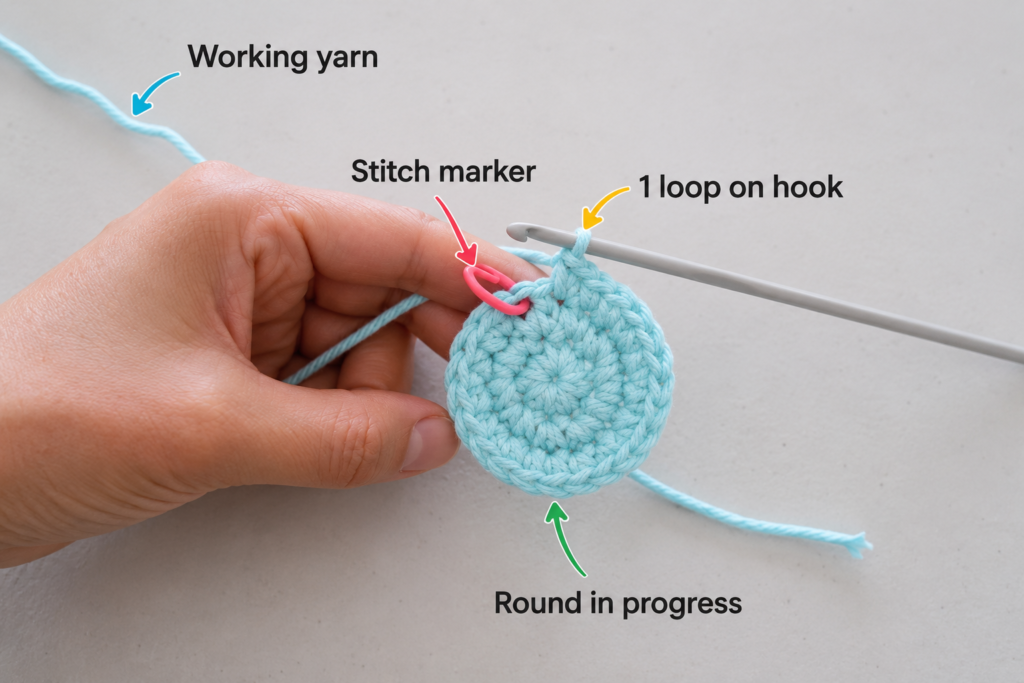
Now work one single crochet in every stitch for approximately four rounds.
Keep the stitch count at 24.
As these rounds stack above one another, the flat circle naturally develops into a rounded cup.
This is exactly what you want.
Rotate the piece occasionally and look at it from the side. The edge should rise evenly.
Beginner tip:
If your circle continues spreading outward, check whether you accidentally continued increasing.
Common mistake to avoid:
Do not remove the marker because the spiral looks obvious. The beginning becomes much harder to identify after several rounds.
Step 5: Add the Bunny Face
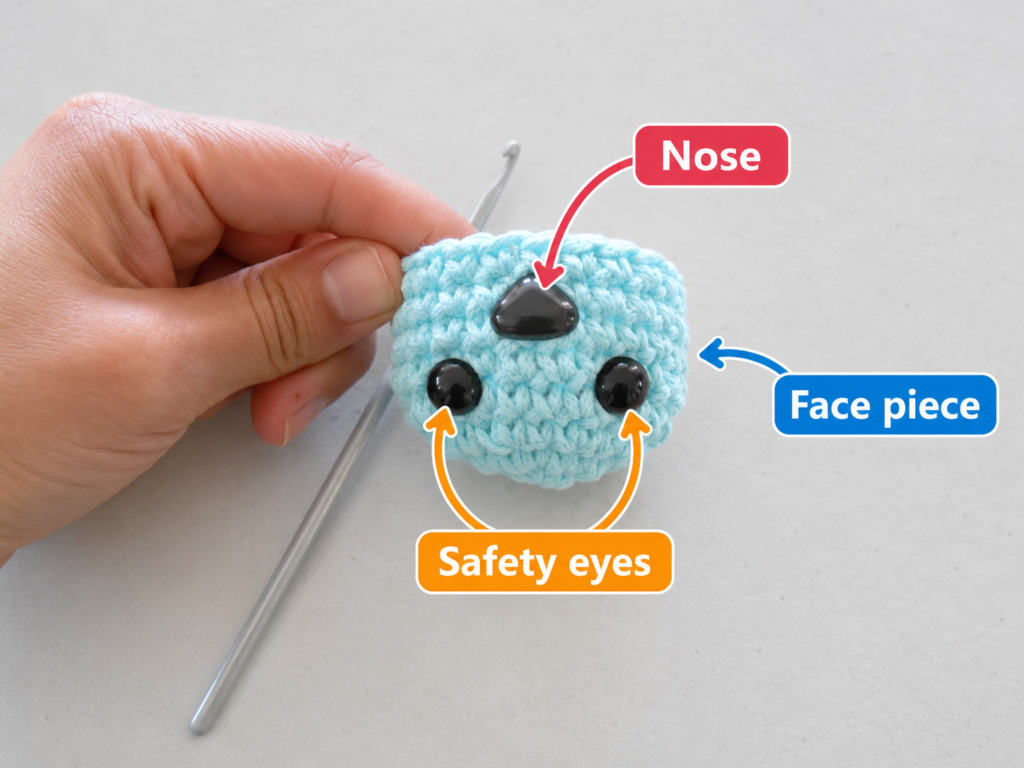
Before closing the head, add the facial details while you can still reach the reverse side.
Using dark-brown embroidery yarn:
- Make two short horizontal or tiny vertical eye stitches.
- Keep approximately 4 stitches between the eyes.
- Embroider a tiny upside-down triangle or simple V-shaped nose below them.
- Add a short mouth stitch if desired.
Check the face from arm’s length before tying knots.
Tiny amigurumi faces often look uneven when viewed extremely close but perfectly balanced at normal viewing distance.
Beginner tip:
Mark eye positions first with two scraps of contrasting yarn.
Step 6: Shape, Stuff and Close the Head
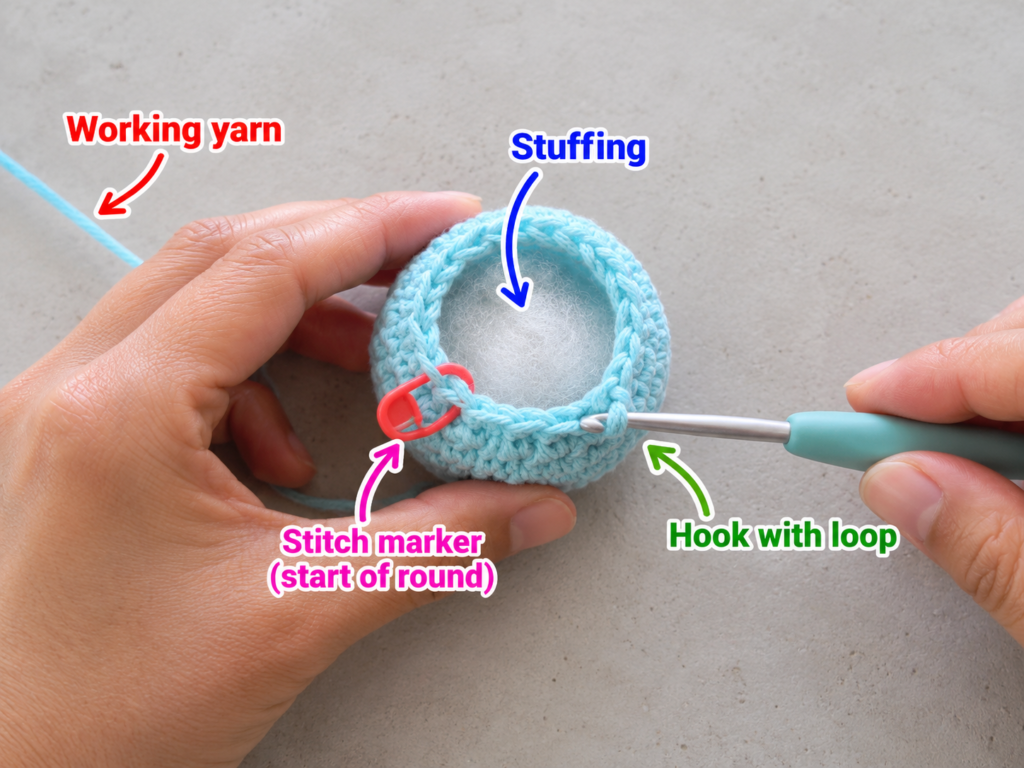
Begin reducing the circumference.
Work a decrease round using a repeating rhythm of 2 sc followed by one invisible decrease.
After that round, insert small pieces of stuffing.
Do not push one large ball inside. Small tufts are easier to distribute evenly.
Continue with another decrease round, alternating 1 sc and one decrease.
Add the last small amount of stuffing before the opening becomes too narrow.
Finally, decrease around until only a tiny hole remains.
Cut the yarn, leaving a tail. Thread the tail through the remaining front loops and pull gently to close.
How much stuffing?
The bunny should feel softly firm.
If the stitches stretch apart enough to show white fiberfill, remove some.
A charm that will swing from a gym bag benefits from keeping its shape, but it does not need to become rock hard.
Step 7: Crochet Two Simple Bunny Ears
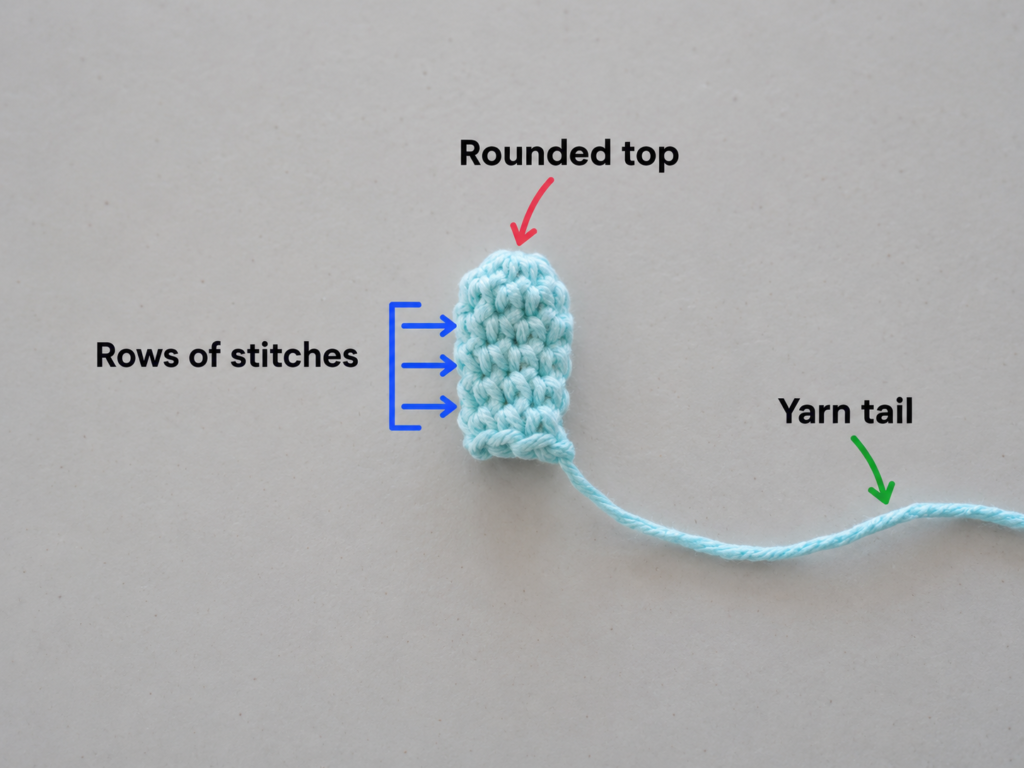
For this version, make two flat oval ears rather than small stuffed tubes.
Chain 7.
Beginning in the second chain from the hook:
- work single crochet along the chain,
- place several stitches into the final chain to turn the corner,
- then work down the unused loops on the opposite side.
Work one additional shaping round if you want a wider ear.
Fasten off with a sewing tail approximately 8 inches / 20 cm long.
Make the second ear exactly the same way.
Match the ears before sewing
Lay them side by side.
One can be slightly different—handmade crochet does not need machine symmetry—but obvious size differences are easier to correct now.
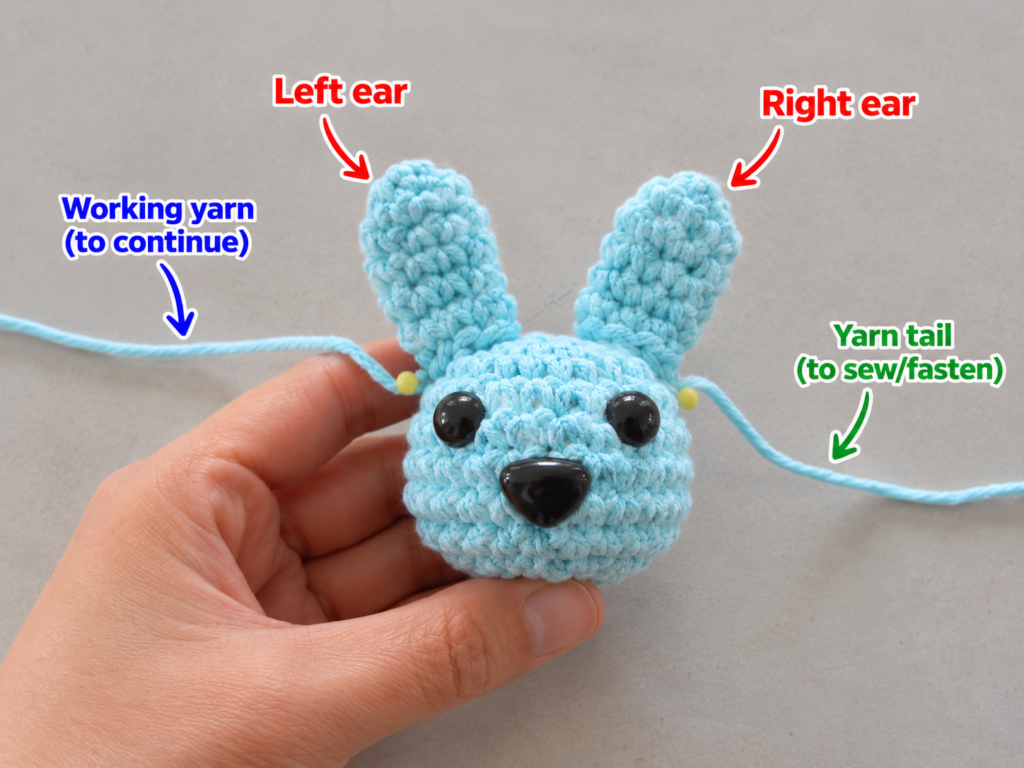
Step 8: Sew the Ears to the Head
Place the ears near the top of the bunny head.
Instead of sewing immediately, pin both ears first.
Look at the bunny from the front.
Are the ears equally far from the center? Are they leaning naturally? Is one noticeably higher?
Once you like the placement, thread a sewing tail onto the tapestry needle.
Pass through the base of the ear and through complete stitches on the head. Work back and forth several times across the ear base.
Do not pull so hard that the head puckers.
When secure, run the yarn tail through the stuffed head and bring it out somewhere farther away. Pull slightly, trim, then massage the surface; the end should disappear inside.
Step 9: Add a Reinforced Hanging Loop and Clasp
This step matters more on a gym bag charm than on something decorative that stays indoors.
A gym bag gets lifted, dropped, thrown into lockers and squeezed into cars. Do not rely on a loose jump ring pushed randomly through one crochet stitch.
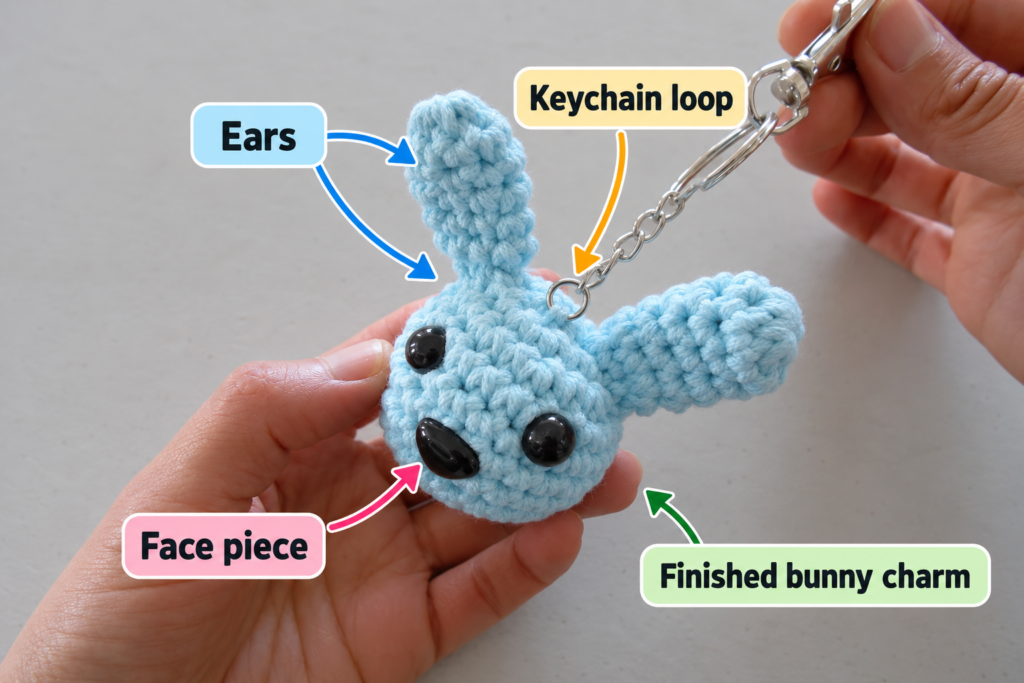
Create a short reinforced attachment loop:
- Join yarn securely near the top center between the ears.
- Chain 5–7 stitches.
- Slip stitch back into the same strong area.
- Work several slip stitches around the chain loop if additional thickness is needed.
- Fasten off and weave the tail deeply into the head.
Pass a split ring through the crocheted loop.
Attach the lobster clasp to the split ring.
If using an ordinary jump ring, open it sideways with jewelry pliers rather than pulling the two ends apart vertically.
Give the clasp a firm test tug.
Pattern Notes or Stitch Notes
Turning chain
There is no turning chain in the head because it is worked in continuous spiral rounds.
Stitch count
Always count after an increase or decrease round.
Straight rounds are easier to repair, but shaping rounds determine the overall form.
Right side and wrong side
For normal amigurumi, keep the typical V-shaped surface facing outward.
If your work begins curling with the opposite surface outside, gently turn the growing cup so the normal crochet face sits externally.
Size adjustments
The simplest way to change size is yarn weight.
- Sport-weight yarn + smaller hook = tiny charm
- DK yarn + 3–3.5 mm hook = standard bag charm
- Worsted yarn + 3.5–4 mm hook = chunkier charm
Changing the number of increase rounds requires redesigning the decrease sequence, so beginners will find yarn substitution easier.
Common Beginner Mistakes
1. Losing the Beginning of the Round
Problem: The stitch count seems correct, but the shaping slowly shifts.
Fix: Keep a locking marker in the first stitch and physically move it after every round.
2. Accidental Extra Increases
Problem: The head remains flat instead of becoming cup-shaped.
Fix: Once the increase section is finished, work exactly one sc in each stitch during the straight rounds.
3. Stuffing Showing Through
Problem: White fibers are visible between stitches.
Fix: Remove some stuffing or use a slightly smaller hook on your next charm.
4. Uneven Face
Problem: One eye looks higher.
Fix: Mark both positions before embroidering permanently.
5. Loose Ears
Problem: The ear flops from a single attachment stitch.
Fix: Sew across several stitches along the entire ear base.
6. Weak Hardware Connection
Problem: The ring stretches one crochet stitch until it opens.
Fix: Add a reinforced crocheted loop and attach the hardware through that loop rather than relying on one stitch.
7. Over-tight Decreases
Problem: The final rounds become difficult to work.
Fix: Maintain controlled tension and use the hook tip to enter the front loops without yanking the working yarn.
How to Customize This Crochet Project
Change the yarn colors
Try:
- cobalt blue with white embroidery
- lime green with navy details
- lavender with cream features
- hot pink with burgundy details
- black with neon embroidery
For a gym accessory, high-contrast colors make the charm easier to recognize on a crowded locker-room hook.
Add a sporty accent
Embroider a tiny:
- lightning bolt
- initial
- heart
- number
- stripe
onto the back.
Create team-color versions
Use school, club or team colors for one ear, the face and hanging loop.
Make a matching set
Create several charms in different colors for:
- gym bag
- backpack
- yoga tote
- dance bag
- travel duffel
- locker key
- water-bottle sling
Texture options
Try working the ears in BLO for a subtle ridged texture while leaving the head in standard single crochet.
Finishing Instructions
Inspect every seam and yarn end.
If an end is visible, thread it onto a tapestry needle and weave it through multiple stitches in different directions.
Avoid cutting tails directly beside a knot.
Gently roll the stuffed bunny between your palms to redistribute the stuffing.
Cotton charms can usually tolerate gentle spot cleaning, although you should always follow the specific yarn manufacturer’s care label. Remove detachable metal hardware before washing when practical.
Do not aggressively steam-block stuffed amigurumi. Heat can alter synthetic filling and flatten dimensional shaping.
Quick Printable-Style Summary
Skill level: Easy / confident beginner
Finished size: About 2½–3 in / 6–8 cm plus clasp
Yarn: DK/light-worsted cotton or cotton blend
Hook: 3.25 mm
Main stitches: ch, sc, inc, invisible dec, sl st
Starting method: 6 sc into magic ring
Construction: Head worked in continuous rounds; two separate ears; embroidered face; lightly stuffed
Repeat: Increase to required circumference, work straight rounds, decrease to close
Finishing: Sew ears, weave ends securely, create reinforced hanging loop, attach split ring and lobster clasp
FAQ
Is this crochet gym bag charm pattern suitable for beginners?
Yes. It is best for someone who already understands chain and single crochet but wants a first small amigurumi project. The primary new techniques are working continuously in the round, increases and decreases.
What yarn is best for a crochet gym bag charm?
Cotton or a cotton-rich blend is particularly useful because it produces crisp stitches and tends to hold small shapes well.
Can I use worsted-weight yarn?
Yes. Your charm will simply be larger. Choose a hook small enough to keep the stuffed fabric dense.
Do I need safety eyes?
No. Embroidered eyes work very well and keep the charm lightweight.
Why is my bunny head turning into a flat circle?
You are probably continuing to increase. After the final increase round, crochet one single crochet in every stitch for several rounds so the sides rise.
How do I keep the charm from falling off my gym bag?
Use a sturdy split ring or closed connector with a lobster clasp and reinforce the crocheted attachment loop. Do not rely on a metal ring inserted through one loose stitch.
Can I sell finished charms made from this tutorial?
The tutorial presented here is an original educational pattern structure. If you use another designer’s proprietary pattern instead, follow that designer’s stated licensing conditions. Also use your own product photography rather than photographs belonging to another crochet designer.
Conclusion
Small crochet projects are useful because every stage teaches something without using much yarn.
With this crochet gym bag charm pattern, you practice essentially the same foundation skills used in much larger amigurumi projects: spiral rounds, controlled increases, straight shaping, decreases, stuffing, embroidery, component assembly and neat finishing.
Once you have made the first bunny, the second usually works up much faster. Try changing the color, embroidery or ear details so each one feels different.





