A football lovey is a great project when you want something more special than a basic baby blanket but much quicker than a full-size afghan. This version combines a small football-field-inspired crochet blanket with a soft stuffed football in the center, giving you a handmade baby gift that immediately reads “game day” without needing complicated colorwork or appliqué charts.
This tutorial was designed for an advanced beginner. You should be comfortable making basic crochet stitches and counting rounds, but you do not need previous experience with complicated amigurumi.
The blanket is made first as a simple center-out square. Then you crochet a miniature football using single crochet increases and decreases. Finally, the football receives embroidered yarn laces and is sewn securely to the center of the blanket.
There are no plastic eyes, buttons, beads, or glued embellishments in this design.
The result is approximately 15 inches square, although your finished size will vary with yarn, hook size, and tension.
Pattern originality note: The construction and stitch sequence below are original for this article. The researched photographs listed above are visual-reference material only and should not be treated as the pattern for this project.
What You’ll Learn
- How to start a center-out crochet lovey blanket
- How to make even crochet corners
- How to change colors cleanly
- How to crochet a football shape in continuous rounds
- How increases create the football’s widest point
- How decreases form the opposite point
- When and how firmly to stuff amigurumi
- How to embroider football laces
- How to attach a stuffed component securely to a lovey
- How to adjust colors and finished size
Materials You’ll Need
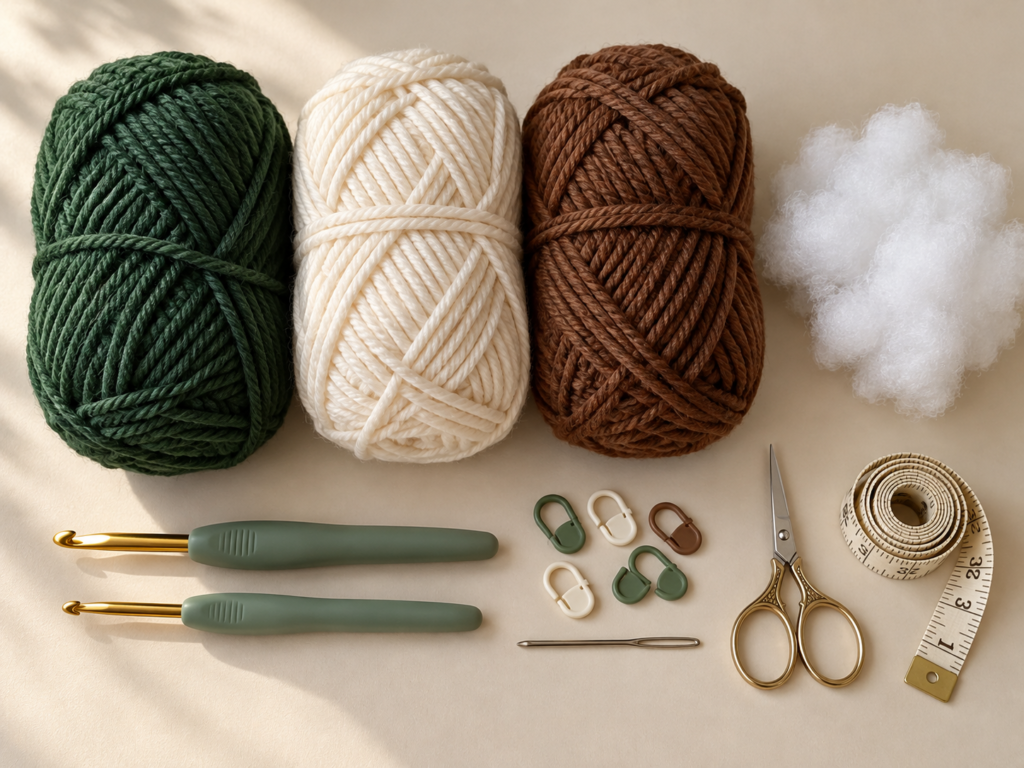
For the version shown in the image plan, use smooth medium #4 worsted-weight yarn. The Craft Yarn Council classifies worsted and aran yarns within its Medium/4 category. Craft Yarn Council
You will need approximately:
- 140 yards forest green worsted yarn
- 40–50 yards warm ivory worsted yarn
- 40–50 yards chestnut-brown worsted yarn
- 5.0 mm crochet hook for the blanket
- 4.0 mm crochet hook for the football
- Polyester fiberfill
- Blunt tapestry needle
- Stitch marker
- Scissors
- Measuring tape
Smooth acrylic, anti-pilling acrylic, or cotton/acrylic yarn works particularly well because the stitch definition is easy to see and the finished item can generally be cared for more easily than novelty yarn.
Always follow the care instructions printed on your specific yarn label.
Crochet Abbreviations Used
This tutorial uses US crochet terminology. The abbreviations follow common Craft Yarn Council conventions. Craft Yarn Council
- ch = chain
- sl st = slip stitch
- sc = single crochet
- hdc = half double crochet
- dc = double crochet
- st/sts = stitch/stitches
- inc = increase; work 2 stitches into one stitch
- dec = decrease; combine the next 2 stitches into one
- rnd = round
- rep = repeat
- ch-sp = chain space
US/UK terminology note
US and UK crochet terminology is not identical. For example, a US single crochet is called a UK double crochet, while a US double crochet is a UK treble. Craft Yarn Council
The instructions below are written entirely in US terms.
Before You Start
Gauge and tension
Exact blanket gauge is not critical because a lovey does not have to fit a body. However, consistent tension matters.
Your blanket stitches should feel soft and flexible rather than stiff.
For the stuffed football, use slightly firmer tension. The 4.0 mm hook is intentionally smaller than the blanket hook so the single crochet fabric is dense enough to help keep fiberfill from showing through.
How to count stitches
Count every stitch before moving to the next round, especially while making the football.
Put a locking marker into the first stitch of every football round. Move the marker upward each time you begin a new round.
How to keep the blanket square
Every blanket corner contains the same increase sequence.
If one corner receives fewer stitches, the square can pull inward. If it receives too many, it may ripple.
Spread the blanket flat every two or three rounds and check that all four corners look alike.
How to avoid curling
A center-out square generally lies flat when:
- Your starting ring is not pulled excessively tight.
- Your chain spaces are loose enough to accept the next corner stitches.
- Every corner receives the required increase.
If the blanket starts cupping upward, first check your stitch count before changing hook size.
Choosing colors
Traditional football colors work beautifully:
- green = field
- brown = football
- ivory/white = yard-line accent and laces
You can also replace green with the recipient’s favorite team color.
Step-by-Step Crochet Tutorial
Step 1: Crochet the Center of the Lovey Blanket
Use the 5.0 mm hook and forest green yarn.
Make a magic ring.
Round 1
Chain 3. The chain 3 counts as your first double crochet.
Work:
2 dc into ring, ch 2, [3 dc into ring, ch 2] three times.
Pull the magic-ring tail until the center closes neatly.
Slip stitch to the top of the beginning ch-3.
You now have four groups of double crochet separated by four corner spaces.
Do not worry if the center still looks more circular than square. The next rounds create the visible corners.
Beginner tip: Place a stitch marker in one corner space. This gives you an obvious reference point when counting the four sides.
Common mistake to avoid: Do not crochet your corner chains excessively tight. You need enough room to insert four stitches into each corner on the next round.
Step 2: Form the Four Square Corners
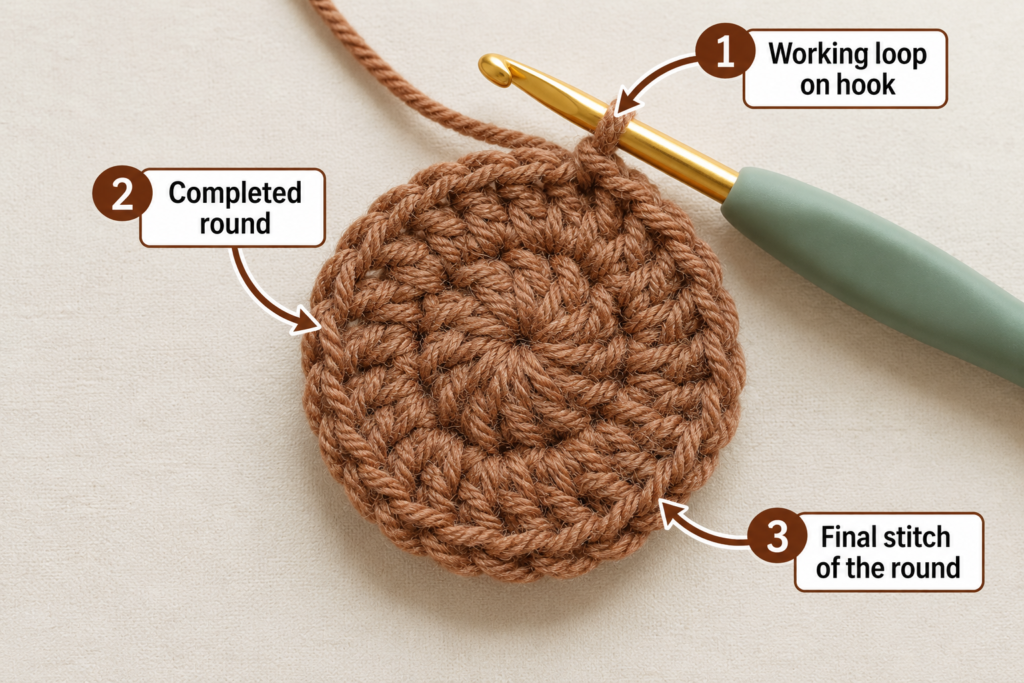
Slip stitch across until your hook is inside the next ch-2 corner space.
Round 2
Chain 3, dc in the same corner space, ch 2, then work 2 dc into that same corner.
This completes the first corner.
Work 1 dc into each stitch along the side.
In the next corner space:
2 dc, ch 2, 2 dc.
Repeat the same process around the square.
Join with a slip stitch to the beginning chain.
Round 3
Continue using the same rule:
- work 1 dc in every regular stitch;
- work 2 dc, ch 2, 2 dc into every corner space.
The square should now be easy to recognize.
Beginner tip: Think “ordinary stitch = one dc, corner space = four dc plus a ch-2 gap.”
Common mistake to avoid: Do not accidentally work the corner increase into the first double crochet beside the corner. All four corner stitches belong inside the ch-2 space.
Step 3: Add a Football-Field Stripe
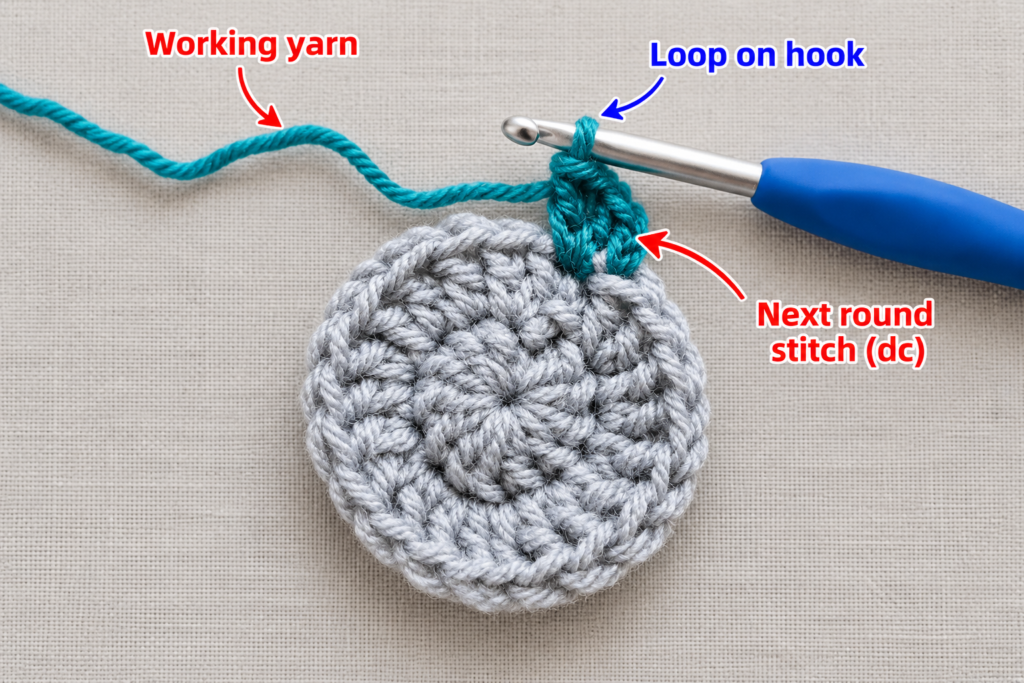
Continue the same corner formula for the remaining blanket rounds.
Use this color sequence:
- Rounds 1–3: forest green
- Round 4: warm ivory
- Rounds 5–8: forest green
- Round 9: warm ivory
- Round 10: forest green
To change colors, complete the final yarn-over of the last stitch using the new color. This makes the transition cleaner than finishing the stitch completely in the old shade.
Do not knot the yarn on the front of the blanket.
After changing colors, leave a 5–6 inch tail so you can weave the end securely later.
Beginner tip: Join each new color in the same general corner area. After finishing, that corner can serve as the “back” side of the lovey.
Common mistake to avoid: Avoid carrying unused yarn around the entire perimeter. It can create visible floats and unnecessary bulk. Fasten off instead.
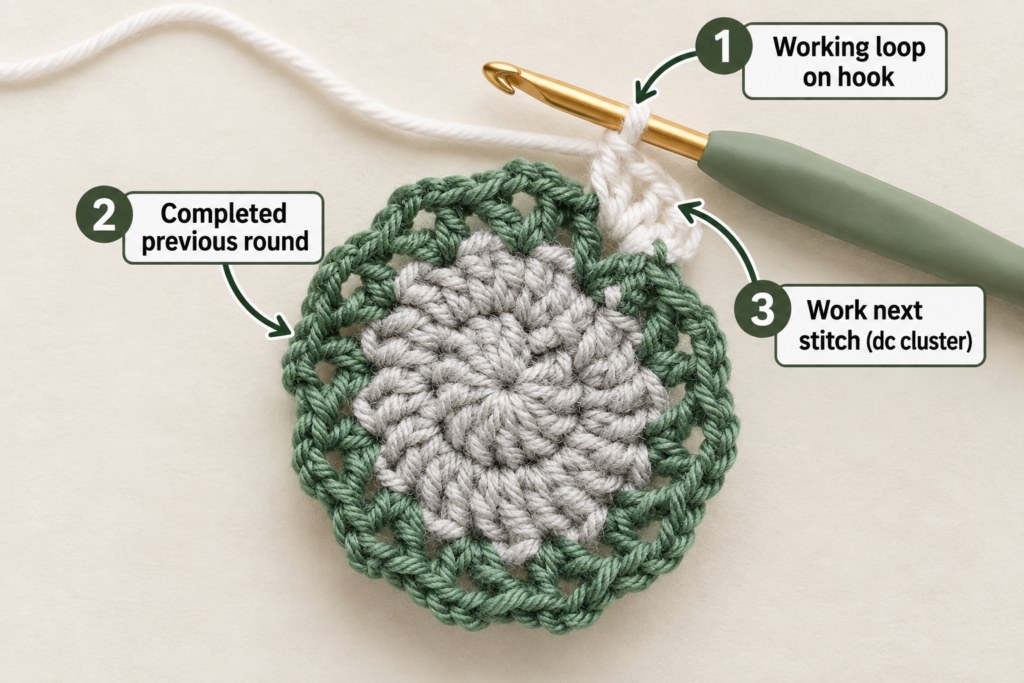
Step 4: Continue Until the Blanket Measures About 14–15 Inches
Continue the same increase rule through Round 10.
Remember:
Every side stitch receives one double crochet. Every ch-2 corner receives 2 dc, ch 2, 2 dc.
Your stitch count will increase naturally because every corner adds extra width.
Measure diagonally and from side to side occasionally.
You do not have to match exactly 15 inches. A lovey between roughly 13 and 16 inches works nicely for this project.
If your blanket reaches your preferred size after Round 9, you can stop there.
If you want it larger, add more green rounds before beginning the border.
Beginner tip: Lay the blanket flat rather than measuring it while hanging from the hook.
Common mistake to avoid: If one side looks shorter, recount the previous round rather than trying to “fix” it by randomly adding stitches.
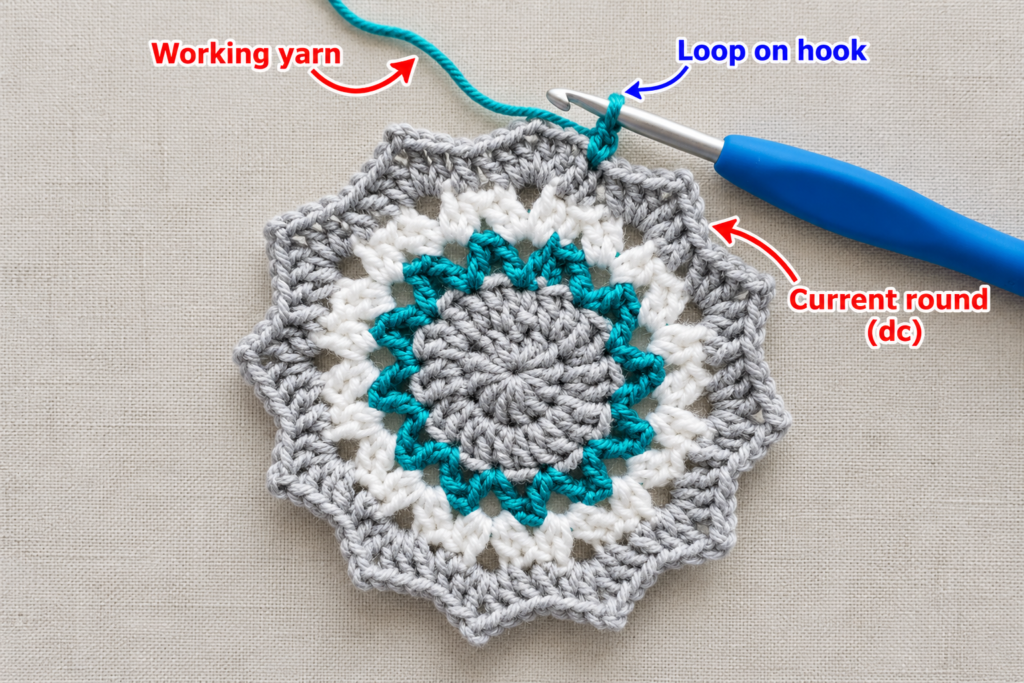
Step 5: Add the Border
Change to warm ivory.
Work one round of half double crochet around the blanket.
Work 1 hdc into every stitch.
At each corner space, work:
3 hdc into the corner.
Join to the first hdc with a slip stitch.
Fasten off.
Weave the yarn tail through the back of several stitches, reverse direction, and weave through another section before trimming.
The blanket portion is now complete.
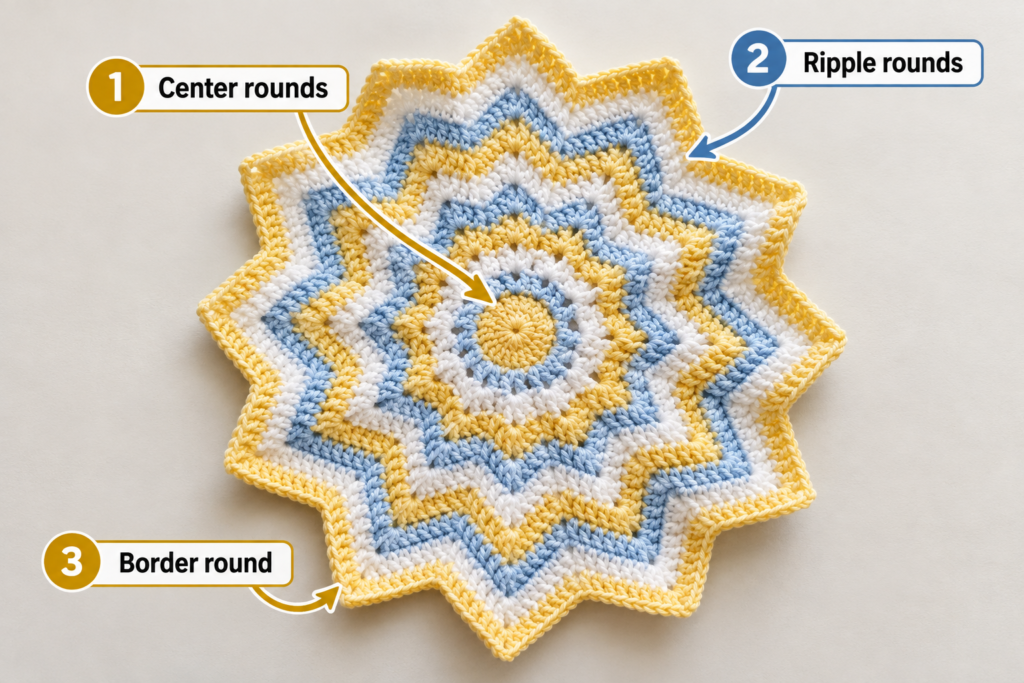
Crochet the Stuffed Football
Switch to the 4.0 mm hook.
The football is worked in continuous rounds. Do not join unless specifically directed.
Place a stitch marker into the first stitch of every round.
Step 6: Form the First Point of the Football
Using chestnut brown:
Round 1: 6 sc into a magic ring. — 6 sts
Round 2: Sc in each stitch around. — 6 sts
Round 3: Inc in every stitch. — 12 sts
Round 4: Sc around. — 12 sts
Round 5: Sc in next st, inc in next st. Repeat around. — 18 sts
Round 6: Sc around. — 18 sts
The narrow starting rounds help create a tapered football end instead of a completely spherical shape.
Beginner tip: Use your finger to push the tip outward occasionally so you can see the football profile developing.
Common mistake to avoid: Never count the stitch containing the marker twice.
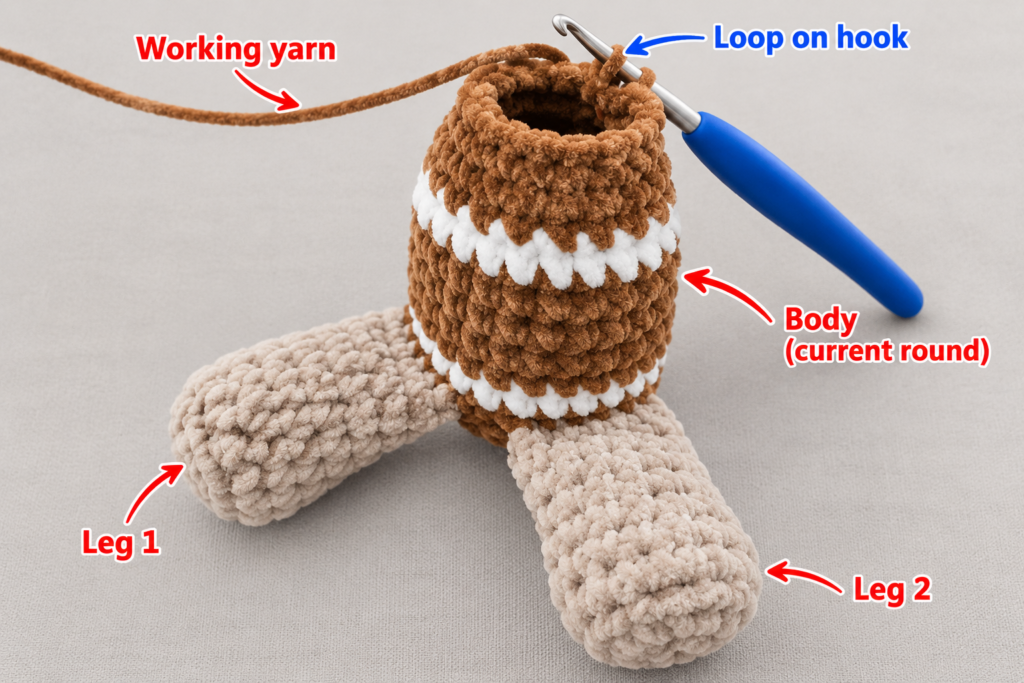
Step 7: Add the First Ivory Stripe and Widen the Football
Change to warm ivory.
Round 7: Sc in next 2 sts, inc. Repeat around. — 24 sts
Round 8: Sc around. — 24 sts
Change back to chestnut brown.
Round 9: Sc around. — 24 sts
Round 10: Sc in next 3 sts, inc. Repeat around. — 30 sts
Rounds 11–14: Sc in every stitch around. — 30 sts each round
These center rounds create the broadest part of the football.
Beginner tip: Do not cut the brown yarn excessively short during a nearby stripe change. Leave enough tail to weave securely.
Common mistake to avoid: Keep the white stripe only two rounds wide. An accidental third white round makes one stripe noticeably wider than the other.
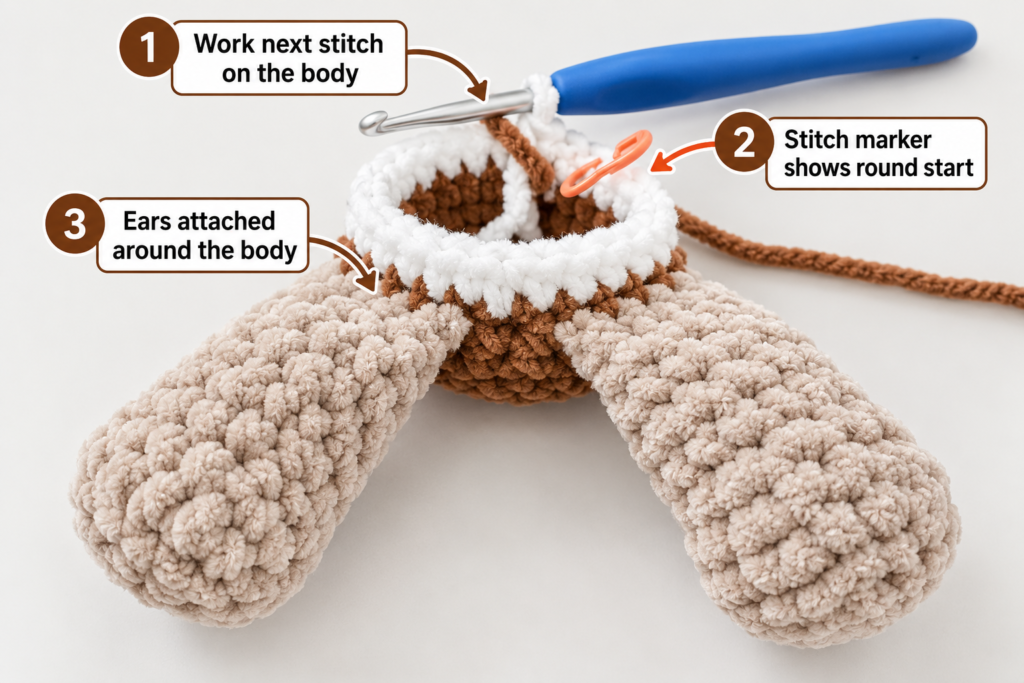
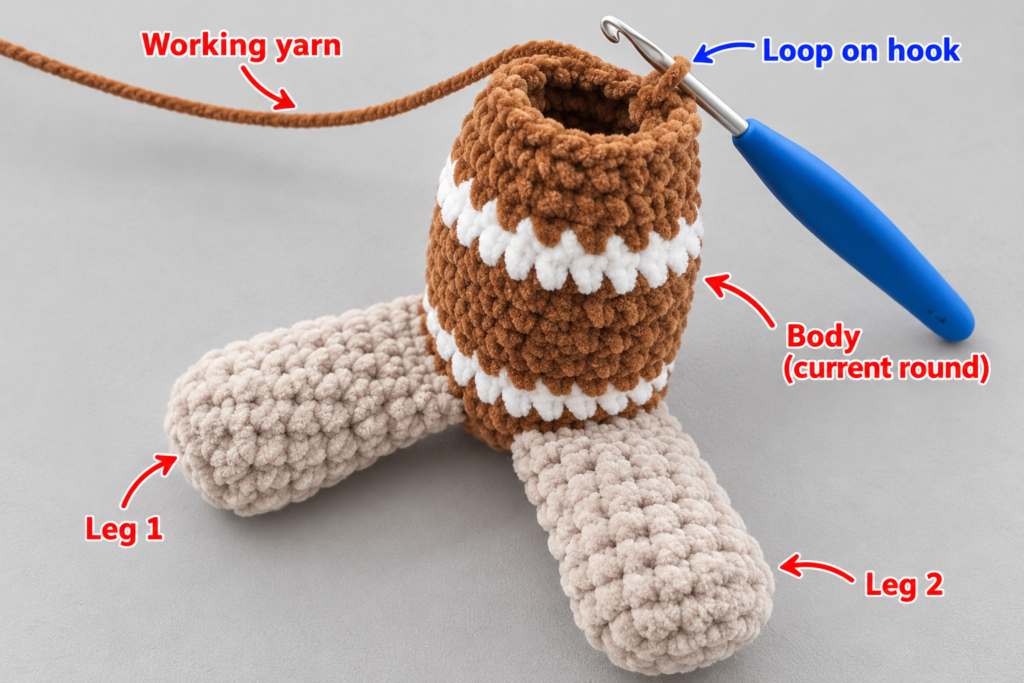
Step 8: Decrease, Add the Second Stripe and Stuff
Now begin shaping the opposite side.
Using brown:
Round 15: Sc in next 3 sts, dec. Repeat around. — 24 sts
Change to ivory.
Rounds 16–17: Sc around. — 24 sts
Change back to brown.
Round 18: Sc around. — 24 sts
Round 19: Sc in next 2 sts, dec. Repeat around. — 18 sts
Round 20: Sc around. — 18 sts
Round 21: Sc in next st, dec. Repeat around. — 12 sts
Pause here.
Begin adding fiberfill.
Push a small amount into each pointed end first. Then fill the center.
The football should be firm enough to hold its oval form but still compress comfortably when squeezed.
Do not pack the stuffing so tightly that individual stitches stretch apart.
Round 22: Dec around. — 6 sts
Fasten off, leaving a long tail.
Thread the tail onto a tapestry needle. Pass the needle through the front loops of the remaining six stitches and gently pull closed.
Secure and bury the yarn tail inside the football.
Step 9: Embroider the Football Laces
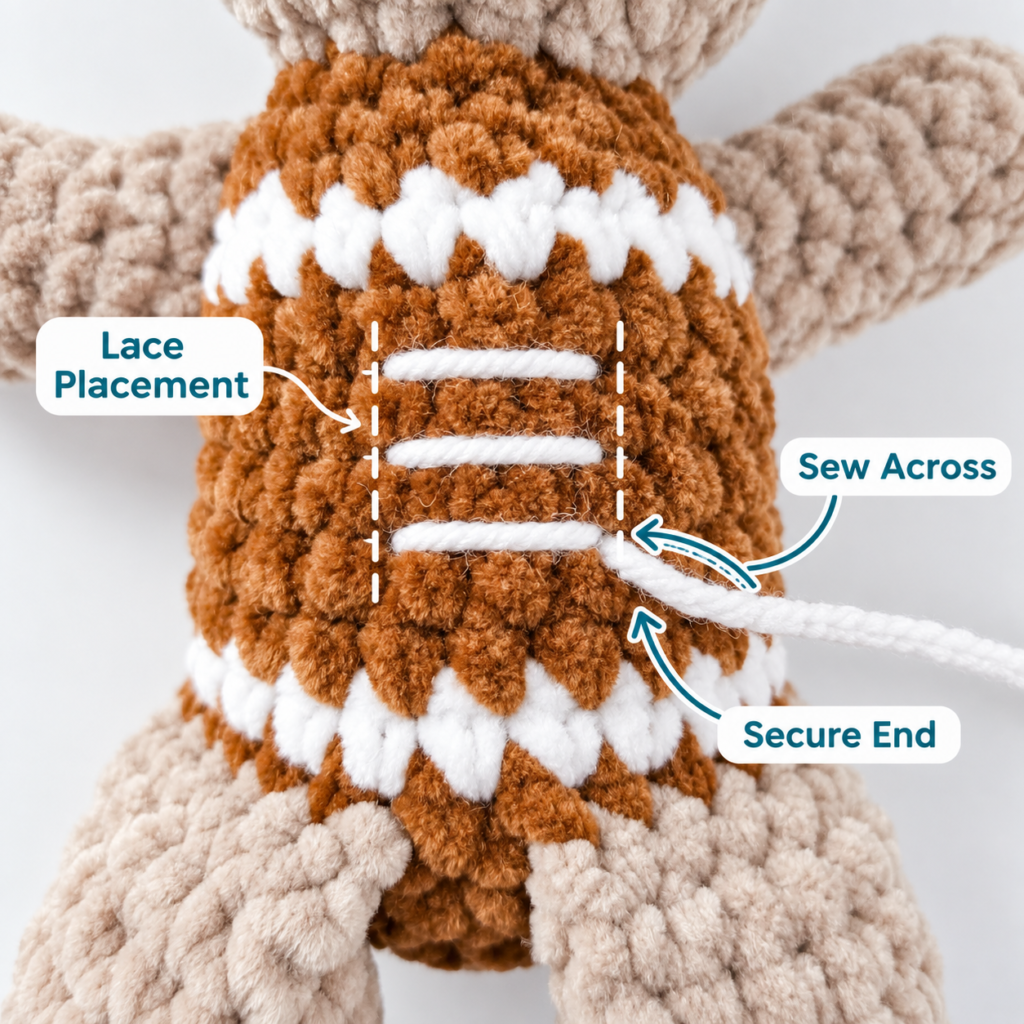
Thread approximately 24 inches of warm ivory yarn onto your tapestry needle.
Find the broadest center section of the football.
First stitch one horizontal line approximately 1½–2 inches long.
Now add four short vertical bars across that long line.
Try to keep the spacing even.
You do not need to pull the embroidery tightly. Tight embroidery can dent the stuffed football.
After the last stitch, take the needle through the football and bring it out several stitches away. Pull gently, trim the yarn close to the surface, and massage the football so the cut end retracts inside.
For a baby item, embroidered yarn details are preferable to using buttons for decoration. Nicole Chase’s baby-lovey guidance similarly notes the choking concern associated with safety eyes and noses.
Step 10: Attach the Football to the Lovey
Lay the blanket flat with the right side facing upward.
Position the football horizontally at the exact center.
Rotate it until the embroidered laces face upward.
Use removable stitch markers to hold the football temporarily if needed.
Thread your tapestry needle with brown yarn.
Rather than sewing through the entire football, catch stitches along the lower contact area.
Pass the needle:
- through a secure stitch at the lower edge of the football,
- through the top loops of the blanket beneath it,
- back into the football,
- and continue around the contact area.
Make several additional reinforcing passes at the two ends.
Check the underside frequently. It should remain neat, with no long loose yarn floats.
When the attachment feels secure, knot inside the football/blanket junction and bury the yarn end.
Give the football a firm test tug in several directions before considering the project finished.
Pattern Notes or Stitch Notes
Turning-chain rule
The blanket is worked in joined rounds rather than turned rows.
The beginning ch-3 counts as the first double crochet.
Corner rule
For the main blanket:
(2 dc, ch 2, 2 dc) goes into every corner space.
Do not use this increase anywhere else.
Football rounds
The football is worked continuously in a spiral.
Do not join each round.
Always mark the first stitch.
Right side and wrong side
The blanket technically has a right side and wrong side because the color-change tails and joins are easier to hide on one side.
Attach the football to the cleaner-looking side.
Size adjustment
For a smaller lovey, stop after Round 8 or 9.
For a larger lovey, continue the main square pattern for additional rounds before adding the border.
Because every new round grows all four sides evenly, no new shaping formula is required.
Common Beginner Mistakes
1. Losing the blanket corners
Problem: Your square begins looking round or uneven.
Fix: Mark one corner and identify all four ch-2 spaces before starting each round. The increases belong in those spaces.
2. Adding stitches along the sides
Problem: The blanket ripples.
Fix: Work only one dc into ordinary stitches. Extra stitches should be concentrated at the four corners.
3. Missing football increases
Problem: The football remains too narrow.
Fix: Count each round immediately after completing it. Never wait several rounds to check.
4. Forgetting the stitch marker
Problem: You cannot tell where a football round starts.
Fix: Place the marker into the first stitch, not between stitches.
5. Overstuffing
Problem: Fiberfill becomes visible through gaps.
Fix: Remove a little stuffing and reshape the football. Tight crochet fabric should not be stretched to its limit.
6. Pulling embroidered laces too tightly
Problem: The football develops a dent.
Fix: The embroidered yarn should rest on the surface rather than compress it.
7. Weak attachment to the blanket
Problem: The football feels loose when pulled.
Fix: Sew through multiple secure football stitches and blanket stitches around a wide contact area. Add reinforcement passes at both ends.
How to Customize This Crochet Project
Change the team colors
Keep the football brown and ivory, but replace forest green with:
- navy
- red
- burgundy
- orange
- royal blue
- gold
- purple
This gives the lovey team spirit without needing to reproduce a trademarked logo.
Make a neutral nursery version
Try:
- sage + cream + caramel
- oatmeal + ivory + brown
- dusty blue + cream + tan
Change the yarn
Cotton gives crisp stitch definition and a slightly heavier drape.
Acrylic usually produces a lighter, softer blanket and is widely available.
If you change yarn weight, use a hook suitable for that yarn and expect the finished dimensions to change.
Make the blanket larger
Continue the granny-square rounds.
The same corner formula works as the blanket expands.
Change the border
Instead of the simple hdc border, try:
- single crochet
- two hdc rounds
- alternating green and ivory rounds
- a very simple scallop border for a more decorative version
For a baby lovey, avoid long loops or fringe.
Make it a gift set
Pair the lovey with:
- a crochet football hat
- football booties
- a matching baby blanket
- a football coaster set for the parents
- a game-day bib
Finishing Instructions
Inspect every yarn end before gifting the project.
Fastening off
Pull each final yarn tail through the last loop completely.
Weaving in ends
Use a blunt tapestry needle.
Weave through the backs of several stitches, reverse direction, and weave through another section.
Avoid simply cutting a tail after one short pass.
Shaping
The square blanket may need only gentle hand shaping.
Lay it flat and smooth each corner outward.
The football can be rolled lightly between your palms to redistribute the fiberfill.
Blocking
If your yarn permits wet blocking:
- dampen the blanket,
- gently press out excess water,
- shape it into a square on a dry towel or blocking mat,
- allow it to dry completely.
Do not apply direct heat to acrylic yarn unless the yarn manufacturer specifically allows it.
Washing and care
Follow the yarn manufacturer’s label.
Because the project contains stuffing, make sure the football dries all the way through before using or storing it.
Baby safety
Do not add buttons, beads, plastic eyes, bells, loose ribbons, or detachable decorations to this version.
Check seams and embroidered details regularly for damage.
Handmade baby items should always be used appropriately and under responsible adult supervision.
Quick Printable-Style Summary
Project: Crochet Football Lovey
Skill level: Advanced beginner
Finished size: Approximately 15 inches square
Yarn: Medium #4 worsted weight
Hooks: 5.0 mm blanket; 4.0 mm football
Main colors: Forest green, warm ivory, chestnut brown
Stitches: ch, sl st, sc, hdc, dc, inc, dec
Blanket starting method: Magic ring
Blanket construction: Center-out solid square
Corner repeat: 2 dc, ch 2, 2 dc in each corner space
Blanket color order: 3 green rounds, 1 ivory, 4 green, 1 ivory, 1 green, ivory border
Football starting method: 6 sc in a magic ring
Football shaping: Gradually increase from 6 to 30 stitches, work center rounds, gradually decrease back to 6
Football details: Two ivory stripes plus embroidered laces
Finishing: Stuff football, close opening, embroider laces, sew securely to center of blanket and weave in all ends.
FAQ
Is this crochet football lovey pattern suitable for beginners?
It is best for an advanced beginner. The blanket itself is straightforward. The football adds increases, decreases, continuous rounds and stuffing, so having made a small crochet project previously will help.
What size should a crochet lovey be?
There is no single required crochet size. This tutorial produces approximately a 15-inch-square blanket, making it much smaller than a standard baby blanket and easy to carry.
Can I use cotton yarn?
Yes. Medium-weight cotton or a cotton blend will work well. Expect cotton to produce a slightly different drape and weight compared with acrylic.
Can I make the football without stuffing?
You could make two flat football appliqués and sew them together with little or no stuffing, but the shape will look different from the 3D football in this tutorial.
How do I make the football larger?
Use a heavier yarn with an appropriately larger hook, or redesign the increase section with additional rounds. Simply increasing the hook without changing yarn may create unwanted gaps.
Can I use safety eyes to turn the football into a character?
For a baby lovey, this tutorial intentionally avoids plastic eyes and similar detachable pieces. Embroidered features are a better direction for this particular project.
How do I stop fiberfill showing through?
Use a smaller hook for the football than for the blanket, maintain firm single crochet tension, and avoid overstuffing. Dense amigurumi fabric is one reason the tutorial changes from a 5.0 mm blanket hook to a 4.0 mm football hook.
Conclusion
This crochet football lovey pattern keeps the sports theme recognizable while relying on techniques that an advanced beginner can realistically master: a center-out square, simple color changes, basic amigurumi increases and decreases, embroidery, and sewing.
The green field-style blanket gives you plenty of room to personalize team colors, while the brown stuffed football becomes the tactile centerpiece of the project.
If you make several baby gifts throughout the year, save this construction method. Once you understand how to combine a small blanket with a securely attached crochet centerpiece, you can adapt the same general project format to many other themes.





