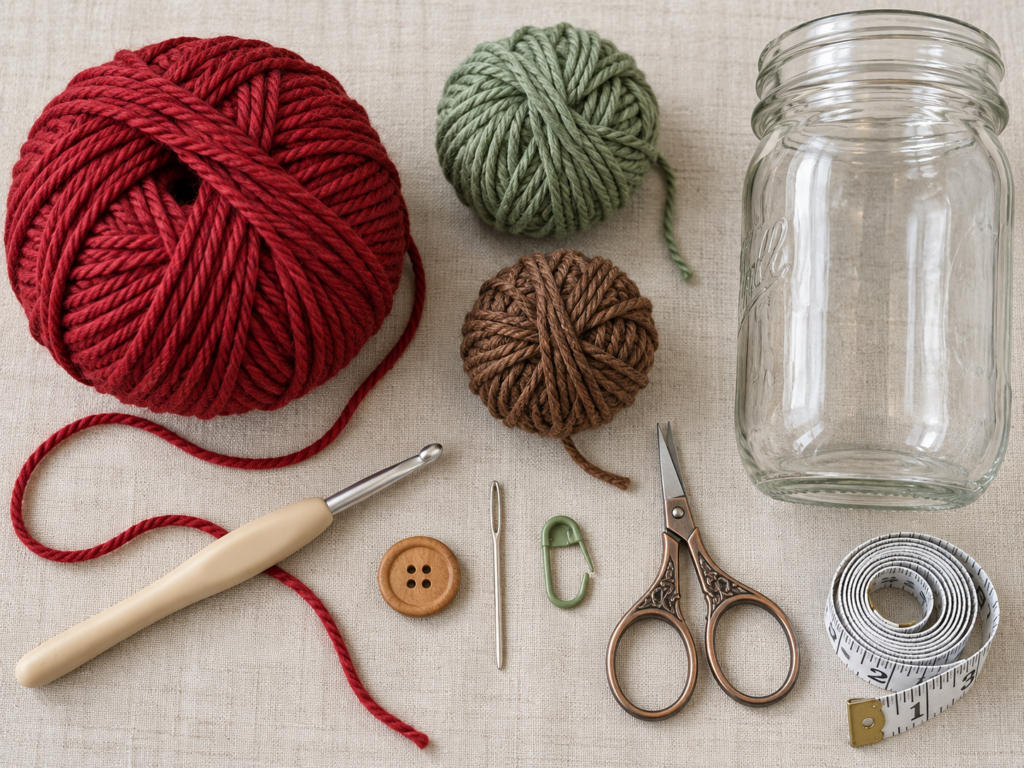
A plain glass jar becomes much more fun when you dress it like an apple.
This crochet apple jar cozy pattern is designed as a small, approachable project for newer crocheters. Instead of complicated shaping or working a fitted cylinder in rounds, you will crochet one flat rectangle, test it directly against your jar, add an adjustable button closure, and finish it with a tiny green leaf and brown stem.
The construction is useful if you are still learning because you can actually see whether the project fits before committing to the finishing work. If your stitches are slightly tighter or looser than mine, you simply adjust the length instead of fighting with exact gauge.
The red body uses a simple moss-style stitch that alternates single crochet stitches and chain spaces. This creates enough texture to make the cozy interesting while remaining repetitive enough for a beginner.
The finished project works beautifully as autumn kitchen décor, a teacher-themed handmade gift, a pencil-holder cover, a small flower-jar sleeve, or reusable decorative wrapping for a jar filled with treats.
What You’ll Learn
By the end of this crochet apple jar cozy tutorial, you will know how to:
- Measure a jar for a fitted crochet cover.
- Make a relaxed foundation chain.
- Work a simple moss-stitch texture.
- Recognize chain-one spaces.
- Count rows and maintain straight edges.
- Test crochet fit before fastening off.
- Make an adjustable button loop.
- Sew on a button securely.
- Crochet a tiny stem.
- Crochet a simple leaf around both sides of a foundation chain.
- Attach small crochet appliqués neatly.
- Weave in ends without creating visible lumps.
Materials You’ll Need
For one cozy:
- Approximately 35–50 yd / 32–46 m medium #4 cotton or cotton-blend yarn in apple red.
- A small amount of medium #4 sage or leaf-green yarn.
- A small amount of medium #4 brown yarn.
- 5 mm / H-8 crochet hook.
- One small button approximately ¾–1 inch / 19–25 mm.
- Tapestry needle.
- Scissors.
- Flexible measuring tape.
- One or two stitch markers.
- Straight-sided glass jar, approximately 16 oz, or another jar you can measure while working.
Medium #4 yarn encompasses common worsted and aran-type yarns in the Craft Yarn Council system.
Finished Size
The sample is intended for a straight-sided jar with a body circumference of approximately 9¾–10½ inches.
Aim for a cozy approximately:
- 3–3¼ inches tall
- ½–1 inch shorter than the jar circumference before buttoning
That small amount of negative ease allows the crochet fabric and button loop to hold the cozy snugly against the glass.
Do not treat these measurements as mandatory. Glass jars vary significantly between manufacturers, so measuring your own jar is more reliable.
Crochet Abbreviations Used
This tutorial uses U.S. crochet terms.
- ch = chain
- sc = single crochet
- hdc = half double crochet
- dc = double crochet
- sl st = slip stitch
- st/sts = stitch/stitches
- sp = space
- rep = repeat
- RS = right side
- WS = wrong side
The Craft Yarn Council maintains a standardized crochet abbreviation list and notes, for example, that U.S. single crochet corresponds to U.K. double crochet terminology.
Before You Start
Measure the jar first
Wrap your measuring tape around the straight section where the cozy will sit.
Do not measure around the threaded neck or curved shoulder. You want the main cylindrical part of the jar.
Write the circumference down.
If your jar measures 10 inches around, aim for a finished crochet rectangle around 9¼–9½ inches long, then use the button loop to bridge the remaining gap.
Gauge and tension
Exact gauge is not critical because you can check the rectangle against the jar.
For reference, aim for a firm but flexible fabric. The cozy should stretch slightly without becoming transparent between stitches.
If the fabric is floppy, try a smaller hook.
If your hook is difficult to insert or your hands feel strained, loosen your tension or move up half a millimeter.
How to count the moss stitch
Moss stitch consists of alternating single crochet stitches and chain-one spaces.
After the first setup row, your single crochets are generally worked into the chain spaces from the previous row rather than stacked directly on top of another single crochet. That staggered construction creates the small woven-looking texture.
Keeping the edges straight
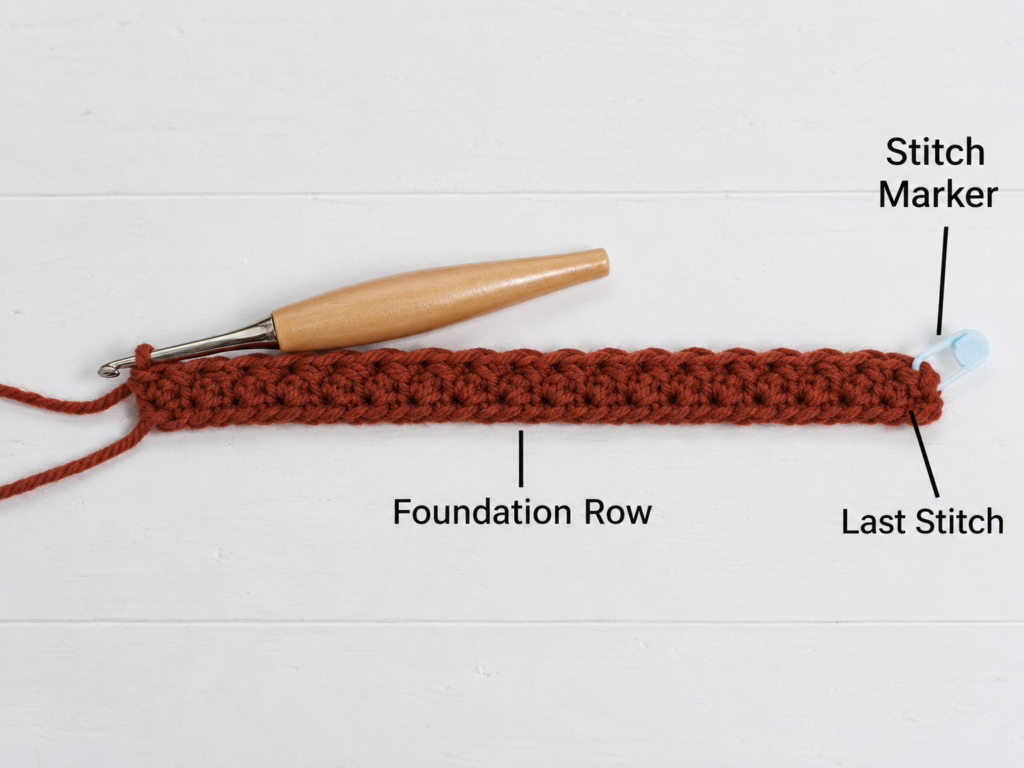
Always identify the first and final single crochet.
A removable stitch marker in the first stitch can save a lot of frustration. If the rectangle starts getting narrower, the final stitch is usually being missed.
Choosing colors
Classic apple colors are:
- Red + sage green + brown
- Bright green + dark green leaf + brown
- Golden yellow + olive leaf + dark brown
You can also make several varieties inspired by different apples.
Step-by-Step Crochet Tutorial
Step 1: Make the Foundation Chain
With apple-red yarn, make a slip knot.
Ch 36.
Do not tighten each chain excessively. Your chain should move along the hook comfortably.
This chain creates a starting width suitable for many medium mason jars, but your yarn and tension may make it shorter or longer than mine.
Measure the chain without stretching it. If it is dramatically shorter than the circumference needed for your jar, add chains in pairs while keeping the total construction suitable for the moss-stitch repeat.
Beginner tip:
Look for the small V-shaped top of every chain. The loop already sitting on your crochet hook is not counted as one of the chains.
Common mistake to avoid:
Do not pull your foundation chain tightly. A tight chain can cause the bottom edge of the finished rectangle to bow.
Step 2: Work the Moss-Stitch Setup Row
Turn the chain so you can work back along it.
Row 1
Work 1 sc in the second chain from the hook.
Then:
*Ch 1, skip the next chain, sc in the next chain; repeat from * across.
You should finish with a single crochet at the opposite end.
Ch 1 and turn.
The chain spaces you created are important. They become the insertion points for the following rows.
Beginner tip:
Spread the row gently with your fingers. The chain-one spaces appear as small horizontal gaps between single crochets.
Common mistake to avoid:
Do not put a single crochet in every foundation chain. The deliberate skipped chains create the moss-stitch structure.
Step 3: Build the Textured Cozy Body
Row 2
Ch 1 and turn.
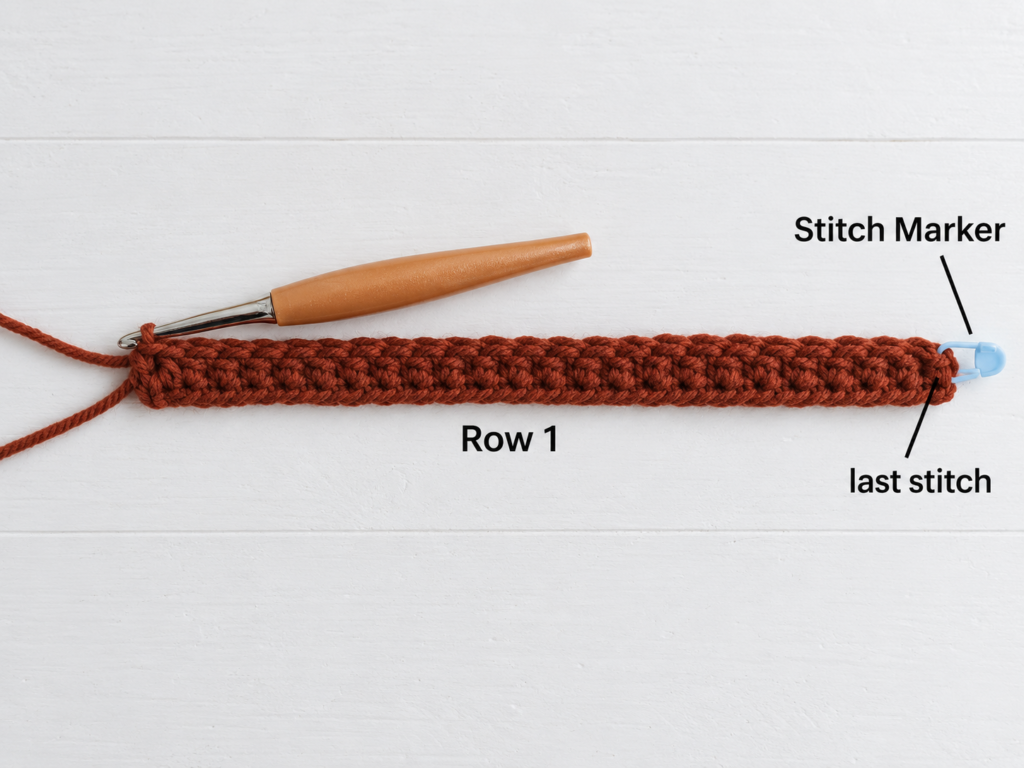
Sc in the first sc.
Then work:
*Ch 1, sc in the next ch-1 sp; repeat from * across.
Finish with a single crochet in the final stitch.
Rows 3–11
Repeat Row 2.
After several rows, the fabric should start to resemble a tiny woven grid rather than ordinary stacked single crochet.
Your goal is approximately 3–3¼ inches in height.
If your yarn creates shorter rows, add one or two rows.
If your rectangle reaches the required height earlier, stop sooner.
Beginner tip:
Count your rows periodically rather than waiting until the end. Placing a stitch marker every fifth row makes counting easy.
Common mistake to avoid:
Do not crochet into the single crochet when the repeat tells you to crochet into the chain-one space. Working into the wrong location gradually destroys the staggered texture.
Step 4: Test the Fit Before Fastening Off
Wrap the rectangle around the straight section of the jar.
The two short ends should almost meet.
A small gap of roughly ½–1 inch is useful because the closure loop will bridge it.
The cozy should not slide down when you release it lightly.
If the rectangle overlaps significantly, it is too long for this jar.
If the ends are separated by several inches, it is too short.
Because width is determined by the foundation chain, correcting a major sizing problem means restarting with more or fewer chains. That sounds inconvenient, but this is a very small project, so making the correction now is much better than ending with an unusable cozy.
Beginner tip:
Do this fitting before weaving in any yarn ends.
Common mistake to avoid:
Do not stretch the fabric as hard as possible to make it fit. A small amount of stretch is ideal; excessive tension can pull the button open later.
Step 5: Add the Button Loop
Fasten off the main working yarn and weave the tail a short distance into the back of the fabric.
Lay the rectangle flat.
Choose one short side for the loop.
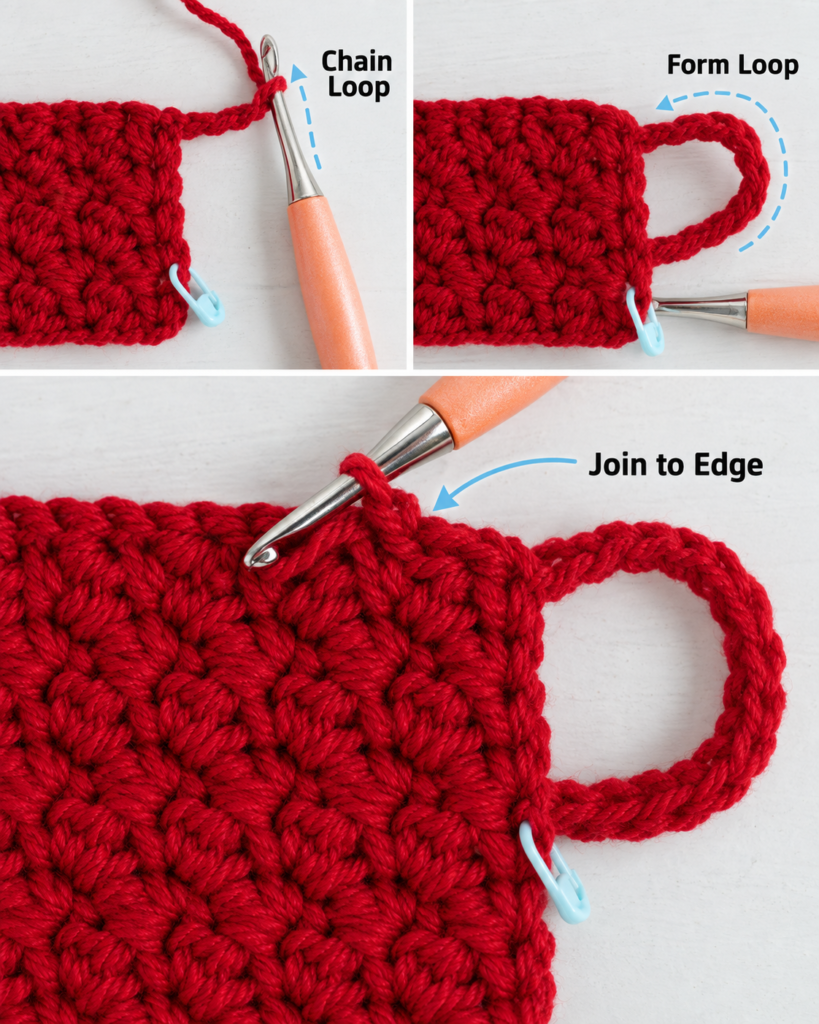
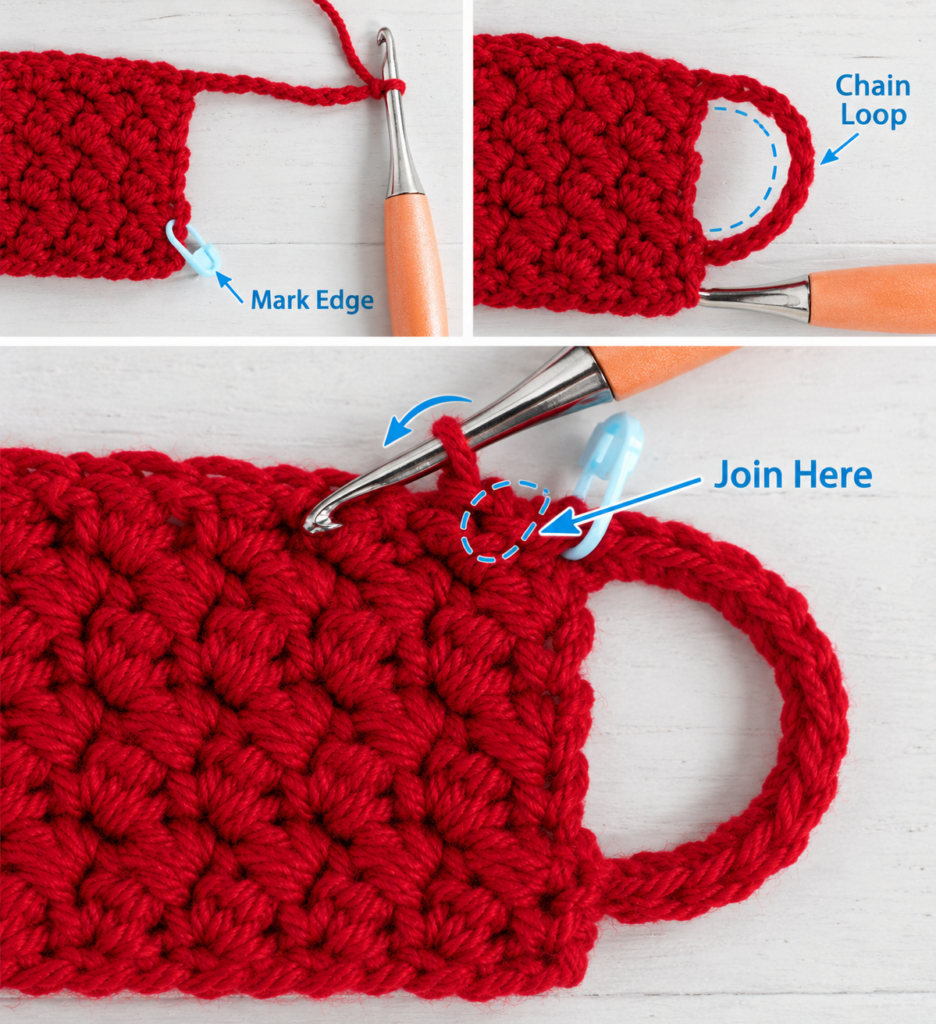
With red yarn, join approximately one-third of the way down the edge.
Chain 8–12, depending on your button diameter.
Without twisting the chain, attach the other end approximately one-third of the way up from the opposite side of the center point using a slip stitch.
You now have a small horizontal loop centered along the short edge.
Test it around your button before fastening off.
If the button drops through without resistance, shorten the chain.
If the loop cannot stretch over the button, make it slightly longer.
Beginner tip:
Build the loop around the actual button instead of trusting a fixed chain count.
Common mistake to avoid:
Do not make a very loose loop. Cotton yarn relaxes slightly with use.
Step 6: Sew on the Button
Wrap the cozy around the jar again.
Use the loop to determine exactly where the button should sit on the opposite edge.
Mark that location.
Remove the cozy from the jar.
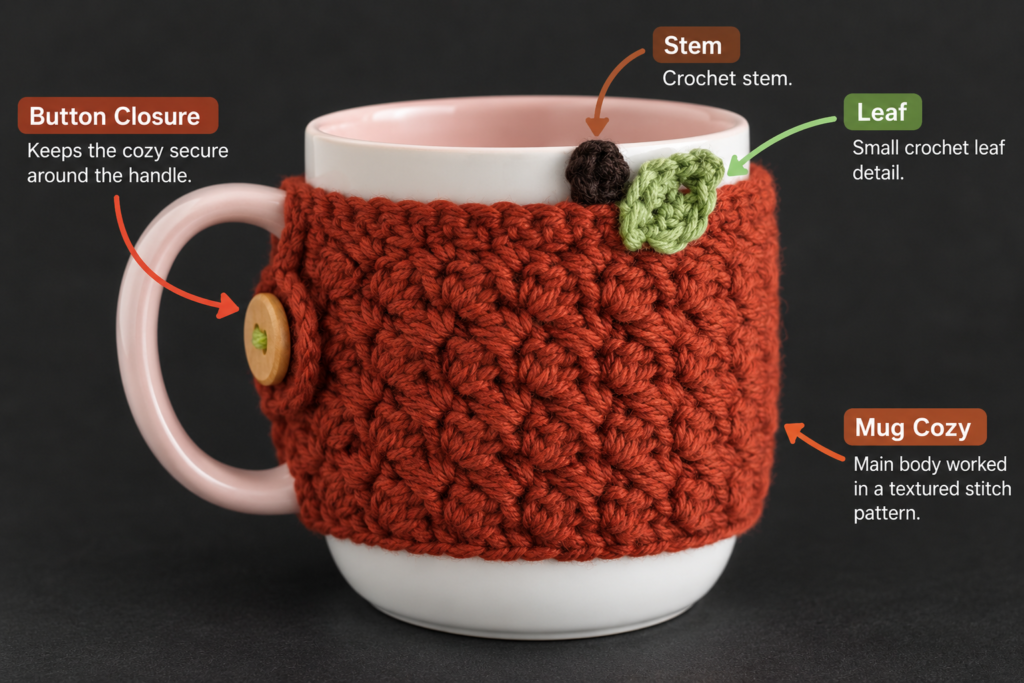
Using matching red yarn or strong sewing thread, sew the button firmly through several sections of crochet fabric.
Do not sew only through one loose strand of yarn. Spread the stitches over a small area so repeated opening and closing does not distort the fabric.
Test the closure.
It should hold the cozy snugly without pulling the rectangle into an hourglass shape.
Step 7: Crochet the Brown Apple Stem
With brown yarn:
Ch 5.
Starting in the second chain from the hook:
Sl st in each chain across.
You now have a short, narrow stem.
Fasten off while leaving approximately 6 inches for sewing.
The stem should look slightly organic rather than perfectly rigid. You can curve it gently when attaching it.
Step 8: Crochet the Green Leaf
With sage-green yarn:
Ch 7.
Beginning in the second chain from the hook, work:
- sl st
- sc
- hdc
- dc
- hdc
- sc
Now rotate the chain so you can crochet along the unused loops on the opposite side.
Work back toward the starting end with complementary stitches:
- sc
- hdc
- dc
- hdc
- sc
- sl st
Fasten off, leaving a sewing tail.
The leaf should form a small pointed oval.
It does not need to be perfectly symmetrical. Slight asymmetry often looks more natural on a handmade apple motif.
Beginner tip:
When you rotate the chain, do not turn the project as though starting a new row. You are working along the opposite side of the same foundation chain.
Step 9: Attach the Stem and Leaf
Place the cozy flat with the side you want visible facing upward.
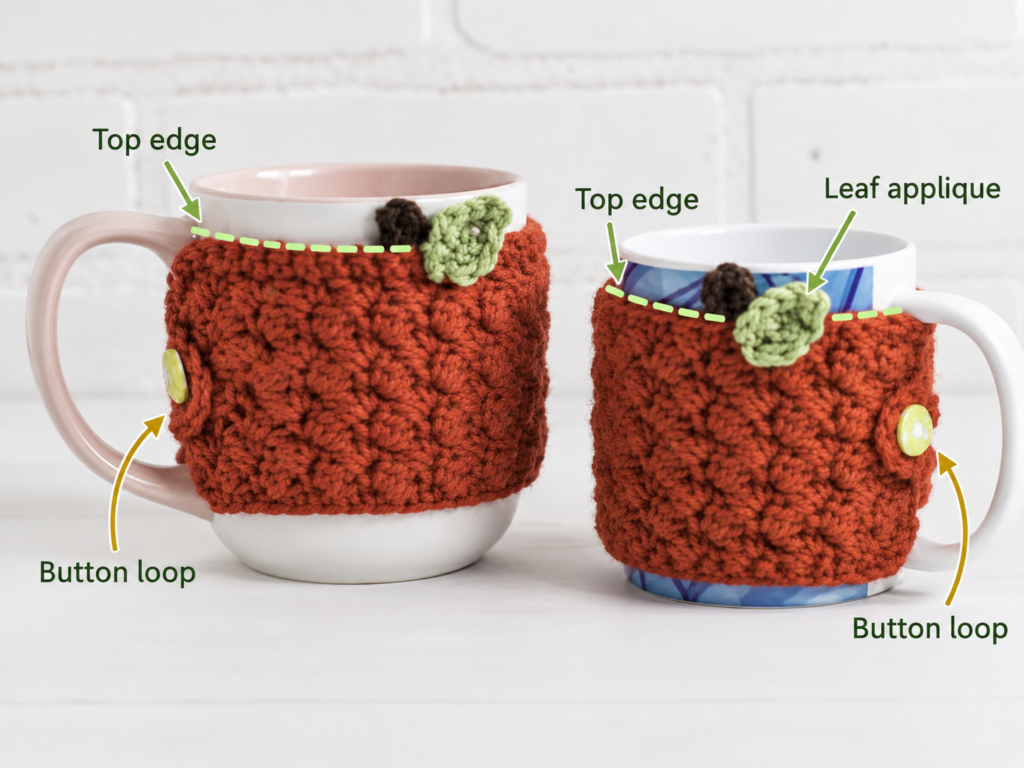
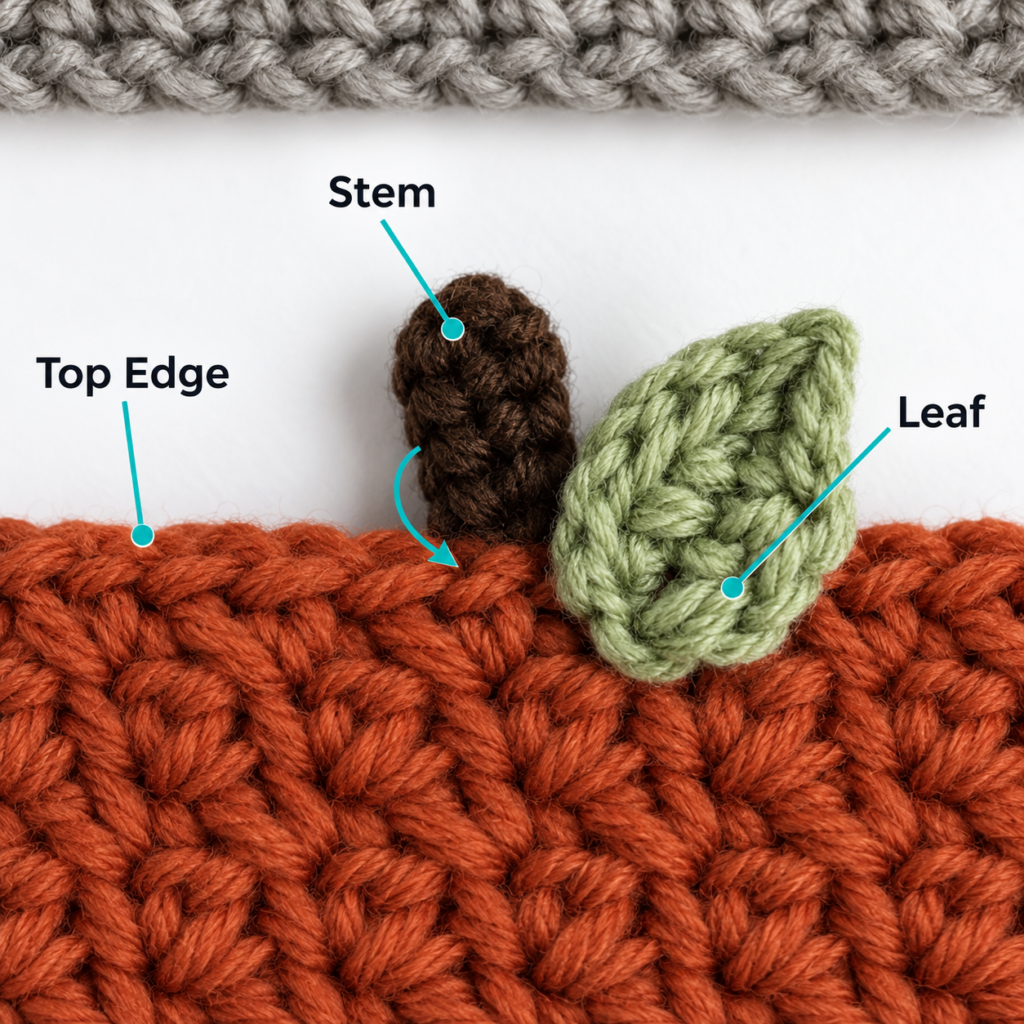
Position the brown stem near the top edge, slightly away from the button.
Tack the lower portion of the stem securely to the cozy while allowing the upper portion to remain visible.
Place the leaf beside the stem at a slight diagonal.
Use the green yarn tail to sew around the center and lower edge of the leaf. You do not have to sew every outer stitch down. Leaving the tip slightly free gives the leaf dimension.
Check the back frequently so your sewing stitches remain tidy.
Step 10: Weave In the Ends and Dress the Jar
Turn the cozy to the back.
Thread each remaining tail through a tapestry needle.
Run the yarn through several stitches in one direction, reverse direction, and pass through several more stitches before trimming the excess.
Avoid cutting directly beside the final knot or stitch.
Button the cozy around the jar.
Smooth the upper and lower edges with your fingers.
The leaf and stem should sit near the top like the crown of an apple.
Pattern Notes or Stitch Notes
Turning chain
The ch 1 at the beginning of a row does not count as a stitch in this tutorial.
Stitch pattern
Once the foundation/setup row is established, the repeating structure is:
Sc, ch 1, sc in the next ch-1 space.
Continue maintaining the staggered chain spaces.
Stitch count
More important than memorizing a numeric stitch count is maintaining the same number of single crochets and chain spaces on every row.
If the panel suddenly becomes narrower, inspect the final stitch.
Right side and wrong side
Moss stitch is reasonably attractive on both surfaces, so this project does not have a dramatically different right and wrong side.
Choose whichever side looks neater as your RS before attaching the apple leaf and stem.
Size adjustment
For a wider jar, increase your starting chain in increments compatible with the stitch repeat and check the chain around your jar before starting the first row.
For a smaller jar, remove chains.
The finished rectangle should normally be slightly shorter than the jar circumference because the button loop supplies the final connection.
Common Beginner Mistakes
1. Making the foundation chain too tight
Problem: The lower edge pulls inward.
Fix: Restart using deliberately relaxed chains or temporarily use a slightly larger hook for the chain.
2. Missing the final stitch
Problem: The rectangle gradually turns into a trapezoid.
Fix: Mark the first and last stitch of the row until you can identify them confidently.
3. Crocheting into the wrong place in moss stitch
Problem: The texture becomes irregular or dense.
Fix: Find the visible chain-one opening and place the next sc there.
4. Making the rectangle exactly equal to jar circumference
Problem: The finished cozy may sag.
Fix: Build in modest negative ease and let the button loop bridge the remaining distance.
5. Making the button loop too large
Problem: The loop repeatedly slips off the button.
Fix: Remove a few chains and retest.
6. Sewing the appliqué too tightly
Problem: The top of the cozy puckers.
Fix: Attach the leaf firmly but without pulling the sewing yarn hard enough to gather the fabric.
7. Weaving ends only once in one direction
Problem: Tails may work loose during use or washing.
Fix: Weave through several stitches, reverse direction, and weave again.
How to Customize This Crochet Project
Change the apple variety
Try dark burgundy for a red-delicious-inspired cozy, yellow for a golden apple, or fresh green for a Granny Smith style.
Make a taller jar cover
Add more moss-stitch rows.
Leave enough exposed glass at the top so the cozy does not interfere with a lid or threaded rim.
Make it removable
The button construction already makes washing and changing cozies easier than a permanently sewn tube.
Replace the button
You can use a wooden, coconut-shell, or simple washable plastic button.
For a child-oriented environment, avoid decorative pieces that could detach easily.
Add texture
Once comfortable with the pattern, try:
- half double crochet
- back-loop single crochet ribbing
- seed stitch
- alternating stripes
Add an apple blossom
A tiny white crochet flower can turn the same design into a spring apple-orchard theme.
Gift ideas
Use the finished cozy around a clean jar containing:
- wrapped sweets
- pencils
- crochet hooks
- stitch markers
- small stationery items
- artificial flowers
- teacher desk supplies
Finishing Instructions
Fasten off by cutting the working yarn with several inches remaining, pulling the yarn tail completely through the final loop, and tightening gently.
Weave every tail into the back of the fabric.
Blocking
Heavy blocking is normally unnecessary.
If your rectangle is slightly wavy, dampen it lightly, smooth it flat to the intended dimensions, and let it dry completely before attaching it to the jar.
Washing and care
Follow the care instructions printed on your specific yarn label.
Cotton cozies can often tolerate more washing than decorative novelty yarn, but the button material may require separate consideration.
Remove the cozy from the glass jar before washing.
Important use note
A crochet cozy does not make ordinary glass safe for boiling liquids or extreme temperature changes. Follow the jar manufacturer’s instructions for heat exposure.
Do not use a yarn cozy around an open flame or as a cover for a burning candle.
Quick Printable-Style Summary
Skill level: Beginner / easy
Project type: Apple-themed removable mason jar cozy
Yarn: Medium #4 cotton or cotton blend
Hook: 5 mm / H-8
Main stitches: ch, sc, moss stitch, sl st
Starting method: Ch 36 for the sample; adjust to measured jar size when necessary.
Body: Work one setup row followed by repeated moss-stitch rows until approximately 3–3¼ inches tall.
Fit: Rectangle should be approximately ½–1 inch shorter than jar circumference.
Closure: Centered chain loop plus one button.
Decoration: Small brown stem and sage-green leaf.
Finishing: Sew decorations securely, weave in all tails, and button around jar.
FAQ
Can I make this crochet apple cozy for a regular mason jar?
Yes. The pattern is designed around the straight section of a glass jar. Because jar sizes differ, measuring circumference before starting is more reliable than assuming every 16 oz jar has identical dimensions.
Is cotton yarn better than acrylic for a jar cozy?
Cotton is an excellent option because it gives crisp stitch definition and relatively stable sizing. A cotton blend can also work well.
Can a beginner make moss stitch?
Yes. Once the setup row is complete, the pattern mainly alternates single crochet stitches with chain spaces. The important skill is learning to identify each chain-one space.
How do I make the cozy larger?
Increase the starting-chain length so the finished rectangle wraps around your jar with a small gap for the closure.
For additional height, simply crochet more rows.
Do I need a button?
No. You could seam the short edges together to create a permanent tube. A button closure is useful because the cozy can be removed from the jar easily.
Can I use the cozy on a hot mason jar?
The yarn sleeve does not change the thermal limitations of the glass. Only use the jar at temperatures approved by its manufacturer.
Can I make this as a teacher gift?
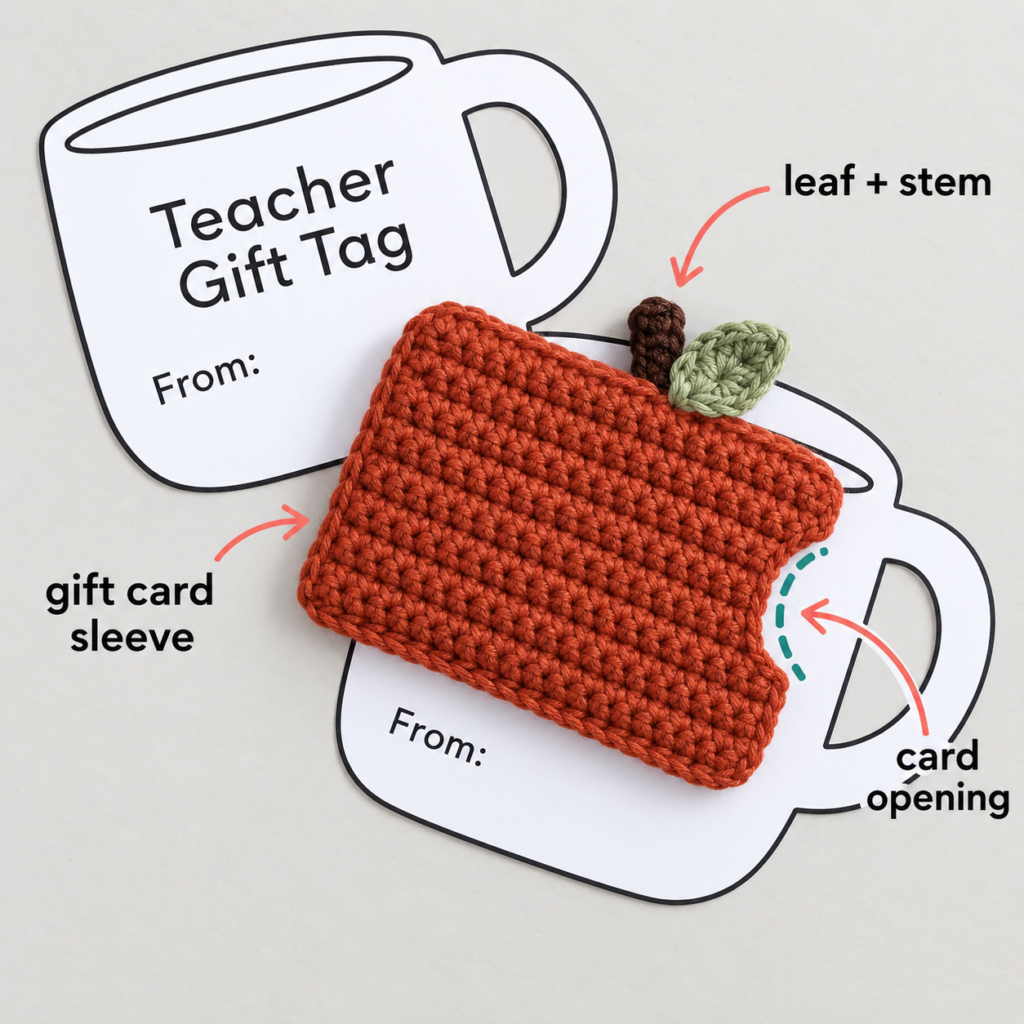
Yes. The apple motif makes it especially suitable for teacher gifts. You can fill the jar with wrapped treats, pencils, markers, or small desk supplies instead of using it as drinkware.
Conclusion
This crochet apple jar cozy is a useful beginner project because nearly every skill is easy to see and correct: you can count the foundation chain, recognize the moss-stitch spaces, measure the rectangle directly against the jar, adjust the loop before attaching the button, and reposition the leaf before sewing it permanently.
Once you have made one, the construction becomes a reusable template. Change the red to orange and you have the beginning of a pumpkin-inspired fall cozy; work it in cream and green for a farmhouse look; or make several different apple colors for autumn and teacher-gift projects.
The most important habit is to measure the actual jar rather than depending entirely on a fixed chain count. That one step makes the pattern much more forgiving for beginners.





