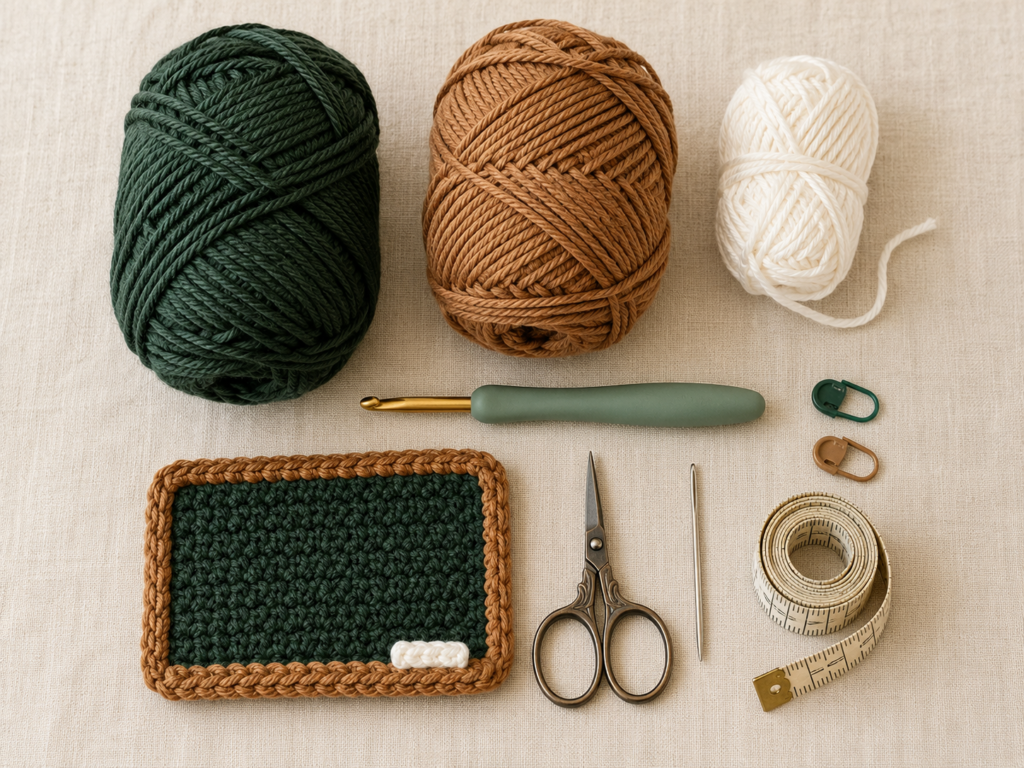
A miniature chalkboard is one of those crochet motifs that instantly says school, classroom, teacher and back-to-school without needing a complicated design.
This beginner-friendly crochet chalkboard applique keeps the construction intentionally simple. You will first make a small, firm rectangle in dark green yarn, surround it with a warm brown frame, and finish it with a few ivory yarn stitches that look like chalk writing.
There are no complicated color charts, shaping calculations or advanced stitches. If you can chain and work single crochet, you can make the main piece.
The finished applique can be sewn onto a teacher tote, pencil pouch, backpack, classroom banner, notebook cover, granny square or back-to-school blanket.
The tutorial below is an original construction rather than a transcription of the visual reference tutorial.
What You’ll Learn
- How to crochet a small flat rectangular appliqué.
- How to keep single-crochet rows straight.
- How to crochet an even frame around four edges.
- How to make clean corners.
- How to embroider simple chalk-style lettering.
- How to weave in ends without making a small appliqué bulky.
- How to change the dimensions for other school projects.
Materials You’ll Need
For one chalkboard approximately 4–4½ inches wide, gather:
- DK or light worsted cotton yarn in dark forest green
- DK or light worsted cotton yarn in camel, tan or medium brown
- Small amount of ivory or white yarn
- 3.5 mm crochet hook
- Scissors
- Tapestry needle
- 1–2 stitch markers
- Measuring tape
- Optional pins for blocking
Cotton is especially useful here because a firm, defined stitch makes the rectangular shape and embroidered details easier to see. Hook size should ultimately be matched to your yarn and desired fabric; the Craft Yarn Council treats hook/yarn recommendations as guidelines rather than universal interchangeability rules.
Crochet Abbreviations Used
This tutorial uses standard US terminology:
- ch = chain
- sc = single crochet
- sl st = slip stitch
- st/sts = stitch/stitches
- RS = right side
- WS = wrong side
These abbreviations align with the Craft Yarn Council’s standard crochet terminology.
US/UK terminology note
The US single crochet (sc) used throughout this project is called double crochet (dc) in UK terminology.
Before You Start
Gauge and tension
Gauge is not critical because this is an applique rather than a fitted garment.
What matters more is producing a firm fabric without large gaps. You want the green center to look like a solid chalkboard rather than an open lace rectangle.
If the fabric looks loose, try a hook 0.5 mm smaller.
If the rectangle feels stiff enough to curl strongly, move up one hook size or relax your tension.
How to count stitches
After completing the first row, you should have 17 single crochet stitches.
Count them before continuing.
The turning chain does not count as a stitch in this tutorial.
Place a marker in the first stitch of a row if you have difficulty seeing it.
How to keep the edges straight
Most crooked beginner rectangles come from accidentally skipping the final stitch or working into the turning chain.
At the end of each row:
- Stop.
- Count 17 stitches.
- Chain 1.
- Turn.
That five-second check saves much more time than undoing several crooked rows.
Choosing colors
Traditional classroom chalkboards work especially well in:
- dark forest green + medium brown
- charcoal + honey brown
- black + camel
- deep navy + pale wood
Use ivory instead of brilliant optical white if you want the lettering to look softer and more handmade.
Step-by-Step Crochet Tutorial
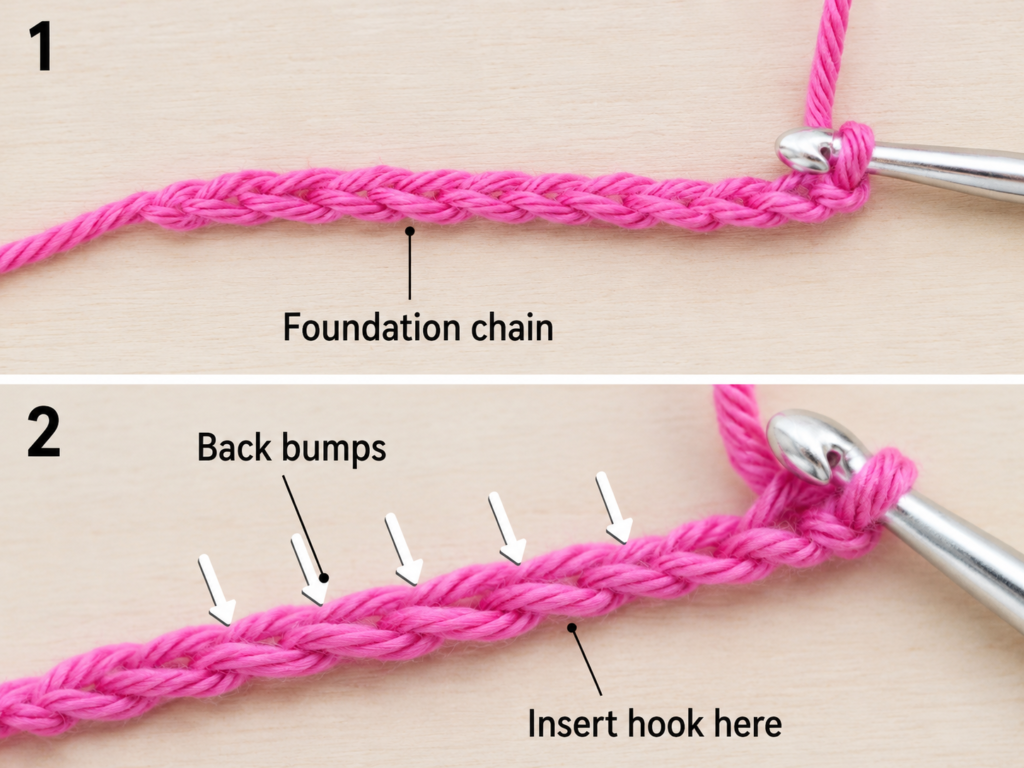
Step 1: Make the Foundation Chain
With the dark forest green yarn, make a slip knot.
Chain 18.
Try not to make the foundation chain much tighter than your normal stitches. A tight foundation can pull the bottom edge inward and create a curved rectangle.
Beginner tip: Hold the newest chain close to the hook rather than gripping the entire chain tightly.
Common mistake to avoid: Do not count the loop currently on your hook as one of your 18 chains.
Step 2: Crochet the First Row
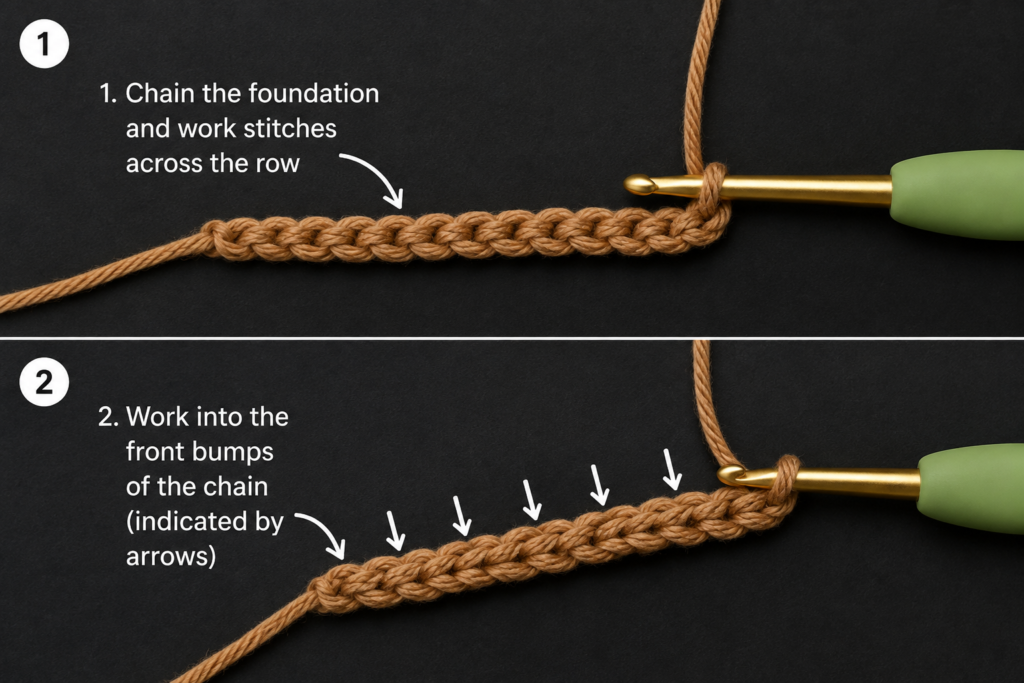
Insert the hook into the second chain from the hook.
Work 1 single crochet.
Continue placing 1 sc in every remaining chain.
You should finish with:
17 sc
Chain 1 and turn.
Your first row will not look much like a chalkboard yet. What matters is that the stitches are evenly spaced and the foundation edge remains relatively straight.
Beginner tip: If you have difficulty seeing the chain loops, tilt the chain slightly toward you before inserting the hook.
Common mistake to avoid: Working into the first chain beside the hook would accidentally increase your stitch count.
Step 3: Begin Building the Chalkboard Panel
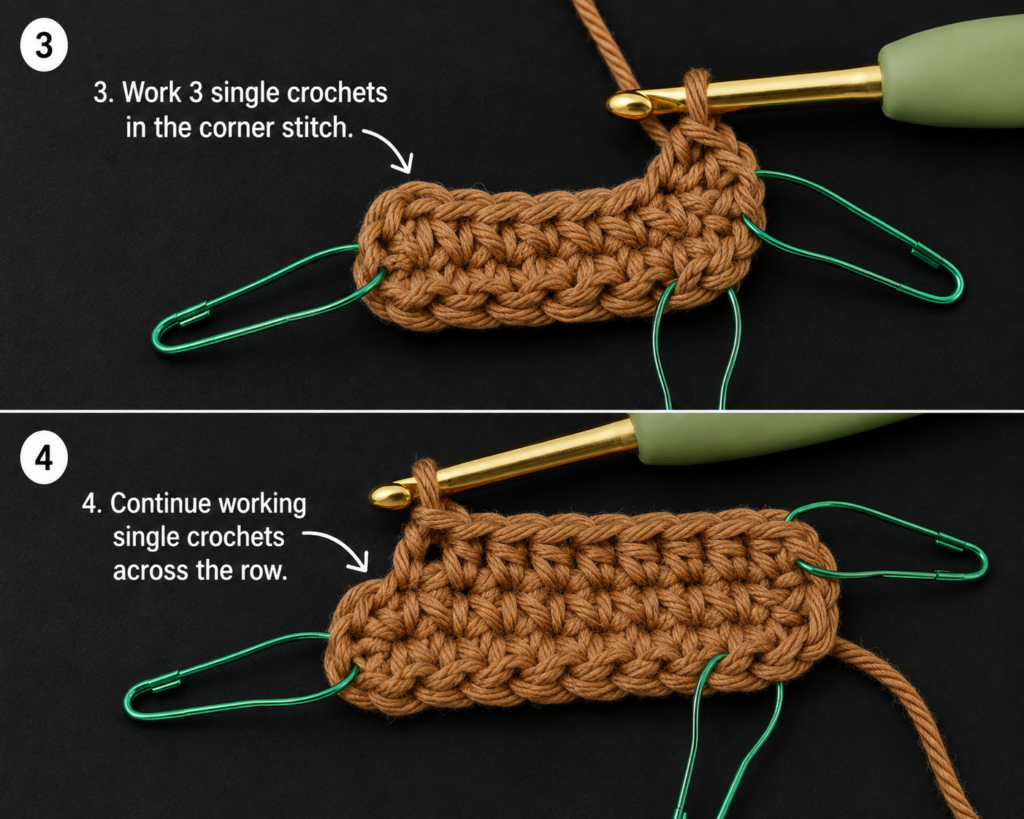
For the next row:
Sc in every stitch across — 17 sc.
Chain 1 and turn.
Repeat the same process.
Continue until you have worked approximately 5 or 6 total rows.
The small green panel should now clearly resemble a rectangle.
Keep the fabric relaxed on the table every few rows. If one side is narrowing, count the stitches immediately.
Beginner tip: The first and last stitch in single crochet can look smaller than the middle stitches. A removable marker in the first stitch makes the edge much easier to identify.
Common mistake to avoid: Do not work into the chain-1 turning chain.
Step 4: Keep the Sides Straight
Continue working:
1 sc in each of the 17 stitches.
Chain 1 and turn after every row.
Pause around the middle of the panel and compare the two long edges.
They should remain approximately parallel.
If you started with 17 stitches but now have 16, you probably missed the last stitch in one row.
If you have 18, you may have accidentally worked into the turning chain.
Correct the stitch count before continuing.
Why 17 stitches?
An odd number gives you a convenient central stitch when you later position a letter, chalk line, small apple or another decorative detail.
It isn’t mandatory. It simply makes visual centering easier.
Beginner tip: Count every second or third row even if the rectangle looks correct.
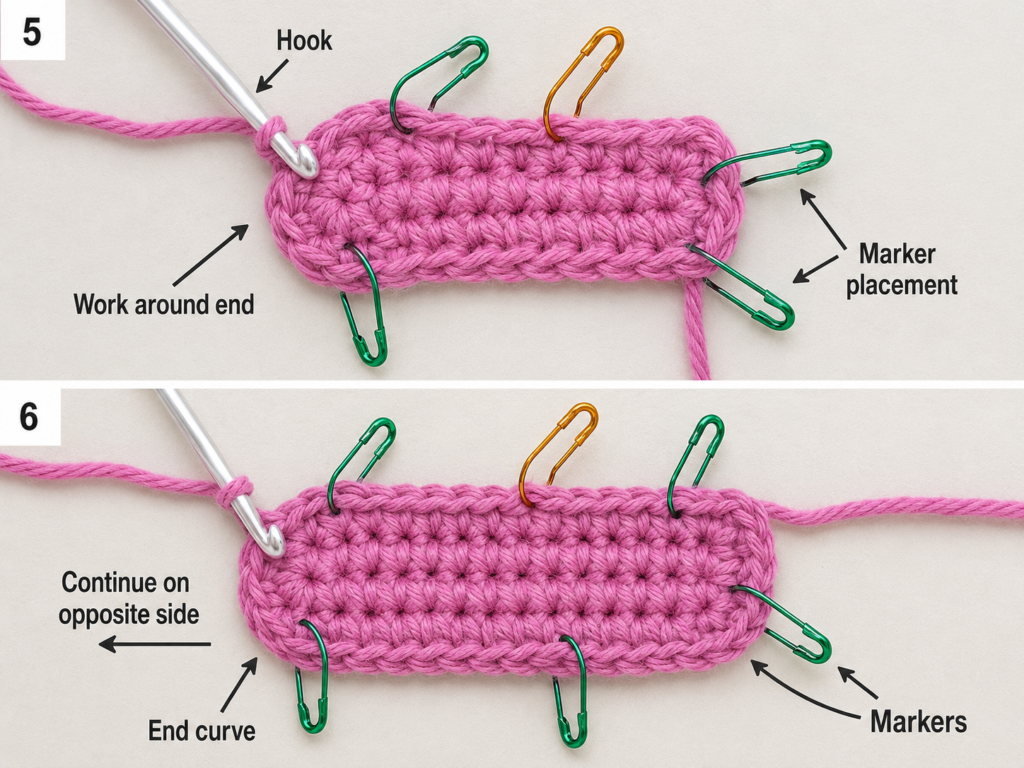
Step 5: Finish the Chalkboard Center
Continue until you have approximately 13 rows total.
For the sample:
- 17 stitches wide
- 13 rows tall
Do not chain 1 after your last row.
Cut the yarn, leaving a tail around 5–6 inches long, and pull the end through the final loop.
Lay the rectangle flat.
If the foundation edge is slightly tighter than the top edge, gently stretch the fabric horizontally with your fingers.
A small amount of variation is completely acceptable because the frame will visually sharpen the finished outline.
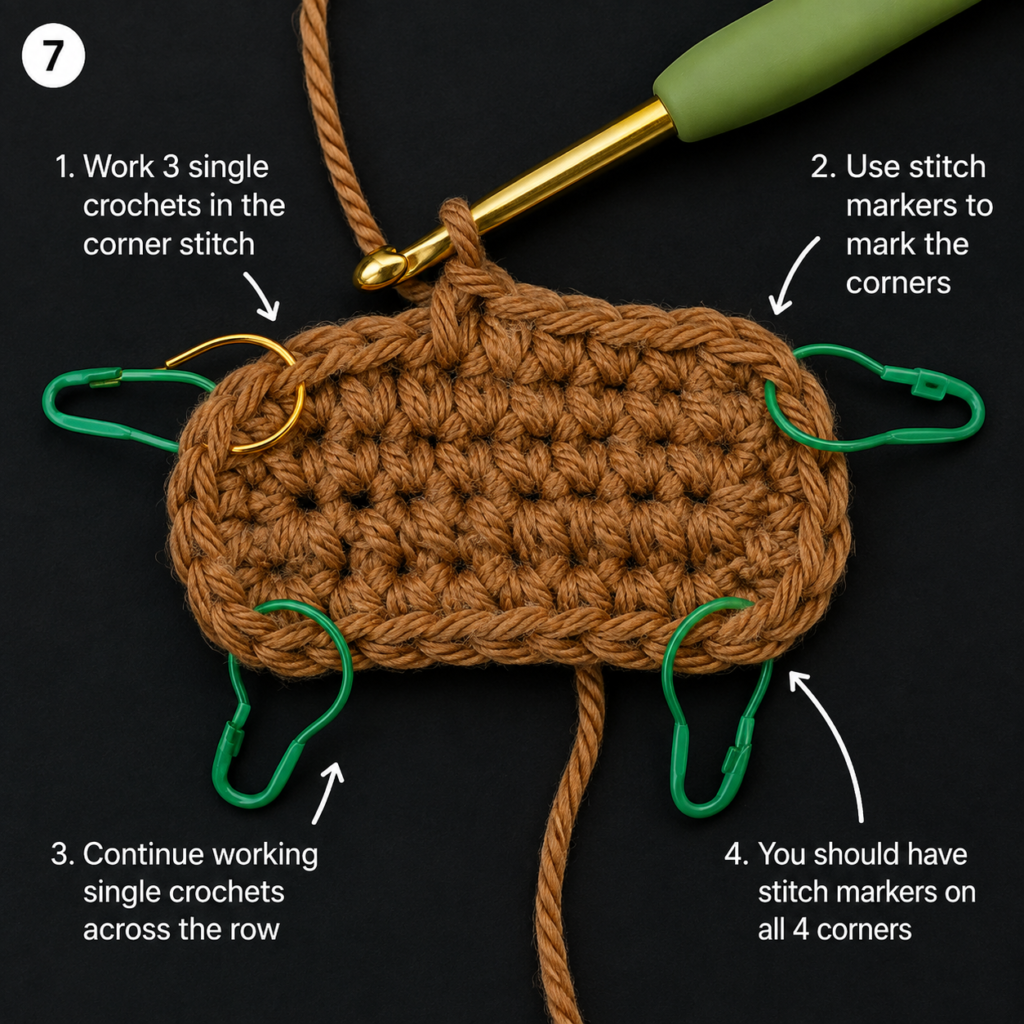
Step 6: Crochet the Wooden Frame
Change to camel or medium brown yarn.
Join the brown yarn near one corner.
Chain 1.
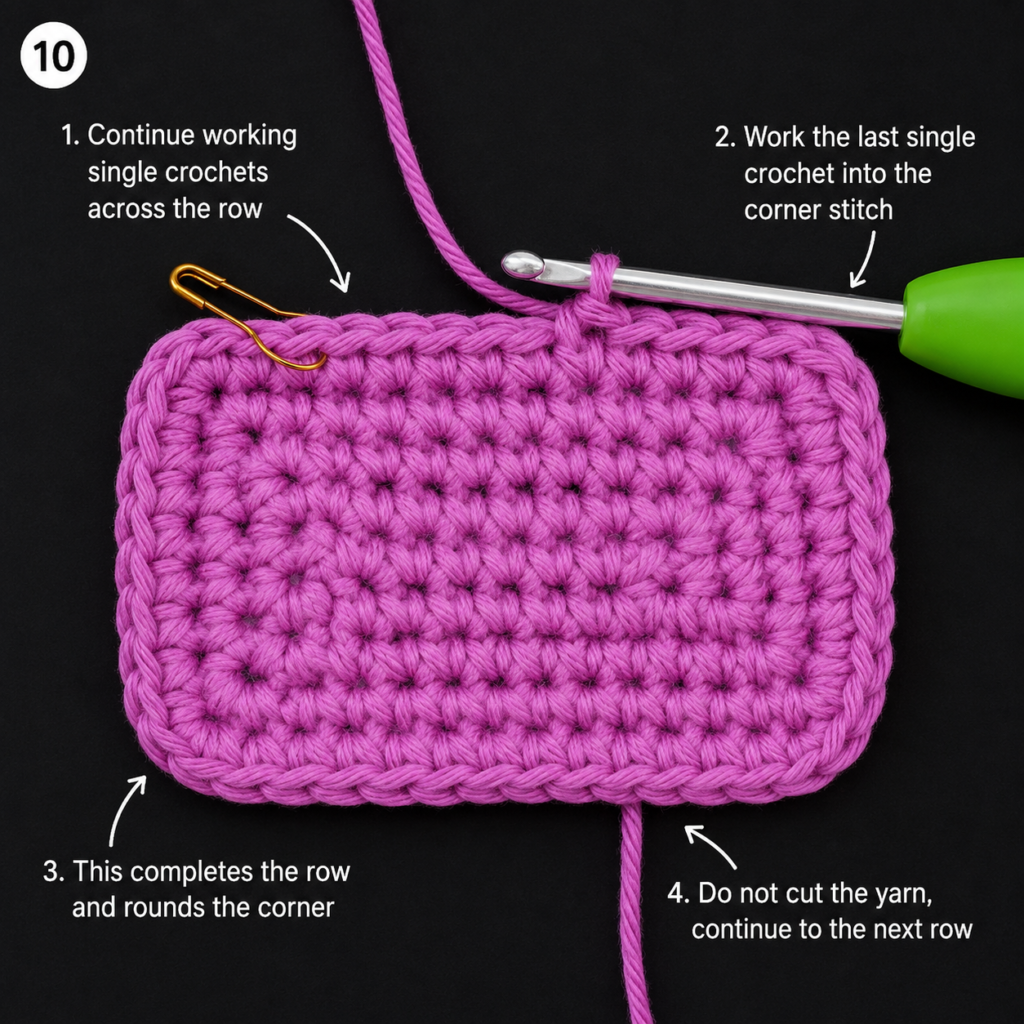
Begin working single crochet evenly around the entire outside edge.
Across the top and bottom, place stitches directly into the existing single crochet stitches.
Along the side edges, insert the hook into the ends of the rows and distribute the stitches evenly.
At each corner, work:
(sc, ch 1, sc)
into the corner area.
This gives the frame room to turn without pulling the board inward.
When you return to the beginning, join with a slip stitch.
Beginner tip: Do not obsess over forcing an exact number of stitches into the side edges. Even spacing and a flat result are more important for this appliqué.
Common mistake to avoid: Too many stitches along the sides cause the border to ripple. Too few make the rectangle cup.
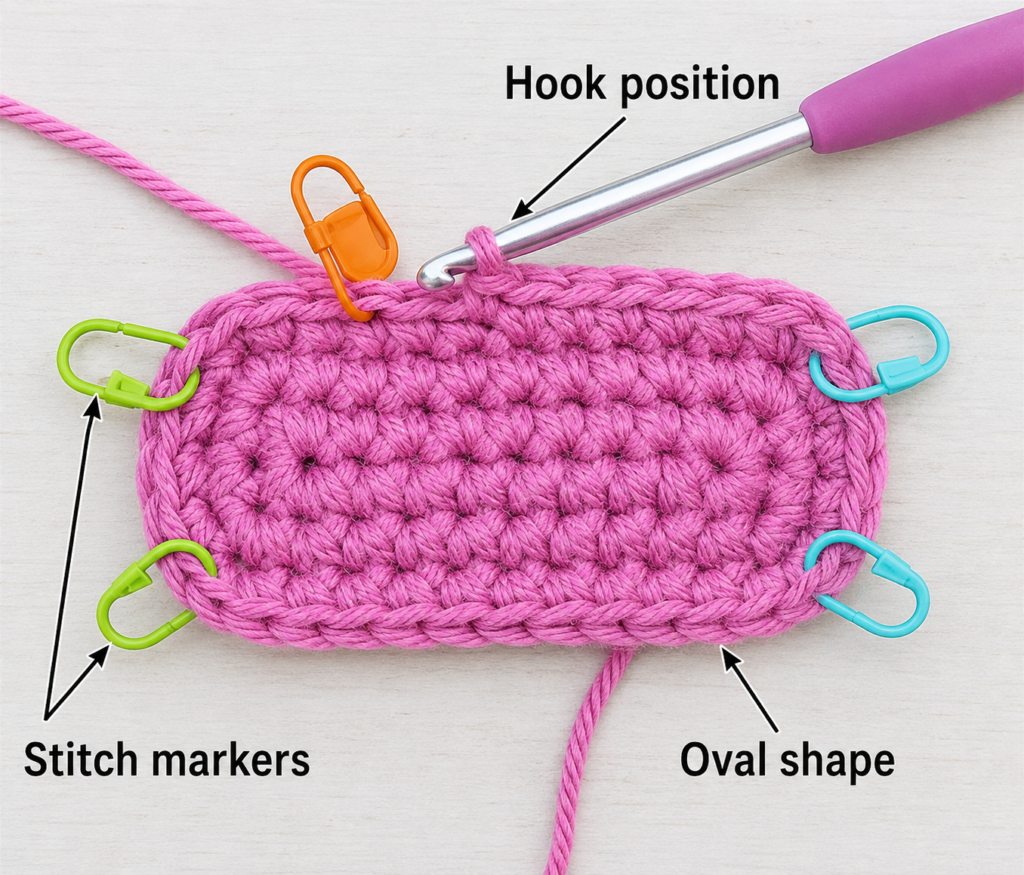
Step 7: Make the Frame More Defined
For a thicker classroom-style wooden frame, add one more round.
Chain 1.
Work:
1 sc in each border stitch.
When you reach each ch-1 corner space, work:
(sc, ch 1, sc)
in that space.
Continue around.
Join to the first stitch with a slip stitch.
Fasten off.
Your rectangle should lie almost completely flat.
If you prefer an extremely small applique for a badge, keychain or mini ornament, you can skip this second frame round.
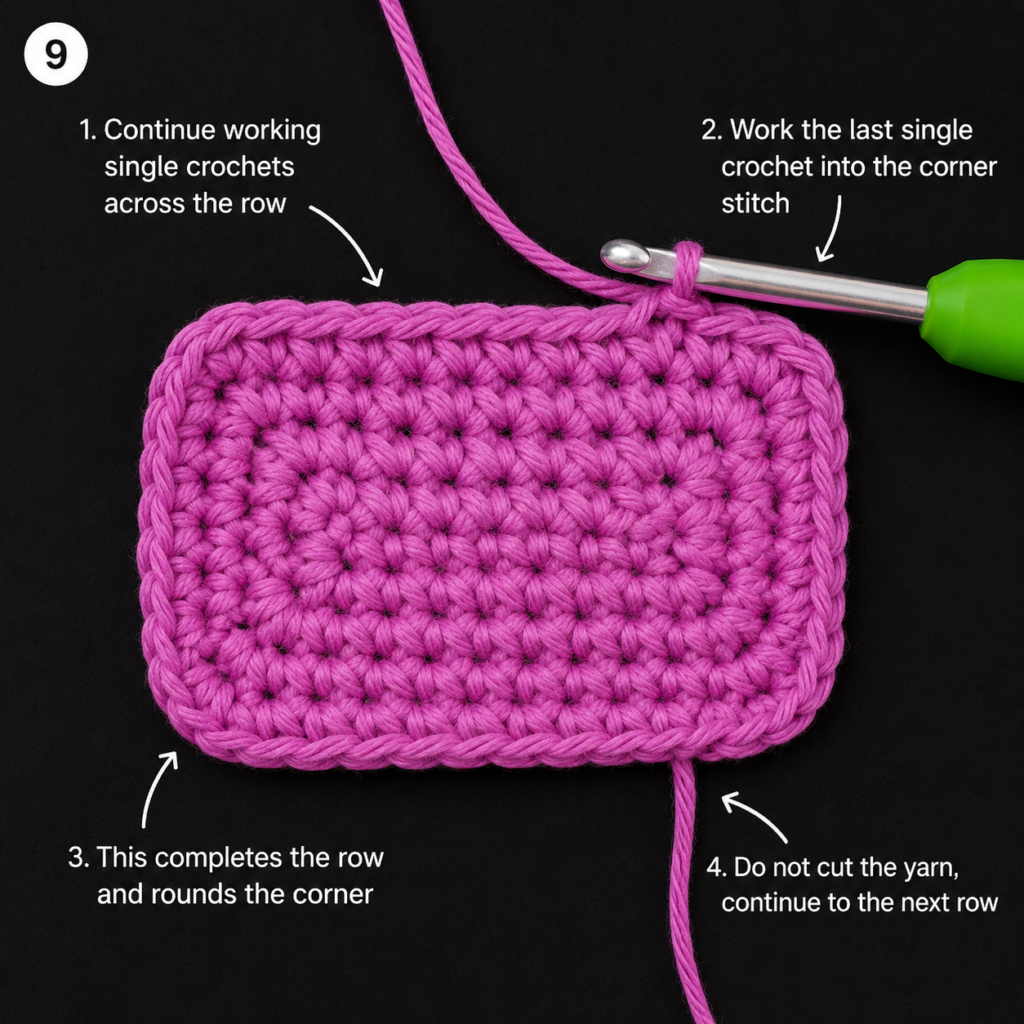
Step 8: Add the Chalk Writing
Thread your tapestry needle with ivory or white yarn.
Before stitching, place the chalkboard on the table and decide how simple you want the design.
For a beginner version, embroider:
A B C
Use short straight stitches rather than trying to make elaborate curves.
You could also stitch:
1 2 3A+- a heart
- one horizontal chalk line
- the recipient’s initial
Keep the yarn relaxed. Pulling the embroidery too tightly will gather the green panel.
For very small letters, separate a strand from a thinner cotton yarn rather than forcing thick DK yarn through the same area repeatedly.
Beginner tip: Sketch the lettering mentally across the stitch grid before inserting the needle.
Common mistake to avoid: Avoid bringing several stitches through exactly the same crochet hole because it can spread the underlying stitches apart.
Pattern Notes or Stitch Notes
Turning chain
The ch 1 at the end of each green row does not count as a stitch.
Always place your first single crochet into the first actual stitch.
Main panel stitch count
Keep:
17 sc per row
throughout the green panel.
Number of rows
The sample uses approximately:
13 rows
You can add or remove rows depending on how tall you want the chalkboard.
Border repeat
Work single crochet evenly around the four edges.
Use the corner space consistently to create clean turns.
Right side and wrong side
Single crochet produces slightly different appearances on alternate rows, but this project does not require a strict functional RS/WS.
Choose whichever surface looks cleaner as the right side before adding the white lettering.
Size adjustments
For a wider chalkboard, increase the foundation chain.
For a taller chalkboard, add rows.
The easiest approach is visual rather than mathematical: stop when the rectangle has proportions that resemble a small classroom board.
Common Beginner Mistakes
1. The rectangle becomes narrower
Cause: Missing the final single crochet.
Fix: Count 17 stitches before turning.
2. The rectangle becomes wider
Cause: Accidentally crocheting into the turning chain.
Fix: Remember that ch 1 does not count as a stitch in this tutorial.
3. The foundation edge curves
Cause: The starting chain was crocheted too tightly.
Fix: Make the chains more loosely or use a hook one size larger for the chain only.
4. The brown border ripples
Cause: Too many stitches were added along the row ends.
Fix: Remove a few stitches and space them more evenly.
5. The border pulls the green panel inward
Cause: Too few edge stitches or insufficient corner space.
Fix: Add another stitch along the tight area and make sure every corner has enough room to turn.
6. The white letters pucker
Cause: Embroidery yarn was pulled too firmly.
Fix: Allow each decorative stitch to rest on the surface instead of cinching the crochet fabric.
7. The lettering looks crowded
Cause: Trying to fit too much detail into a small applique.
Fix: Use only ABC, one initial, a heart or a short chalk line.
How to Customize This Crochet Project
Change the chalkboard color
Dark green gives the project a traditional classroom feel, but charcoal and black also work beautifully.
A navy center creates a more modern school-supply look.
Change the frame
Try:
- camel
- walnut brown
- honey gold
- beige
- terracotta
You can also work the second border round in a slightly darker brown for subtle depth.
Make it larger
Use a longer foundation chain and continue working additional rows.
A larger version can become a centerpiece for a classroom bunting or teacher wall hanging.
Make it smaller
Try fewer foundation chains and fewer rows.
Mini versions are useful for:
- teacher ornaments
- backpack decorations
- gift tags
- badge-reel decorations
- keychains
Add texture
Instead of plain single crochet, experienced beginners can experiment with working the green panel in BLO single crochet for subtle horizontal lines.
For the most recognizable chalkboard appearance, however, plain sc gives the white lettering the cleanest background.
Add school-themed companions
A chalkboard applique pairs naturally with:
- crochet pencil appliques
- crochet apple appliques
- crochet book motifs
- crochet ruler appliques
- crochet alphabet letters
- small crochet crayons
Together they can become a complete back-to-school garland or classroom blanket.
Finishing Instructions
Weave the green tail into green stitches only.
Weave the brown tail into the back of the frame.
Hide the ivory embroidery ends behind the dark green center so they do not appear against the brown edge.
Trim the yarn only after each end has traveled in at least two directions through the fabric.
If the piece curls slightly, lightly dampen it and pin it into a neat rectangle.
Allow it to dry completely.
Cotton responds particularly well to gentle wet blocking, but always follow the care directions printed on your specific yarn label.
If you are attaching the appliqué to another crochet object, pin it into position first.
Sew around the brown outer frame using matching brown yarn. Small, evenly spaced stitches will keep the green center free of visible attachment stitches.
Quick Printable-Style Summary
Skill level: Beginner / Easy
Finished size: Approximately 4–4½ inches wide, depending on yarn and tension
Yarn: DK/light worsted cotton
Hook: 3.5 mm
Main stitches: ch, sc, sl st
Starting method: Ch 18
Green panel: Work 17 sc across and maintain 17 sts for approximately 13 rows.
Frame: Join brown yarn and work evenly around all four sides, giving each corner additional space to turn. Add a second border round if desired.
Decoration: Embroider simple chalk-style letters using ivory yarn.
Finishing: Weave in ends, lightly block, and sew the brown frame to the intended project.
FAQ
Can a beginner make a crochet chalkboard applique?
Yes. The central panel uses only chains and single crochet. The only slightly new technique is crocheting around the outer edges to create the frame.
What yarn is best for a crochet chalkboard applique?
Smooth cotton or cotton-blend yarn works especially well because the stitches remain well defined and the finished applique holds a neat shape.
Can I use worsted-weight yarn?
Yes. A heavier yarn will simply create a larger and thicker chalkboard. Adjust the hook according to the yarn and your tension rather than assuming all yarns within a weight category behave identically. The Craft Yarn Council likewise recommends checking actual gauge when substituting yarn or hook sizes.
How can I make the chalkboard smaller?
Reduce the foundation chain and work fewer rows. Keep the same basic rectangle → frame → lettering sequence.
Should the letters be crocheted or embroidered?
For a very small beginner applique, embroidery is much easier to control. Surface crochet can also work if you already feel comfortable inserting the hook through an existing crochet fabric.
What can I put on the chalkboard instead of ABC?
Try 123, A+, a heart, a teacher’s initial or simple horizontal chalk marks.
How do I attach the applique?
Pin the finished piece to your project and sew through the brown outer-frame stitches using matching yarn and a tapestry needle. Keep the stitches small and evenly spaced.
Conclusion
A crochet chalkboard applique is a useful little project because it combines basic crochet practice with a very recognizable finished motif.
The simple rectangular center gives beginners time to practice consistent single crochet, while the contrasting frame introduces edge work without requiring complicated shaping. The final chalk-style lettering makes even a basic rectangle immediately look classroom-ready.
Once you are comfortable with this version, try making coordinating pencils, apples, books or alphabet letters and turn the motifs into a complete back-to-school crochet set.





