A plain plastic badge reel is useful, but it does not exactly have much personality. This little crochet apple changes that without turning the project into a complicated amigurumi marathon.
In this crochet teacher badge reel pattern, you will make a miniature stuffed apple with a tiny leaf and stem, then add a flat crochet mounting disc that lets the apple sit securely on the front of a retractable ID reel.
The apple theme works especially well for teachers, classroom assistants, school librarians, office staff, and anyone who wears identification throughout the day. Because the project uses only small amounts of yarn, it is also an excellent scrap-yarn project.
The selected visual reference is Elendipity’s miniature apple tutorial. Its photographed sequence demonstrates a teacher-gift-sized apple, separate stem and leaf, shaping, finishing, and an attachment option. The project below uses an independently written construction and adds a badge-reel mounting system that is not part of the reference tutorial.
What You’ll Learn
By the end of this tutorial, you will know how to:
- crochet a small apple in continuous rounds;
- increase and decrease without creating sharp corners;
- make a tiny crochet stem;
- crochet a miniature leaf around both sides of a chain;
- attach small details securely;
- stuff miniature crochet without overfilling it;
- shape an amigurumi apple with a finishing strand;
- crochet a flat mounting disc;
- attach the apple to a retractable badge reel;
- adjust the size for different reel hardware.
Materials You’ll Need
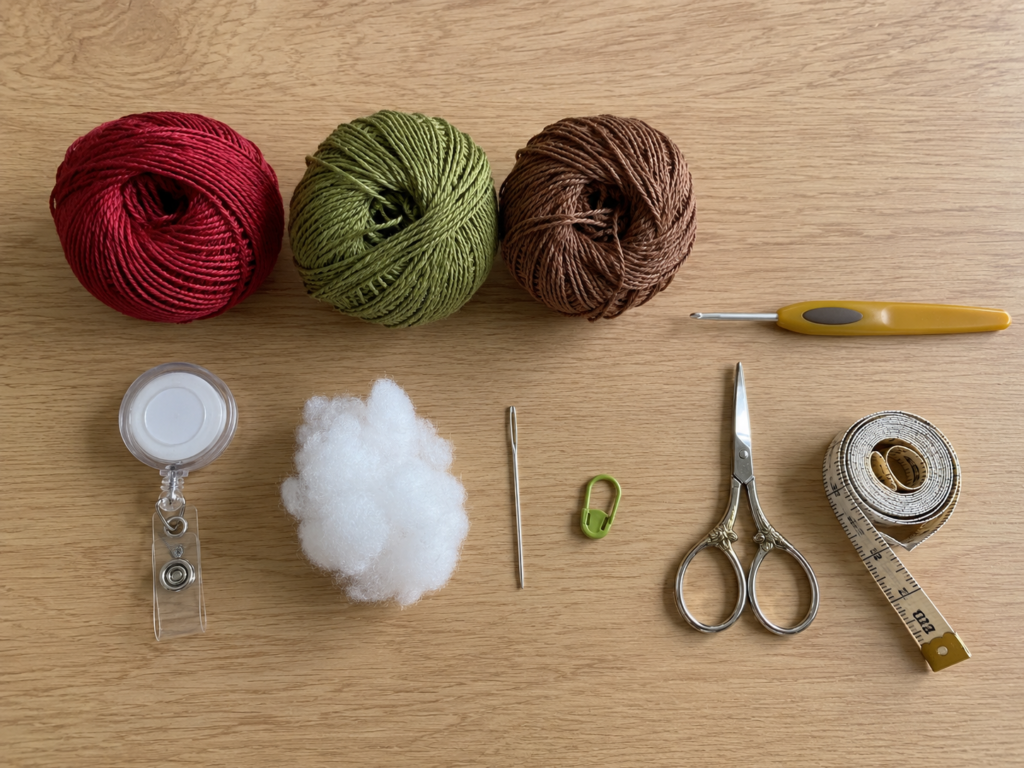
For one teacher badge reel:
- Small amount of DK or light worsted cotton yarn in deep red
- Scrap of olive or medium green cotton yarn
- Scrap of brown cotton yarn
- 3.25 mm crochet hook
- Polyester fiberfill
- Tapestry needle
- Scissors
- Stitch marker
- Measuring tape
- Plain retractable badge reel with a relatively flat front
- Flexible multi-surface craft adhesive suitable for the material of your badge reel, if needed
- Optional sewing thread for extra reinforcement
A smooth cotton yarn is particularly useful for tiny crochet accessories because individual stitches remain easy to see. The Craft Yarn Council classifies yarn by standardized weight categories and provides metric hook-size references; the exact hook should still be adjusted to achieve dense fabric with your chosen yarn.
Crochet Abbreviations Used
This tutorial uses US crochet terminology. These abbreviations align with standard crochet terminology published by the Craft Yarn Council.
- ch = chain
- sc = single crochet
- hdc = half double crochet
- dc = double crochet
- sl st = slip stitch
- st/sts = stitch/stitches
- inc = work 2 sc into the same stitch
- dec = single crochet decrease
- FLO = front loop only
US/UK terminology note
This article uses US terms. Remember that US single crochet is called double crochet in UK terminology, so check terminology before following instructions from different sources.
Before You Start
Gauge and tension
Exact gauge is not essential because this is not a fitted project. What matters is creating fabric dense enough to hide the stuffing.
Your stitches should be firm without becoming painfully difficult to insert your hook into.
If stuffing is visible between stitches:
- move down 0.25–0.5 mm in hook size;
- tighten your working tension slightly;
- or switch to a slightly fuller yarn.
Finished size
With DK cotton and a 3.25 mm hook, expect an apple roughly 2–2.5 inches wide, depending on tension.
Before mounting it, compare the apple to the badge reel. The apple can extend slightly beyond the reel body, but it should not block the retractable cord or rear clip.
Counting rounds
Place a stitch marker in the first stitch of every round.
This project is worked in a continuous spiral, so there is no joining slip stitch unless specifically mentioned.
Do not overstuff
A badge topper needs to remain lightweight. The goal is a gently rounded apple, not a hard ball.
Too much fiberfill makes the topper unnecessarily bulky and can distort your stitches.
Badge-reel safety
Keep all yarn, adhesive, and crochet fabric away from the reel’s cord opening, rotating clip, and retracting mechanism. Test the reel several times after assembly before wearing it.
Step-by-Step Crochet Tutorial
Step 1: Crochet the Brown Stem
Using brown yarn:
- Leave approximately a 6-inch sewing tail.
- Chain 6.
- Beginning in the second chain from your hook, slip stitch through each remaining chain.
- Fasten off, leaving another sewing tail.
The slip stitches turn the chain into a compact cord rather than leaving it floppy.
You do not need to make the stem perfectly straight. A slight natural curve looks good on the finished apple.
Beginner tip:
Insert your hook under both loops of each chain instead of crocheting into only one strand. This gives the stem slightly more body.
Common mistake to avoid:
Do not tighten the starting chain excessively. Tiny chains become surprisingly difficult to work back into.
Step 2: Crochet the Green Leaf
Using green yarn:
- Chain 6.
- Slip stitch in the second chain from the hook.
- Single crochet in the next chain.
- Half double crochet in the next chain.
- Double crochet in the next chain.
- Work 3 half double crochets into the final chain to curve around the tip.
- Continue along the unused side of the foundation chain.
- Work a double crochet, half double crochet, single crochet and slip stitch as you travel back toward the beginning.
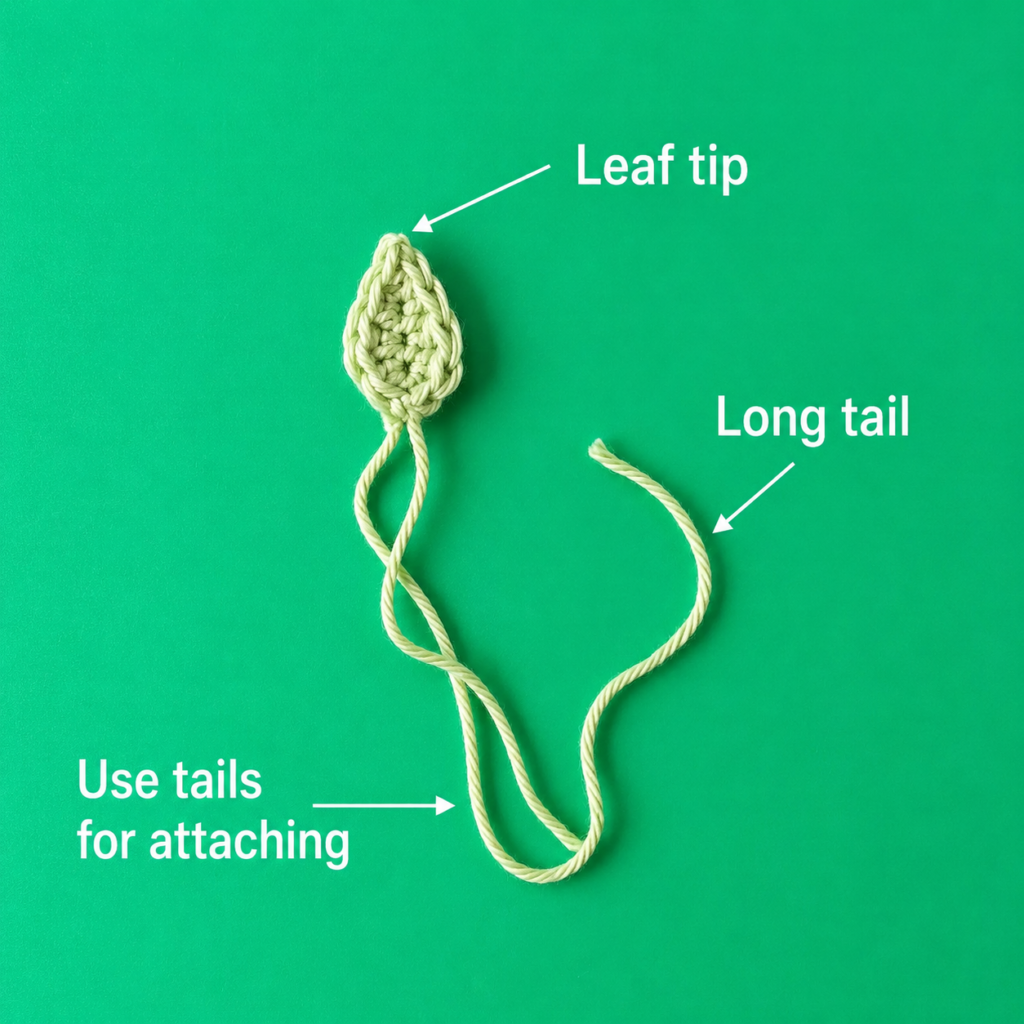
- Fasten off, leaving a long sewing tail.
You should now have a tiny pointed oval leaf.
Beginner tip:
When working along the second side of the foundation chain, rotate the leaf rather than twisting your wrist awkwardly.
Common mistake to avoid:
Do not accidentally work back into the stitches you just completed. The second half of the leaf goes into the remaining loops on the opposite side of the original chain.
Step 3: Start the Apple Body
Change to deep red.
Make a magic ring.
Round 1: Work 6 sc into the ring. — 6 sts
Round 2: Work 2 sc into every stitch. — 12 sts
Round 3: Repeat 1 sc, inc around. — 18 sts
Round 4: Repeat 2 sc, inc around. — 24 sts
Round 5: Repeat 3 sc, inc around. — 30 sts
Your work should resemble a shallow red bowl after a few additional stitches begin stacking upward.
Pull the magic ring closed firmly but do not cut the starting tail yet.
Beginner tip:
Count every round before moving on. With a project this small, one accidental increase can visibly change the shape.
Common mistake to avoid:
If your circle becomes dramatically wavy, you probably added an extra increase somewhere. If it forms a steep cup too early, an increase was probably missed.
Step 4: Attach the Stem and Leaf
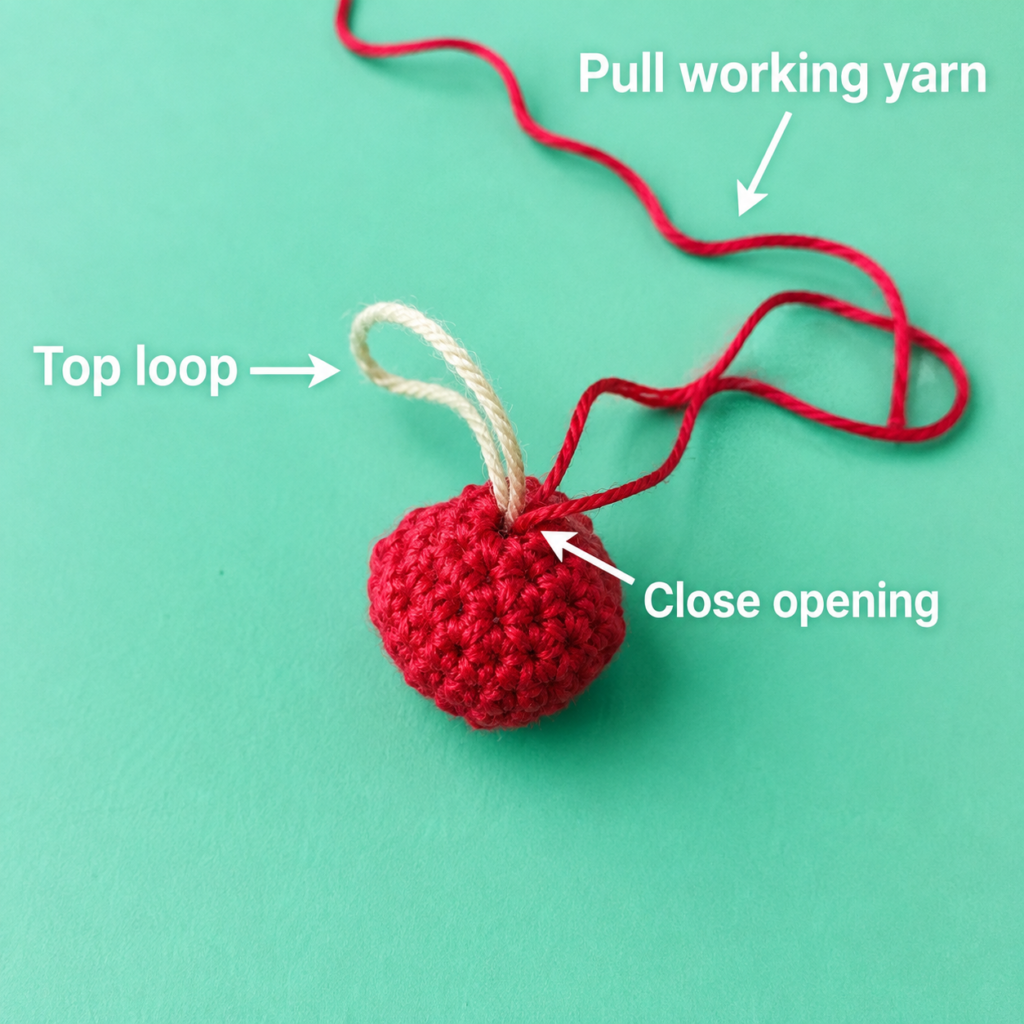
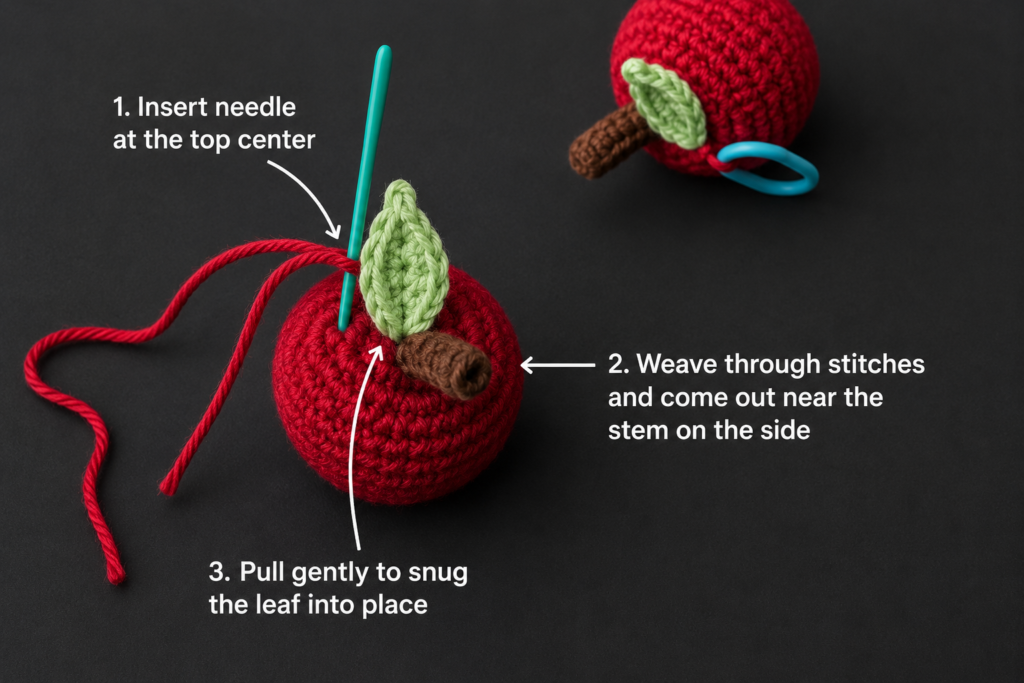
Before the apple becomes too deep to access comfortably, position the stem and leaf at the center top.
Use the long sewing tails to anchor each piece securely around the center of the starting round.
Keep the leaf slightly angled rather than placing it directly behind the stem. That lets both details remain visible when viewed from the front.
Tie or weave the ends securely on the inside of the apple.
Avoid leaving a bulky knot directly beneath the center because that can create an unwanted bump.
Beginner tip:
Hold the apple upright before tightening everything. Check how the leaf sits from the viewing angle that will face outward once the badge reel is worn.
Common mistake to avoid:
Do not leave the leaf attached by only one loose stitch. Badge reels are handled frequently and weak decorative pieces can loosen.
Step 5: Build and Shape the Apple
Continue in red.
Round 6: Sc in every stitch. — 30 sts
Round 7: Sc in every stitch. — 30 sts
Now begin decreasing.
Round 8: Repeat 3 sc, dec around. — 24 sts
Round 9: Repeat 2 sc, dec around. — 18 sts
Round 10: Repeat 1 sc, dec around. — 12 sts
Add fiberfill.
Use small wisps instead of pushing in one large lump. That produces a smoother apple.
Concentrate most of the filling around the center and sides. Keep the top slightly softer because we will pull the apple inward during shaping.
Beginner tip:
The stuffing should support the stitches, not stretch them.
Common mistake to avoid:
If white fiberfill becomes visible, remove some stuffing before closing.
Step 6: Close the Apple
Round 11: Decrease around. — 6 sts
Fasten off, leaving a tail at least 10 inches long.
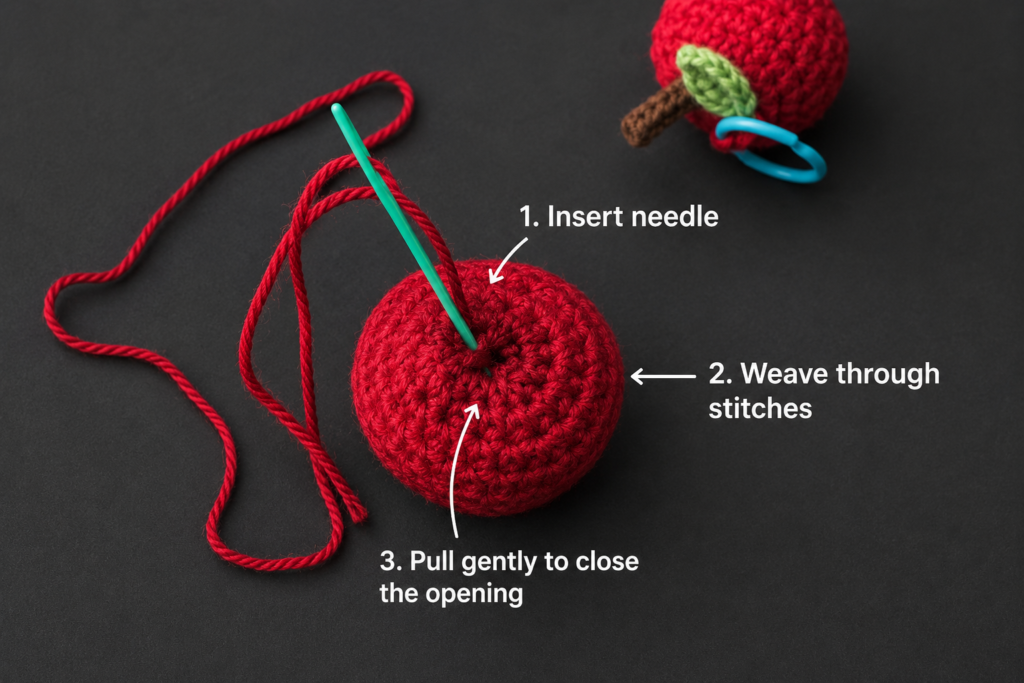
Thread the tail onto your tapestry needle.
Pass the needle through the front loops of the final six stitches.
Pull gradually.
The opening should close like a drawstring.
Pass through the center again to secure it.
Beginner tip:
Pull in two or three smaller stages instead of jerking the yarn hard at once. Cotton can snap if severely stressed.
Common mistake to avoid:
Do not cut the tail after closing. You still need it for shaping.
Step 7: Give the Apple Its Characteristic Shape
A small red sphere already looks cute, but one finishing move makes it read much more clearly as an apple.
With the long red tail still threaded:
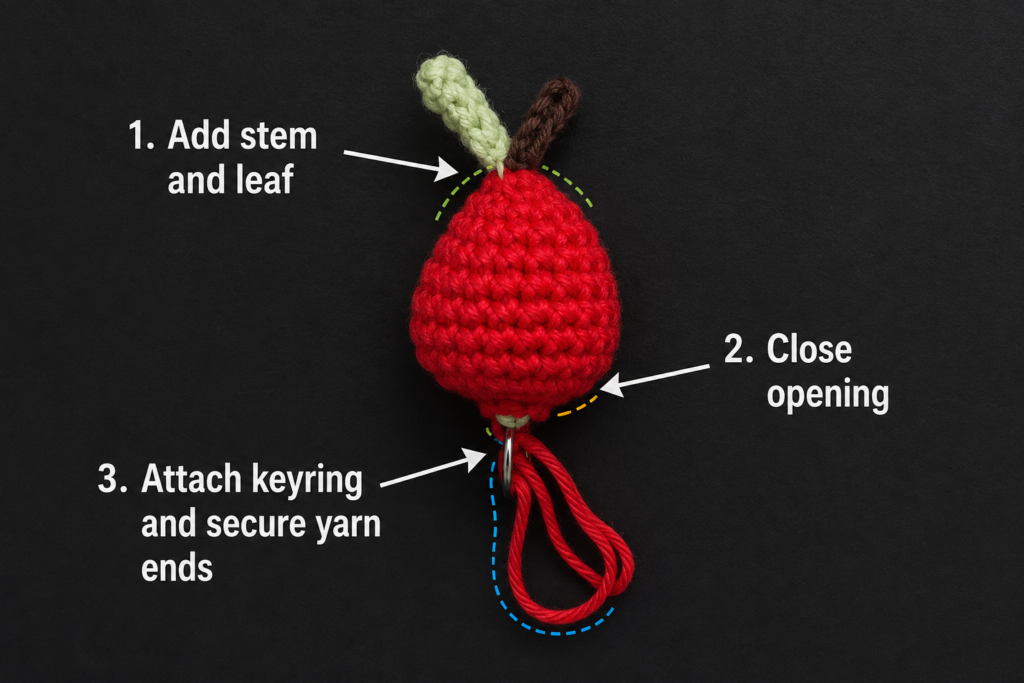
- Insert the needle through the bottom center.
- Bring it out close to the stem at the top.
- Insert it near the stem and travel back toward the bottom.
- Gently pull the thread until the top and bottom indent slightly.
- Repeat once if necessary.
- Secure and weave the remaining end into the apple.
Do not pull hard enough to collapse the fruit.
You are aiming for a shallow indentation at both ends.
Beginner tip:
Roll the finished apple gently between your palms after shaping. This redistributes the stuffing.
Common mistake to avoid:
A very tight shaping strand creates a pumpkin-like rib. Stop as soon as the apple gains a visible center dip.
Step 8: Crochet the Badge Reel Mounting Disc
Now create the part that turns the miniature apple into an actual badge reel topper.
Use red yarn.
Round 1: Make a magic ring and work 6 sc into it. — 6 sts
Round 2: Inc in every stitch. — 12 sts
Round 3: Repeat 1 sc, inc around. — 18 sts
Check the disc against your badge reel.
For many reels, three rounds will be enough.
If your reel has a larger face:
Optional Round 4: Repeat 2 sc, inc around. — 24 sts
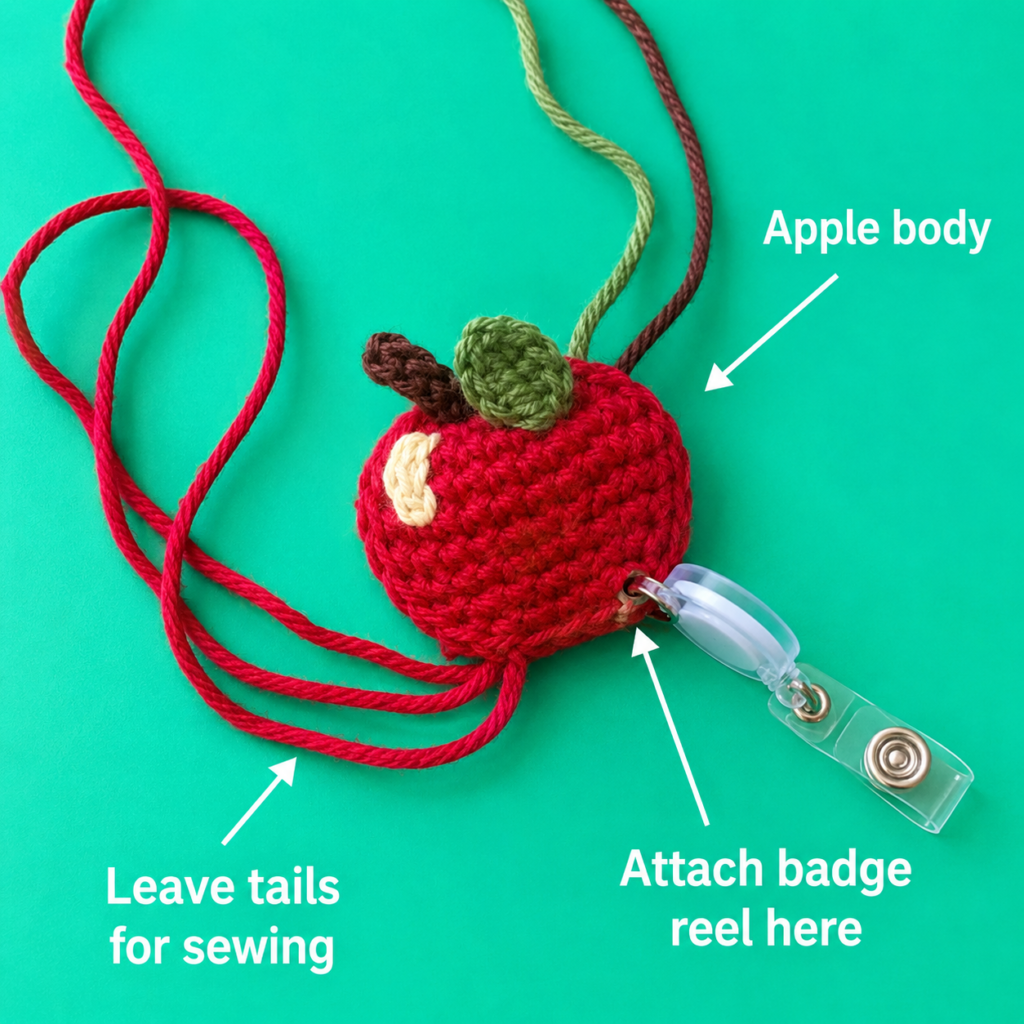
Fasten off with a long sewing tail.
The disc should remain flat.
It does not need to cover the entire reel perfectly. A disc slightly smaller than the hardware often works better because it leaves the moving edges clear.
Beginner tip:
Lay the disc directly on the badge reel before fastening off. It is much easier to add another round now than after assembly.
Common mistake to avoid:
Do not crochet a disc large enough to overlap the retractable cord opening.
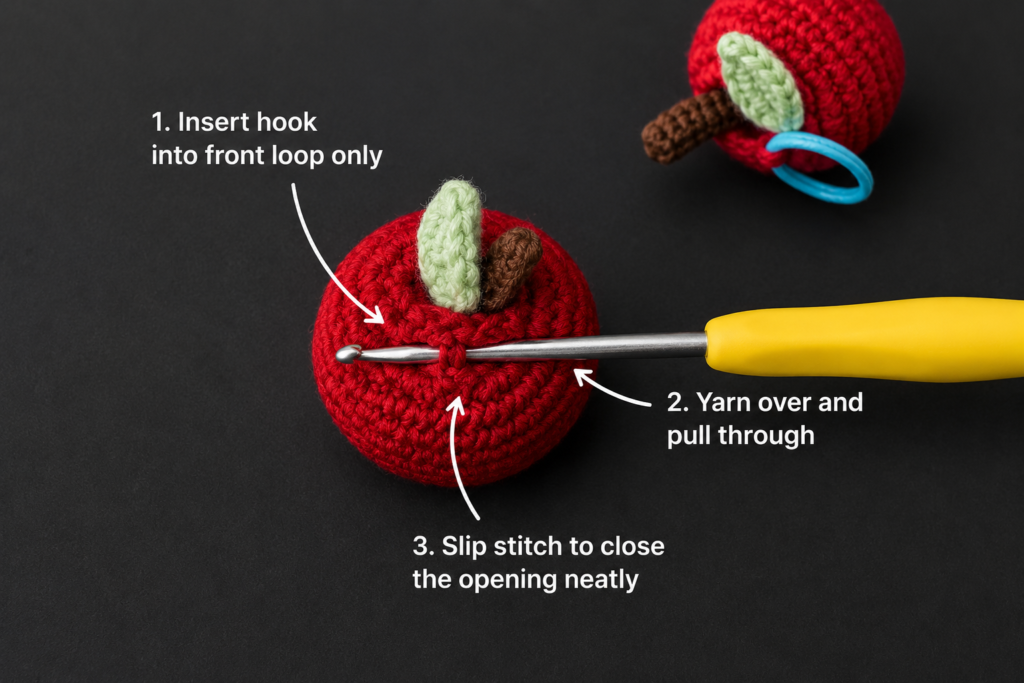
Step 9: Attach the Apple to the Mounting Disc
Place the apple on top of the crochet disc.
The bottom/back portion of the apple should touch the center of the disc.
Using the disc’s long red tail and a tapestry needle, take several small stitches between the disc and the lower stitches of the apple.
Work around approximately half to two-thirds of the apple’s lower circumference.
Check the front repeatedly.
You want the apple to sit upright rather than tilting sideways.
Pull gently on the apple when finished. It should feel secure.
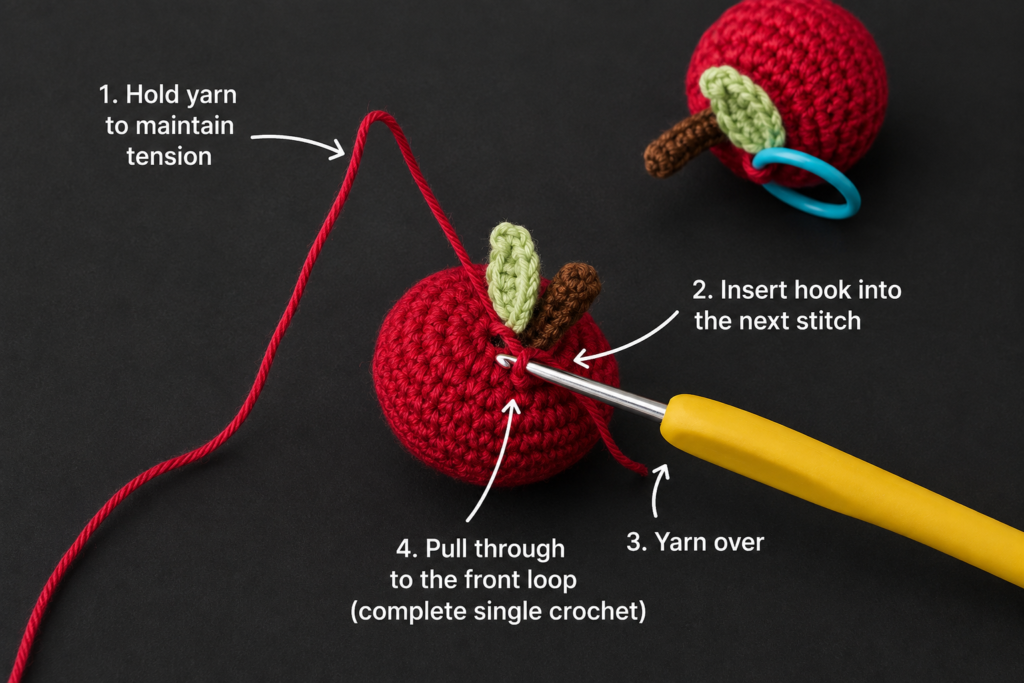
Step 10: Mount the Crochet Topper to the Badge Reel
Before attaching anything permanently, identify:
- the front face;
- the retracting cord opening;
- the rear clip or swivel;
- any rotating areas of the casing.
The crochet disc should touch only the fixed front face.
Depending on the reel construction, attach the crochet disc using an adhesive appropriate for that particular plastic or metal surface, following its manufacturer’s curing instructions.
Keep adhesive several millimeters away from seams and moving parts.
Press the crochet disc into position without compressing the apple itself.
Allow the adhesive to cure completely before testing the reel.
Then:
- Pull the badge cord to full normal working length.
- Allow it to retract slowly.
- Rotate or use the clip.
- Check that nothing catches on yarn.
- Pull lightly on the apple to confirm the topper remains secure.
If your particular badge reel has holes or a sewable face, mechanical stitching may be possible instead, but do not puncture or modify enclosed retractable hardware unless its construction is designed for that purpose.
Pattern Notes or Stitch Notes
Turning chain rules
There are no turning chains in the apple body. It is worked continuously in rounds.
Stitch counts
Count after every increase or decrease round:
- 6
- 12
- 18
- 24
- 30
- 30
- 30
- 24
- 18
- 12
- 6
The mounting disc uses:
- 6
- 12
- 18
- optional 24
Repeat pattern
Increases are distributed evenly around the apple to produce a smooth shape rather than obvious wedges.
Decreases reverse that shaping toward the bottom.
Right side/wrong side
The normal outward-facing surface of your single crochet fabric is the right side.
If your work begins turning itself inside out, gently push the fabric back so the right side remains outward before stuffing.
Size adjustment
For a smaller apple:
- use sport-weight cotton;
- use approximately a 2.5–2.75 mm hook;
- or stop increasing at 24 stitches.
For a larger apple:
- use worsted cotton;
- use a 3.5–4 mm hook;
- or add another evenly distributed increase round.
A badge topper should remain lightweight, so avoid enlarging it excessively.
Common Beginner Mistakes
1. Stuffing shows through the stitches
Cause: Hook too large, loose tension, or too much stuffing.
Fix: Remove some fiberfill first. If the gaps remain large, remake the apple with a slightly smaller hook.
2. The apple looks like a perfect ball
Cause: The finishing strand has not created enough indentation.
Fix: Run the long red strand from bottom to top one additional time and pull gently.
3. The apple looks squashed
Cause: The shaping strand was pulled too tightly.
Fix: Massage the filling outward. If necessary, carefully loosen the shaping strand.
4. The leaf disappears behind the stem
Cause: Both components were sewn in the same direction.
Fix: Before securing the tails, rotate the leaf about 30–45 degrees away from the stem.
5. The leaf curls dramatically
Cause: Foundation chain tension was too tight.
Fix: Remake the leaf with a looser starting chain.
6. The apple tilts after mounting
Cause: It was sewn to the mounting disc off-center.
Fix: Remove a few mounting stitches and reposition the apple while looking at it from the front.
7. The reel does not retract smoothly
Cause: Crochet fabric or adhesive is interfering with the cord outlet or casing.
Fix: Stop using the reel until the obstruction is removed. The retracting mechanism must remain completely clear.
How to Customize This Crochet Project
Change the apple color
A traditional bright red apple is instantly recognizable, but there are plenty of alternatives.
Try:
- golden yellow;
- Granny Smith green;
- burgundy;
- coral red;
- cream with a red blush.
For a coordinated teacher gift set, make several apples in different shades.
Add a tiny embroidered highlight
A short cream-colored embroidered stitch on one side can suggest a highlight without adding plastic parts.
Keep embellishment minimal because badge accessories experience more movement and friction than decorative amigurumi.
Make a flatter version
If you dislike bulky badge toppers, reduce the amount of filling dramatically.
The apple will become a soft padded motif rather than a round amigurumi.
Change the leaf
A darker forest-green leaf creates a classic fall look.
A bright spring green feels more playful for back-to-school season.
Add a second miniature leaf
Crochet another leaf using the same instructions and place one on each side of the stem.
Make sure the finished topper does not become too wide.
Turn it into a gift
A teacher badge reel can be paired with:
- a handmade pencil pouch;
- crochet bookmarks;
- a crochet lanyard;
- classroom-color accessories;
- a handmade gift card sleeve.
Convert the apple to another accessory
Before mounting it permanently, the miniature apple could instead become:
- a zipper pull;
- keychain;
- bag charm;
- backpack accessory;
- planner charm.
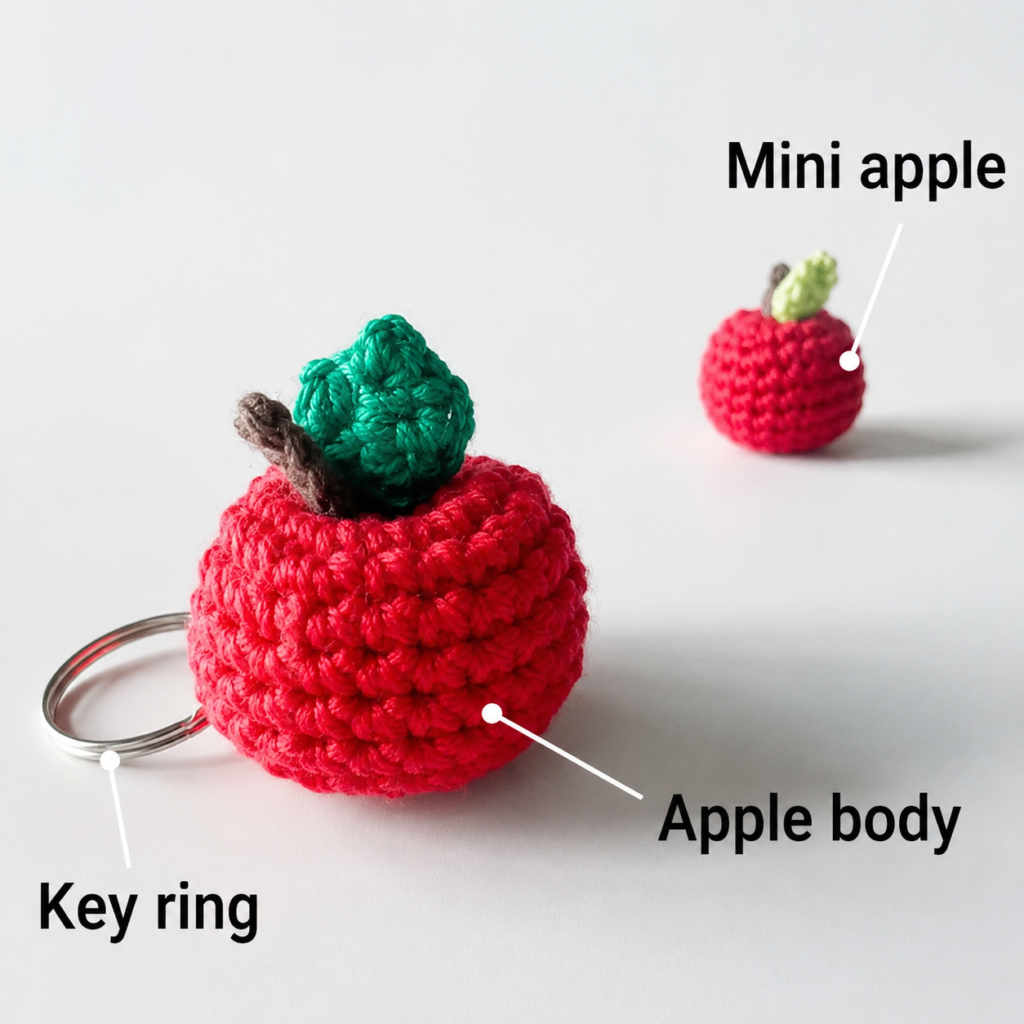
The selected source similarly demonstrates that the miniature apple concept can be used in both teacher-gift and keychain-style applications.
Finishing Instructions
Check every yarn tail.
Anything attached to a frequently used accessory should be secure enough that gentle pulling does not loosen it.
Fastening off
After your final stitch:
- Cut the yarn leaving an appropriate sewing tail.
- Pull the tail completely through the final loop.
- Thread it onto a tapestry needle.
- Weave through several stitches.
- Reverse direction once before trimming.
Weaving ends
Do not simply cut tails immediately beside a knot.
Small crochet projects receive concentrated wear because there is little fabric to distribute tension.
Blocking
Traditional wet blocking is usually unnecessary for the stuffed apple.
The leaf can be lightly dampened and finger-shaped if it curls excessively.
Allow it to dry completely before mounting.
Washing and care
Because a retractable badge reel contains mechanical components, do not immerse the completed accessory in water.
If the crochet becomes dusty, gently spot-clean only the yarn portion while protecting the reel mechanism from moisture.
Final check
Before wearing it:
- inspect the leaf;
- inspect the stem;
- inspect the apple-to-disc stitching;
- inspect the disc-to-reel connection;
- extend and retract the ID cord several times.
Quick Printable-Style Summary
Skill level: Beginner/Easy
Finished size: Approximately 2–2.5 inches across, depending on yarn and tension
Yarn: DK/light worsted cotton in red, green and brown
Hook: 3.25 mm
Other materials: Stuffing, tapestry needle, stitch marker, retractable badge reel, scissors
Stitches: ch, sl st, sc, hdc, dc, inc, dec
Starting method: Magic ring
Apple progression: Increase evenly to 30 stitches, work even rounds, decrease gradually, stuff lightly, close and shape.
Stem: Short slip-stitched chain
Leaf: Worked around both sides of a short foundation chain
Badge mounting: Crochet a small flat disc, sew the apple securely to the disc, then mount the disc to the fixed front face of compatible badge-reel hardware without obstructing moving parts.
Finishing: Weave ends securely, shape the apple, test the attachment, then check full reel extension and retraction.
FAQ
Is this crochet teacher badge reel pattern suitable for beginners?
Yes. The apple mostly uses single crochet, basic increases and basic decreases. The leaf introduces half double and double crochet but is small enough to remake quickly if necessary.
Being comfortable with a magic ring will help, but a chain-based adjustable starting loop can be substituted if needed.
What yarn is best for a crochet badge reel topper?
Smooth cotton works particularly well because it produces defined stitches and a relatively firm miniature fabric.
DK or light worsted yarn keeps the topper compact.
Avoid very fuzzy yarn if you are a beginner because it makes the tiny stitches and decrease points harder to identify.
How large should a crochet teacher badge reel topper be?
Around 2 inches is a practical target for many designs.
The exact ideal size depends on your particular badge reel.
Before permanently attaching anything, compare the crochet topper to the hardware and confirm that the cord outlet and clip remain clear.
Can I make the apple without stuffing?
Yes.
A very small amount of stuffing gives it a dimensional amigurumi look, but you can omit most or all fiberfill for a flatter topper.
A flatter apple may be preferable if you regularly wear the badge underneath a jacket or cardigan.
Can I glue the crochet directly onto the badge reel?
A mounting disc gives you more control because the apple can be sewn securely to crochet first.
If adhesive is required for the hardware, use one specifically compatible with your reel material and follow its manufacturer’s instructions.
Never allow glue to enter the reel seam, cord opening or retracting mechanism.
Can this apple be turned into a keychain instead?
Yes.
Instead of making the mounting disc, attach an appropriate loop or keychain fitting securely to the apple.
The selected visual source itself presents a miniature apple and a larger keychain variation, which is one reason it works well as the visual reference for this project.
Can I make these as teacher gifts?
Yes. The apple theme is especially appropriate for school-related handmade gifts, and the primary visual source itself originally discusses the project in a teacher-gift context.
For gifting, consider making the reel in the recipient’s school colors or packaging it on a simple cardstock holder.
Conclusion
This crochet teacher badge reel is small enough for an evening project but has enough detail to feel much more personal than ordinary badge hardware.
The most important parts are keeping the crochet dense, using only a small amount of stuffing, securing the stem and leaf carefully, and leaving the retracting mechanism completely unobstructed.
Once you are comfortable with the construction, the same idea can become a whole collection of classroom badge toppers—apples, pencils, flowers, stars or miniature books—all using the same basic mounting concept.





