Bathroom counters have an impressive ability to disappear underneath shampoo bottles, face wash, washcloths, hair products, and all the little things you actually use every day.
A handmade hanging organizer is an easy way to move some of that clutter upward instead of letting it spread across every available surface.
This crochet shower caddy pattern is designed for crocheters who already know how to chain and make a basic stitch but have never made a structured organizer before. You will crochet one long back panel, make two separate storage pockets, sew them into position, and finish the top with a sturdy crocheted hanging loop.
There is no complicated shaping and no difficult stitch pattern to memorize.
The small openwork row in each pocket is intentional: it gives moisture a path to escape instead of creating a completely solid pouch. The rest of the caddy uses dense half double crochet so the fabric remains supportive enough for lightweight bathroom essentials.
The project is also easy to modify. Make the pockets taller for shampoo bottles, divide them into narrow sections for brushes, shorten the panel for a small bathroom, or change the hanging loop to suit your shower hook.
What You’ll Learn
By the end of this tutorial, you will know how to:
- crochet a firm rectangular back panel;
- maintain straight crochet edges;
- create simple drainage openings with chain spaces;
- crochet matching storage pockets;
- attach a pocket evenly to a flat panel;
- divide one large pocket into smaller compartments;
- make a sturdy crochet hanging strap;
- reinforce high-stress areas;
- adjust the caddy for different toiletries;
- finish and care for a crochet organizer used in a humid bathroom.
Finished Size
With the yarn and gauge suggested here, the finished caddy measures approximately:
10 inches / 25.5 cm wide
20–21 inches / 51–53 cm long before the hanging loop
The hanging loop adds approximately another 5–7 inches, depending on how it hangs.
Exact measurements are not critical. A shower organizer is forgiving as long as your pockets fit the back panel.
Materials You’ll Need
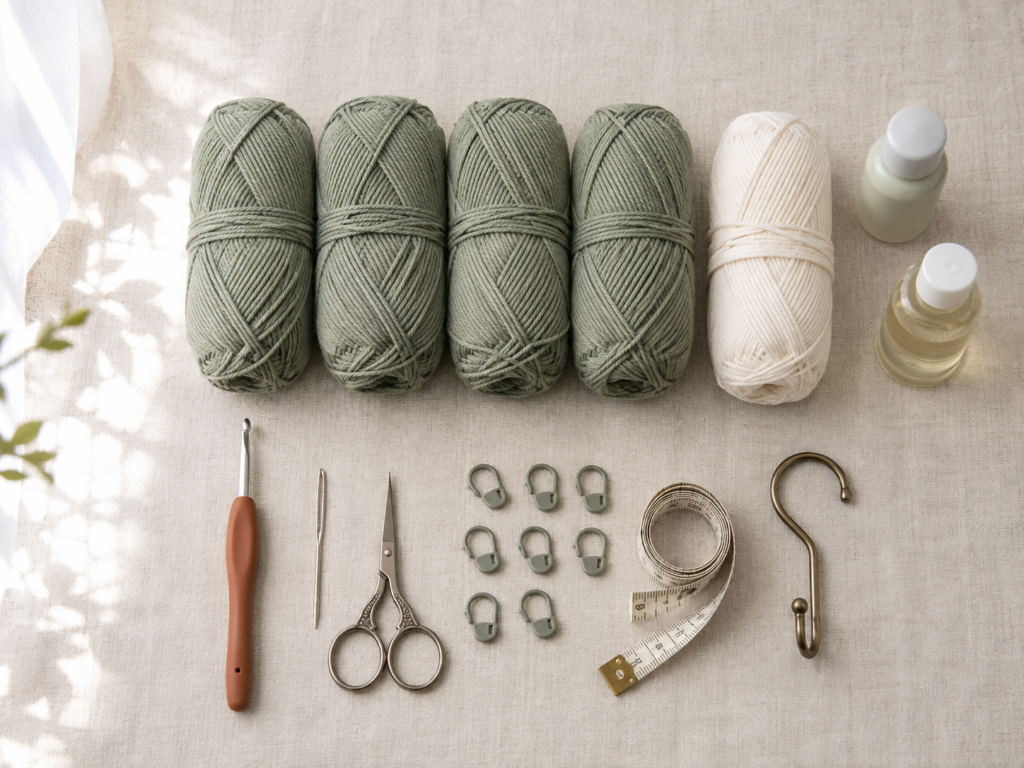
- Approximately 400–450 yards / 365–410 m medium #4 cotton yarn
- Optional small amount of contrasting cotton yarn for edging
- 4.5 mm crochet hook
- Tapestry needle
- Scissors
- 6–8 locking stitch markers
- Measuring tape
- Rust-resistant shower hook if needed for your installation
- Optional washable fabric or plastic mesh insert for extra pocket support
A washable cotton yarn is convenient for a bathroom organizer because it produces clear stitches and relatively firm crochet fabric. If your finished caddy will remain directly under constant shower spray, consider testing a quick-drying synthetic cord instead.
The Craft Yarn Council classifies yarn by weight and notes that recommended hook ranges are guidelines rather than guarantees of interchangeability; matching the gauge and behavior required for the project matters more than relying on the yarn number alone.
Crochet Abbreviations Used
This tutorial uses US crochet terminology.
- ch = chain
- sc = single crochet
- hdc = half double crochet
- sl st = slip stitch
- st/sts = stitch/stitches
- ch-1 sp = chain-one space
- rep = repeat
- RS = right side
- WS = wrong side
These abbreviations follow commonly standardized US crochet terminology.
UK terminology note: US single crochet corresponds to UK double crochet, while US half double crochet corresponds to UK half treble crochet.
Gauge
Aim for approximately:
16 hdc × 12 rows = 4 inches / 10 cm
Gauge is not as critical as it would be for a sweater, but it does affect both the size and strength of the caddy.
More important than matching the gauge perfectly is producing fabric that feels firm rather than floppy.
If your stitches are very loose, switch to a smaller hook.
If the fabric is so stiff that inserting the hook becomes uncomfortable, move up 0.5 mm.
Before You Start
Keep your tension firm
Bathroom bottles create downward pressure on crochet fabric. Loose stitches can stretch substantially once the pockets are loaded.
You do not need painfully tight tension, but the finished fabric should not resemble a soft scarf.
Count every row
Each main piece contains 40 stitches.
Place a stitch marker in the first and last stitch while you become comfortable identifying the edges.
Keep the turning chain consistent
For this pattern, ch 1 at the beginning of a row does not count as a stitch.
Always place your first hdc directly into the first stitch.
Check the width before crocheting the whole panel
After three or four rows, lay the piece flat and measure it.
You want approximately 10 inches.
If yours is considerably wider or narrower, change hook size now rather than discovering the problem after 60 rows.
Think about where the caddy will hang
Crochet fibers can retain moisture. A caddy positioned outside the direct water stream will dry more efficiently than one continuously soaked under the showerhead.
Do not use this project to suspend heavy glass bottles.
Lightweight plastic toiletries, washcloths, combs, soap cases, and similar bathroom items are more appropriate.
Step-by-Step Crochet Tutorial
Step 1: Crochet the Foundation Chain
With your main dusty sage yarn, make a slip knot.
Ch 41.
Working into the second chain from the hook:
Row 1: Hdc in each chain across.
40 hdc.
Take a moment to count before moving on.
The loop sitting on your hook is never counted as one of the 40 stitches. When counting the foundation row, identify the small V-shaped tops along the row.
Beginner tip:
Make the original chain slightly looser than your normal crochet tension. A foundation chain that is considerably tighter than the first row can pull the bottom of the panel inward.
Common mistake to avoid:
Do not accidentally work into the first chain directly beside the hook. That chain needs to provide enough height for the first row.
Step 2: Build the Long Back Panel
The back panel supports everything else, so take your time here.
Rows 2–60:
Ch 1, turn. Hdc in the first st and in every st across.
40 hdc.
Continue until the panel measures approximately 20 inches long.
Your personal row gauge may be different, so measurement is more important than reaching exactly Row 60.
Lay the panel flat every 10 rows or so.
Both edges should form straight vertical lines.
Beginner tip:
Move one stitch marker up the edge every time you begin a new row. It gives you an immediate visual target for the last stitch when you return across the row.
Common mistake to avoid:
The most common reason a crochet rectangle gradually becomes narrower is skipping the final stitch.
The last stitch can lean sideways and hide beneath the turning chain. Spread the fabric with your fingers and locate the complete V before finishing each row.
Step 3: Add a Firm Border Around the Backing
When the panel reaches the correct length, do not fasten off yet.
Ch 1.
Work sc evenly around all four sides of the rectangle.
At each corner, work 3 sc into the corner space so the edging can turn without pulling.
Along the long sides, avoid stuffing too many stitches into the row ends. The border should lie flat without ruffling.
Join with a sl st when you return to the beginning.
Fasten off.
Beginner tip:
If the long edge begins waving, you probably have too many sc stitches.
If it pulls into a crescent shape, you probably need a few more.
There is no universal stitch count for this edge because individual row height varies.
Step 4: Crochet the Lower Storage Pocket
Now make the first pocket.
Ch 41.
Row 1: Hdc in second ch from hook and across.
40 hdc.
Rows 2–4:
Ch 1, turn. Hdc across.
40 hdc.
Create the drainage row
Row 5:
Ch 1, turn. Sc in first st.
Then work:
*ch 1, skip next st, sc in next st*
Repeat that sequence across until one stitch remains.
Sc in the final stitch.
You should now see a line of small openings running horizontally across the pocket.
Return to solid crochet
Row 6:
Ch 1, turn.
Hdc into each sc and each ch-1 space across, returning to 40 working positions.
Rows 7–15:
Ch 1, turn. Hdc across.
40 hdc.
Fasten off, leaving a yarn tail long enough for sewing.
The pocket should measure approximately 5–5.5 inches tall.
Beginner tip:
When working into the chain spaces on Row 6, insert your hook under the entire chain rather than trying to find individual loops.
Common mistake to avoid:
Do not add an extra hdc beside a chain space. Treat every sc and every chain space as one working position.
Step 5: Crochet a Second Matching Pocket
Make a second pocket using the same instructions:
- Ch 41
- 40 hdc across
- four solid rows
- one drainage row
- return to solid hdc
- continue until the pocket reaches approximately 5–5.5 inches tall
Before fastening off, place the two pockets on top of each other.
The widths should be almost identical.
Minor differences are easy to hide during sewing. Large differences usually indicate that a stitch was added or dropped.
Optional contrast edge
For a little more definition, join warm ivory yarn at one upper corner and sc once across the pocket opening.
Do this on both pockets so they match.
Step 6: Position and Sew the Lower Pocket
Lay the long back panel flat with the side you want to display facing upward.
Place the lower pocket approximately 1 inch above the bottom edge.
Match the pocket’s lower edge with the back panel and place locking stitch markers at:
- bottom left;
- bottom center;
- bottom right;
- upper left;
- upper right.
Make sure the pocket is straight.
Thread the long yarn tail onto your tapestry needle.
Beginning at one upper corner, sew:
- down the first side;
- across the entire bottom;
- up the opposite side.
Do not sew across the top.
Whip stitch works well here, although a neat running stitch or mattress-style seam can also be used.
Every few inches, stop and check the back of the organizer to make sure the seam is not bunching.
Beginner tip:
Do not pull the sewing yarn as tightly as possible.
Pull only until the pocket sits firmly against the backing. Excessively tight sewing can make the panel curl.
Optional pocket depth
For slightly more room, pinch approximately 1/2 inch of fabric at each lower pocket corner before sewing it in place.
The tiny fold creates a shallow gusset.
Step 7: Attach and Divide the Upper Pocket
Position the second pocket approximately 2–2.5 inches above the first pocket.
The gap gives taller bottles enough room to rise above the lower pocket without colliding with the next section.
Secure it with stitch markers.
Sew the sides and bottom exactly as you did for the first pocket.
Now decide whether you want one wide upper pocket or two smaller compartments.
For two compartments:
- measure the pocket width;
- mark its exact center;
- thread a tapestry needle with matching yarn;
- stitch vertically from the lower seam to the upper opening;
- pass through both the pocket and back panel with each stitch.
Keep the line straight but do not pull hard enough to pucker the fabric.
This divider is useful for items such as razors, combs, facial cleanser, small bottles, or rolled washcloths.
The selected reference source also demonstrates dividing an organizer pocket with running stitch, making this stage especially useful as a visual teaching reference while the new pocket construction remains different.
Step 8: Crochet the Hanging Strap
The hanging strap needs to be much firmer than a simple chain.
Ch 7.
Row 1: Sc in second ch from hook and across.
6 sc.
Rows 2–46:
Ch 1, turn. Sc across.
6 sc.
The finished strap should measure roughly 9–10 inches long.
If you need a larger hanging loop, simply continue adding rows.
Fasten off, leaving a long tail.
Reinforce the strap
Place both strap ends against the back of the upper panel.
Position them roughly 1.5–2 inches apart around the center point.
Pin with stitch markers.
Using your tapestry needle, sew around all four sides of each strap end.
Then sew one diagonal line through the attachment area.
This creates far more support than simply stitching once across the end.
Beginner tip:
Before completing the second strap attachment, hang the unfinished caddy over your intended hook and confirm the loop is long enough.
Common mistake to avoid:
Do not attach a narrow strap with only two or three loose stitches. The entire filled organizer pulls against this area.
Pattern Notes or Stitch Notes
Turning chain
The beginning ch 1 never counts as a stitch in this pattern.
Always work the first hdc or sc into the first actual stitch.
Stitch count
The back panel and both pockets use 40 working stitches across their solid rows.
Check this count regularly.
Drainage repeat
The drainage row alternates:
ch 1, skip 1, sc in next stitch
Small openings are preferable to very large mesh because bottles and narrow objects are less likely to push through the fabric.
Right side and wrong side
Half double crochet looks similar on both sides.
Choose whichever side looks neater to you as the RS of your backing and make sure both pockets face the same direction.
Size adjustments
To make the caddy wider, add foundation chains.
To make the caddy narrower, remove foundation chains.
No special stitch multiple is required for the solid half double crochet sections.
If you want to retain the exact alternating drainage row, an even working stitch count is easiest.
To lengthen the organizer, add more rows to the back panel.
To increase pocket capacity, add rows to the pockets or use the shallow-gusset option during sewing.
Common Beginner Mistakes
1. The panel gets narrower
Cause: The last stitch of one or more rows was skipped.
Fix: Count 40 stitches before turning and mark the first and last stitch.
2. The panel gradually becomes wider
Cause: You may be crocheting into the turning chain as if it were another stitch.
Fix: Remember that the ch 1 does not count.
3. The drainage holes do not line up
Cause: An extra sc was added or a skipped stitch was missed.
Fix: Work slowly across the drainage row and check each sequence: sc, chain, skip, sc.
The exact visual alignment is less important than maintaining the total width.
4. The pocket puckers after sewing
Cause: The sewing yarn was pulled too tightly.
Fix: Remove the tight section and resew with enough tension to hold the layers together without compressing the crochet.
5. The pocket opening stretches
Cause: Heavy bottles are pulling on the upper edge.
Fix: Add a row of tighter sc across the opening or sew a narrow fabric reinforcement strip to the inside.
6. The whole organizer stretches after filling
Cause: Crochet fabric naturally has some give, especially with loose tension.
Fix: Use a smaller hook, firmer yarn, lighter contents, or add a washable reinforcement layer behind the panel.
7. The caddy stays wet
Cause: The material or location is not drying efficiently.
Fix: Move it out of the direct water stream between showers, choose a quicker-drying fiber for the next version, and wash/dry according to the yarn manufacturer’s care instructions.
How to Customize This Crochet Project
Change the yarn
A firmly spun cotton creates a natural spa-style look and is easy to wash.
Polyester cord creates a more structured, quicker-drying organizer.
Avoid extremely stretchy yarn.
Use two colors
Try combinations such as:
- sage + ivory;
- charcoal + white;
- terracotta + cream;
- dusty blue + sand;
- blush + warm gray.
Use the contrast color for the upper pocket edges and hanging strap.
Make three pockets
Extend the back panel by approximately 6–7 inches and crochet a third pocket.
Leave enough vertical spacing that bottles can be inserted easily.
Create narrow bottle compartments
Instead of dividing the upper pocket in half, sew two vertical seams to create three narrow compartments.
Measure the bottles you actually use before choosing the divider positions.
Add more drainage
Repeat the chain-space row twice, separated by one solid row.
Avoid turning the entire pocket into loose mesh unless your yarn is extremely firm.
Add a decorative border
Simple options include:
- reverse single crochet;
- small picot edging;
- contrasting single crochet;
- surface slip stitch.
Keep embellishment away from the lower pocket edges where water needs to escape.
Gift ideas
A crochet bathroom organizer can be paired with:
- handmade washcloths;
- wrapped soap;
- reusable facial rounds;
- small bath products;
- a matching soap saver.
It makes a useful housewarming, dorm-room, camper, or small-apartment project.
Finishing Instructions
Once all pieces are attached, inspect every seam before weaving in the tails.
Pay special attention to:
- the two strap attachments;
- bottom pocket corners;
- vertical divider seams;
- the beginning and end of the drainage rows.
Thread each yarn tail through a tapestry needle.
Weave it through the backs of several stitches in one direction.
Change direction and weave through several more stitches.
Trim only after the tail feels secure.
Blocking
A heavy wet block is usually unnecessary.
If the caddy twists slightly, dampen it lightly, arrange it flat into a straight rectangle, and allow it to dry completely.
Do not stretch the pockets wider than their natural shape.
Washing and Care
Always follow the care information provided on the actual yarn label.
The Craft Yarn Council recommends keeping yarn-label care information available for handmade projects because fiber-specific care requirements can differ.
For a bathroom caddy, allowing it to dry thoroughly is particularly important.
Remove bottles before washing.
Reshape while damp if necessary.
Final Result
Your completed shower caddy should hang straight with:
- a firm rectangular backing;
- two front pockets;
- small drainage openings;
- a divided upper storage area if desired;
- one reinforced crochet hanging loop.
Load it gradually the first time.
Start with a washcloth and one lightweight bottle. Observe how the fabric behaves before filling every compartment.
Quick Printable-Style Summary
Skill level: Easy / Advanced Beginner
Finished size: Approximately 10 inches wide × 20–21 inches long plus hanging loop
Yarn: Medium #4 firm washable cotton, approximately 400–450 yards
Hook: 4.5 mm
Main stitches: ch, sc, hdc, sl st
Back panel starting chain: Ch 41
Back panel: 40 hdc across; continue to approximately 20 inches long
Pocket starting chain: Ch 41
Pockets: 40 stitches wide with one chain-space drainage row; approximately 5–5.5 inches tall
Number of pockets: 2
Pocket attachment: Sew sides and bottom only
Optional divider: Vertical running stitch through pocket and backing
Hanging strap: Ch 7, 6 sc wide, approximately 9–10 inches long
Finishing: Reinforce hanging strap, weave in all ends, lightly shape if required
FAQ
What yarn is best for a crochet shower caddy?
A firm, washable cotton yarn works well for a bathroom organizer that hangs outside the strongest water stream.
If the organizer will repeatedly become saturated, a quick-drying synthetic or polyester-based cord may be more practical.
Whatever fiber you choose, make a small swatch and wet it before committing to the entire project.
Can I hang a crochet caddy directly from the showerhead?
It depends on your shower hardware and the weight of the contents.
The crochet loop can be placed over a suitable rust-resistant hook or stable fixture, but avoid placing unnecessary weight on plumbing components.
A separate approved shower hook is usually easier to position.
Will cotton yarn stretch when it gets wet?
Crochet fabric can change shape under moisture and weight, so the caddy should not be overloaded.
Firm tension, dense stitches, reinforcement, and lightweight contents help reduce distortion.
How can I make the shower caddy dry faster?
Use the drainage row, avoid excessively thick or fuzzy yarn, remove pooled water from containers before storing them, and allow the organizer to hang where air can circulate.
You can also add another drainage row to each pocket.
Can beginners make this crochet shower caddy?
Yes.
The main construction uses chains, half double crochet, single crochet, and basic hand sewing.
The trickiest part for a newer crocheter is maintaining 40 stitches across every row.
Using stitch markers solves most edge-counting problems.
How do I make the pockets deeper?
You have two options.
Crochet additional rows to make them taller, or add a shallow gusset when sewing the lower corners.
For wide shampoo bottles, the gusset method gives better depth without making the front excessively tall.
Can I make this into a bathroom wall organizer instead?
Absolutely.
Replace the shower-hanging loop with:
- two small hanging loops;
- a wooden dowel for dry-wall use;
- rust-resistant rings;
- hooks mounted to a bathroom door.
For continuously damp environments, avoid hardware that may rust or deteriorate when exposed to moisture.
Conclusion
A useful crochet project does not need complicated shaping to be satisfying.
This shower caddy is essentially a collection of beginner skills—crocheting rectangles, counting stitches, making simple chain spaces, sewing straight seams, and reinforcing a strap—combined into something practical enough to use every day.
Once you have made the basic version, customize the next one around your own bathroom instead of following fixed pocket dimensions. Measure the shampoo bottles, washcloths, combs, or skincare products you actually want to store, then adjust the pocket height and divider positions accordingly.
Save this crochet shower caddy pattern so you can return to the construction steps when you are ready to make a matching bathroom organizer, washcloth set, or hanging basket.





