A handmade floor cushion is one of those crochet projects that looks much more complicated than it actually needs to be. Once you break the shape into simple pieces, you are really making two large squares, one long strip and a few straightforward seams.
This crochet floor cushion pattern is designed specifically with newer crocheters in mind. There are no complicated shaping rounds, intricate stitch repeats or hidden construction tricks. You will use basic single crochet to make two square panels, crochet one long gusset for the sides, and then join the pieces into a sturdy box-shaped cushion.
The thick yarn is also satisfying to work with because every stitch is easy to see. A super bulky yarn and large hook create visible stitch structure and allow the project to grow considerably faster than a cushion crocheted with ordinary worsted-weight yarn.
The finished sample is designed to measure approximately 20 x 20 inches with a 4-inch depth, making it large enough for a reading nook, children’s room, casual living space or extra floor seating.
This pattern uses U.S. crochet terminology. The Craft Yarn Council standard abbreviation list identifies ch, sc, sl st and related terms and also documents the differences between U.S. and U.K. terminology. In U.K. terminology, the stitch called single crochet in the U.S. is called double crochet.
What You’ll Learn
By the end of this tutorial, you will know how to:
- choose sturdy yarn for a floor cushion;
- make and measure a gauge swatch;
- crochet a square panel without accidentally widening it;
- count edge stitches and row ends;
- make a long gusset that creates cushion depth;
- divide a long crochet strip accurately into four sections;
- join flat pieces at square corners;
- insert a firm cushion form;
- create either a permanent or removable final seam;
- resize the pattern for another cushion insert.
Finished Size
Approximately:
20 in x 20 in x 4 in / 51 cm x 51 cm x 10 cm
Small differences are normal because thick cotton and T-shirt yarn can vary significantly in diameter.
Materials You’ll Need
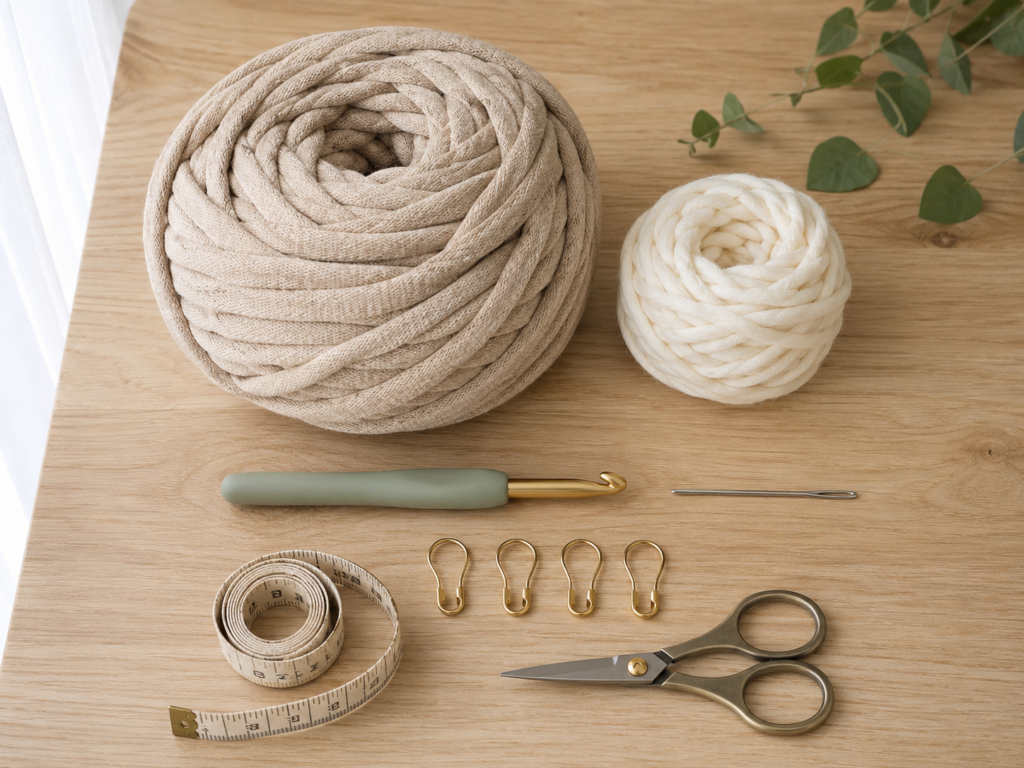
For this crochet floor cushion you will need:
- approximately 750–900 yards of #6 super bulky cotton tube yarn, recycled cotton yarn or sturdy T-shirt yarn;
- 10 mm crochet hook;
- approximately 30–50 yards of warm ivory or coordinating yarn for visible seams, optional;
- tapestry needle with an eye large enough for the yarn;
- scissors;
- measuring tape;
- at least 8 locking stitch markers;
- 20 x 20 x approximately 4 inch floor-cushion insert, box cushion insert or a firm inner cushion;
- optional additional polyester filling for corners if your insert does not completely fill the crochet shell.
Category #6 super bulky yarn commonly falls within a broad recommended crochet-hook range of about 9–15 mm. Those recommendations are only guidelines, so use the hook that produces the dense, sturdy fabric required for your cushion.
Crochet Abbreviations Used
This tutorial uses standard U.S. abbreviations consistent with commonly used Craft Yarn Council terminology.
ch = chain
sc = single crochet
sl st = slip stitch
st/sts = stitch/stitches
rep = repeat
RS = right side
WS = wrong side
Gauge
Using a 10 mm hook:
7 sc x 7 rows = approximately 4 inches
Gauge matters more than it might seem for a cushion. If each panel is several inches too large, the finished shell will look loose and floppy. If it is too small, stretching it over the insert can distort the stitches and put unnecessary stress on the seams.
Make a small swatch before committing to the full project.
If you have fewer than 7 stitches in 4 inches, your stitches are too large. Try a slightly smaller hook.
If you have more than 7 stitches in 4 inches, your stitches are too small. Try a larger hook.
The Craft Yarn Council also recommends using the pattern gauge rather than relying only on a yarn-label hook recommendation.
Before You Start
Count the first and last stitch every row
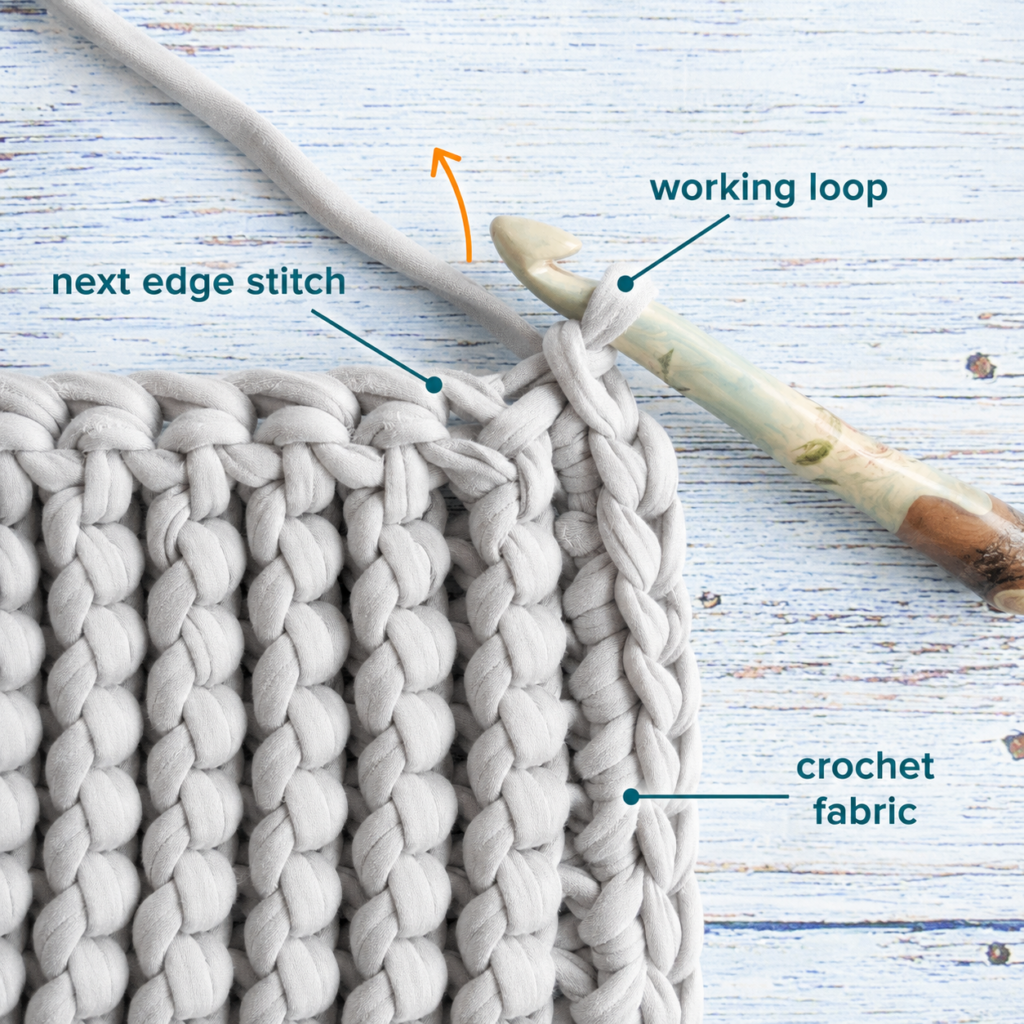
One of the most common reasons a beginner’s square becomes a trapezoid is accidentally skipping the last stitch.
Put a locking stitch marker in the first and last stitch of every row until you are completely comfortable identifying them.
Your panel should always contain 35 single crochet stitches.
Keep the foundation chain relaxed
An overly tight foundation chain can pull the bottom edge inward and make the panel curve. The Craft Yarn Council specifically notes that a foundation edge can pucker when it is crocheted too tightly.
If necessary, make the chain with an 11 or 12 mm hook and switch to the 10 mm hook for Row 1.
Do not intentionally crochet extremely tightly
This is a floor cushion, so the fabric should be firm enough that the insert does not show dramatically through the stitches. But excessively tight stitches make jumbo yarn tiring to crochet and can make assembly difficult.
Aim for firm, consistent and flexible.
Choose a washable material
Floor cushions naturally receive more contact with floors, shoes, pets and everyday household life than decorative sofa pillows. Check the care instructions on your actual yarn before washing.
Cotton tube yarn and recycled T-shirt yarn are especially attractive choices because they create substantial fabric, but different manufacturers and recycled materials may have completely different washing requirements.
Step-by-Step Crochet Tutorial
Step 1: Crochet the Foundation Chain
For the first panel:
Ch 36.
Do not count the loop currently sitting on your hook as one of the chains.
The Craft Yarn Council’s beginner pattern guidance likewise explains that the active loop on the hook is not counted as a chain stitch.
After making several chains, lay the chain on the table.
It should look relaxed rather than stretched like a cord.
Row 1
Work 1 sc in the second ch from the hook.
Continue with 1 sc in each chain across.
You should have:
35 sc
Place one marker in the first stitch and another in the last stitch.
Beginner tip: Count all 35 stitches before starting the second row. Fixing a missed foundation stitch now is much easier than discovering it after twenty rows.
Common mistake to avoid: Do not crochet into the slip knot at the end of the chain.
Step 2: Crochet the First Square Panel
Rows 2–35
Ch 1 and turn.
Work 1 sc in each of the 35 sts across.
Repeat until you have completed 35 total rows.
The turning ch-1 does not count as a stitch in this pattern. This is also consistent with common single-crochet pattern convention described by the Craft Yarn Council.
Your target is approximately:
20 x 20 inches
Measure the panel after about 20 rows.
If the width is dramatically different from 20 inches, stop and correct the gauge before investing more yarn.
Keep the edges straight
Each row should contain exactly 35 sc.
A useful routine is:
- Crochet across.
- Count 35 stitches.
- Move the markers.
- Chain 1.
- Turn.
It takes only a few seconds and prevents most accidental shaping.
Beginner tip: If it is difficult to insert the large hook beneath both top loops, rotate the hook slightly downward rather than pulling the working yarn excessively tight.
Common mistake to avoid: Do not work a second stitch into the first stitch simply because the turning chain looks like an empty space.
Step 3: Check the Shape and Crochet the Second Panel
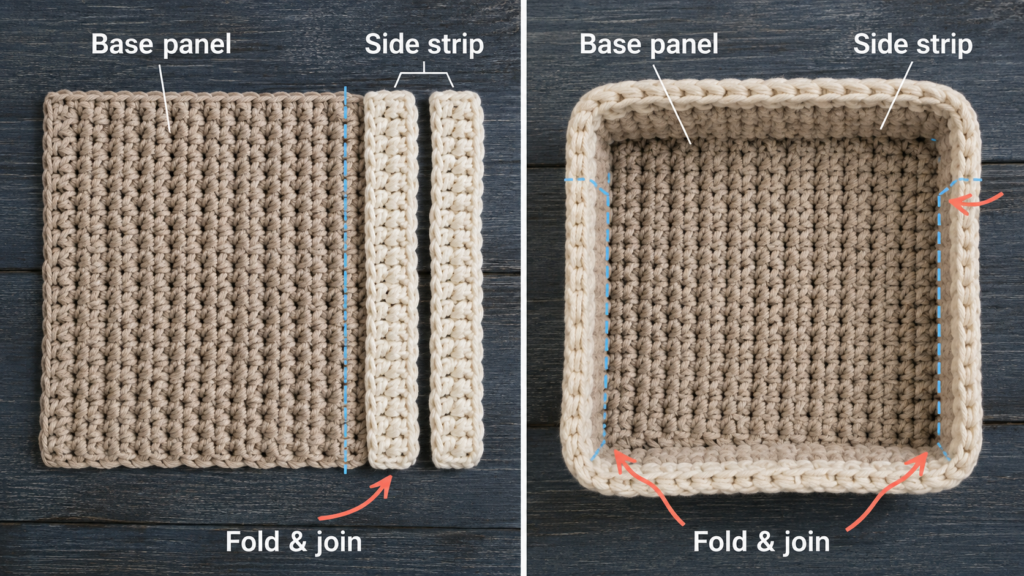
Before fastening off Panel 1, check three things.
First, count the final row. You need 35 sc.
Second, count your rows. You need 35 rows.
Third, measure both directions. The panel should be approximately square.
Small differences are perfectly acceptable. A half inch does not normally matter with a flexible cushion cover. A difference of two or three inches does.
Fasten off Panel 1 and leave a tail of approximately 8 inches.
Now make Panel 2 exactly the same way:
- Ch 36.
- Work 35 sc in Row 1.
- Maintain 35 sc.
- Continue for 35 total rows.
- Fasten off.
Lay Panel 2 directly on Panel 1.
The edges and corners should line up without pulling.
Beginner tip: Comparing the panels physically is more useful than relying exclusively on a measuring tape.
Common mistake to avoid: Don’t decide that the second panel needs “one more row” simply because it looks shorter while still attached to the working yarn. Lay both pieces completely flat before adjusting anything.
Step 4: Crochet the Side Gusset
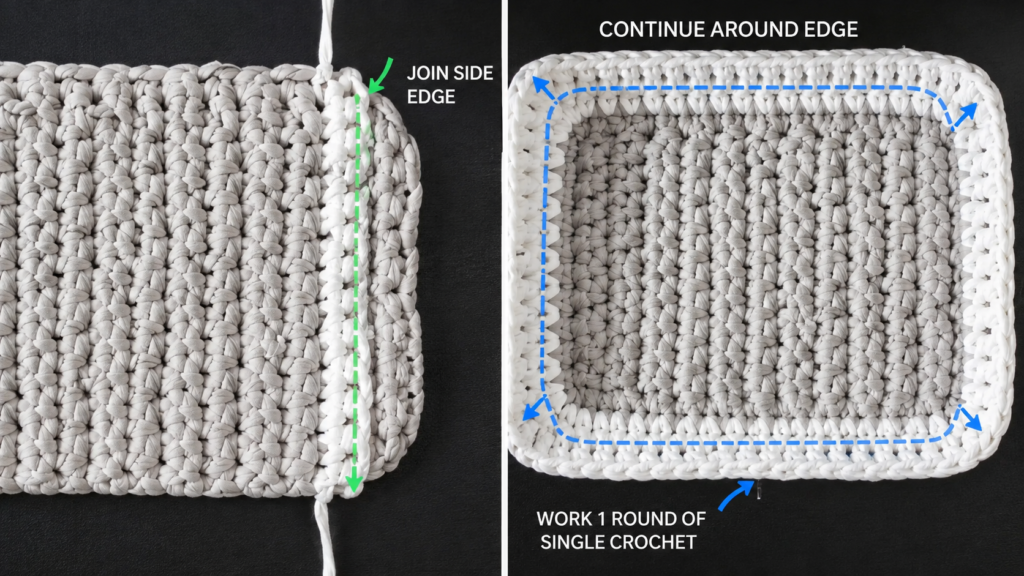
The gusset is the long strip that gives your cushion its depth.
Because each panel has 35 stitch positions on all four sides, the complete perimeter contains:
35 × 4 = 140 joining positions
That makes our gusset especially easy to align.
Gusset foundation
Ch 141.
Gusset Row 1
Work 1 sc into the second chain from the hook and 1 sc into every remaining chain.
140 sc
Gusset Rows 2–7
Ch 1 and turn.
Work:
1 sc in each st across — 140 sc
After seven total rows, the strip should measure approximately 4 inches wide.
Before fastening off, wrap the strip around one panel.
Its long edge should approximately match the complete perimeter.
If your gauge differs, physical fit is more important than forcing the numerical measurement.
Join the two short ends of the strip using slip stitches or a simple whip seam to create one large loop.
Add quarter markers
Count along one long edge of the gusset.
Place markers:
- at the seam;
- 35 stitches later;
- another 35 stitches later;
- another 35 stitches later.
You now have four equal sections.
Each section corresponds to one side of your square panel.
Beginner tip: Do not skip the markers. They stop all the extra fabric from gradually accumulating on one side.
Common mistake to avoid: Stretching the gusset aggressively while measuring it. Let the crochet lie naturally.
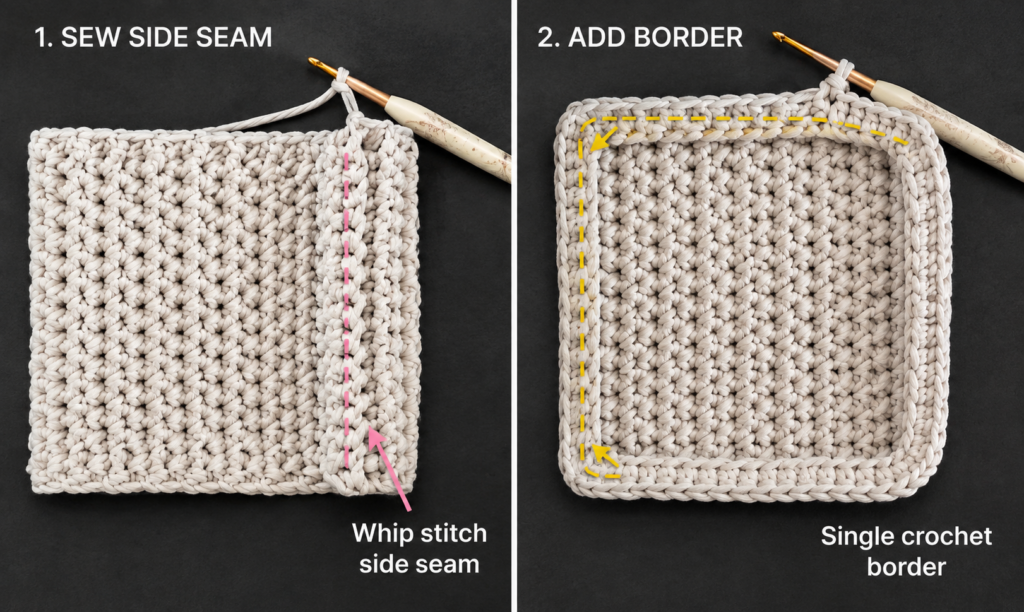
Step 5: Join the Gusset to Panel 1
Lay Panel 1 flat.
Position the gusset around it.
Match each gusset quarter marker with a corner of the panel.
Use additional stitch markers every few inches to temporarily hold the layers together.
For an attractive raised seam, hold the pieces with wrong sides together so the joining stitches remain visible on the exterior.
Attach your warm ivory seam yarn at one corner.
Work one single crochet through:
- one edge position on Panel 1;
- and the corresponding stitch of the gusset.
Continue around the entire panel.
Working along the top and bottom
Each stitch already gives you an obvious joining position.
Working along the side edges
Each row end acts as one joining position.
Because Panel 1 has 35 rows, you should have approximately 35 positions along each side.
Do not work multiple stitches randomly into a row end.
When you reach a corner marker, confirm that the next gusset section begins with the next side of the panel.
Continue until all four sides are attached.
Slip stitch to your first joining stitch.
Fasten off.
Your project should now resemble a very shallow open box.
Beginner tip: Stop at every corner and check alignment before continuing.
Common mistake to avoid: If the panel starts ruffling, you are probably squeezing too many joining stitches into its edge. If the seam pulls inward, you may not be using enough edge positions.
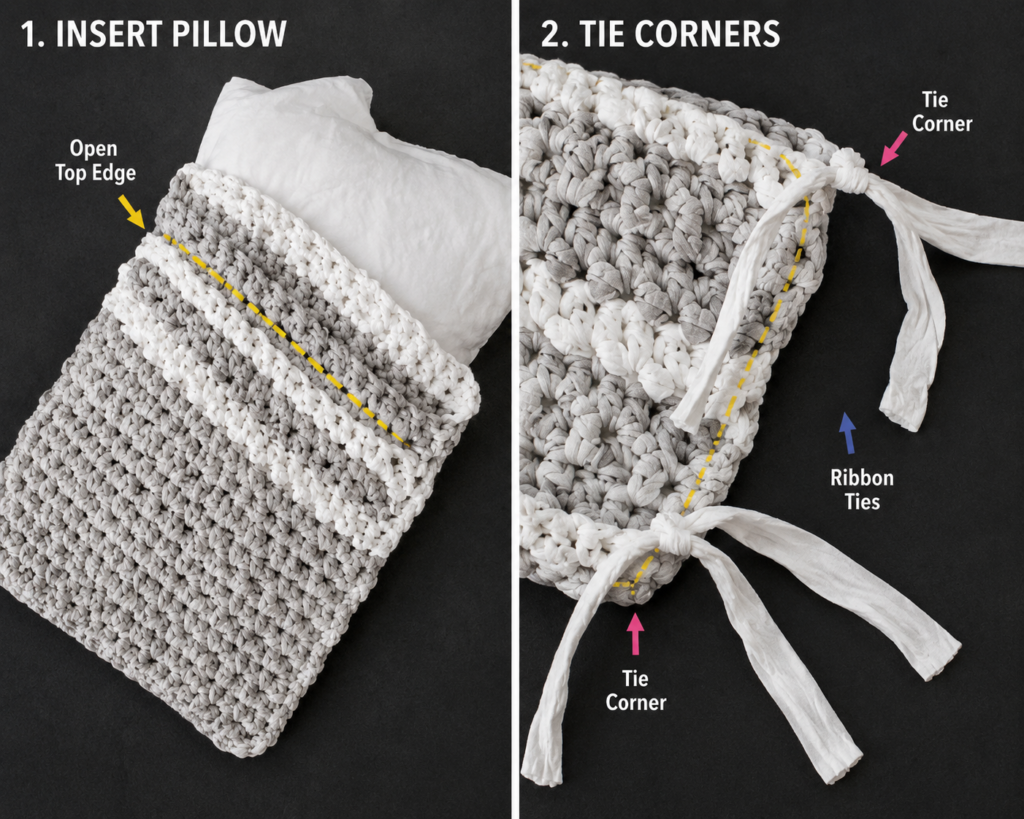
Step 6: Attach the Second Square Panel
Place Panel 2 over the open gusset.
Line up all four corners before crocheting anything.
Again, place markers:
- at all four corners;
- halfway along each side if useful.
Attach your seam yarn.
Single crochet Panel 2 to the upper edge of the gusset exactly as you joined Panel 1.
But this time, stop after three complete sides.
Leave the fourth side open.
This opening needs to be wide enough to insert your cushion form without excessive stretching.
Check the corners.
The floor cushion should now clearly have a square box shape.
Beginner tip: If one corner starts drifting away from its marker, undo a few inches rather than trying to hide the mismatch at the end.
Common mistake to avoid: Joining all four sides before remembering the cushion insert.
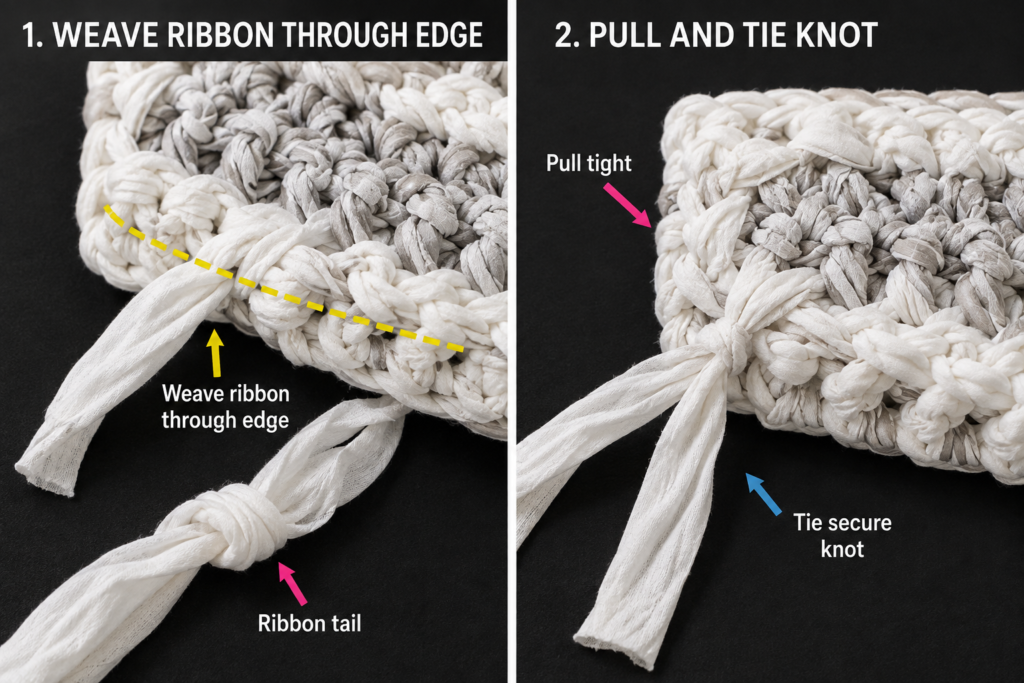
Step 7: Insert and Shape the Cushion
Fold or compress the cushion insert slightly.
Push one end through the open side.
Rather than forcing the whole cushion inside at once, work methodically around the cover.
Push the insert fully into the two far corners first.
Then settle the two near corners.
Massage the crochet shell with your hands until:
- all four corners are filled;
- the gusset sits upright;
- the front and back panels lie evenly;
- no large lumps remain.
A floor cushion usually looks better slightly full rather than underfilled.
If you are using loose stuffing rather than a commercial insert, place the stuffing inside a separate fabric liner first. Loose polyester fiber can otherwise work its way through open spaces between large crochet stitches.
Add small amounts of extra filling to weak corners if necessary.
Do not stuff so firmly that the stitches remain permanently stretched apart.
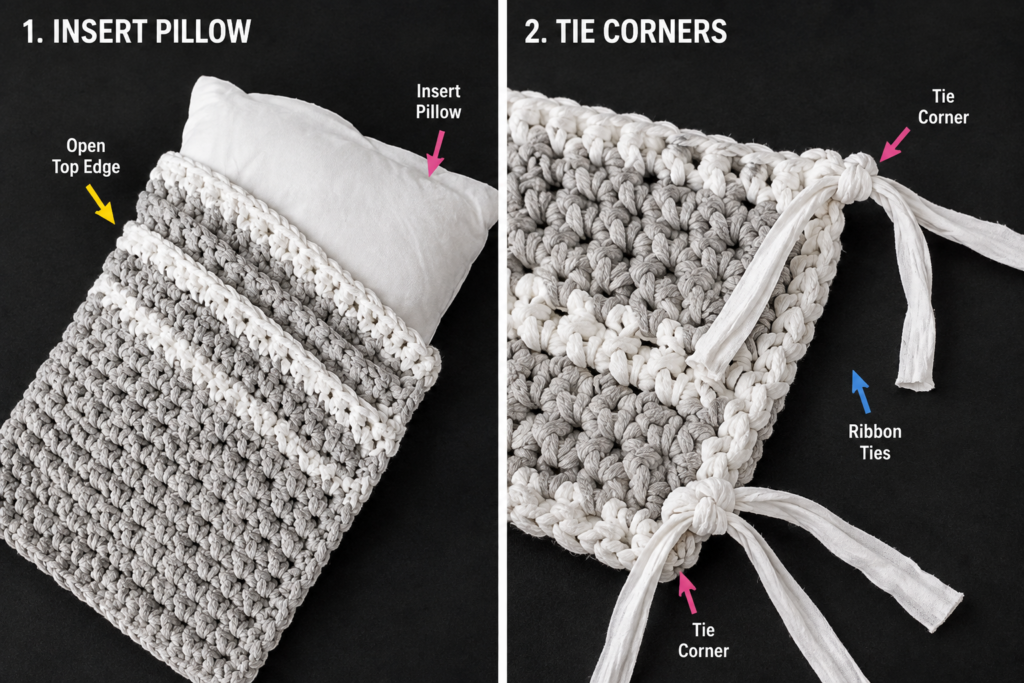
Step 8: Close the Final Side
You have two good finishing options.
Option 1: Permanent crochet seam
If you do not need the insert to be removable, continue your single crochet seam across the final side.
Fasten off securely.
Weave the yarn tail back through several seam stitches.
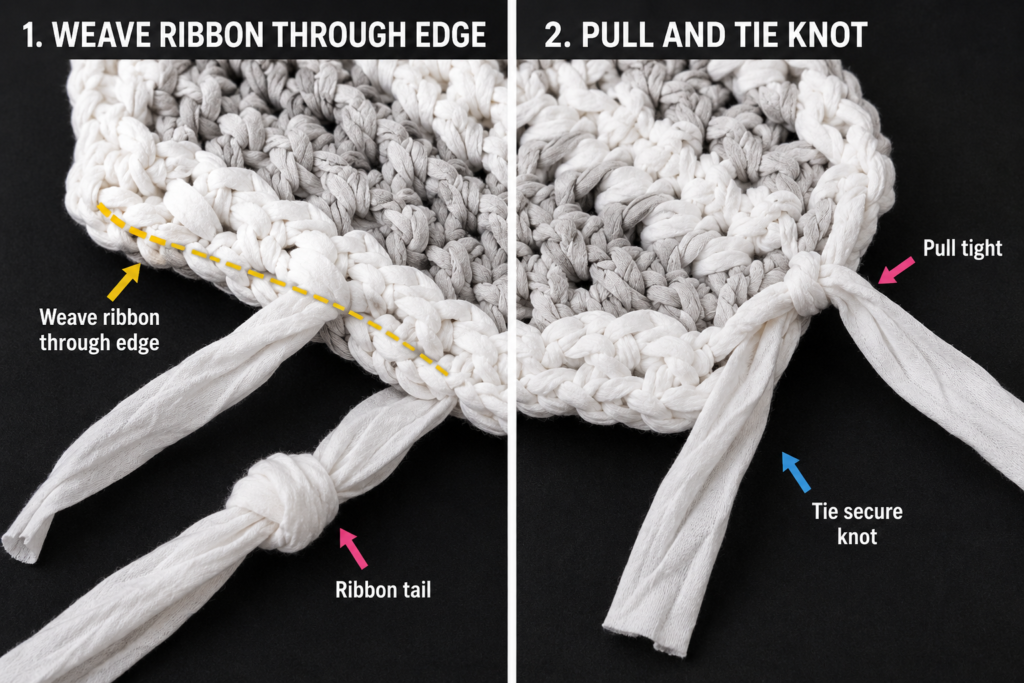
Option 2: Removable yarn-laced seam
For a more practical floor cushion, cut a long length of seam yarn.
Thread it onto a tapestry needle.
Beginning at one corner, pass the yarn alternately through matching edge loops on the panel and gusset.
Think of the movement like lacing a shoe.
Keep the yarn comfortably snug but not tight.
When you reach the opposite corner, knot the ends securely and tuck them inside the seam.
Later, the lacing can be untied or cut when you want to remove the inner cushion.
Beginner tip: Close about six inches, stop, and inspect the seam. It is easier to correct tension gradually than redo the entire side.
Common mistake to avoid: Pulling the lacing so tightly that the final side becomes shorter than the other three.
Pattern Notes or Stitch Notes
Turning chain
The ch-1 at the beginning of each single crochet row is used only to bring the yarn to working height.
It does not count as a stitch.
Panel stitch count
Every panel row contains:
35 sc
If you have 34, check whether you missed the final stitch.
If you have 36, you may have accidentally crocheted into the turning chain.
Panel repeat
After Row 1:
Ch 1, turn, sc in each st across.
Repeat until you have 35 total rows or the panel reaches your required height.
Gusset stitch count
Every gusset row contains:
140 sc
The four quarter sections contain approximately:
35 joining positions each
Right side and wrong side
Plain single crochet fabric is fairly reversible, so choose whichever surface looks best to you as the right side.
Once you decide, mark the right side of both panels with a stitch marker.
Size adjustment
The easiest way to resize this pattern is to work from measurements rather than blindly scaling the written stitch counts.
For a different square cushion:
- Crochet Panel 1 until its width matches your insert.
- Continue rows until height equals width.
- Make Panel 2 identical.
- Calculate the approximate perimeter: panel width × 4.
- Crochet the gusset long enough to match that perimeter.
- Make the gusset as wide as the desired cushion depth.
For example, an 18-inch square cushion has an approximate perimeter of:
18 × 4 = 72 inches
A 24-inch square cushion has an approximate perimeter of:
24 × 4 = 96 inches
Always compare the actual crochet pieces before seaming because yarn stretch and gauge matter more than mathematical perfection.
Common Beginner Mistakes
1. The panel gets wider every few rows
Cause: Adding a stitch at one edge.
Fix: Put stitch markers in the first and last stitch and maintain 35 stitches.
2. The panel becomes narrower
Cause: Missing the final stitch.
Fix: Learn to identify the two top loops of the final stitch and count every row.
3. The foundation edge curls inward
Cause: The starting chain is too tight.
Fix: Crochet the chain more loosely or use a larger hook only for the foundation chain.
4. The gusset does not reach all the way around
Cause: Gauge changed or the long chain was worked more tightly than the panels.
Fix: Add length to the gusset before closing its short ends. Do not stretch the strip aggressively to force it to fit.
5. Extra fabric bunches near one corner
Cause: The quarter markers were not aligned accurately.
Fix: Remove the seam back to the previous corner and redistribute the joining positions.
6. Large gaps appear in the crochet fabric
Cause: The hook is too large for the chosen yarn or stuffing pressure is excessive.
Fix: Use a smaller hook for a denser fabric or place the filling inside a solid inner liner.
7. The finished cushion looks floppy
Cause: The insert is too small or not firm enough.
Fix: Use a thicker insert or add small amounts of filling inside the liner, especially near the corners.
How to Customize This Crochet Project
Change the yarn
For a rugged floor cushion, cotton tube yarn or dense T-shirt yarn is ideal.
For a softer bedroom cushion, try a washable super bulky chenille yarn, but remember that extremely plush yarn makes individual stitches harder to see.
Whatever yarn you choose, make a fresh gauge swatch.
Create a two-tone cushion
Use oatmeal for both large panels and a contrasting shade for the gusset.
Good combinations include:
- oatmeal + terracotta;
- cream + sage;
- charcoal + light gray;
- ivory + dusty blue;
- beige + muted mustard.
Add a contrasting seam
Crochet the main cushion in one color and use a second color only for the exposed joining seams.
This makes the box construction a decorative feature.
Make it larger
A 24-inch cushion creates generous floor seating.
For very large cushions, consider using two strands of lighter yarn held together or a lightweight tube yarn so the finished project does not become unnecessarily heavy.
Make it shallower
For a flatter meditation-style cushion, reduce the gusset width from approximately four inches to two or three inches.
Add texture
Once you are comfortable with the basic design, make one panel using:
- back-loop single crochet;
- moss stitch;
- half double crochet;
- alternating textured stripes.
Keep the second panel and gusset simple so the cushion remains easy to assemble.
Gift ideas and uses
A handmade crochet floor cushion works especially well for:
- reading nooks;
- dorm rooms;
- playrooms;
- craft rooms;
- casual living rooms;
- gaming corners;
- meditation areas;
- children’s bedrooms;
- housewarming gifts.
Finishing Instructions
After closing the final side, inspect every seam.
Look especially closely at the four corners. They experience considerable tension when someone sits on the cushion.
Weave every loose yarn tail through several different stitch directions rather than trimming it immediately beside a knot.
Shape the cushion with your hands.
Push the filling fully into all four corners and smooth both large panels.
Should you block a crochet floor cushion?
Traditional wet blocking usually is not necessary once a thick cushion has been assembled.
If the panels need shaping before assembly, lightly dampen them and lay them flat to the required dimensions according to your yarn’s care instructions.
Do not aggressively stretch them.
Washing and care
Always follow the care label for the yarn you actually used.
If you made the removable laced closure, remove the cushion insert before washing the crochet shell.
For a large heavy cotton cover, support its weight when wet rather than hanging it from one edge.
Reshape the shell while drying.
Quick Printable-Style Summary
Project: Chunky Square Crochet Floor Cushion
Skill level: Beginner
Finished size: Approximately 20 x 20 x 4 inches
Yarn: #6 super bulky cotton tube or T-shirt yarn
Hook: 10 mm
Main stitch: Single crochet
Panel starting chain: Ch 36
Panel Row 1: Sc in second ch from hook and across — 35 sc
Panel repeat: Ch 1, turn, 35 sc
Panel size: 35 rows or approximately 20 inches square
Number of panels: 2
Gusset starting chain: Ch 141
Gusset Row 1: 140 sc
Gusset Rows 2–7: Ch 1, turn, sc across
Gusset target: Approximately 80 inches long x 4 inches deep
Assembly: Join short gusset ends, quarter-mark the gusset, attach to Panel 1, attach Panel 2 while leaving one side open, insert cushion form, close final side.
Finishing: Weave in ends and shape corners.
FAQ
Is this crochet floor cushion pattern suitable for beginners?
Yes. The project uses chains, single crochet and straightforward joining. The biggest challenge is not the stitch technique but maintaining consistent gauge and keeping the large pieces aligned.
What yarn is best for a crochet floor cushion?
A durable #6 super bulky cotton tube yarn or T-shirt-style yarn is a strong choice because it creates substantial fabric. The Craft Yarn Council identifies #6 as the super bulky category.
Can I use regular worsted-weight yarn?
You can, but a single strand of ordinary worsted-weight yarn will create a completely different gauge and much thinner fabric.
If you want to use yarn from your stash, holding several strands together may create a heavier fabric, but you must make a new gauge swatch and recalculate your stitch counts.
How much yarn do I need for a crochet floor cushion?
For this approximately 20-inch design, plan for roughly 750–900 yards of super bulky yarn. Actual usage can vary considerably with yarn thickness, hook size, tension and modifications.
Buying a little extra is preferable because matching dye lots later can be difficult.
How do I make the floor cushion bigger?
Make each panel the required finished width and height, then crochet a gusset long enough to match the complete panel perimeter.
For a square:
Perimeter = width × 4
The gusset width controls the depth of the cushion.
Should I use loose stuffing or a pillow insert?
A firm cushion insert or fabric inner liner is cleaner and usually produces a better shape.
If you prefer polyester fiberfill, place it inside a sewn fabric liner so fibers do not migrate through the large crochet stitches.
How do I keep a crochet cushion from stretching?
Use firm yarn, a dense gauge, a hook that is not excessively large, secure joins and an insert that fits without overstuffing.
Cotton-based yarns generally provide more structure than very elastic yarns.
Conclusion
A large crochet home-decor project becomes much less intimidating once the construction is reduced to simple shapes.
For this floor cushion, the entire structure comes from two squares and one long strip. The quarter-marker system keeps the gusset aligned, while the thick single crochet fabric gives the finished cushion the durable, handmade texture that makes chunky crochet particularly effective for home decor.
Once you have made the basic version, the same construction can become a smaller chair cushion, an oversized reading pillow, a meditation cushion or a colorful floor-seat set.
Save the pattern so you can return to the measurements when you are ready to try a second size or color combination.





