A college keychain needs to do more than look cute. It gets tossed into backpacks, carried between classes, dropped on dorm-room desks, pulled out at the library, and used again and again during the day.
That makes a crocheted wristlet surprisingly useful.
This beginner-friendly crochet college keychain pattern turns a small amount of cotton yarn into a sturdy wrist loop that keeps dorm keys, apartment keys, an ID holder, or a small card pouch easier to grab. The two-color design also gives you a simple way to work in favorite school colors without needing complicated colorwork.
The project is worked as one narrow strip using basic single crochet. After the strip is long enough, you fold it into a loop, add keychain hardware, and sew the attachment securely.
You do not need to know amigurumi, shaping, increases, decreases, or complicated stitch repeats. If you can make a chain and single crochet, you can make this project.
The tutorial below uses deep navy as Color A and warm gold as Color B, but those are only examples. Swap them for any two colors you like.
What You’ll Learn
By the end of the tutorial, you will know how to:
- Make an even crochet foundation chain.
- Work a narrow strip in single crochet.
- Count stitches so the wristlet stays the same width.
- Keep the side edges reasonably straight.
- Change colors neatly at the end of a row.
- Create symmetrical college-color stripes.
- Weave in color-change tails securely.
- Turn a flat strip into a wrist loop.
- Attach a metal swivel clasp.
- Reinforce the hardware seam so the finished keychain can handle regular use.
- Adjust the length or width for different preferences.
Materials You’ll Need
For one college wristlet keychain:
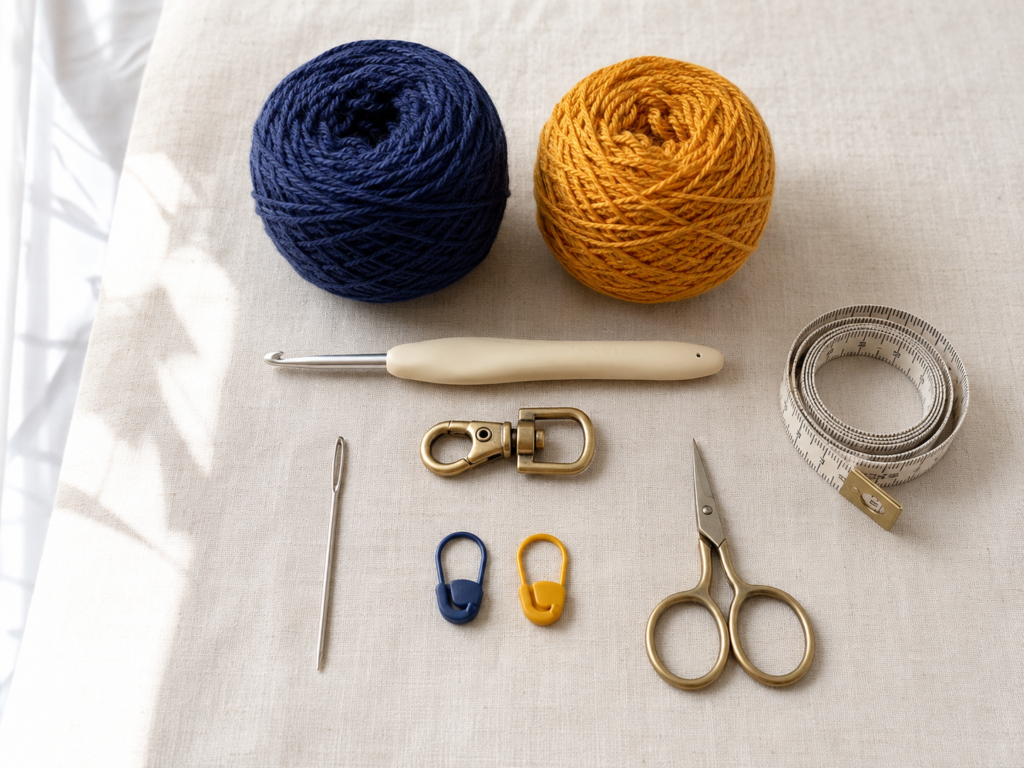
- Worsted-weight #4 cotton yarn, Color A: approximately 12–15 yards.
- Worsted-weight #4 cotton yarn, Color B: approximately 5–8 yards.
- 4.0 mm crochet hook, US G-6. The Craft Yarn Council lists 4.0 mm as G-6.
- 1-inch swivel lobster clasp or key-fob clasp with a rectangular base.
- Blunt tapestry needle.
- Scissors.
- Measuring tape or ruler.
- Two stitch markers, optional but helpful for beginners.
Cotton is my first choice because this is a functional accessory rather than a soft garment. A dense cotton fabric keeps the loop from feeling overly stretchy.
The Craft Yarn Council classifies yarn into standardized weight categories from 0 through 7. This tutorial uses medium/worsted #4 yarn, but exact thickness still varies between brands, so use the finished measurements as your main guide.
Crochet Abbreviations Used
This pattern uses US crochet terminology.
- ch = chain
- sc = single crochet
- sl st = slip stitch
- st/sts = stitch/stitches
- CC = contrasting color
- RS = right side
- WS = wrong side
- rep = repeat
These abbreviations align with standard crochet terminology published by the Craft Yarn Council.
US/UK terminology note
A US single crochet is called a double crochet in UK terminology. This tutorial is written entirely in US terms, so use US single crochet throughout.
Before You Start
Gauge
Exact gauge is not critical because the project does not have to fit the body precisely.
What matters more is producing a firm strip that does not stretch excessively.
Aim for a strip approximately:
- 1.4–1.6 inches wide
- 10–11 inches long before assembly
If your seven single crochets create a strip much wider than 1.6 inches, either crochet more firmly or move down one hook size.
If the strip feels like cardboard and your hook is difficult to insert, move up to 4.5 mm.
How to count your stitches
Each row in this pattern contains 7 single crochet stitches.
Look across the top edge. Each completed single crochet produces a V-shaped stitch.
Count:
1, 2, 3, 4, 5, 6, 7.
Do this every few rows.
A narrow project makes missing a stitch very noticeable. Losing one stitch changes the width quickly.
How to keep the edges straight
The chain 1 at the beginning of each row is a turning chain only.
It does not count as a stitch.
After turning, place your first single crochet directly into the first actual stitch.
Place the seventh single crochet into the final stitch at the opposite edge.
If finding the end stitches is difficult, put a stitch marker into the first and seventh stitches after completing each row.
How to avoid curling
A little curling is normal while making a narrow strip.
Severe curling usually means your foundation chain or turning chains are too tight.
Keep your chain relaxed enough that you can insert the hook without forcing it.
Light steam or wet blocking can flatten the strip before assembly if necessary.
Choosing college colors
Two colors are enough.
Try:
- Navy + gold
- Maroon + cream
- Forest green + white
- Red + charcoal
- Purple + gold
- Royal blue + white
- Black + orange
For a polished look, use one dark main color and one brighter accent color.
You can also choose colors inspired by a school without adding protected logos, mascots, seals, or branded lettering.
Step-by-Step Crochet Tutorial
Step 1: Make the Foundation Chain
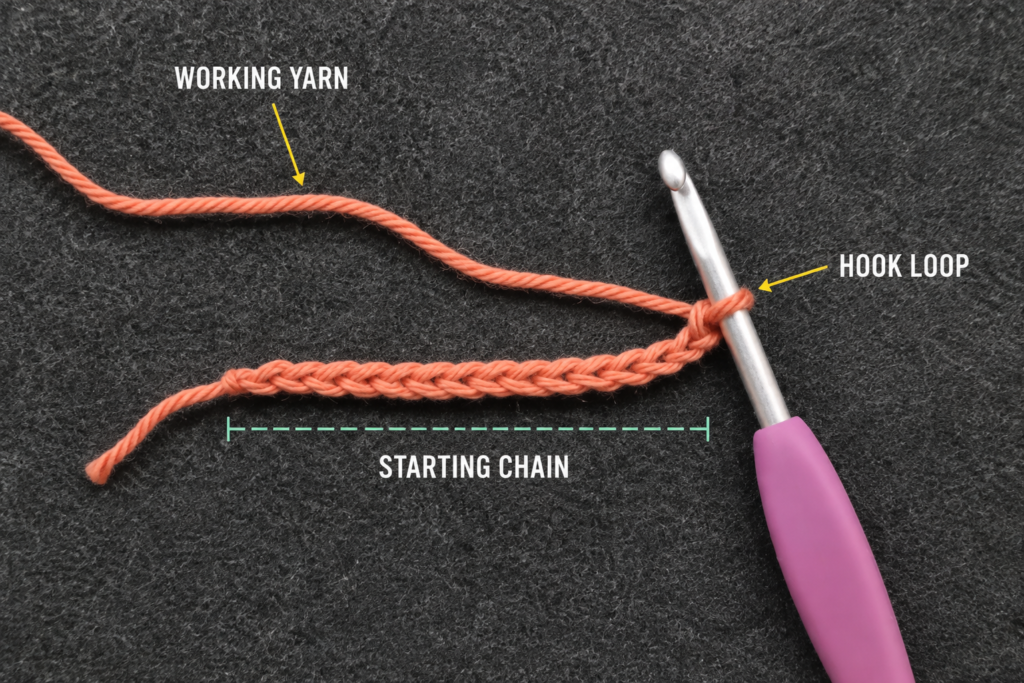
Using Color A — deep navy in the sample — chain 8.
Do not pull the chains tight.
You need to work back into them on the next step, so each chain should have enough space for the hook tip to enter comfortably.
Your working loop on the hook does not count as one of the eight chains.
Beginner tip
Lay the chain horizontally for a moment and identify the V shape of each chain.
Starting immediately below the hook, count eight chain stitches.
Common mistake to avoid
Mistake: Crocheting into the first chain directly beside the hook.
Fix: Skip that first chain and begin in the second chain from the hook. That skipped chain gives the row enough height for the first single crochet.
Step 2: Crochet the First Row
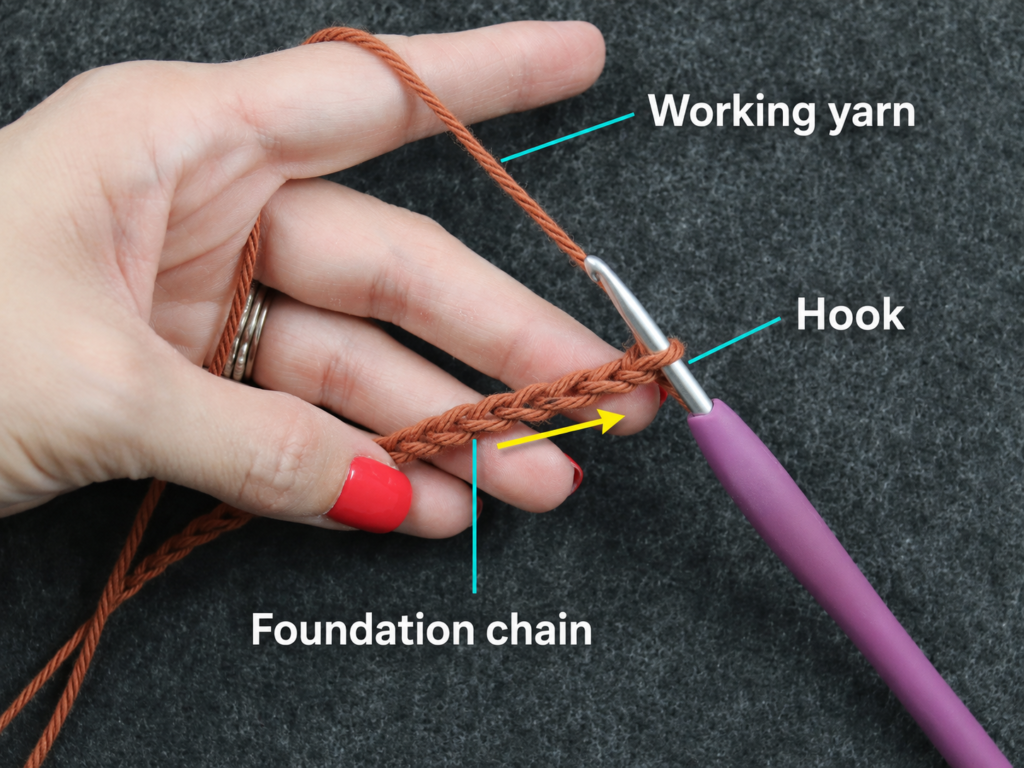
Insert the hook into the second chain from the hook.
Yarn over and pull up a loop.
You now have two loops on your hook.
Yarn over again and pull through both loops.
That completes one single crochet.
Work one single crochet into each remaining chain.
At the end of Row 1, you should have:
7 sc
Turn the work.
Beginner tip
Count the row before moving on.
Your first row establishes the permanent width of the wristlet.
Common mistake to avoid
Mistake: Accidentally crocheting twice into one foundation chain.
Fix: After completing each stitch, look for the next unused chain before inserting the hook again.
Step 3: Build the First Navy Section
For every following row:
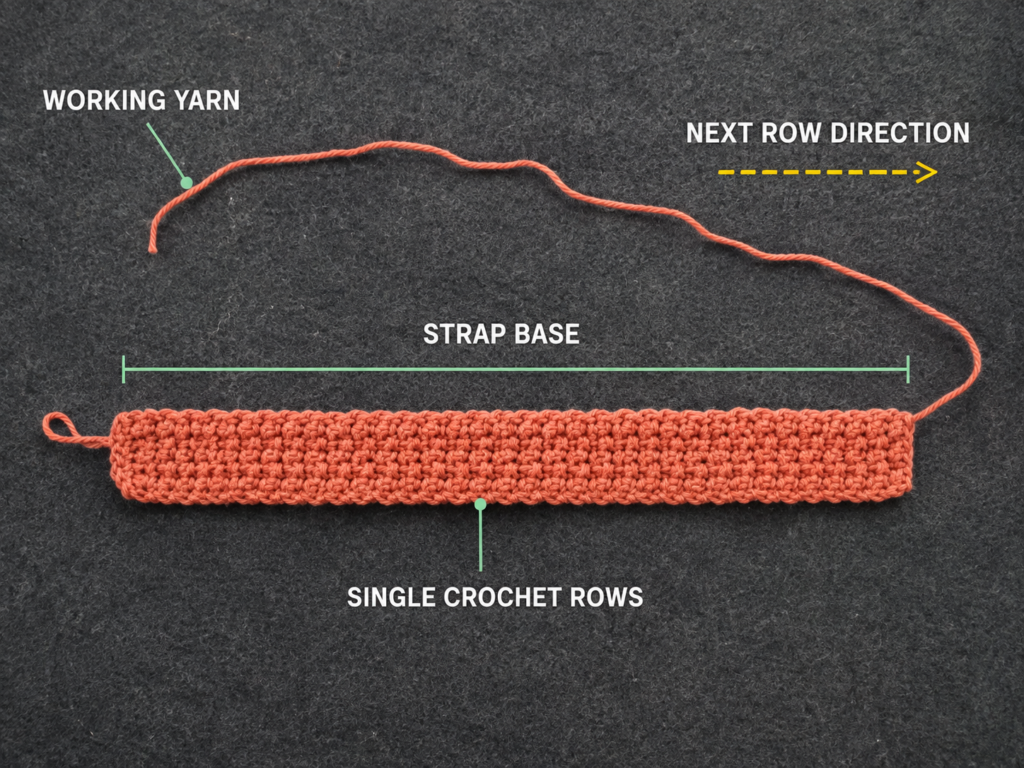
Ch 1, turn, sc in each of the 7 sts across.
Continue in Color A through Row 9.
At the end of every row, you should still have:
7 sts
Your strip will begin looking like a small rectangle.
The edges do not have to be machine-perfect, but the width should remain consistent.
Beginner tip
Count every row until you feel confident locating the first and last stitches.
On a seven-stitch-wide strip, counting takes only a few seconds.
Common mistake to avoid
Mistake: Working into the turning chain at the end of the row.
That creates an accidental eighth stitch and causes the strap to widen.
Fix: Remember that the turning chain does not count as a stitch.
Step 4: Add the First School-Color Stripe
After completing Row 9 in Color A, prepare Color B.
In this sample, Color B is warm gold.
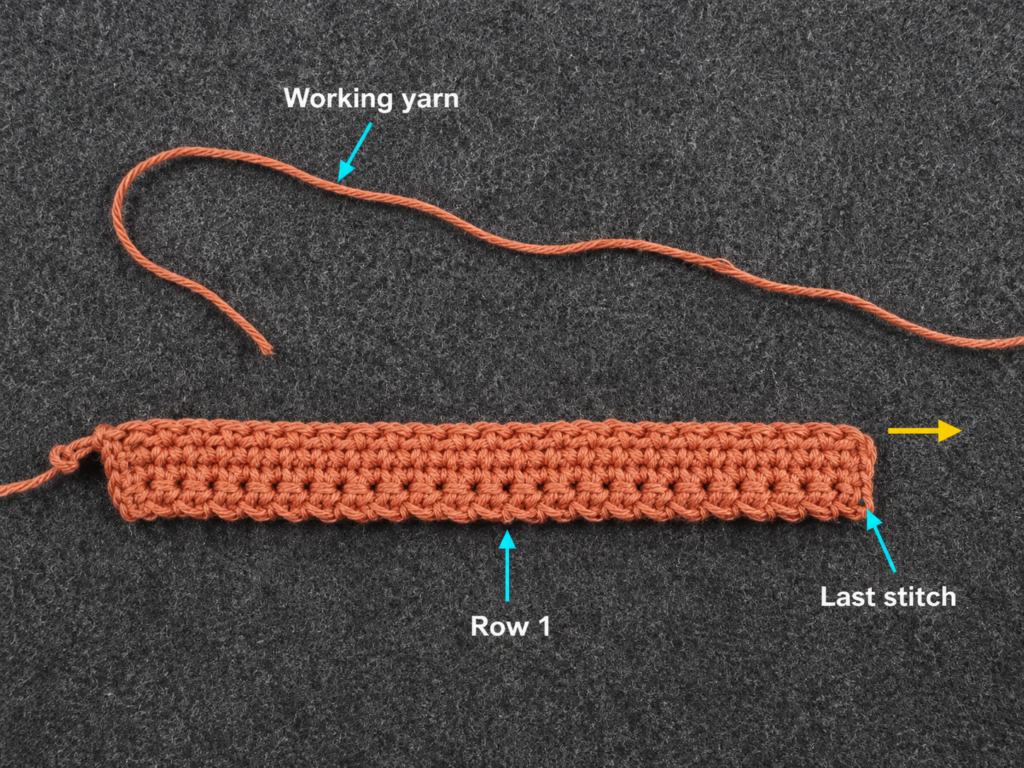
For the cleanest transition, change colors during the final single crochet of Row 9:
- Insert the hook into the final stitch.
- Yarn over with Color A.
- Pull up a loop.
- Drop Color A.
- Yarn over with Color B.
- Pull Color B through the two loops on your hook.
The stitch is completed in Color B, and the next row begins with Color B ready to use.
Work:
Rows 10–14: Ch 1, turn, sc across — 7 sts.
You now have a five-row contrast stripe.
Leave a 4–5 inch tail when changing yarn so it can be woven in securely later.
Beginner tip
Do not knot the yarn directly beside the stitch.
A properly woven tail is cleaner and avoids a hard knot in the wristlet.
Common mistake to avoid
Mistake: Completing the entire last stitch in navy and changing yarn only after the row is finished.
That creates a small color bump.
Fix: Introduce the new color during the final yarn-over of the last stitch.
Step 5: Finish the Symmetrical College-Color Strip
Change back to Color A after Row 14 using the same technique.
Continue:
- Rows 15–28: Color A — 7 sc per row.
- Rows 29–33: Color B — 7 sc per row.
- Rows 34–42: Color A — 7 sc per row.
Your complete sequence is:
A × 9 rows
B × 5 rows
A × 14 rows
B × 5 rows
A × 9 rows
This makes the two ends match when the wristlet is assembled.
Your strip should measure roughly 10–11 inches long.
If your strip is significantly shorter than 10 inches after Row 42, add rows equally to the two final Color-A sections when making your next keychain.
If it is longer than about 11.5 inches, remove an equal number of rows from both end sections next time.
For the current project, a small length difference is not a problem.
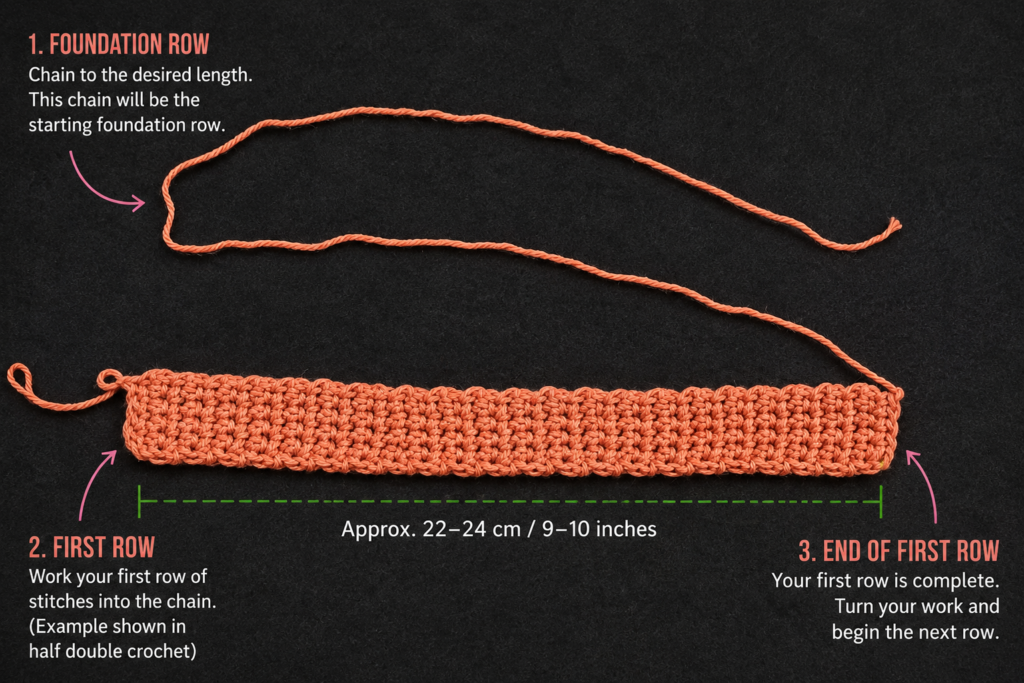
After the final row, fasten off while leaving a 20–24 inch tail for sewing the hardware.
Beginner tip
Measure the strip without stretching it.
Crochet fabric naturally lengthens a little when pulled.
Common mistake to avoid
Mistake: Cutting the finishing yarn too short.
Fix: Leave far more yarn than you think the seam requires. A 20–24 inch tail gives you room for a reinforced seam and weaving in.
Step 6: Weave In the Color-Change Tails
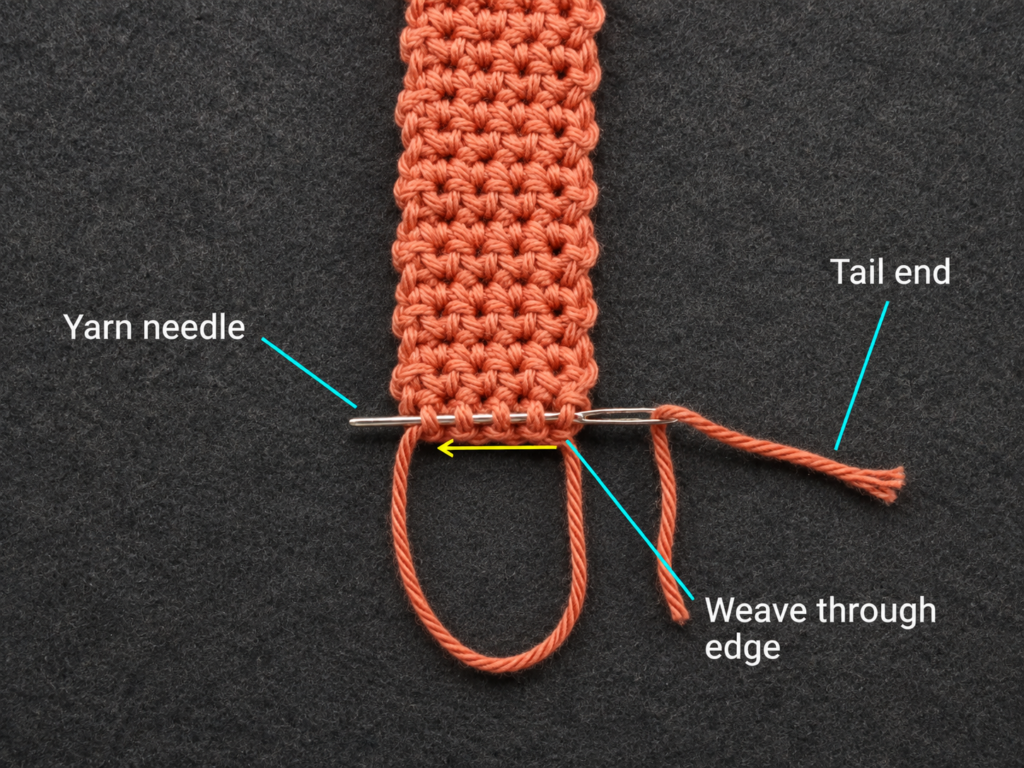
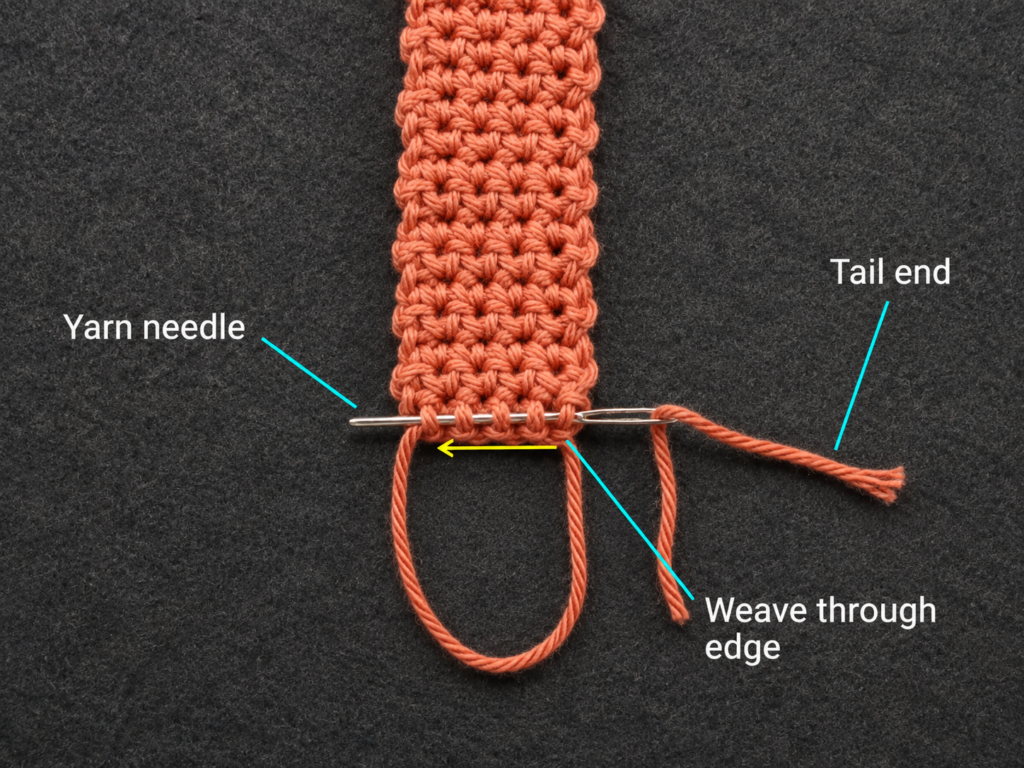
Before attaching the clasp, deal with every loose yarn tail except the long final sewing tail.
Thread one tail through the tapestry needle.
On the wrong side of the strip:
- Weave through the backs of 4–5 nearby stitches.
- Reverse direction.
- Weave through another 3–4 stitches.
- Trim the excess.
Repeat with each color-change tail.
Try to keep the yarn inside stitches of the same color so navy ends do not show through the gold stripe and vice versa.
Beginner tip
Stretch the strip gently after weaving in each end.
If the tail immediately pulls loose, weave it through a few more stitches before trimming.
Common mistake to avoid
Mistake: Cutting color-change tails directly beside the fabric.
Fix: Always weave them through several stitches first. A wristlet experiences regular movement and friction.
Step 7: Fold the Strip Into a Wrist Loop
Lay the strip flat.
Bring the two short navy ends together.
Make sure:
- The strip is not twisted.
- The gold sections appear symmetrically.
- The edges line up.
- The right side of the fabric faces outward if one side looks neater than the other.
The center section becomes the rounded end of the wrist loop.
Hold the two short ends together with a stitch marker if needed.
Beginner tip
Before sewing anything, place your hand through the loop.
The fit should feel comfortable rather than tight.
Common mistake to avoid
Mistake: Joining a twisted strip.
Fix: Trace one long edge with your finger from one short end around the loop and back. If the edge changes sides, untwist the strip before attaching the clasp.
Step 8: Position the Keychain Hardware
Take the brushed-brass swivel clasp.
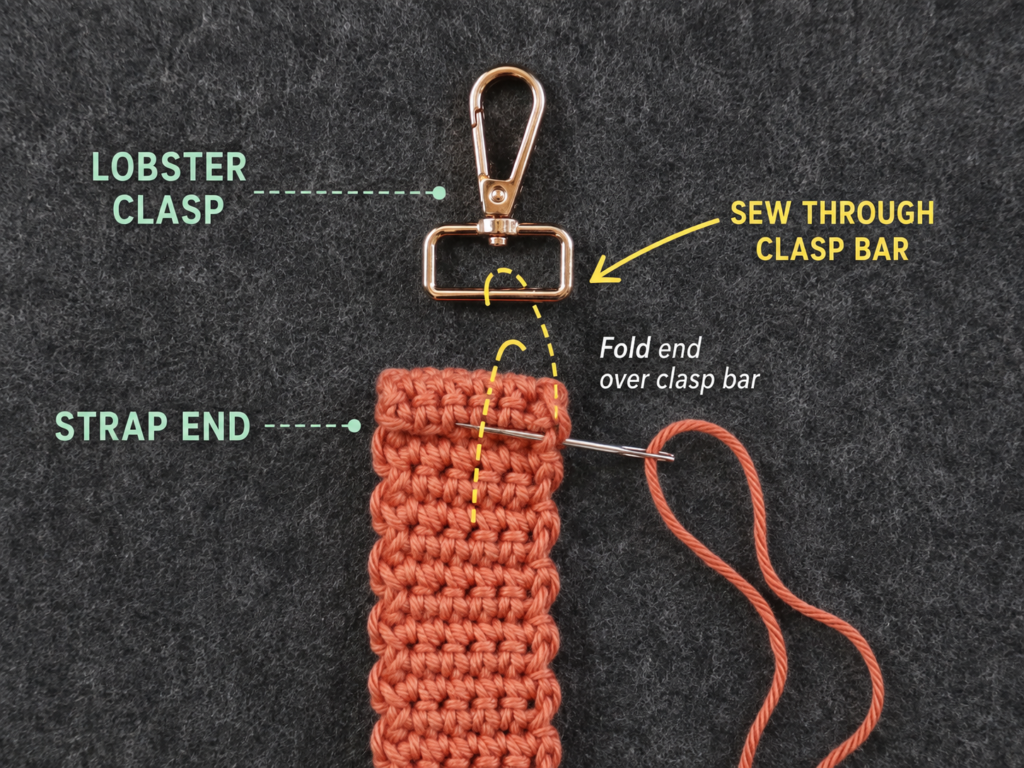
Slide the two aligned short ends through the rectangular base of the hardware.
Pull approximately 3/4 inch of crochet through.
Fold that section back toward the inside of the wristlet so the clasp bar is enclosed securely.
Keep everything centered.
The hardware should sit squarely rather than leaning toward either edge.
Thread the long finishing tail onto the tapestry needle.
Beginner tip
Use two temporary stitch markers through the layers before sewing.
One marker near each edge keeps the layers from sliding.
Common mistake to avoid
Mistake: Sewing the clasp onto only one layer.
Fix: Before making each stitch, check that the needle travels through all layers you intend to secure.
Step 9: Sew the Clasp Securely
This is the most important finishing step.
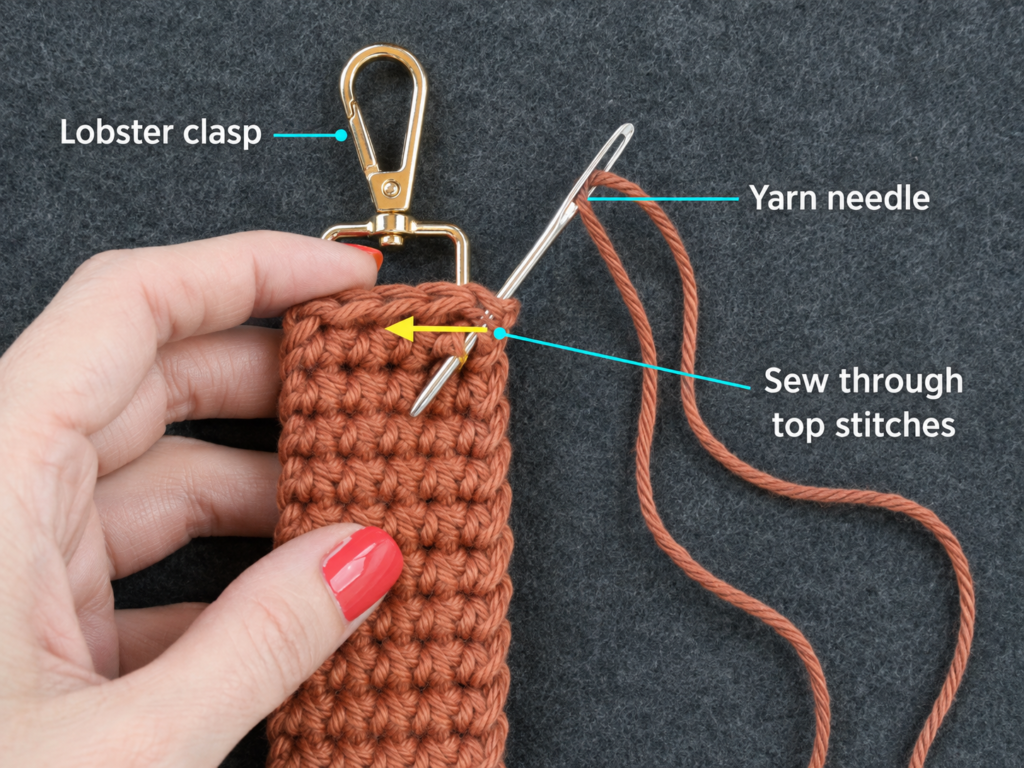
Using the long yarn tail and tapestry needle, sew horizontally across the width of the strap directly beneath the clasp.
Pass the needle through the crocheted layers while keeping your stitches snug.
Do not pull hard enough to bunch the strap.
After crossing the full width once, reverse direction and sew back across.
For extra durability, make a second parallel seam approximately 1/4 inch below the first.
The result should feel firm when you tug gently on the clasp.
Finish by weaving the remaining tail through the interior stitches several times.
Trim the yarn.
Beginner tip
Think of this as structural sewing, not decorative sewing.
Small inconsistencies in the hidden seam matter much less than strength.
Common mistake to avoid
Mistake: Making only two or three loose stitches around the clasp.
Fix: Sew completely across the width, reverse direction, and reinforce the seam.
Step 10: Test and Finish the Wristlet
Before using the keychain, inspect the complete project.
Check:
- No loose yarn ends are visible.
- The clasp sits centered.
- The wrist loop is not twisted.
- Both gold stripes appear balanced.
- The hardware seam feels firm.
- The crochet fabric has no large gaps.
Hold the crochet loop in one hand and clasp in the other.
Give them a few moderate tugs.
You should not see the sewing tail pulling free.
Clip on your keys only after the seam passes this test.
Pattern Notes or Stitch Notes
Turning chain
Chain 1 before every new row.
The chain 1:
- Provides height.
- Does not count as a stitch.
- Is not worked into on the following row.
Each finished row should contain 7 sc.
Stitch count
Maintain:
7 sts per row
If you have 6, you probably missed the final edge stitch.
If you have 8, you probably worked into the turning chain.
Correct the error immediately rather than continuing, because a one-stitch change is very noticeable on such a narrow accessory.
Color repeat
The sample color sequence is:
- Rows 1–9: A
- Rows 10–14: B
- Rows 15–28: A
- Rows 29–33: B
- Rows 34–42: A
This produces 42 rows total.
Do not worry if your finished length differs slightly because row height varies with individual tension.
Right side and wrong side
Basic single crochet worked in turned rows looks similar on both surfaces.
If one surface appears neater, treat it as the right side and keep it facing outward when folding the wristlet.
Size adjustment
Longer wristlet
Add rows to the center Color-A section.
For example, adding four rows to the center increases the total strap length while keeping the end design symmetrical.
Shorter wristlet
Remove two or four rows from the center section.
Do not make the loop too small to pass comfortably over the widest part of your hand.
Wider strap
Start with more chains.
For example:
- Ch 9 gives 8 sc.
- Ch 10 gives 9 sc.
Before changing width, make sure the completed strip still fits the rectangular opening on your keychain hardware.
Common Beginner Mistakes
1. Losing the final stitch
This is the most common problem when working narrow strips.
If the wristlet starts narrowing, count your stitches.
Fix: Mark the first and last stitch of each row until you can recognize them easily.
2. Adding a stitch into the turning chain
If the strap gradually becomes wider, you may be treating the turning chain as a stitch.
Fix: The chain 1 does not count. Work only into the seven actual single crochet stitches.
3. Making the foundation chain too tight
A tight foundation chain makes the starting edge shorter than later rows.
The strap may curve.
Fix: Crochet the chain with relaxed tension. You can even make the foundation chain with a 4.5 mm hook and switch to 4.0 mm for the first row.
4. Pulling the color change too tightly
A tight yarn change can pinch the edge inward.
Fix: After joining Color B, gently adjust both yarn strands so the new stitch matches the neighboring stitches.
5. Leaving a weak hardware seam
A beautiful wristlet is not useful if the clasp pulls off.
Fix: Sew across the attachment multiple times and weave the tail securely through the fabric.
6. Twisting the loop before assembly
Once sewn, a twisted loop cannot be corrected without removing the seam.
Fix: Lay the entire strip flat and confirm the edges remain aligned before attaching hardware.
7. Choosing very stretchy yarn
Soft acrylic can work, but some acrylic yarns stretch more than cotton.
Fix: Use firm tension or select cotton/cotton-blend yarn for a structured keychain.
How to Customize This Crochet Project
One reason a college wristlet is such a useful small project is that customization requires very little extra yarn.
Change the school colors
Replace navy and gold with any two-color palette.
You could also use three colors.
For a three-color version, divide one five-row accent stripe into:
- 2 rows Color B
- 1 row Color C
- 2 rows Color B
Repeat the same sequence on the second stripe.
Make a solid-color minimalist wristlet
Skip every color change.
Work all 42 rows in one neutral shade such as:
- Black
- Charcoal
- Cream
- Olive
- Camel
- Navy
This is a good option if you are making multiple graduation gifts quickly.
Add surface texture
Use back-loop-only single crochet for the main strip if you prefer a ribbed appearance.
Be aware that BLO fabric can stretch differently, so measure before attaching the hardware.
Add a simple decorative edge
After completing the strip, you can work slip stitches along the long edges in the contrast color.
Keep the slip stitches loose.
Tight slip stitching can cause the strap to curl.
Add an initial
A small embroidered initial can personalize the wristlet without requiring a complicated appliqué.
Use simple straight stitches and keep the letter small enough that it does not stiffen the strap.
For school-specific selling or commercial work, avoid reproducing protected university logos, branded wordmarks, or mascots unless you have permission to use them.
Make a matching set
Use the same colors for:
- Wristlet keychain
- Crochet lanyard
- ID-card strap
- Backpack charm
- Mini pouch
- Pencil keychain
- Book-shaped charm
A coordinated set makes a practical handmade college or graduation gift.
Gift ideas
This small project can work for:
- College freshmen
- Dorm move-in gifts
- Graduation gifts
- Resident assistants
- Teachers
- Student orientation gifts
- Sorority or club-color gifts using generic colors
- Campus craft fairs
- Back-to-school care packages
Finishing Instructions
Fastening off
After your final row, cut the yarn leaving approximately 20–24 inches.
Pull the cut end completely through the final loop.
That long tail becomes your sewing yarn for attaching the hardware.
Weaving in ends
All smaller tails should be woven in before assembly.
Work each tail through multiple stitches on the wrong side.
Change direction at least once.
Do not simply cut tails flush with the fabric.
Blocking
Blocking is optional.
If the strip twists or curls noticeably, lightly wet it with cool water.
Press out excess water gently using a towel.
Do not wring.
Lay the strip flat to dry and shape it into an even rectangle.
The primary reference designer also notes in a reader response that blocking can help a crochet wristlet lie flatter.
Shaping
The finished loop does not need aggressive shaping.
After the hardware is attached, smooth the strip with your hands so the seam sits directly beneath the clasp.
Washing and care
Follow the washing instructions on your yarn label.
For a keychain with metal hardware, hand washing is the safest general approach:
- Use cool or lukewarm water.
- Add a small amount of gentle detergent.
- Avoid prolonged soaking of the metal hardware.
- Rinse carefully.
- Press water out with a towel.
- Reshape.
- Dry flat.
Make sure the metal hardware is completely dry before putting the keychain back into a bag.
Safety note
The finished project contains removable metal hardware and is intended as an accessory for older children, teens, or adults.
It is not a baby toy.
Do not give a keychain containing small metal components to an infant or young child who may place parts in their mouth.
Quick Printable-Style Summary
Project: Crochet College Keychain Wristlet
Skill level: Beginner
Finished size: Approximately 5–5.5 inches folded × 1.5 inches wide, excluding clasp
Yarn: Worsted-weight #4 cotton
Hook: 4.0 mm / G-6
Other materials: 1-inch swivel clasp, tapestry needle, scissors, measuring tape
Stitches: ch, sc
Starting method: Ch 8
Row 1: Sc in second ch from hook and each chain across — 7 sc
Basic repeat:
Ch 1, turn, sc in each st across — 7 sc
Color sequence:
- Rows 1–9: Color A
- Rows 10–14: Color B
- Rows 15–28: Color A
- Rows 29–33: Color B
- Rows 34–42: Color A
Total: 42 rows
Before finishing: Strip should measure roughly 10–11 inches.
Finishing:
Leave a long sewing tail, weave in smaller tails, fold the strip into an untwisted loop, attach swivel clasp, sew securely through the crochet layers, reinforce seam, and weave in final tail.
FAQ
Is this crochet college keychain pattern suitable for a complete beginner?
Yes. The crochet portion uses only chain stitches and single crochet worked in simple rows.
The most challenging part for a new crocheter is usually keeping exactly seven stitches in every row.
Using stitch markers on the first and last stitches solves much of that problem.
What yarn is best for a crochet wristlet keychain?
A firm cotton or cotton-blend yarn is an excellent choice because a wristlet benefits from structure and stitch definition.
Worsted-weight yarn also makes the project quick enough for beginners.
If substituting another yarn weight, remember that yarn category and hook-size recommendations vary. The Craft Yarn Council publishes standardized yarn-weight guidance and suggested hook ranges.
Can I use acrylic yarn?
Yes.
Acrylic is especially useful when you already have suitable school colors in your scrap stash.
Just check the stretch before attaching the hardware.
If the strip stretches considerably, use a smaller hook or firmer tension.
How much yarn do I need?
Very little.
Approximately 20 yards total is usually plenty for this size of wristlet, although exact yardage changes with yarn thickness, tension, and adjustments.
This makes the project suitable for leftover yarn.
How can I make the wristlet larger?
Add rows to the middle Color-A section until the strip reaches your preferred length.
Test the loop around your hand before sewing on the clasp.
Can I make this as a regular key fob instead of a wristlet?
Yes.
Shorten the strip substantially so it forms a small grab loop rather than a full wrist loop.
Keep the hardware attachment method the same.
Can I use official university colors?
You can certainly choose yarn shades that suit your preferred color palette.
If the project is for personal use, simple color inspiration is straightforward.
If you intend to sell finished pieces using university names, logos, mascots, seals, or other branded elements, licensing and trademark rules may apply. A generic color-based design avoids making the tutorial dependent on a particular institution.
Conclusion
A college keychain is the kind of crochet project that earns its place in everyday life.
It takes very little yarn, does not demand complicated techniques, and gives a beginner enough repetition to practice consistent single crochet without committing to a large project.
Once you understand the basic construction, the design is easy to adapt. Make one in school colors, create a neutral version for everyday keys, lengthen it into a lanyard, or use leftover yarn to crochet several for graduation gifts.
The most important details are simple: keep seven stitches in every row, measure the strip before assembly, avoid twisting the loop, and reinforce the clasp seam.
Save the tutorial with your small-project patterns, because the same construction can become the foundation for many other crochet keychains and lanyards.





