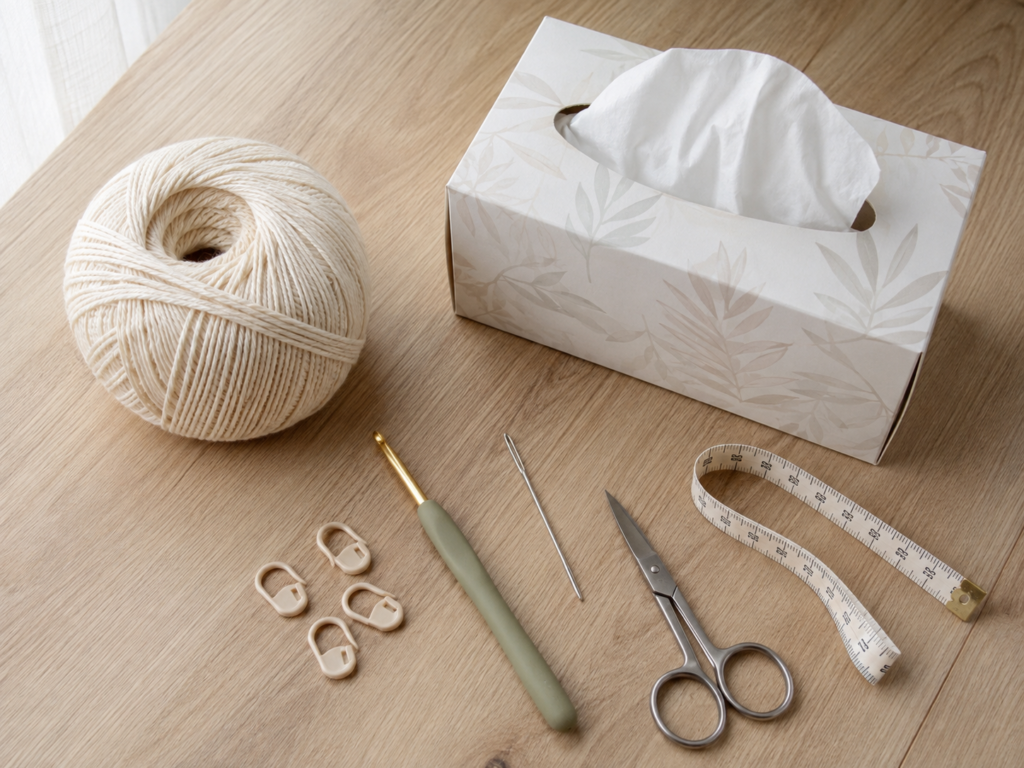
A cardboard tissue box is useful, but it is rarely the prettiest thing sitting on a bedside table, bathroom counter or living-room shelf. A simple crochet cover solves that problem while giving you a manageable project that actually gets used.
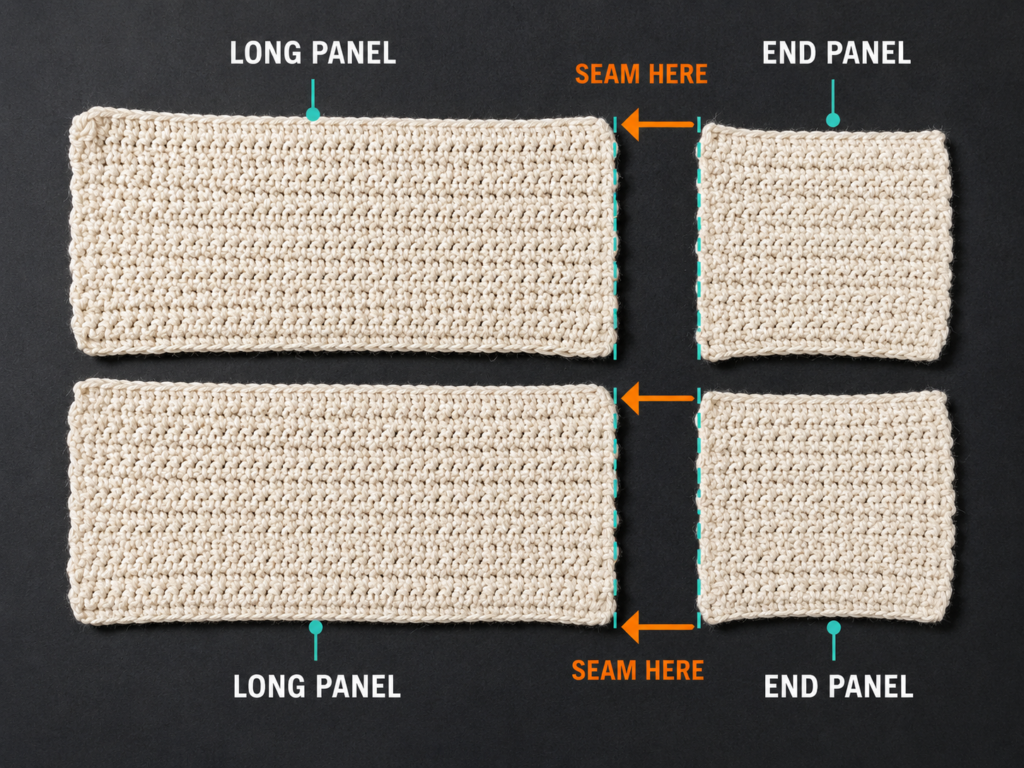
This crochet tissue box cover pattern is designed for beginners who are comfortable making a chain and single crochet. Instead of shaping a complicated box in the round, you will crochet five flat pieces: two long sides, two short sides and one top panel. The top includes a simple chain opening so tissues can pull through normally.
Once the pieces are finished, you will join them with visible single crochet seams. Those seams do more than hold the project together—they create clean architectural edges that help the soft crochet fabric resemble a real box.
The sample tutorial fits a rectangular tissue box approximately 9 inches long × 4.75 inches wide × 3.5 inches high, but I will also show you how to modify the measurements for your own box.
Most importantly, you do not need perfect crochet skills. Because this project uses short rows, repetitive single crochet and separate panels, mistakes are easy to spot and correct before assembly.
What You’ll Learn
By the end of this tutorial, you will know how to:
- Measure a tissue box before crocheting.
- Crochet neat rectangular single crochet panels.
- Keep the sides of your rectangles straight.
- Create a centered opening using chains and skipped stitches.
- Block crochet panels before assembly.
- Join panels with an exposed single crochet seam.
- Attach a top panel evenly around four sides.
- Adjust the pattern for different tissue box dimensions.
- Diagnose a loose, tight, wavy or crooked cover.
Skill Level
Beginner / Easy
You should know how to make:
- A slip knot.
- A foundation chain.
- Single crochet.
- A basic fasten-off.
Everything else is explained as part of the project.
Finished Size
The sample cover is approximately:
9.25 in long × 5 in wide × 3.5 in high
It is intended to slip over a rectangular tissue box measuring approximately:
9 in long × 4.75 in wide × 3.5 in high
A small amount of positive ease prevents the crochet fabric from pulling tightly over the cardboard.
Estimated Time
Approximately 3–4 hours, depending on crochet speed and whether you block the panels before assembly.
Materials You’ll Need
For the sample cover:
- Approximately 180–220 yards of medium-weight cotton or cotton-blend yarn.
- 4.5 mm crochet hook.
- Scissors.
- Tapestry or yarn needle.
- 6–10 locking stitch markers.
- Measuring tape or ruler.
- Rust-resistant blocking pins, optional.
- Blocking mat, optional.
- One rectangular tissue box to use for fitting.
Cotton is a useful choice because it creates firm stitch definition and does not usually feel excessively fuzzy around the tissue opening. A cotton-acrylic blend also works.
Craft Yarn Council recommends using metric hook measurements because manufacturer letter sizing can vary, and it emphasizes checking gauge rather than relying only on the hook label.
Crochet Abbreviations Used
This pattern uses US terminology.
- ch = chain
- sc = single crochet
- sl st = slip stitch
- st = stitch
- sts = stitches
- rep = repeat
- RS = right side
- WS = wrong side
In UK terminology, the US single crochet used throughout this project is called a double crochet.
Gauge
Aim for approximately:
16 sc × 18 rows = 4 in × 4 in
Measure after gently flattening the swatch.
Gauge matters more than usual for a box cover because the finished fabric must correspond to a fixed three-dimensional object.
If your swatch is wider than 4 inches, try a slightly smaller hook.
If your swatch is narrower than 4 inches, try a slightly larger hook.
Do not force yourself to copy the sample tension. The correct hook is whichever produces the stated measurements with comfortable stitches.
Before You Start
Measure the Actual Tissue Box
Never rely only on a label such as “standard box.” Packaging dimensions can vary.
Measure:
- Length.
- Width.
- Height.
Write all three numbers down.
For this tutorial, the sample box is approximately:
9 × 4.75 × 3.5 inches.
We add a little ease so the cover slides on without stretching the crochet dramatically.
Count Your Stitches
After every row, look at the top of your work. Each single crochet forms a small V.
For the sample:
- Long panels contain 37 stitches.
- Short panels contain 20 stitches.
- Top panel contains 37 stitches across.
Counting the first few rows saves far more time than discovering a tapered rectangle after sixteen rows.
Keep the Edges Straight
The turning chain does not count as a stitch.
At the end of a row:
- Crochet into the last real stitch.
- Chain 1.
- Turn.
- Crochet into the first stitch immediately below the hook.
If you accidentally skip the first or last stitch repeatedly, the panel will become narrower.
What If the Corners Curl?
A small amount of curling is normal in dense single crochet.
Do not immediately switch to a much larger hook just because the first few rows curve. Finish the panel, lay it flat and evaluate the actual measurement.
Light blocking and the finished seams usually straighten minor curling.
Choosing Colors
A single neutral shade gives the project a clean home-decor look, but you can easily change the design.
Try:
- Cream for Scandinavian-style decor.
- Sage green for a natural look.
- Charcoal for a modern office.
- Dusty rose for a vanity.
- Two colors with contrasting seams.
- Stripes made by changing color every two or four rows.
Step-by-Step Crochet Tutorial
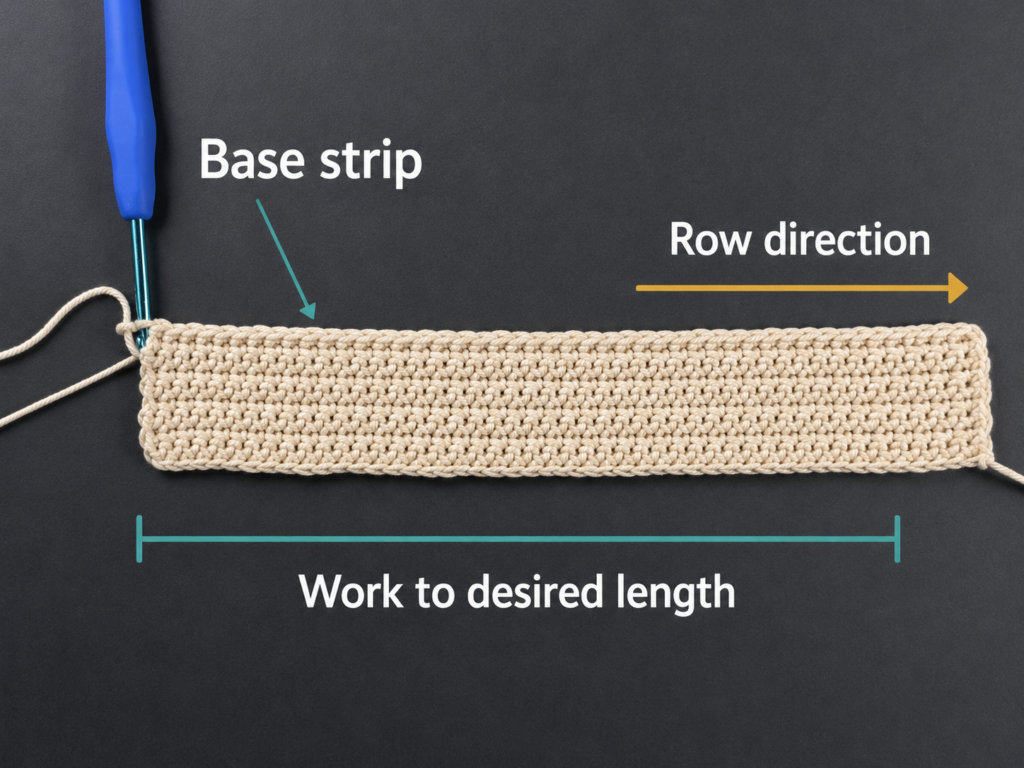
Step 1: Crochet Two Long Side Panels
The long panels cover the front and back of the tissue box.
Make 2
Foundation: Ch 38.
Row 1
Sc in the second ch from the hook and in every chain across.
Stitch count: 37 sc.
Ch 1 and turn.
Rows 2–16
Sc in every stitch across.
37 sc each row.
Ch 1 and turn after Rows 2–15.
After Row 16, fasten off.
Your rectangle should measure approximately:
9.25 inches wide × 3.5 inches high.
Do not worry if it is a fraction larger or smaller. Compare it directly with your box.
Beginner tip
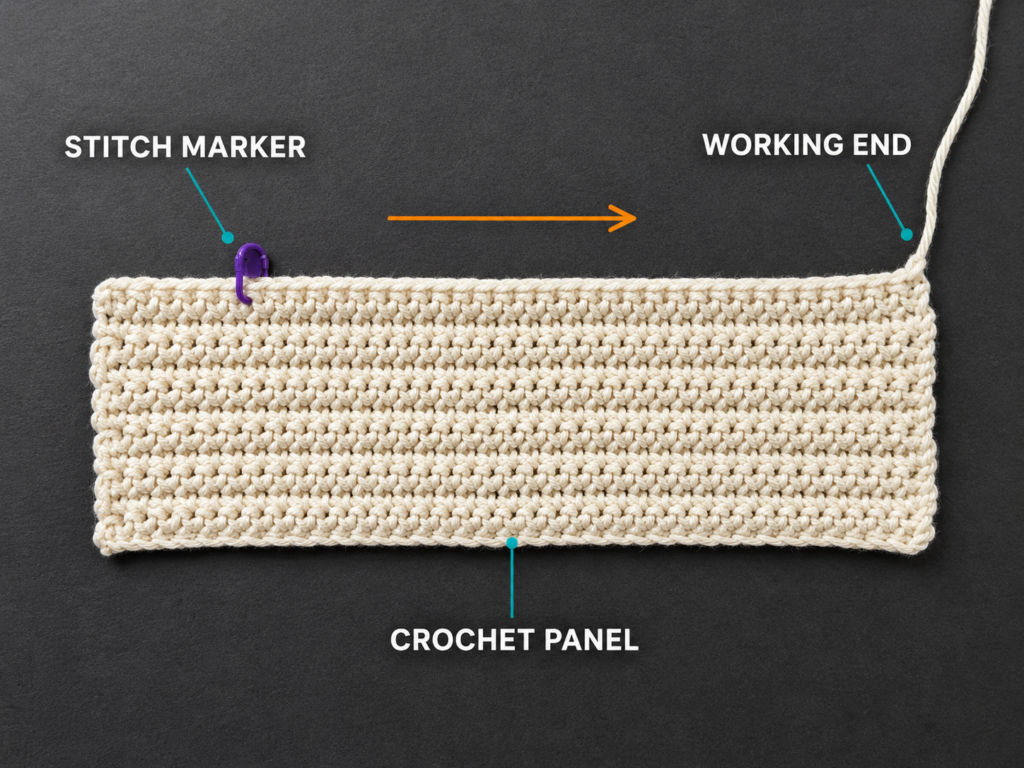
Place a stitch marker in the first and last stitch of the row while you are learning. It makes accidental decreases much easier to catch.
Common mistake to avoid
Do not crochet into the turning chain when you return across the next row. Doing so adds an extra stitch and gradually widens your rectangle.
Crochet the Two Short Side Panels
Make 2
Foundation: Ch 21.
Row 1
Sc in the second chain from the hook and across.
20 sc.
Ch 1 and turn.
Rows 2–16
Sc across.
20 sc each row.
Fasten off after Row 16.
These pieces should measure close to:
5 inches wide × 3.5 inches high.
Lay all four pieces beside the tissue box before continuing.
Step 2: Start the Top Panel
The top uses the same stitch pattern, but we will interrupt one row with a chain opening.
Foundation: Ch 38.
Row 1
Sc in the second chain from the hook and across.
37 sc.
Ch 1 and turn.
Rows 2–10
Sc in every stitch across.
37 sc.
Keep checking the width against the long edge of your tissue box.
The rectangle should remain flat and evenly shaped.
Step 3: Create the Tissue Opening
The opening is created by replacing the center stitches of one row with chains.
Row 11
Sc in the first 9 sts.
Ch 19.
Skip the next 19 sts.
Sc in the final 9 sts.
You now have:
9 sc + 19 chains + 9 sc.
The chain should sit above the skipped stitches like a small bridge.
Do not pull those chains unusually tight. They should have the same relaxed tension as your foundation chain.
Beginner tip
Before chaining, count the remaining stitches.
You should have:
- 9 stitches before the opening.
- 19 skipped stitches.
- 9 stitches after the opening.
This keeps the tissue slot centered.
Common mistake to avoid
Do not accidentally crochet into any of the 19 stitches you are supposed to skip. The chain needs an empty space underneath it.
Step 4: Work Across the Chain Opening
Ch 1 and turn.
Row 12
Sc in the first 9 stitches.
Work 1 sc into each of the 19 chains.
Sc in the final 9 stitches.
37 sc total.
You have now converted the chain bridge into the upper edge of the tissue opening.
Before continuing, lay the panel over the cardboard box.
Check that:
- The tissue slot is centered.
- A tissue can pull through comfortably.
- The top panel still reaches both short edges of the box.
Rows 13–22
Sc across.
37 sc each row.
Fasten off after Row 22.
The top should be approximately:
9.25 × 5 inches.
Optional Step: Lightly Block the Pieces
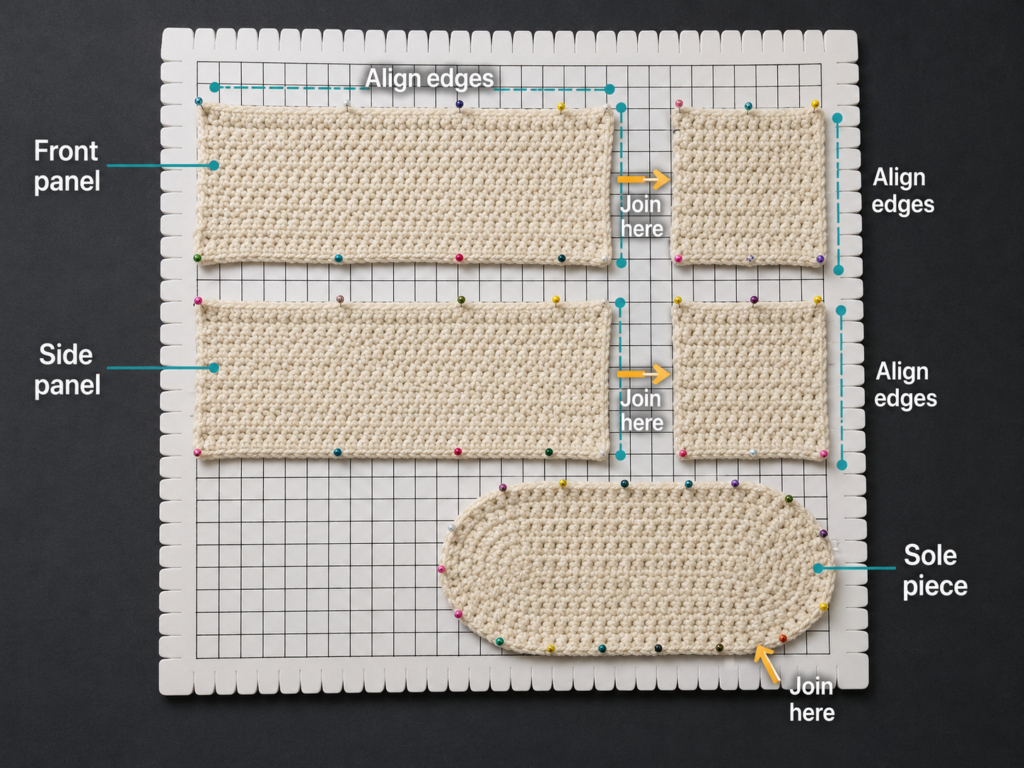
Lay the five panels flat.
If your cotton yarn can safely be wet blocked, dampen the pieces lightly and shape them to the correct dimensions.
Pin the corners without overstretching.
Allow everything to dry completely.
Always follow the care instructions for the specific yarn you purchased. Craft Yarn Council’s care-symbol reference explains the standardized symbols manufacturers place on yarn labels.
Blocking is optional, but it makes assembly noticeably easier when your row edges curl.
Step 5: Align the First Side Panels
Take:
- One long panel.
- One short panel.
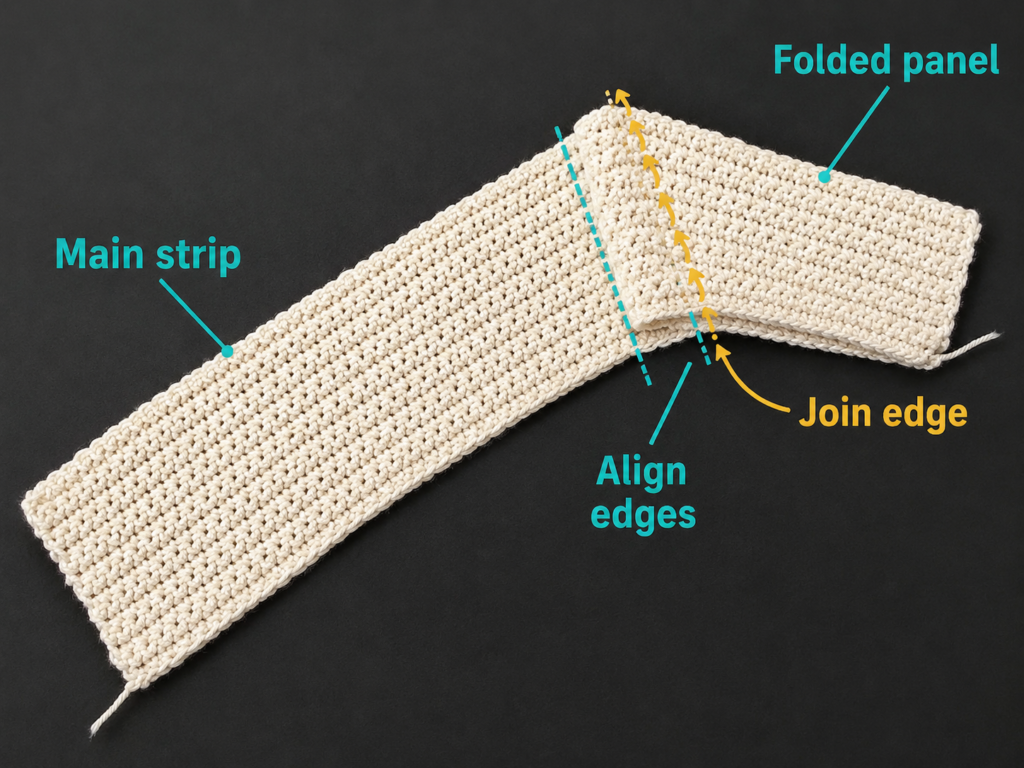
Place their 16-row edges together.
Because both pieces are the same height, the row ends should correspond closely.
Insert a locking stitch marker through both pieces at:
- The top.
- The center.
- The bottom.
This prevents one panel from stretching ahead of the other.
Beginner tip
Do not start crocheting the seam immediately and assume the pieces will naturally stay aligned. Secure the corners first.
Step 6: Crochet the First Corner Seam
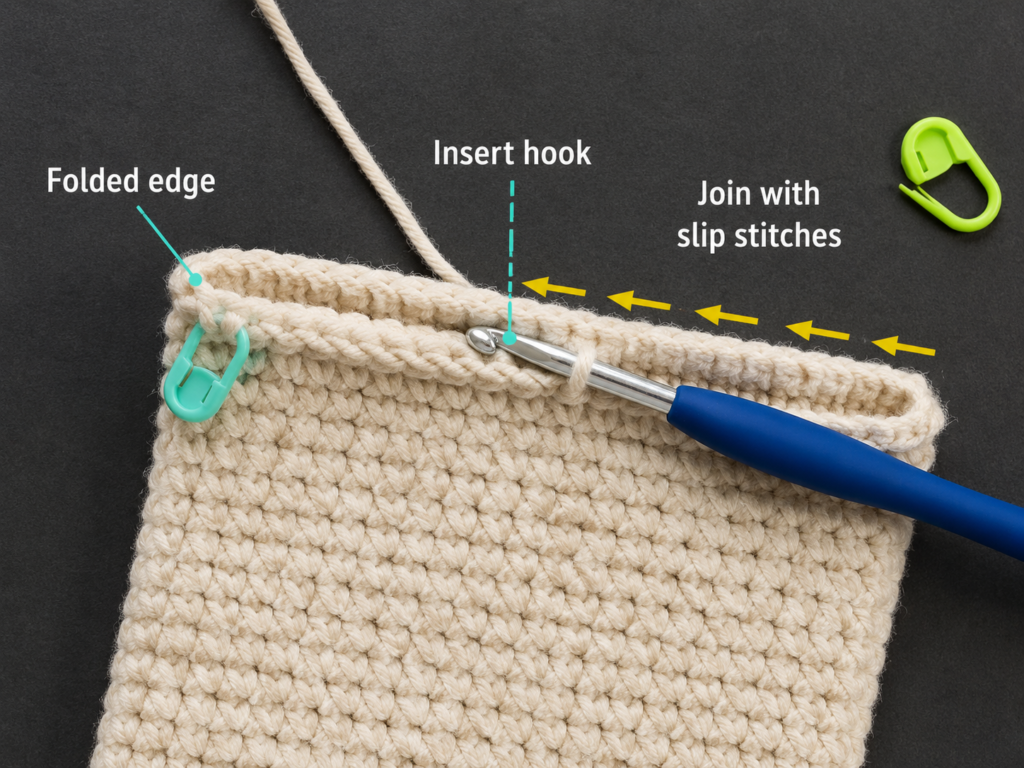
With a separate strand of yarn, make a slip knot.
Insert your hook through the first available edge loop of both panels.
Pull yarn through and chain 1 to secure.
Then work single crochet stitches through both layers from top to bottom.
Aim for approximately one joining stitch per row end.
The seam should feel firm but not compressed.
Fasten off.
Check Your Seam
Open the panels so they form a 90-degree angle.
The seam should create a narrow raised ridge.
If the corner immediately buckles or curls dramatically, your joining stitches were probably too tight.
Beginner tip
Keep your joining tension slightly more relaxed than your normal single crochet tension.
Common mistake to avoid
Do not insert the hook through only one panel. Every joining stitch must capture both layers.
Step 7: Join the Remaining Side Panels
Continue in this order:
Long side → short side → long side → short side.
Finally join the two remaining open edges.
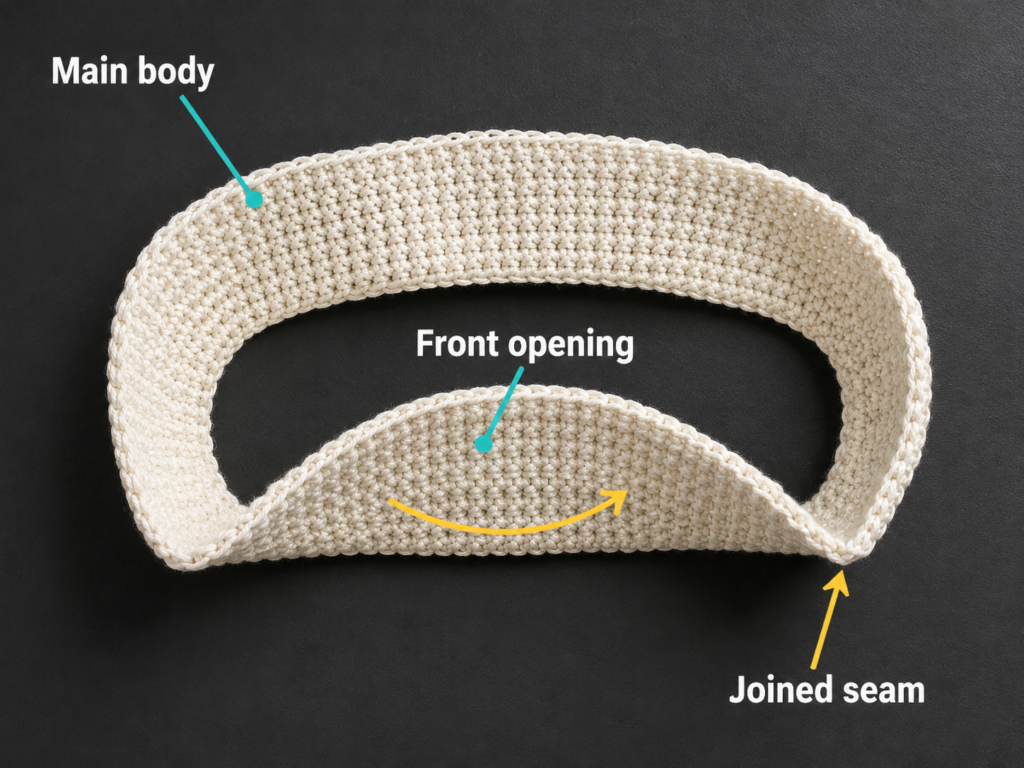
You should now have a rectangular crochet tube with an open top and bottom.
Slide it loosely over your tissue box.
Do this before attaching the top.
Fit check
The wall should:
- Slide over the box without excessive force.
- Touch or nearly touch all four cardboard sides.
- Keep the corners close to 90 degrees.
- Reach the bottom edge of the tissue box.
If it is noticeably too tight, correcting it now is easier than after attaching the top.
Step 8: Attach the Top Panel
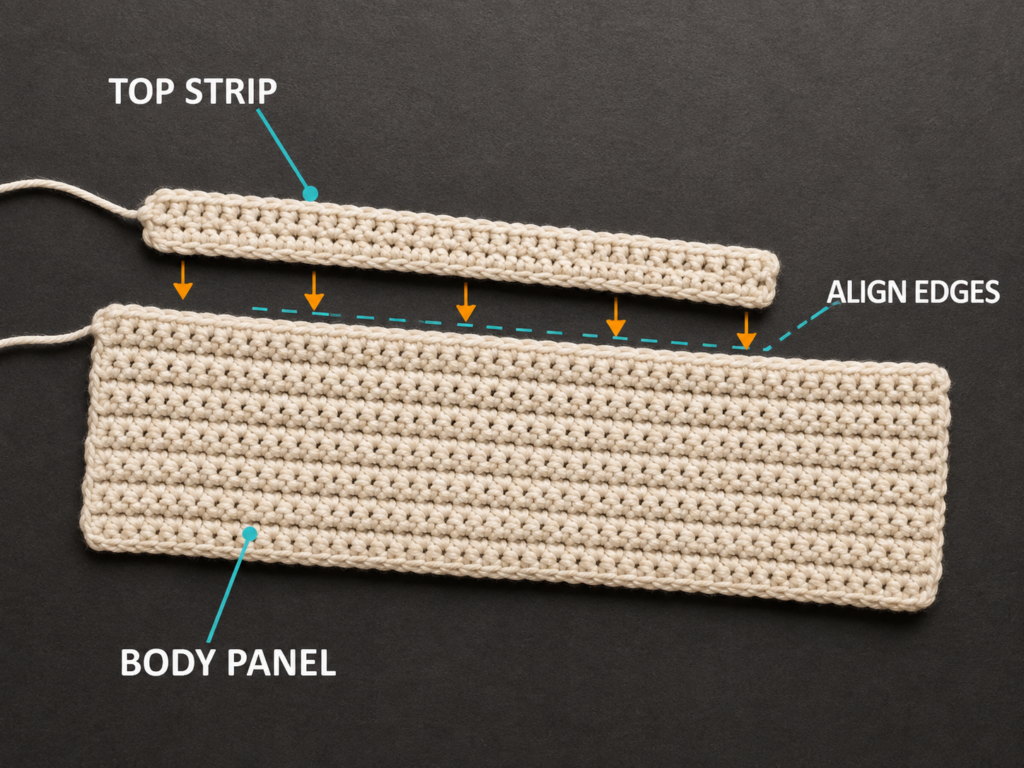
Lay the top panel over the assembled walls.
The tissue opening should face outward.
First secure all four corners with stitch markers.
Then place another marker approximately halfway along each side.
This is important because the row ends on the short edges of the top do not necessarily correspond one-for-one with every stitch on the short side panel.
Instead of forcing exact stitch matching, distribute the fabric evenly.
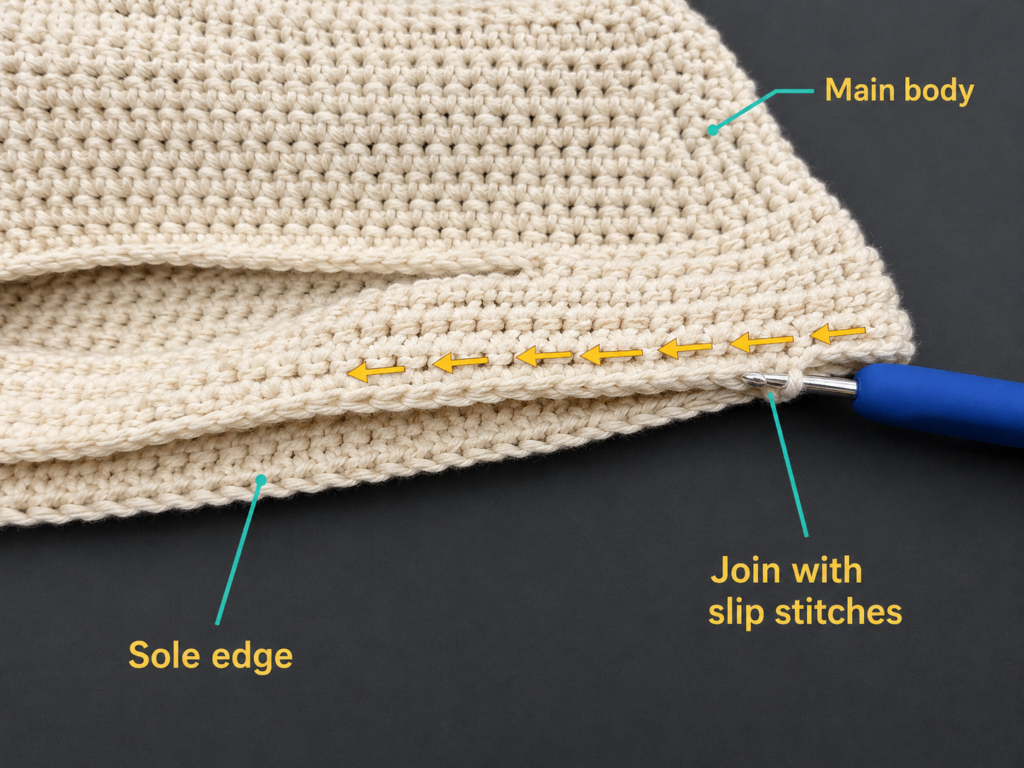
Starting at one corner:
- Insert the hook through the top panel and upper edge of the side wall.
- Pull up yarn.
- Ch 1.
- Single crochet through both layers.
- Continue toward the next corner.
Around the short edges, occasionally work through two adjacent top-panel row ends before moving to the next side-panel stitch if necessary. The goal is a smooth, evenly distributed seam—not mechanically identical stitch counts.
Continue around all four sides.
Join or fasten off when you return to the starting corner.
Beginner tip
Stop every few inches and look at the fabric behind your hook. If either layer is bunching, redistribute the remaining fabric before continuing.
Pattern Notes
Turning Chain
The ch 1 at the end of each row is used only to reach the height of the next row.
It does not count as a stitch.
Stitch Counts
Long side:
37 sts × 16 rows
Short side:
20 sts × 16 rows
Top:
37 sts × 22 rows
Opening row:
9 sc, ch 19, skip 19 sts, 9 sc
Right Side and Wrong Side
Ordinary single crochet creates a slightly different appearance on alternating sides, but this project does not depend on a strongly defined decorative RS and WS.
The most important rule is consistency.
When assembling, decide whether you want the raised joining seams facing outward or inward.
For the tutorial photographs, the raised seams are intended as a visible design feature.
Repeat Pattern
There is no complicated stitch repeat.
Every standard row is simply:
Sc in every stitch across, ch 1, turn.
How to Resize the Pattern
This is one of the most useful parts of a simple panel construction.
Make a gauge swatch first.
Suppose your gauge gives:
4 stitches per inch
4.5 rows per inch
Measure the box.
For a box measuring:
L × W × H
calculate approximately:
Long Panel Width
L × stitches per inch
Short Panel Width
W × stitches per inch
Panel Height
H × rows per inch
Add approximately 0.125–0.25 inch of ease to the length and width before calculating if you prefer a cover that slips on easily.
Then round to the nearest practical whole stitch or row.
Starting Chain
After deciding how many stitches you need:
starting chain = desired stitch count + 1
because the first single crochet is worked in the second chain from the hook.
Top Panel
Use the same stitch count as the long side.
Work enough rows for the top to match the short-side width.
Center your tissue opening by leaving the same number of stitches on each side.
Common Beginner Mistakes
1. The Panels Get Narrower
Cause: You are skipping either the first or last stitch.
Fix: Count every row. Add markers to the edge stitches until your stitch placement becomes automatic.
2. The Panels Get Wider
Cause: You may be crocheting into the turning chain as if it were a stitch.
Fix: Remember that the ch 1 does not count.
Your final stitch goes into the final single crochet from the previous row.
3. The Tissue Opening Is Off Center
Cause: The stitches on both sides of the skipped section were not counted before chaining.
Fix: Mark both boundaries before making the chain.
For the sample, leave 9 stitches on each side.
4. The Chain Opening Pulls Too Tight
Cause: The chain stitches were crocheted more tightly than your normal gauge.
Fix: Relax your grip when chaining. If necessary, make the chain bridge with a hook 0.5 mm larger and switch back afterward.
5. The Side Seams Pucker
Cause: Your joining single crochet stitches are too tight.
Fix: Undo the affected section and rejoin it with looser yarn tension.
The seam should support the corner, not shorten it.
6. The Top Panel Becomes Wavy During Assembly
Cause: Too many joining stitches are being squeezed into one section, or the top has been stretched unevenly.
Fix: Place markers at all four corners and halfway points before crocheting. Distribute small differences gradually.
7. The Cover Slides Up When a Tissue Is Pulled
A lightweight box can sometimes move with the cover.
Fix options:
- Make the cover slightly closer fitting.
- Add short crochet retaining straps across the lower corners.
- Place a small removable nonslip pad beneath the box.
Do not glue the crochet permanently to a disposable tissue box if you intend to reuse the cover.
How to Customize This Crochet Project
Change the Yarn
For a crisp modern cover, cotton is ideal.
For a softer look, try a cotton-acrylic blend.
Avoid extremely fluffy yarn if you are a beginner because fuzzy fibers can hide stitch placement around the tissue opening and seams.
Use Contrasting Seams
Crochet all five panels in cream and join them with:
- Black.
- Rust.
- Forest green.
- Dusty blue.
- Mustard.
The exposed corner seams will look intentionally outlined.
Add Stripes
Because the side panels are straightforward rectangles, you can create stripes without changing the construction.
For example:
- Rows 1–4: cream.
- Rows 5–8: sage.
- Rows 9–12: cream.
- Rows 13–16: sage.
Keep the same stripe sequence on all four walls.
Add a Decorative Border Around the Opening
After assembly, join yarn at the tissue slot and work one neat round of slip stitch around the opening.
This can visually sharpen the edge.
Use relaxed tension so the opening does not contract.
Add Surface Crochet
A simple chain-like line of surface slip stitches can decorate the front panel after assembly.
Try:
- Minimal geometric lines.
- A simple border.
- A small initial.
- A horizontal accent stripe.
Gift Ideas
A crochet tissue box cover works particularly well as:
- Housewarming gift.
- Teacher desk accessory.
- Dorm-room decor.
- New-home gift.
- Office accessory.
- Bathroom decor.
- Bedside-table accessory.
- Handmade holiday gift.
Finishing Instructions
Once all five panels are assembled, examine every seam.
Trim only after you are certain no section needs to be reopened.
Fastening Off
After the final stitch:
- Cut the yarn, leaving a 6-inch tail.
- Pull the tail completely through the active loop.
- Tighten gently.
Weaving In Ends
Thread the tail through a tapestry needle.
Weave through the dense backside of several single crochet stitches.
Change direction at least once.
Avoid weaving directly along the visible outer edge because the tail may be easier to see there.
Trim the remaining yarn close to the fabric.
Insert the Box
Feed one tissue through the crochet opening first.
Then slide the cardboard box into the cover through the open bottom.
Adjust each corner gently.
The crochet top should sit flat against the cardboard without stretching dramatically.
Washing and Care
Keep the original yarn label.
Different fibers require different washing and drying methods, so follow the instructions supplied by the yarn manufacturer rather than applying one universal washing rule. Craft Yarn Council’s care-symbol reference can help interpret common yarn-label symbols.
If the yarn can be reshaped while damp, square the corners again after washing and dry the cover in the recommended manner.
Quick Printable-Style Summary
Project: Modern rectangular crochet tissue box cover
Skill level: Beginner / Easy
Yarn: Medium-weight cotton or cotton blend
Hook: 4.5 mm
Gauge: Approximately 16 sc × 18 rows = 4 inches
Main stitch: Single crochet
Sample box: Approximately 9 × 4.75 × 3.5 inches
Long Panels — Make 2
Ch 38.
37 sc across.
Work 16 rows total.
Short Panels — Make 2
Ch 21.
20 sc across.
Work 16 rows total.
Top Panel
Ch 38.
37 sc across.
Rows 1–10: sc across.
Row 11: 9 sc, ch 19, skip 19 sts, 9 sc.
Row 12: sc across, working 19 sc into chain section.
Rows 13–22: sc across.
Assembly
Join:
- Long side to short side.
- Add second long side.
- Add second short side.
- Close final corner.
- Attach top panel evenly around upper edge.
Finishing
Fasten off.
Weave in all ends.
Insert the tissue box from the open bottom.
Pull one tissue through the top slot.
FAQ
Can a beginner crochet a tissue box cover?
Yes. A panel-based cover is particularly approachable because most of the project consists of flat rectangles made with one basic stitch.
The most challenging stages are centering the tissue opening and distributing the top evenly during assembly. Stitch markers make both tasks much easier.
What is the best yarn for a crochet tissue box cover?
Cotton and cotton-blend yarns are strong options because they provide clear stitch definition and enough structure for home-decor pieces.
Medium-weight yarn is easy for beginners to handle, but there is no requirement to use one exact fiber as long as you adjust your gauge and dimensions.
Craft Yarn Council maintains a standardized yarn-weight system that can help compare yarn categories across brands.
What size crochet hook should I use for a tissue box cover?
This sample uses 4.5 mm.
However, gauge is more important than copying the hook number. If your fabric is too loose, use a smaller hook. If it is too dense or narrow, use a larger hook.
Hook sizing systems can vary by manufacturer, which is another reason metric measurements and gauge are useful.
How do I make the pattern fit a different tissue box?
Measure the length, width and height of the actual box.
Make a gauge swatch to determine stitches and rows per inch.
Multiply those figures by the box dimensions, adding a small amount of ease to length and width when desired.
That gives you the approximate stitch and row counts for your customized panels.
Why is my crochet tissue box cover curling?
Dense single crochet frequently curls somewhat while it is still a flat rectangle.
First check that you have not accidentally decreased stitches.
If the stitch count is correct, gently flatten or block the panels before assembly. The seams and cardboard box also help shape the finished cover.
Can I make the tissue opening smaller?
Yes.
The opening does not need to contain exactly 19 chains.
For a smaller slot, leave more single crochet stitches on each side and make fewer chains.
Keep the opening centered and verify that tissues still pull through without tearing.
Can I crochet the cover in one piece instead?
Yes. Tissue box covers can also be constructed in rounds or as larger folded pieces.
The separate-panel approach used here is intentional because it gives beginners straightforward rectangles, makes sizing easy to test, and produces defined corner seams.
Conclusion
A crochet tissue box cover is a good example of how a basic stitch can become something much more polished once construction and finishing are considered carefully.
You do not need complicated texture, advanced shaping or dozens of stitch types. Five accurate rectangles, a centered chain opening and neat seams are enough to turn a disposable cardboard box into a reusable piece of crochet home decor.
If this is your first fitted crochet project, pay the most attention to your measurements rather than trying to crochet at a particular speed. Count your stitches, compare the pieces with the actual tissue box as you work, and use stitch markers generously during assembly.
Once you understand the construction, you can reuse the same method for almost any rectangular tissue box and experiment with stripes, contrasting seams, decorative borders or different yarn colors.
Save the tutorial so you can return to the resizing formula the next time you find a tissue box with slightly different dimensions.





