Tiny crochet acorns are one of those projects that look much more complicated than they really are. Once you understand how a small stuffed shape is built in rounds, the project becomes wonderfully repetitive: crochet a little nut, add its textured cap, make a leaf, and repeat until you have enough pieces to fill your garland.
This crochet acorn garland pattern is designed as a confident-beginner project. Instead of asking you to manage several complicated textures at once, the acorn body and cap are made separately. That gives you plenty of time to check the stuffing, correct the shape, and position the cap neatly before sewing anything permanently.
The tutorial also includes a simple one-round leaf and an adjustable crochet chain, so you can make a short garland for a shelf or a longer version for a fireplace mantel, doorway, bookcase, fall party table, or Thanksgiving display.
The sample project uses five acorns and six leaves, but there is no fixed finished length. Once you know the basic pieces, you can continue adding motifs until the garland fits your space.
What You’ll Learn
- How to crochet a small stuffed acorn in continuous rounds
- How to increase and decrease without losing your stitch count
- How to stuff small crochet pieces without creating lumps
- How to crochet a separate textured acorn cap
- How to make a simple crochet stem
- How to make an easy one-round autumn leaf
- How to connect motifs directly to a crochet chain
- How to adjust the spacing and total garland length
- How to finish the project neatly so both the front and back look tidy
Materials You’ll Need
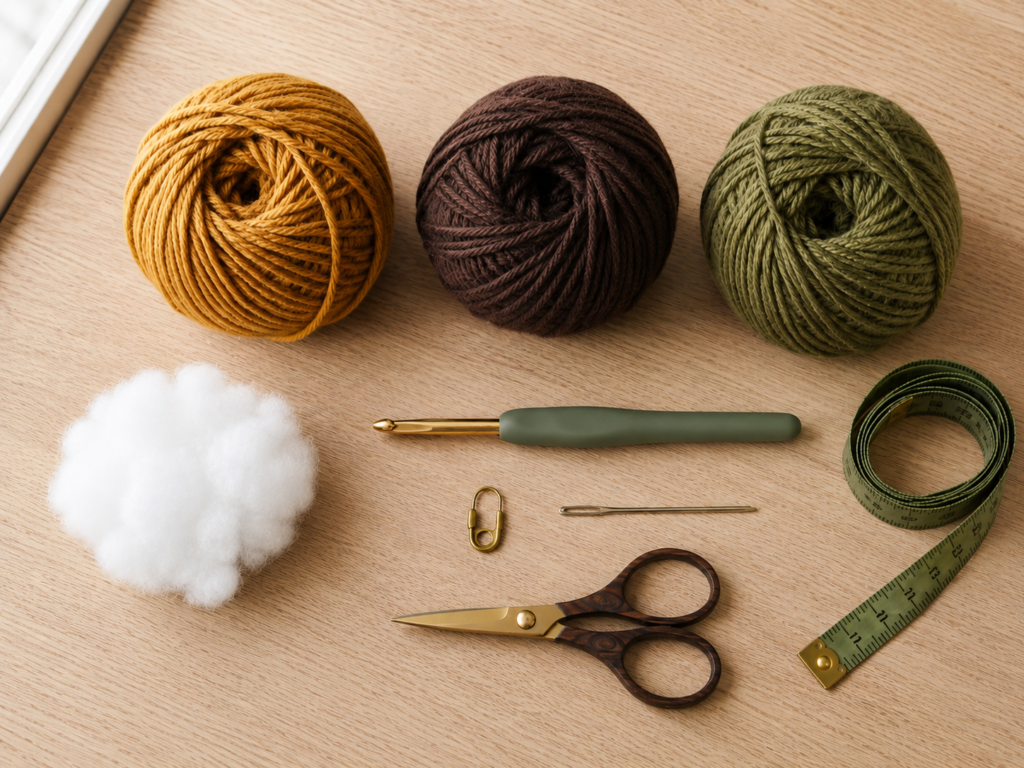
For one five-acorn garland, gather:
- Medium weight #4 smooth yarn in golden ochre for the acorn bodies
- Medium weight #4 yarn in deep cocoa brown for the caps and stems
- Medium weight #4 yarn in moss green for the leaves and garland cord
- 4.0 mm (G/6) crochet hook
- Polyester fiberfill
- One locking stitch marker
- Blunt tapestry needle
- Scissors
- Measuring tape
- Optional pins for checking motif spacing before assembly
A smooth cotton-acrylic blend is especially useful for a first attempt because the stitches remain easy to see. Pure acrylic also works well. If you use cotton, expect a slightly firmer and more structured acorn.
The Craft Yarn Council’s yarn-weight system is useful when comparing yarn substitutions, while its hook chart notes that metric hook measurements are the most dependable way to compare sizes across manufacturers.
Crochet Abbreviations Used
This tutorial uses US crochet terminology.
- ch = chain
- sc = single crochet
- hdc = half double crochet
- dc = double crochet
- sl st = slip stitch
- st/sts = stitch/stitches
- rep = repeat
- inc = work 2 single crochet stitches in the same stitch
- dec = single crochet 2 stitches together
- BLO = back loop only
- rnd = round
- MR = magic ring
The Craft Yarn Council maintains a standardized US crochet abbreviation list if you need to check unfamiliar terminology.
Before You Start
Gauge and tension
Exact gauge is not critical for a decorative garland. What matters is creating fabric dense enough that the fiberfill does not show between stitches.
If you can easily see stuffing through your single crochet fabric, try a 3.5 mm hook. If the work feels painfully tight and your hook cannot enter the stitches comfortably, move up to 4.5 mm.
Do not intentionally crochet as tightly as possible. Consistent, moderately firm tension is better than fighting every stitch.
Count every round
The acorns are small enough that one accidental increase can noticeably change their shape.
Move your stitch marker to the first stitch of every new round. When a round should contain 24 stitches, stop and count before beginning the next one.
Correcting a count immediately is far easier than discovering the problem four rounds later.
Continuous rounds
The acorn body is worked in a spiral. Do not slip stitch to join the rounds and do not chain one at the beginning of each new round.
The cap is also worked from the center outward.
Right side and wrong side
Keep the smooth front of your single crochet stitches facing outward on the acorn body.
If the fabric begins curling with the wrong side facing outside, gently turn the little cup right-side-out before adding stuffing.
Choose your colors before making all the motifs
Traditional brown and tan are lovely, but an acorn garland is an easy place to experiment.
Try rust, pumpkin orange, mustard, olive, burgundy, cream, or muted sage.
For the cleanest finished garland, keep one cap color and one cord color consistent, then vary only the acorn bodies.
Step-by-Step Crochet Tutorial
Step 1: Crochet the Top of the Acorn Body
With golden ochre yarn, make a magic ring.
Round 1: Work 6 sc into the magic ring. Do not join. Place the marker in the first stitch. (6 sts)
Pull the magic ring closed.
Round 2: Inc in every stitch around. (12 sts)
Round 3: Sc in next st, inc in next st. Repeat around. (18 sts)
Round 4: Sc in next 2 sts, inc in next st. Repeat around. (24 sts)
You now have the broad top of the acorn body. It may look more like a small shallow bowl than an acorn. That is correct.
Beginner tip: Put the work on the table after Round 4. If one side is dramatically higher than the other, count your stitches before continuing.
Common mistake to avoid: Do not work into the stitch occupied by the marker twice. Remove the marker, work the stitch normally, and replace the marker in the first stitch of the new round.
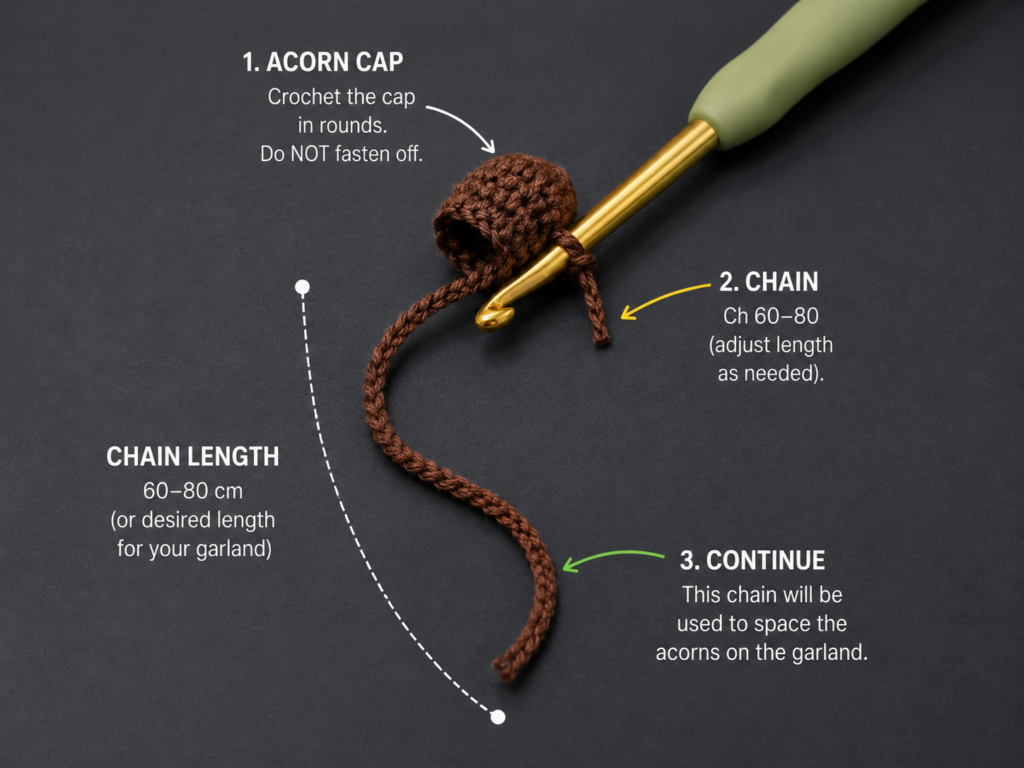
Step 2: Build the Acorn Body and Shape the Point
Continue with golden ochre.
Rounds 5–7: Sc in each stitch around. (24 sts each round)
These three even rounds create the rounded middle.
Round 8: Sc in next 2 sts, dec over next 2 sts. Repeat around. (18 sts)
Round 9: Sc in each stitch around. (18 sts)
Round 10: Sc in next st, dec over next 2 sts. Repeat around. (12 sts)
Now begin stuffing.
Use several small pinches of fiberfill instead of one large wad. Push the first pieces upward toward the broad top, then gradually fill the center.
The acorn should feel springy and three-dimensional, not rock hard.
Round 11: Dec around. (6 sts)
Fasten off, leaving a 15 cm/6 in tail.
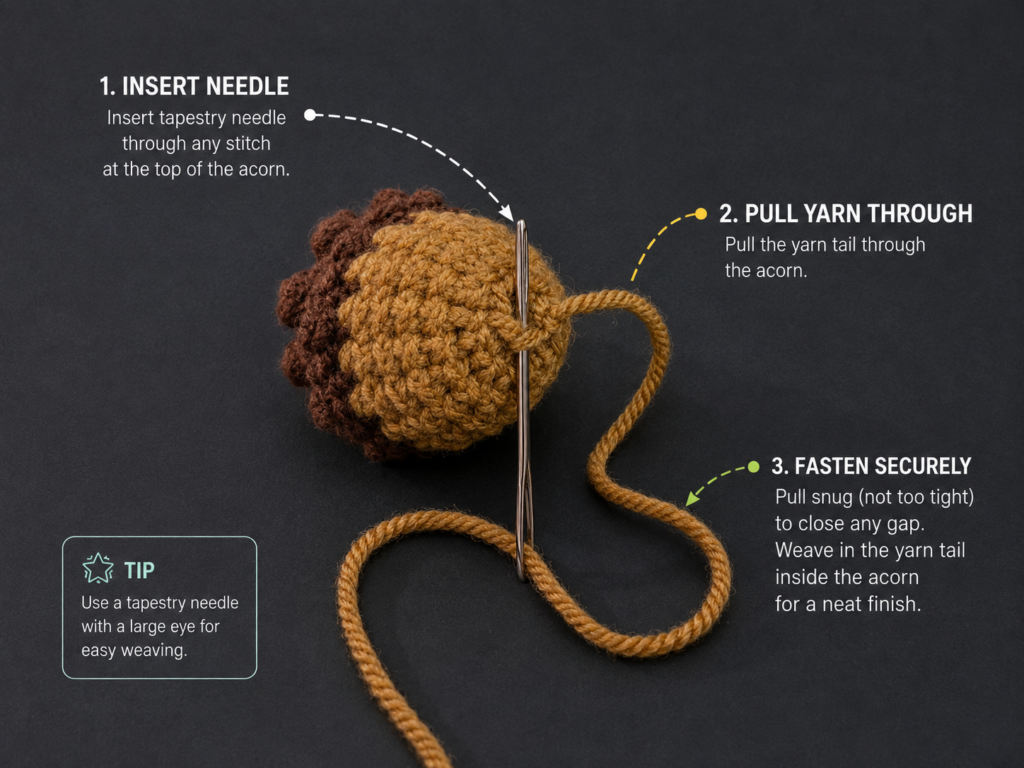
Thread the tail onto your tapestry needle. Pass it through the front loops of the remaining six stitches and pull gently to close the opening.
Before hiding the yarn tail, send the needle upward through the center of the acorn and back toward the pointed end. A gentle tug can help emphasize the natural acorn taper.
Do not pull so tightly that the body becomes dented.
Beginner tip: Roll the stuffed acorn gently between your palms after closing it. This distributes small lumps of fiberfill.
Common mistake to avoid: Overstuffing creates large gaps between stitches. If the stuffing is already pushing through the fabric before the final round, remove a small amount.
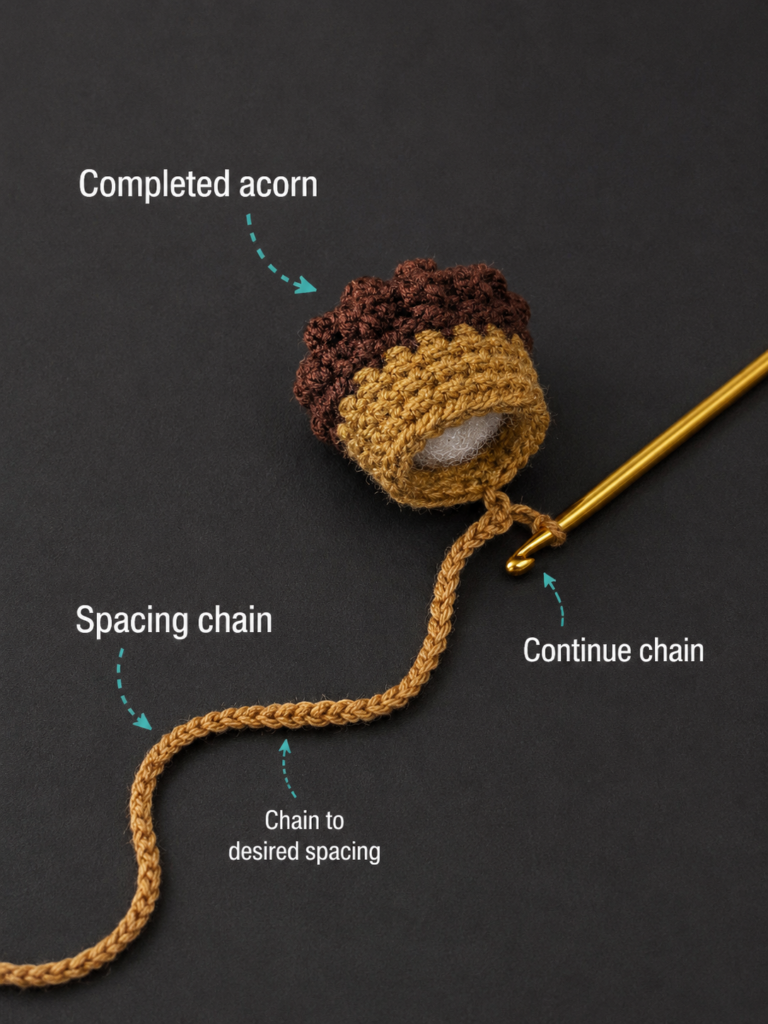
Step 3: Crochet the Acorn Cap
Change to deep cocoa brown yarn.
Make a magic ring.
Round 1: Work 6 sc into MR. (6 sts)
Round 2: Inc around. (12 sts)
Round 3: Sc in next st, inc in next st. Repeat around. (18 sts)
Round 4: Sc in next 2 sts, inc in next st. Repeat around. (24 sts)
Round 5: Working in the BLO, sc in each stitch around. (24 sts)
Working one round through the back loops encourages the cap to bend downward instead of remaining completely flat.
Round 6: Sc around normally. (24 sts)
For a subtle woodland texture, finish the edge with:
Round 7: Sl st in next st, hdc in next st. Repeat around. Join with sl st and fasten off, leaving a long sewing tail.
The alternating stitch heights give the lower edge a slightly irregular texture without introducing a difficult bobble stitch.
Add the stem
Insert your hook through the center of the cap.
Pull up a loop of cocoa yarn.
Ch 4.
Starting in the second chain from your hook, sl st in each of the next 3 chains.
Sl st back into the center of the cap and fasten off.
Weave the short stem ends securely underneath the cap.
Beginner tip: Place the unfinished cap over the acorn before fastening the sewing tail. It should cover roughly the upper quarter to third of the body.
Common mistake to avoid: If the cap looks like a large floppy hat, your tension may be too loose. Try the cap again with a hook 0.5 mm smaller.
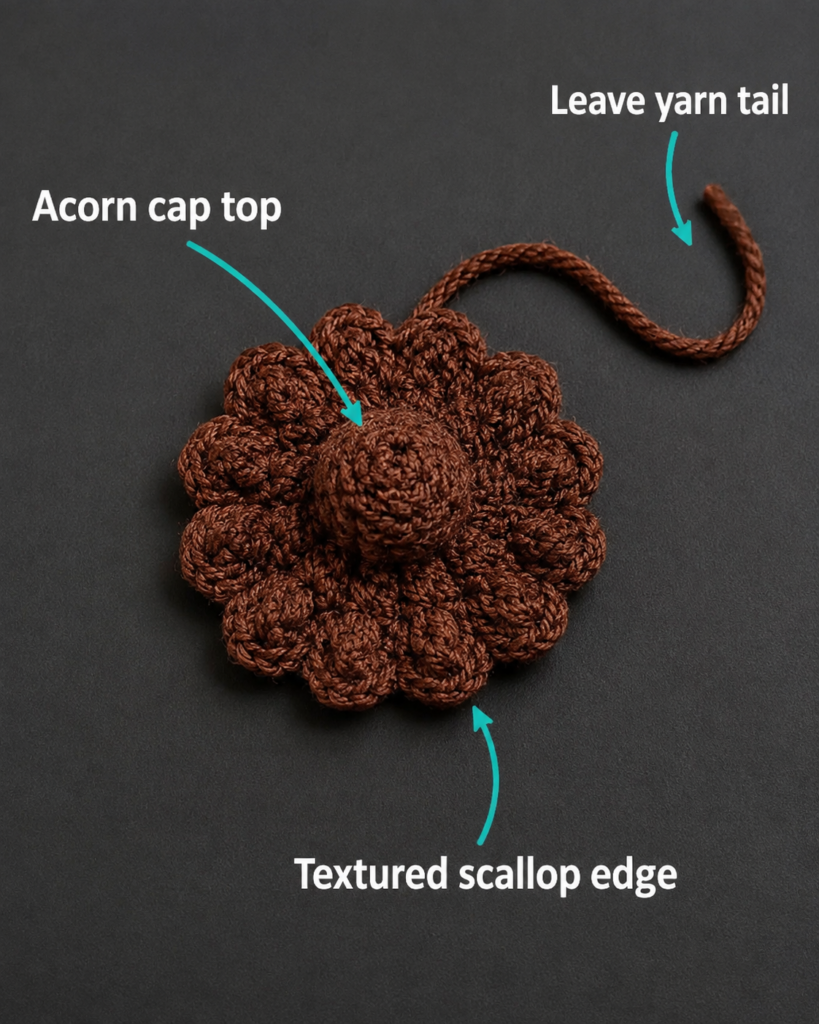
Step 4: Attach the Cap to the Acorn
Place the cap over the broad top of the golden body.
Turn the acorn slowly in your hand and check the cap from every side. The lower edge should sit at approximately the same level around the body.
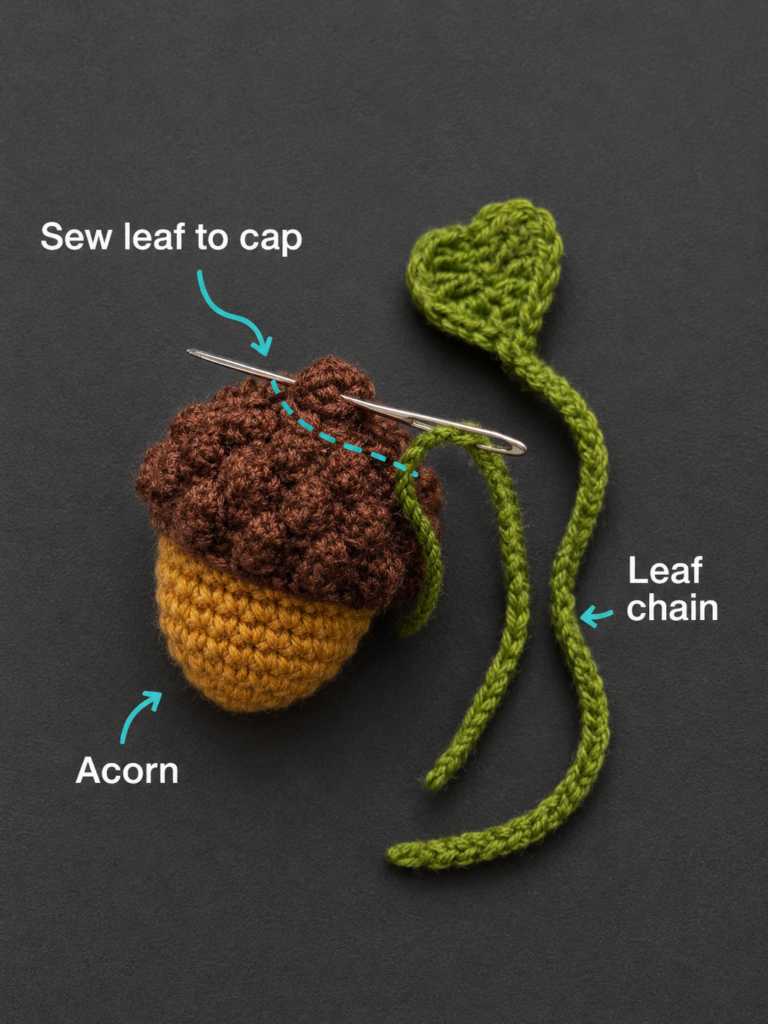
Thread the long cocoa yarn tail onto the tapestry needle.
Pass the needle through one stitch along the edge of the cap and then through the nearby acorn-body fabric.
Move to the next cap stitch and repeat.
Keep the sewing stitches small.
Every few stitches, stop and check that the cap has not shifted to one side.
When you reach the beginning, knot the yarn securely underneath the cap and weave the tail through the stuffed body before trimming it.
Beginner tip: Position the cap with two temporary locking stitch markers before sewing. One marker on opposite sides prevents the cap from sliding while you make the first few stitches.
Common mistake to avoid: Do not pull each sewing stitch as tightly as possible. Excess tension can make the cap edge pucker.
Step 5: Crochet the Simple Leaves
With moss green yarn, ch 7.
Starting in the second chain from the hook, work:
- Sl st in next ch
- Sc in next ch
- Hdc in next ch
- Dc in next ch
- Hdc in next ch
- In the final chain, work sc, ch 2, sc
Do not turn the work.
Rotate the foundation chain so you can crochet along the unused side of those same chain stitches.
Working back toward the beginning:
- Hdc in next chain space
- Dc in next
- Hdc in next
- Sc in next
- Sl st in the final available chain space
Sl st close to the starting point and fasten off.
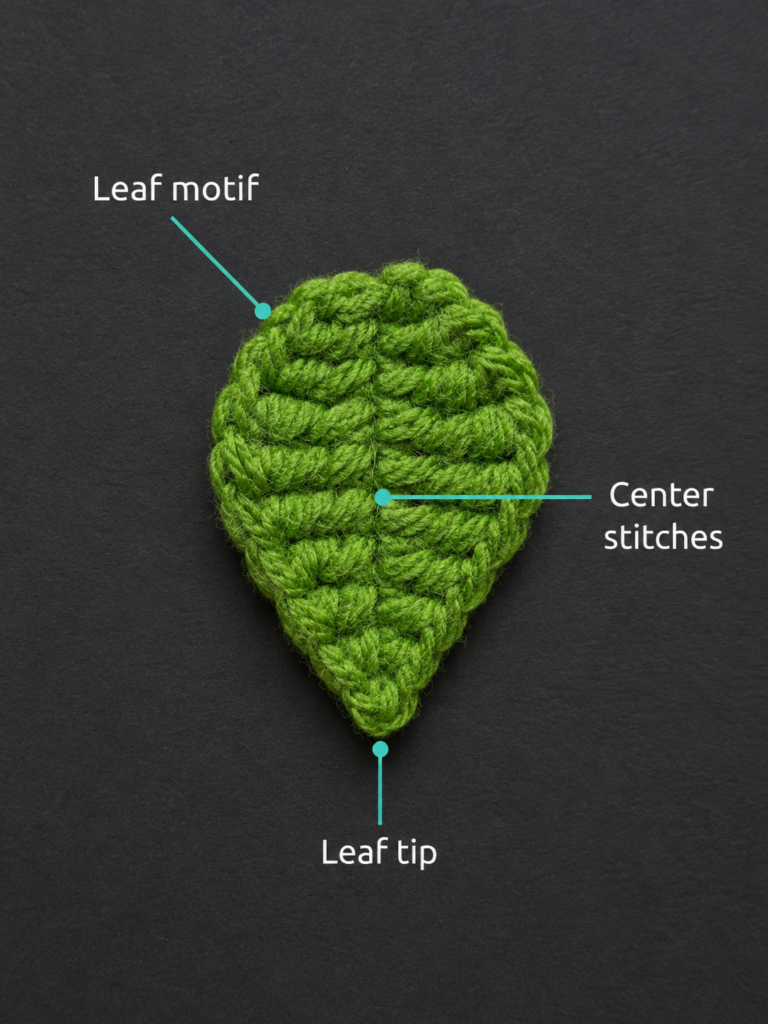
Gently pull the ch-2 point with your fingers to define the leaf tip.
Make six leaves.
Beginner tip: The stitches deliberately rise from short to tall and then become short again. That gradual change in height creates the leaf shape.
Common mistake to avoid: Do not accidentally rotate and crochet around the entire leaf like another full round. You are simply working down one side of the foundation chain and back along the opposite side.
Step 6: Begin the Garland Cord
Now switch to moss green yarn.
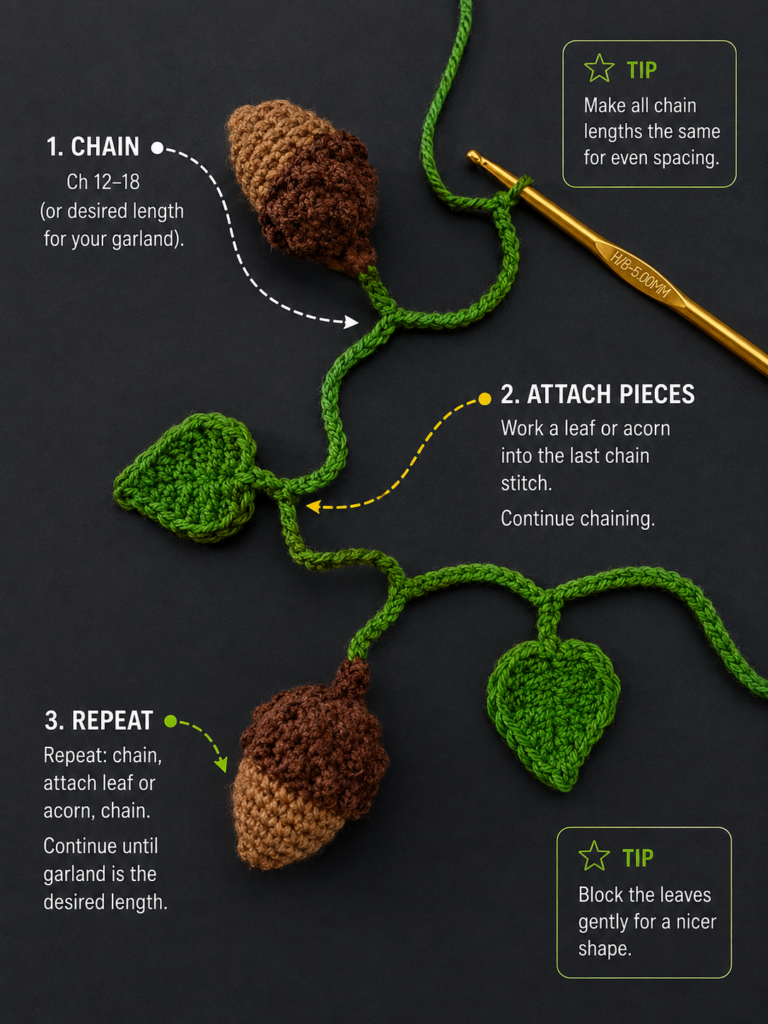
Ch 12.
Sl st into the first chain to make a small hanging loop.
Ch 10.
Before attaching anything, lay the chain flat.
The chain should be relaxed enough to curve naturally. If every chain is extremely tight, the finished cord may twist.
You will place approximately 14 chains between motifs in the sample garland, but this number is completely adjustable.
For wider spacing, use 16–20 chains.
For a compact garland, try 10–12 chains.
Beginner tip: Make ten chains, put the work down, and compare those ten chains with your measuring tape. This gives you an easy estimate of how much length each spacing section adds.
Common mistake to avoid: Do not stretch the chain while measuring it. Measure it relaxed on the table.
Step 7: Attach the First Leaf
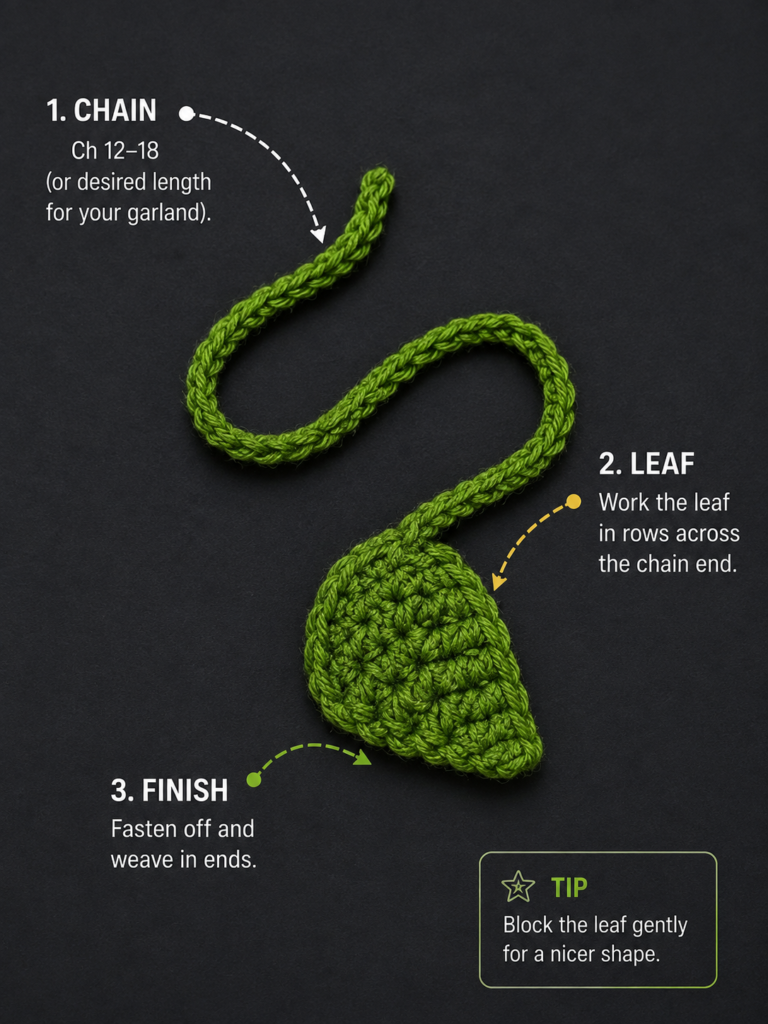
After the first ten chains, pick up one leaf.
Identify a strong stitch near the upper rounded end opposite the point.
With the green loop still on your crochet hook, insert your hook through that stitch.
Yarn over with the working green yarn.
Pull the yarn through the leaf stitch and immediately through the loop already on your hook.
You have effectively made a slip-stitch attachment.
Continue with ch 14.
The leaf should hang freely beneath the chain rather than being trapped tightly against it.
If the leaf faces backward, rotate it gently after the attachment. Because only one point is secured, the motif can move naturally.
Optional reinforcement
If your garland will be handled frequently, thread a short piece of moss green yarn onto your tapestry needle and place one small reinforcing stitch through the attachment point.
This is usually unnecessary for a decorative wall garland but useful for seasonal decorations that are packed away and reused every year.
Step 8: Add the Acorns and Continue the Garland
After the first leaf and 14 chains, pick up one completed acorn.
Insert the hook through a secure stitch near the base of the brown stem.
Do not pierce through the fiberfill-filled body.
Yarn over with moss green.
Pull the loop through the stem stitch and through the loop already on the hook, making another slip-stitch attachment.
Ch 14.
Attach the next leaf.
Continue alternating:
leaf → acorn → leaf → acorn
For the five-acorn sample, use:
Leaf – Acorn – Leaf – Acorn – Leaf – Acorn – Leaf – Acorn – Leaf – Acorn – Leaf
This gives you five acorns and six leaves, placing a leaf at each outer edge of the motif section.
After attaching each motif, place the growing garland flat on your table before continuing.
This simple habit catches spacing problems quickly.
If one gap looks much shorter than the others, count the chains in that section.
Beginner tip: Hold the motif in your non-dominant hand while pulling the attachment loop through. This prevents the acorn’s weight from stretching the active stitch.
Common mistake to avoid: Do not attach through only a loose yarn tail. Your hook must pass through an actual crochet stitch.
Step 9: Finish the Second Hanging Loop
After attaching the final leaf, ch 10.
Now ch another 12 stitches for the hanging loop.
Sl st into the first of those 12 loop chains.
Fasten off.
Weave the green tail back through several chain stitches before trimming it.
Lay the entire garland flat and adjust every motif so the acorns hang below the cord.
Your crochet acorn garland is finished.
Pattern Notes or Stitch Notes
Turning chains: No turning chain is used for the acorn body because it is crocheted continuously in a spiral.
Stitch count: The widest acorn-body round contains 24 stitches. The final body round reduces to six stitches before closing.
Repeat: Make five acorns and six leaves for the sample, or repeat the motifs as many times as required.
Round marker: The stitch marker should always identify the first stitch of the current spiral round.
Right side: Keep the front of the single crochet fabric facing outward.
Garland spacing: The sample uses approximately 14 chains between motifs. This is a design choice, not a structural requirement.
Size adjustment: More chains increase the spacing; additional acorn/leaf pairs increase the overall length.
Finished size: With medium #4 yarn and a 4 mm hook, expect each acorn to be roughly 2½–3 inches tall depending on tension and stuffing. The complete garland length varies with chain tension and motif count.
Common Beginner Mistakes
1. Losing the beginning of the round
Problem: You finish with 23 or 25 stitches instead of 24.
Fix: Move the locking stitch marker immediately after making the first stitch of every round. Count before beginning a decrease round.
2. Stuffing the acorn too firmly
Problem: White fiberfill becomes visible between the stitches.
Fix: Remove a small amount of stuffing. Small decorative amigurumi does not need to be packed as tightly as a firm toy.
3. Creating holes with decreases
Problem: Large gaps appear around the pointed end.
Fix: Use an invisible decrease if you know it, or simply keep the working loop slightly smaller while making standard decreases.
4. Making the cap too large
Problem: The brown cap covers half the acorn.
Fix: Try a smaller hook for the cap, or omit the final plain single-crochet round before the textured edge.
5. Sewing the cap off-center
Problem: More golden body shows on one side.
Fix: Pin opposite sides of the cap in place with stitch markers before sewing.
6. Twisting the leaf
Problem: It curls into a spiral instead of lying like a leaf.
Fix: Confirm that you are working along one side of the starting chain and returning along the opposite side. Do not add an unintended second round.
7. Uneven garland spacing
Problem: Some motifs appear crowded while others are far apart.
Fix: Choose one chain number—such as 14—and count carefully between every attachment.
How to Customize This Crochet Project
Change the acorn colors
Try five differently colored acorn bodies:
- Burnt orange
- Mustard
- Rust
- Olive
- Cream
Keep every cap dark brown to unify the palette.
For a modern neutral garland, use oatmeal, camel and warm beige bodies with espresso caps.
Change the yarn
Using DK yarn with a smaller hook creates daintier acorns.
Bulky yarn produces oversized statement acorns for a fireplace or large fall wreath.
When changing yarn weight, choose a hook that produces firm fabric rather than relying only on the recommended hook printed on the yarn label.
Change the size
For a longer garland, repeat another leaf-and-acorn pair.
For a short shelf garland, make three acorns and four leaves.
For a doorway, make seven to nine acorns and increase the chain sections between them.
Add a decorative edge
For more texture, replace the plain lower cap edge with tiny picots.
You can also surface-slip-stitch around the cap using a slightly lighter brown.
Add leaf variety
Use several autumn shades instead of moss green.
A sequence of olive, mustard, burnt orange and burgundy leaves creates a more colorful woodland look.
Add other motifs
Once you understand the connection method, you can alternate acorns with pumpkins, mushrooms, oak leaves, maple leaves or small crochet berries.
Gift ideas and uses
The individual acorns can also become:
- Gift-wrap ornaments
- Napkin-ring decorations
- Fall wreath embellishments
- Bag charms
- Table-place decorations
- Bowl fillers
- Thanksgiving place settings
- Autumn nursery decor
If the garland will be displayed around children or pets, keep it securely out of reach. Long cords, detachable motifs and loose fibers make decorative garlands unsuitable as infant toys.
Finishing Instructions
Inspect every acorn before hanging the garland.
Trim visible yarn tails only after they have been woven securely through several stitches.
Shape each acorn gently with your hands.
The stuffed acorns normally do not need blocking.
The leaves may benefit from light blocking if they curl.
For cotton leaves, lightly dampen them, reshape them on a towel and allow them to dry flat.
For acrylic yarn, avoid direct high heat. Gentle steaming from a safe distance may relax the motifs, but never press a hot iron directly onto synthetic yarn.
Always follow the care instructions supplied with the yarn. The Craft Yarn Council also provides standardized care-symbol information that can help interpret yarn-label care directions.
Quick Printable-Style Summary
Skill level: Confident beginner
Yarn: Medium #4 yarn in golden ochre, cocoa brown and moss green
Hook: 4.0 mm
Other materials: Fiberfill, stitch marker, tapestry needle, scissors
Main stitches: Ch, sl st, sc, hdc, dc, inc, dec, BLO
Starting method: Magic ring for both acorn body and cap
Acorn body: Increase from 6 to 24 stitches, crochet even rounds, decrease gradually to 6, stuff and close.
Cap: Crochet a separate circular brown cap to 24 stitches, shape it with a BLO round, add a textured edge and short stem, then sew it onto the body.
Leaf: Work short-to-tall stitches along both sides of a seven-chain foundation.
Sample quantity: 5 acorns + 6 leaves
Garland repeat: Attach motifs to a moss green chain with approximately 14 chains between motifs.
Finishing: Add hanging loops, weave in every end, reshape the acorns and lightly block leaves if necessary.
FAQ
Is this crochet acorn garland pattern suitable for beginners?
Yes, it is designed for a confident beginner who already knows basic single crochet. The most important new skills are working in continuous rounds, increasing, decreasing and crocheting on both sides of a foundation chain.
Can I crochet the acorns without a magic ring?
Yes. Chain 2 and work the first round into the second chain from the hook instead. You may have a slightly larger opening at the center, but the cap will cover the top of the body.
What yarn is best for crochet acorns?
Smooth cotton, acrylic or cotton-acrylic yarn works well. Avoid extremely fuzzy yarn for your first acorn because it makes individual stitches difficult to identify.
How much yarn does an acorn garland need?
It is an excellent scrap-yarn project. Exact yardage depends heavily on yarn thickness, motif number and garland length. Small leftover balls are usually enough for several individual motifs, while the garland cord requires the longest uninterrupted strand.
How do I make the garland longer?
Add more chain stitches between motifs, add additional acorn-and-leaf pairs, or do both. It is easiest to determine the finished length by laying the unfinished chain across the actual mantel, wall or shelf while you work.
Do I have to make the leaves?
No. An acorn-only garland works perfectly well. Attach one acorn at each regular interval and omit the leaf steps entirely.
Can I use real twine instead of a crochet chain?
Yes. Make all the acorns separately, cut a suitable length of cotton or jute twine and sew or tie each acorn securely to it. A crochet chain gives you a fully crocheted result, while natural twine produces a more rustic look.
Conclusion
Once the first acorn is finished, the rest of this project becomes an easy rhythm: crochet a body, add a cap, make another leaf, and watch the pile of tiny woodland pieces grow.
The biggest advantage of this crochet acorn garland pattern is that nothing locks you into one finished size. Three acorns can decorate a small shelf. Five work well as a compact seasonal garland. A longer row of seven, nine or more can stretch across a mantel or autumn party backdrop.
Keep the first version simple and concentrate on consistent stuffing and even spacing. After that, experiment with autumn colors, different leaf shades, thicker yarn or additional woodland motifs.
Save the pattern for your fall crochet collection, especially if you enjoy quick seasonal projects that can be made from leftover yarn.





