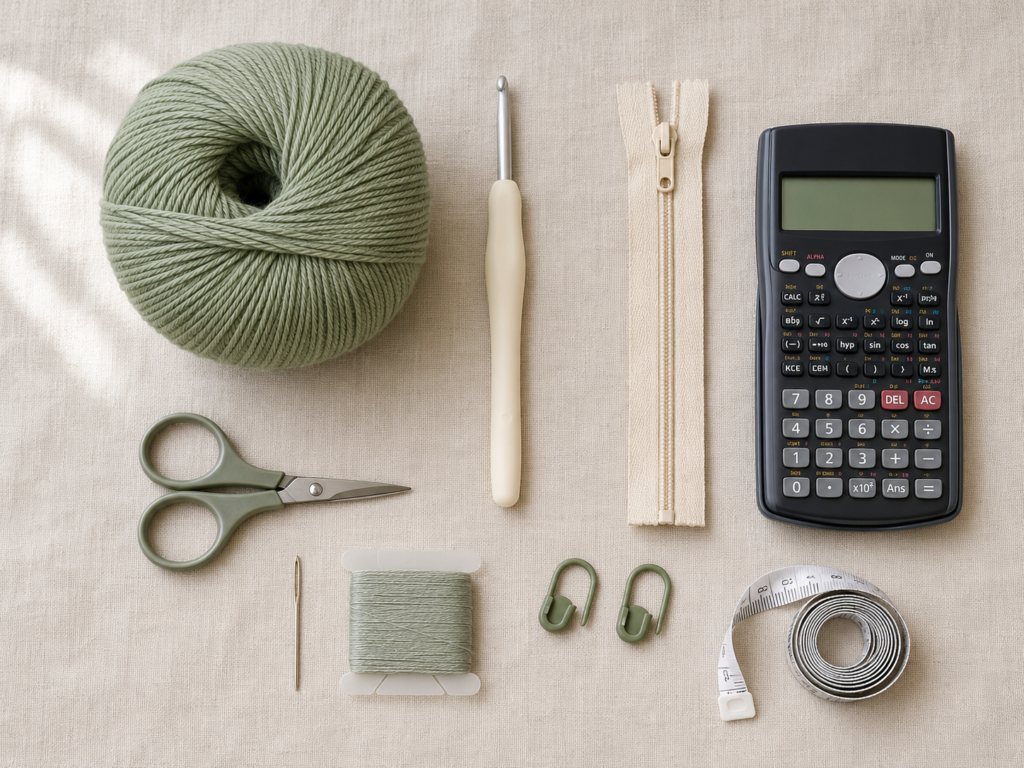
A calculator is one of those school or desk essentials that gets tossed into backpacks beside pens, chargers, keys, notebooks, and just about everything else. A simple crochet case gives it its own soft compartment—and it is also a useful small project for practicing neat single crochet, measuring, seaming, and basic zipper installation.
This crochet calculator case pattern is designed differently from patterns that force you to own a specific calculator model. You will measure the calculator you actually use, crochet two simple rectangles to match it, install a zipper, and join the panels.
That makes the tutorial suitable for many scientific, school, or graphing calculators.
The sample construction uses dense single crochet because it creates a relatively firm fabric without requiring advanced stitches. The zipper keeps the calculator from slipping out, while the customizable panel dimensions mean you do not have to worry if your calculator is slightly wider, longer, or thicker than someone else’s.
This is also a useful first zippered crochet project. There is no complicated shaping, color chart, magic ring, or advanced stitch repeat.
What You’ll Learn
By the end of the tutorial, you will know how to:
- measure a calculator for a custom crochet case;
- determine the width of your starting chain;
- crochet straight single-crochet panels;
- count edge stitches without accidentally increasing;
- make two panels that match;
- position a zipper against crochet fabric;
- hand-sew a zipper securely;
- join two crochet layers using single crochet;
- prevent the panels from shifting while seaming;
- weave in ends neatly;
- adjust the pattern for another calculator or small electronic device.
Materials You’ll Need
For the sample calculator case, gather:
- approximately 70–100 yards of #4 medium/worsted cotton or cotton-blend yarn;
- 4.0 mm crochet hook;
- calculator you want the case to fit;
- nylon zipper at least slightly longer than the finished opening;
- matching sewing thread;
- regular sewing needle;
- tapestry/yarn needle;
- scissors;
- 2–4 locking stitch markers;
- flexible measuring tape or ruler;
- optional fabric for a lining;
- optional small tassel or charm for the zipper pull.
A smooth cotton yarn is especially useful here because the stitches remain easy to see and the fabric tends to feel more structured than a very fuzzy yarn. Yarn categories and recommended hook ranges are standardized by the Craft Yarn Council, although your project gauge should still determine the final hook choice.
Crochet Abbreviations Used
This tutorial uses US crochet terminology.
- ch = chain
- sc = single crochet
- sl st = slip stitch
- st/sts = stitch/stitches
- rep = repeat
- RS = right side
- WS = wrong side
The Craft Yarn Council lists these as standard crochet abbreviations and also provides the corresponding terminology differences between US and UK patterns. In UK terminology, US single crochet is called double crochet.
Before You Start
Measure Your Calculator
Do not begin by copying a foundation-chain number from somebody else’s calculator.
Measure yours.
Record:
- Width: side to side.
- Height: bottom to top.
- Thickness: front to back.
For this tutorial, imagine a calculator measuring approximately:
- 3¼ in wide;
- 6½ in tall;
- ¾ in thick.
These numbers are only a sample. Your calculator determines your actual size.
Calculate the Panel Size
For a flat two-panel case, a useful starting target is:
Panel width = calculator width + calculator thickness + approximately ¼ in ease
Panel height = calculator height + about half the calculator thickness + approximately ¼–½ in ease
For the sample dimensions:
- target panel width ≈ 4¼ in;
- target panel height ≈ 7¼ in.
Do not worry about getting the measurement to the millimeter. Crochet stretches slightly.
What matters is that the calculator slides in without being forced and does not have so much extra room that it moves around freely.
Gauge
For the sample version, aim for approximately:
18 sc × 20 rows = 4 in / 10 cm
Your exact gauge may differ.
Gauge matters here mainly because it determines the physical size of the case. The Craft Yarn Council recommends checking gauge because changing hook size changes the size of the finished crochet fabric.
If your fabric is too loose, try a smaller hook.
If it feels extremely stiff and difficult to work, go up 0.5 mm.
How to Count Stitches
Look for the little V shapes across the top of your row.
Each V is one stitch.
When you work the next row, place one single crochet in each stitch. Do not accidentally crochet into the turning chain unless your pattern specifically tells you to do so.
For this project, the turning chain does not count as a stitch.
Keep Your Edges Straight
The most common cause of slanted panel edges is accidentally adding or losing one stitch.
Count periodically.
If your first row contains 19 sc, every ordinary row should still contain 19 sc.
How to Avoid Curling
A little curling is normal, especially during the first few rows.
If the panel rolls tightly:
- loosen your foundation chain slightly;
- check that you are not missing stitches;
- avoid pulling your turning chain extremely tight;
- consider using a hook 0.5 mm larger for the starting chain only.
Beginner Note
The fit is more important than the exact sample stitch count.
The easiest method is to crochet until your work reaches the required measurement, rather than forcing your calculator into somebody else’s dimensions.
Step-by-Step Crochet Tutorial
Step 1: Make the Foundation Chain
For the sample case:
Ch 20.
This should produce 19 single crochet stitches after Row 1.
Before continuing, place the chain across the width of your calculator.
Do not stretch it.
You want the eventual panel to be wider than the calculator itself because the case also has to accommodate the calculator’s thickness and the side seam.
If your chain is clearly too short, add chains.
If it extends far beyond the required target width, remove some.
Beginner tip:
Measure twice before crocheting thirty rows. Correcting the width now takes seconds; correcting it after both panels are finished means unraveling much more work.
Common mistake to avoid:
Do not pull your chain extremely tight. A tight foundation edge can make the bottom of the panel narrower than the rest.
Step 2: Crochet the First Rectangle
Work into the second chain from your hook.
Row 1: Sc in each chain across. You should have 19 sc for the sample.
Row 2: Ch 1, turn. Sc in the first st and in every st across.
Repeat Row 2 until the panel reaches your calculated height.
For the sample gauge, approximately 36 rows total should produce a panel near 7¼ inches tall, but measurement is more important than row number.
Lay the calculator on top of the fabric occasionally.
The crochet rectangle should extend beyond the device enough to accommodate its thickness and seams.
Beginner tip:
Place a stitch marker into the first stitch of the row if you regularly lose track of your edges.
Common mistake to avoid:
Do not put two stitches into the first stitch just because the turning chain is beside it. The ch-1 is only there to bring your hook to working height.
Step 3: Check the Final Stitch of Every Row
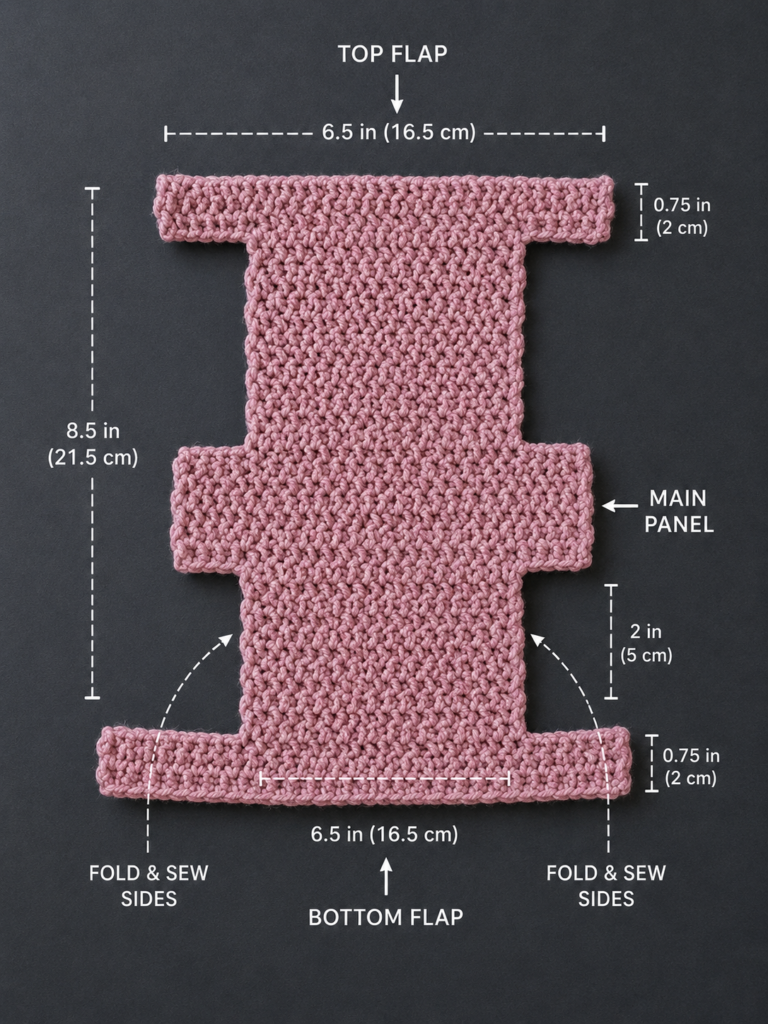
Before making the second panel, inspect your first rectangle.
Count your stitches.
If you began with 19 sc, you should still have 19.
Look closely at the side edges. They should form fairly straight vertical lines.
A small amount of variation is perfectly usable. A calculator case does not require garment-level shaping accuracy.
However, if one edge narrows noticeably, you probably missed the final stitch in several rows.
If it grows wider, you may have accidentally worked into the turning chain or placed two stitches in the first stitch.
Beginner tip:
After every five rows, stop and count.
That small habit is much faster than discovering a problem near the end.
Step 4: Crochet the Second Matching Panel
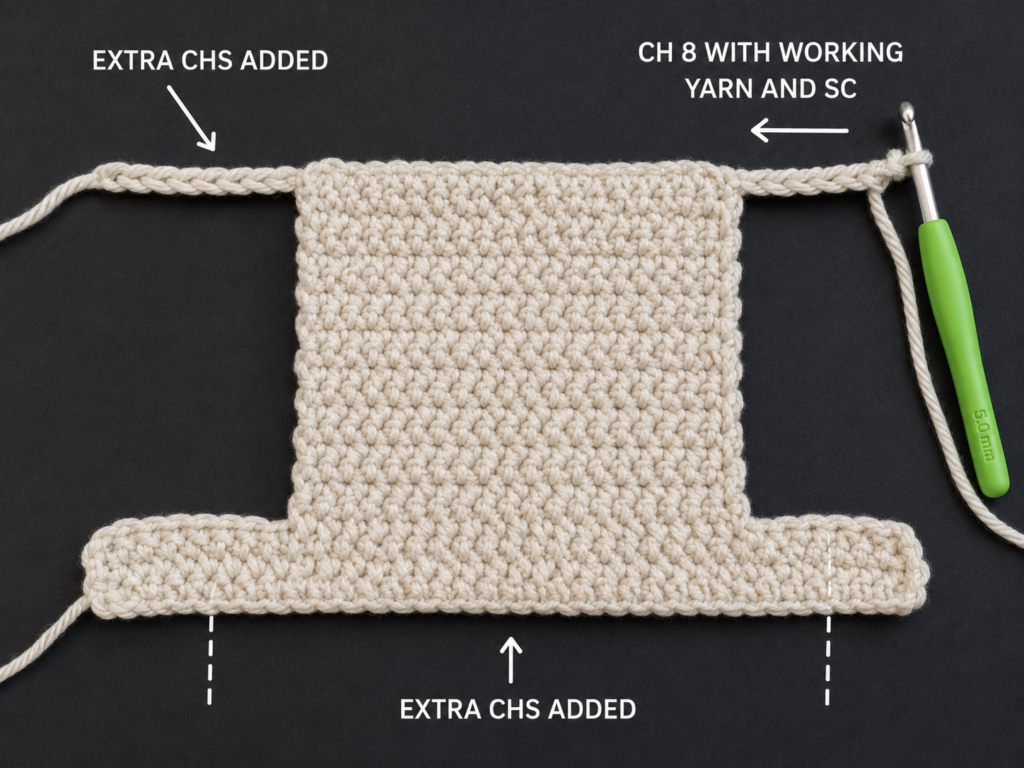
Fasten off the first rectangle, leaving a tail long enough to weave in.
Crochet a second rectangle using exactly the same foundation width and approximately the same number of rows.
When the second panel is complete, lay the two pieces directly on top of each other.
Align:
- top edge;
- bottom edge;
- both side edges;
- corners.
If one panel is one row taller, that is usually easy to correct by removing or adding a row.
If one is substantially wider, recount your stitches before continuing.
Next, place the calculator between the two rectangles.
Bring the side edges toward one another.
The fabric should surround the calculator without excessive stretching.
Do not seam yet.
Beginner tip:
This is your most useful fit check.
It is much easier to modify a flat panel than a completed zippered pouch.
Common mistake to avoid:
Do not assume that matching stitch counts automatically mean matching physical size. Tension can change between sessions, so compare the actual pieces.
Step 5: Position and Sew the Zipper
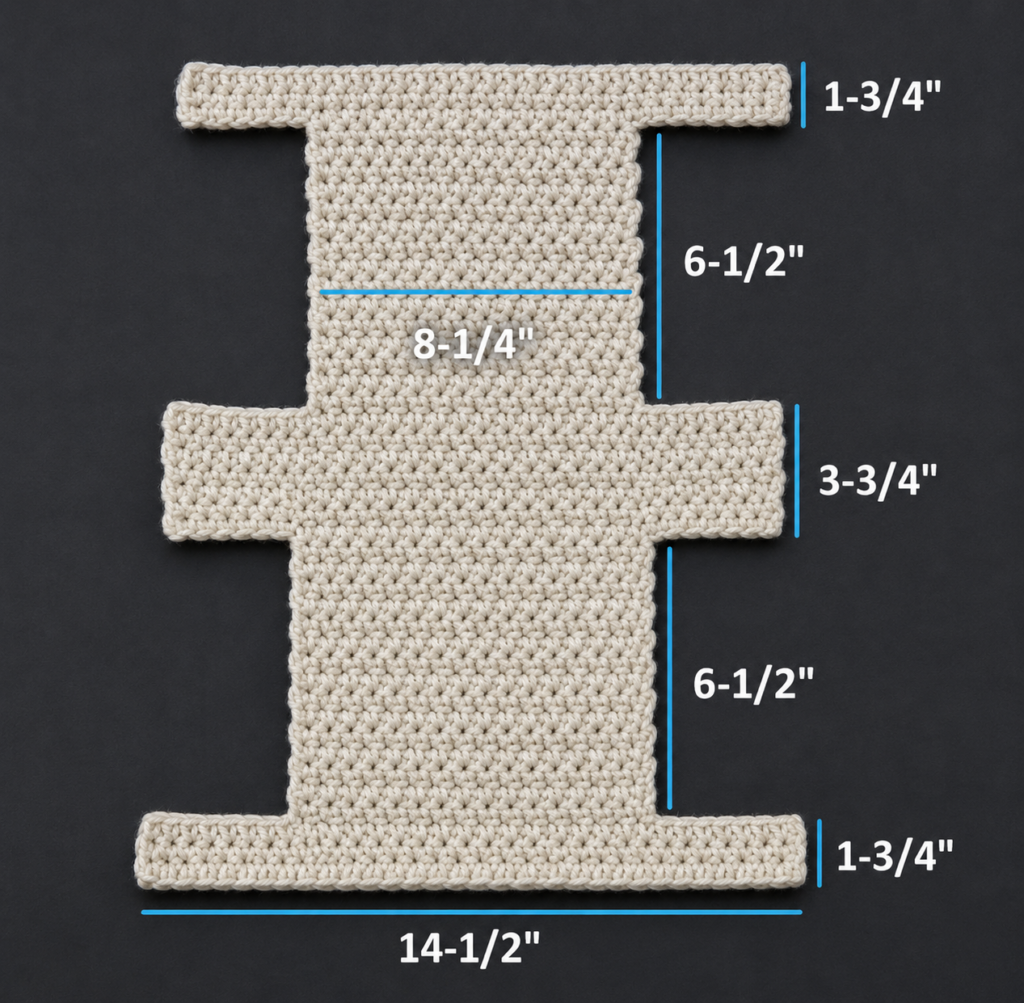
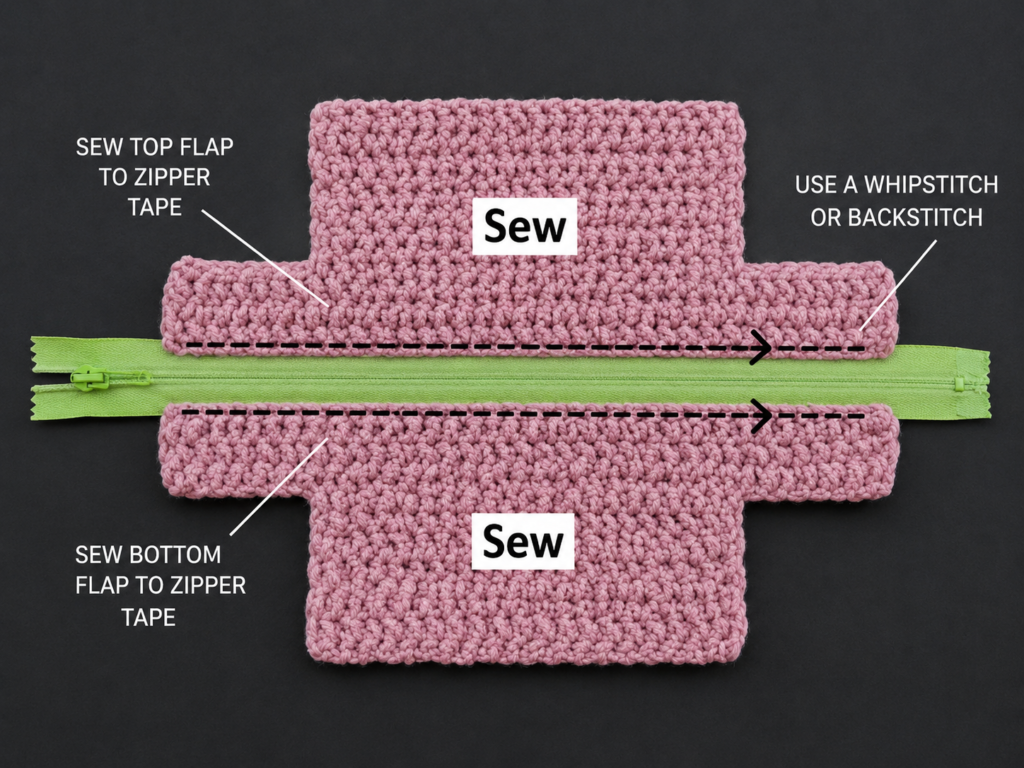
Place both panels flat with the right sides facing upward.
Position the zipper between their top edges.
The zipper teeth should remain visible and unobstructed.
First sew one side.
Pin or clip the zipper tape to the inside of Panel 1.
Using matching sewing thread and a regular sewing needle, make small stitches through the zipper tape and the crochet edge.
Avoid sewing through the actual zipper teeth.
Open and close the zipper after several stitches to make sure the crochet fabric is not catching.
When the first side is secure, position Panel 2 along the opposite zipper tape.
Before sewing, confirm that:
- both top corners align;
- both panels begin at the same point on the zipper;
- neither panel is stretched;
- the zipper can still move freely.
Sew the second side.
Beginner tip:
Use more small stitches rather than a few widely spaced stitches. This distributes stress more evenly across the zipper tape.
Common mistake to avoid:
Do not sew the crochet edge so close to the teeth that the zipper slider catches yarn fibers every time it moves.
Step 6: Join the First Side
Open the zipper before closing the remaining seams.
This is important. If you completely close the case with the zipper shut, turning or accessing the inside becomes unnecessarily awkward.
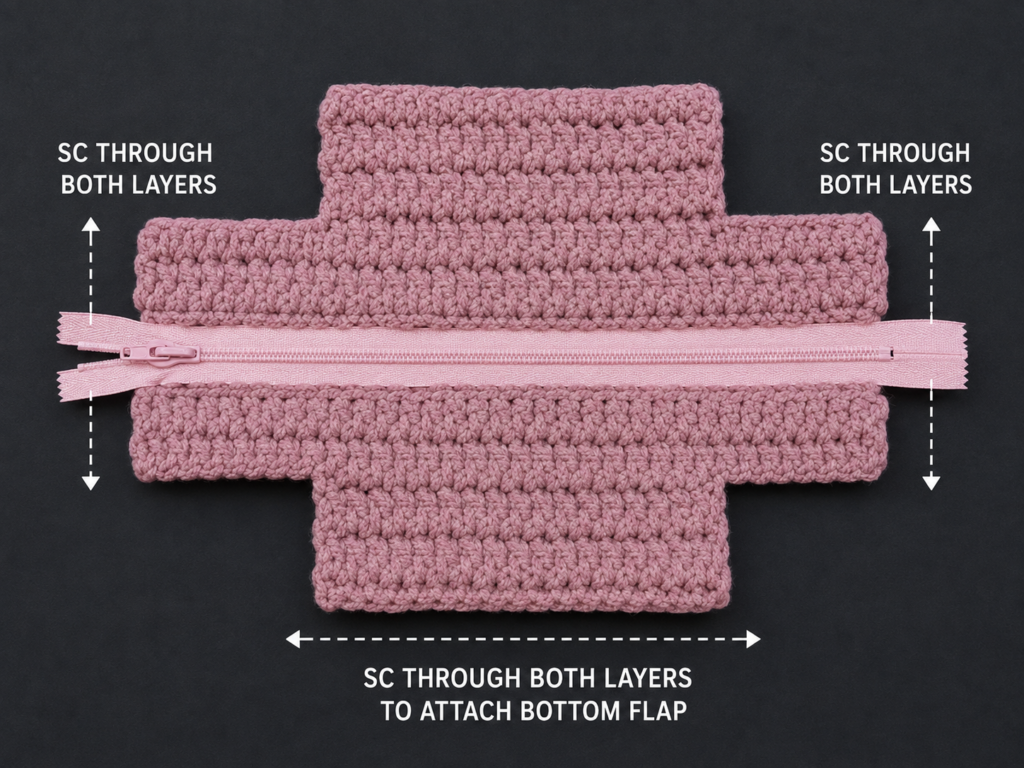
Hold the panels together with the right sides facing outward if you want the single-crochet seam to become a visible border.
Insert your hook through the first corresponding stitch of both layers.
Join the yarn.
Ch 1.
Work one sc through both layers.
Continue down the side, matching one edge stitch from the front panel with the corresponding edge position on the back panel.
You do not have to force a stitch into every tiny gap along a row edge. The goal is a flat, even seam.
Beginner tip:
Pause every inch or so and make sure neither panel is bunching.
Common mistake to avoid:
Do not pull the joining stitches much tighter than the panel fabric. A tight seam can shorten the side and make the pouch bow inward.
Step 7: Align the Bottom Corners
When you reach the bottom corner, stop.
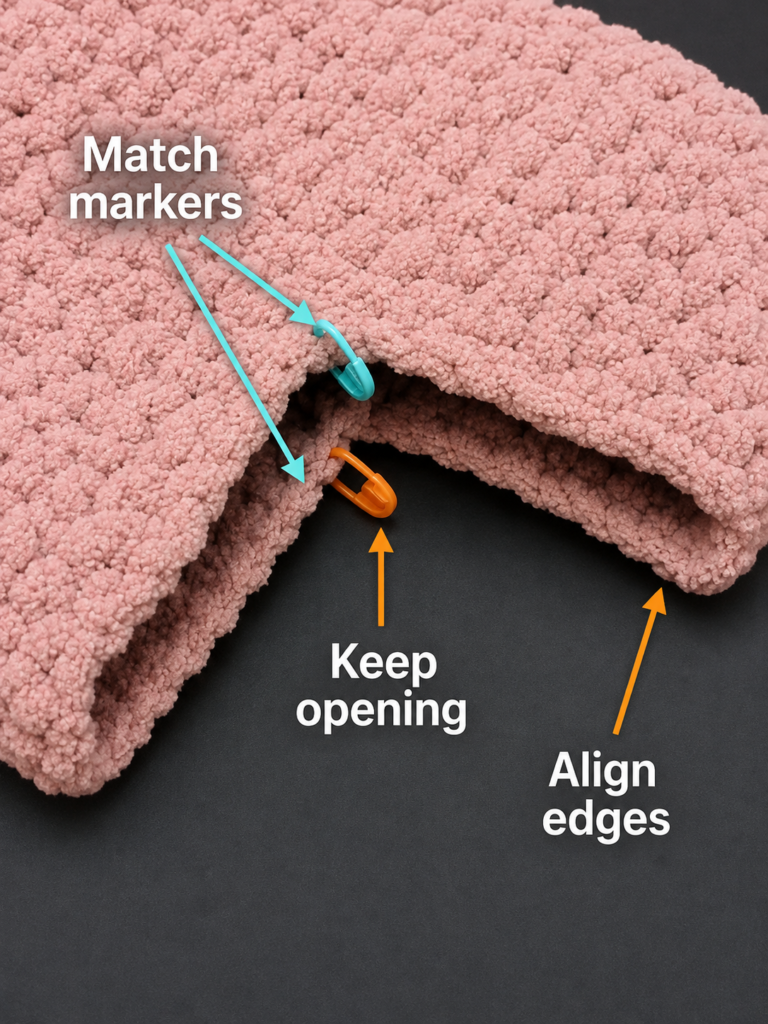
Place a locking stitch marker through both bottom corners.
Add another marker approximately halfway across the bottom edge.
Add a third at the opposite corner if useful.
The markers prevent the panels from sliding out of alignment while you crochet across the bottom.
Turn the corner gently and continue single crocheting through both layers.
If the corner begins to curl, loosen your tension slightly.
At the opposite corner, rotate the work again and crochet up the second side.
Beginner tip:
Matching the corners first matters more than trying to place exactly the same number of seam stitches on every edge.
Common mistake to avoid:
Do not let one panel stretch while the other remains relaxed. You can end up with leftover fabric at the final corner.
Step 8: Complete the Second Side Seam
Continue upward until you reach the zipper.
Fasten off.
Use the tapestry needle to weave the yarn end back and forth through several nearby stitches on the inside or along the seam.
Trim only after the tail feels secure.
Now test the zipper.
Open it fully.
Close it fully.
Insert the calculator.
If the fit feels comfortably snug, the main construction is complete.
If the calculator is difficult to insert because the seams are too tight, inspect whether your joining round pulled the side edges inward.
Pattern Notes or Stitch Notes
Turning chain
Ch 1 at the beginning of a panel row.
The ch-1 does not count as a stitch.
Sample stitch count
For the example gauge:
- Ch 20.
- Row 1 produces 19 sc.
- Keep 19 sc in every panel row.
If you resize the pattern, your count will be different.
Repeat
After Row 1, repeat:
Ch 1, turn, sc in every st across.
Continue until the panel reaches the required height.
Right side and wrong side
Single crochet looks usable from both sides, so this project does not depend strongly on RS/WS orientation.
Choose whichever surface you prefer as the exterior, but keep both panels oriented the same way.
Size adjustment
Never resize by randomly adding several rows at the end.
Instead:
- calculate the required panel width;
- adjust the starting chain until that width is reached;
- crochet until the required height is reached;
- make the second panel identical.
That method makes the pattern usable for many calculator sizes.
Common Beginner Mistakes
1. Making the Case the Exact Width of the Calculator
A calculator has thickness.
If the finished panel is only as wide as the calculator’s front face, the pouch may become too tight once you join the seams.
Fix: Include thickness and a small amount of ease in your target measurement.
2. Stretching the Foundation Chain While Measuring
A chain can stretch significantly.
If you pull it tight against the calculator during the fit test, your relaxed fabric may end up narrower than expected.
Fix: Lay the chain against the calculator without tension.
3. Losing the Last Stitch
The final stitch can hide beside the turning chain.
Repeatedly missing it produces a triangular panel instead of a rectangle.
Fix: Count regularly or place a marker in the first and last stitch.
4. Making the Two Panels Different Sizes
Even the same stitch count can produce slightly different dimensions if your tension changes.
Fix: Stack the panels while working the second one and compare them every few rows.
5. Sewing Too Close to the Zipper Teeth
Crochet fibers can catch in the slider.
Fix: Leave a narrow strip of zipper tape visible between the crochet edge and the teeth, then test the zipper before finishing the seam.
6. Closing the Case Before Opening the Zipper
This is an easy assembly mistake.
Fix: Open the zipper before completing all three crochet seams.
7. Joining the Edges Too Tightly
Very tight joining stitches can distort otherwise straight panels.
Fix: Match the tension used in the body or move up 0.5 mm in hook size for the seam.
How to Customize This Crochet Project
Change the Yarn
Cotton gives the project a clean, structured appearance.
A cotton-acrylic blend can make it slightly softer.
If you substitute yarn weight, do not keep the original stitch count automatically. Recalculate the panel dimensions.
Try a Two-Color Case
Crochet the front panel in one color and the back panel in another.
Good school-inspired combinations include:
- sage + cream;
- navy + gray;
- burgundy + beige;
- dusty blue + white;
- black + bright green.
You could also alternate colors every four or six rows.
Make It Taller
If your calculator has a protective cover or unusually thick upper section, simply add rows until the panel gives you enough room.
Add a Decorative Border
Instead of using the seam yarn in the same color, choose a contrasting shade.
The single-crochet joining round will then look like a deliberate border around three sides.
Add Texture
Once you are comfortable with the basic pattern, you can replace the plain panels with:
- moss stitch;
- half double crochet;
- back-loop-only ribbing;
- alternating single and double crochet.
Keep the fabric relatively dense so calculator buttons and corners do not push through large gaps.
Add a Lining
A soft cotton fabric lining can create a smoother interior.
Cut two fabric pieces slightly smaller than the crochet panels, sew them together along three sides, then hand-stitch the upper edges beneath the zipper tape.
Add a Name Tag
For a school calculator, attach a small fabric label or embroidered initial so the case is easier to identify.
Avoid attaching bulky embellishments where they could press against the calculator screen.
Gift Ideas
This project works well as:
- back-to-school gift;
- college care-package project;
- teacher gift paired with classroom supplies;
- handmade gift for a math student;
- small graduation gift;
- stash-busting project.
Finishing Instructions
After the crochet seam is complete, inspect both zipper ends.
If extra zipper tape remains, fold it neatly toward the inside rather than leaving a bulky section outside the case.
Using your regular needle and matching thread, make several small reinforcement stitches through the zipper tape and nearby crochet fabric.
Do not sew through the zipper teeth.
Check the slider again.
Weave In Ends
Thread each yarn tail through a tapestry needle.
Run it through several stitches on the inside or back of the seam.
Change direction once.
Trim the remaining yarn.
Blocking
Heavy blocking is usually unnecessary.
If the panels look slightly uneven, lightly dampen the finished empty case, shape it with your hands, and allow it to dry flat.
Do not block the project with the calculator inside.
Washing and Care
Follow the care instructions for your yarn.
Remove the calculator before washing the crochet case.
Allow the pouch and zipper area to dry completely before returning an electronic device to it.
Device Safety Note
A crochet calculator case is a soft protective sleeve. It can help separate the calculator from pens, keys, and other objects, but it is not a hard-shell impact case, waterproof case, or substitute for specialized electronics protection.
Quick Printable-Style Summary
Project: Zippered crochet calculator case
Skill level: Beginner
Yarn: #4 medium/worsted cotton or cotton blend
Hook: 4.0 mm
Other materials: Calculator, zipper, sewing needle and thread, tapestry needle, scissors, measuring tape, stitch markers
Stitches: ch, sc, sl st
Sample gauge: Approximately 18 sc × 20 rows = 4 in
Sample starting chain: Ch 20 for a panel approximately 4¼ in wide at the sample gauge.
Row 1: Sc in second ch from hook and each ch across.
Following rows: Ch 1, turn, sc in every stitch.
Repeat: Continue until the panel reaches the calculator’s required height.
Make: Two matching panels.
Assembly: Sew zipper to the two upper edges, open zipper, single-crochet the two panels together around one side, bottom, and opposite side.
Finishing: Fasten off, weave in ends, secure zipper ends, test zipper and calculator fit.
Sizing rule: Measure your own calculator rather than relying exclusively on the sample stitch count.
FAQ
What yarn is best for a crochet calculator case?
A smooth cotton or cotton-blend yarn is a practical choice because it creates defined stitches and can produce a relatively structured fabric. Medium/worsted yarn is easy for beginners to handle.
Can I crochet the case without a zipper?
Yes.
Instead of installing a zipper, make the back panel several rows taller than the front.
Fold the extra section over the opening to create a flap, then add a chain loop and button.
How do I make a crochet calculator case for a TI-style graphing calculator?
Measure the exact width, height, and thickness of your device and follow the sizing method rather than the sample stitch count.
A thicker graphing calculator will generally need additional panel width.
Should the calculator case fit tightly?
It should be snug enough that the device does not rattle around but loose enough that you can insert and remove the calculator without strongly stretching the crochet.
Can beginners sew a zipper into crochet?
Yes. Hand sewing is slow but straightforward.
Pin or clip the zipper first, make small stitches through the zipper tape and crochet edge, and repeatedly test the slider before finishing.
Can I use acrylic yarn?
Yes.
Acrylic works, particularly if you already have suitable scraps.
Choose a smooth yarn and work at a firm gauge so the pouch does not become overly stretchy.
Do I have to make a gauge swatch?
For a small custom-sized project, you can technically measure the panel as you crochet instead.
However, a gauge swatch is useful if you want to calculate your starting stitch count before beginning. The Craft Yarn Council also recommends checking gauge when size matters.
Conclusion
A calculator case is a small project, but it teaches several techniques that transfer directly to larger crochet bags and accessories: measuring for fit, keeping rows straight, making matching panels, installing a zipper, and joining layers cleanly.
The most useful part of this crochet calculator case pattern is that you are not locked into one calculator model. Once you understand how the two rectangles relate to the dimensions of the device, you can make the case taller, wider, slimmer, striped, lined, or color-blocked without redesigning the entire project.
Start with plain single crochet for your first version. Once you have the fit exactly the way you like it, the same basic construction can become a pencil pouch, small electronics sleeve, crochet hook case, or other zippered organizer.
Save your finished measurements along with your yarn and hook information. That gives you your own repeatable calculator-case recipe the next time you want to make one as a gift.





