A crochet pencil is one of those small amigurumi projects that looks more complicated than it actually is. Once you break the shape into sections—the graphite, wooden point, long pencil body, ferrule, and eraser—you are really working a series of basic single crochet rounds with a few carefully placed increases, decreases, and color changes.
This beginner-friendly crochet pencil amigurumi pattern is designed to help you practice those skills without a lot of sewing or separate pieces.
The pencil is crocheted in one continuous piece from the graphite tip to the eraser. You will learn how to form a clean cone, keep the body straight, change colors neatly, add facial features, control your stuffing, and close an amigurumi opening without leaving a visible hole.
This is an independently written project rather than a reproduction of the reference pattern described above.
The finished pencil works well as a desk decoration, teacher gift, back-to-school ornament, backpack charm when made smaller, or simply as a quick amigurumi project for practicing basic shaping.
What You’ll Learn
By the end of this tutorial, you will know how to:
- Start amigurumi with a magic ring.
- Crochet in continuous spiral rounds.
- Mark and count the beginning of each round.
- Increase gradually to create a pencil-shaped cone.
- Change yarn colors without creating large steps.
- Crochet an even cylindrical body.
- Work a back-loop-only round for subtle definition.
- Place safety eyes or embroidered eyes evenly.
- Use invisible decreases.
- Stuff a narrow amigurumi without creating lumps.
- Close the final opening with a yarn needle.
- Embroider a simple face.
- Adjust the colors and size of your pencil.
Materials You’ll Need
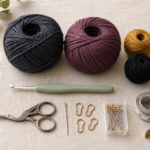
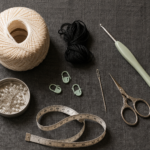
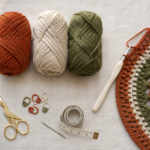
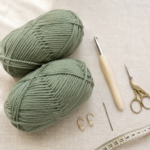
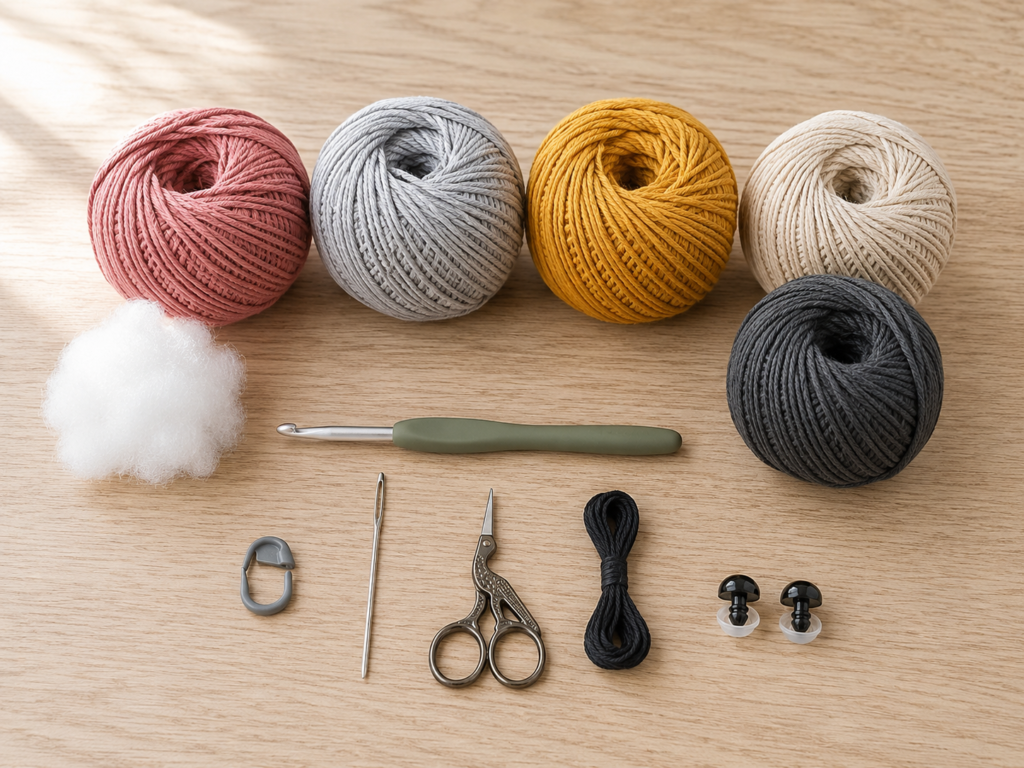
For one pencil, gather:
- Medium #4 cotton or smooth acrylic yarn in:
- charcoal gray for graphite
- oatmeal or pale beige for wood
- mustard yellow for the pencil body
- silver gray for the ferrule
- dusty rose for the eraser
- 3.25 mm crochet hook
- Polyester fiberfill
- Locking stitch marker
- Tapestry needle
- Scissors
- Black embroidery thread or thin black yarn
- Optional 7 mm safety eyes
- Optional chopstick or stuffing tool
Medium #4 yarn is classified within the Craft Yarn Council’s medium-weight category. Standard yarn-weight charts give general hook recommendations, but amigurumi commonly benefits from a denser fabric than ordinary garments or blankets, so using a smaller hook can help prevent stuffing from showing through the stitches.
Crochet Abbreviations Used
This tutorial uses US crochet terminology.
- MR = magic ring
- sc = single crochet
- inc = increase; work 2 sc into one stitch
- dec = decrease; work two stitches together
- BLO = back loop only
- sl st = slip stitch
- st / sts = stitch / stitches
- rnd / rnds = round / rounds
- FO = fasten off
The Craft Yarn Council’s standard abbreviation list confirms common terms such as sc, sl st, BLO, st, and related US terminology. It also explains that US single crochet corresponds to UK double crochet.
US/UK terminology note
This pattern is written in US terms.
If you normally follow UK crochet terminology, every US single crochet in this tutorial is equivalent to a UK double crochet.
Before You Start
Gauge and tension
Exact gauge is not critical for this project because the pencil does not need to fit a person or another object.
What matters is density.
Crochet tightly enough that you cannot easily see daylight through the single crochet fabric when you gently stretch it. If large gaps appear, go down one hook size.
If the hook feels difficult to push through every stitch, however, you have gone too far. Tight amigurumi fabric should be firm—not painful to crochet.
How to count your rounds
The pencil is made in a continuous spiral. Do not join each round with a slip stitch unless specifically instructed.
Place a locking stitch marker into the first stitch of every round. When you reach the marker again, the round is complete. Move the marker upward before continuing.
How to keep the pencil straight
Once the cone reaches its full circumference, every body round should contain the same number of stitches.
If the body unexpectedly becomes wider, you probably added an accidental increase.
If it becomes narrower, you likely skipped a stitch or accidentally worked two stitches together.
Count periodically instead of waiting until the end of the body.
How to choose colors
Traditional yellow is easy to recognize as a pencil, but there is no reason your pencil must be yellow.
Try:
- sage green
- lavender
- coral
- turquoise
- school colors
- rainbow stripes
- a teacher’s favorite color
Keep the wooden and graphite sections relatively neutral if you want the finished project to remain immediately recognizable.
Toy safety
Safety eyes are convenient, but small detachable components can create a choking hazard. The selected professional tutorial likewise warns against safety eyes for babies and recommends yarn, felt, or embroidered alternatives.
If the pencil is intended for a baby, toddler, or anyone who may chew the toy, use embroidered eyes and securely woven yarn details instead.
Step-by-Step Crochet Tutorial
Step 1: Crochet the Graphite Tip
With charcoal yarn, make a magic ring.
Rnd 1: 6 sc into MR. (6)
Pull the center tightly closed.
Rnd 2: Sc in each stitch around. (6)
Rnd 3: Inc in every stitch around. (12)
You should now have a tiny rounded cone beginning to form.
Do not worry if the first few rounds look surprisingly small. The wooden section added next creates most of the visible sharpened point.
Beginner tip
The magic ring needs to close completely because it forms the very tip of the pencil. After pulling the ring closed, gently tug the yarn tail again before you continue.
Common mistake to avoid
Do not stuff the graphite section yet. At this size, stuffing can push the center ring open and make the tip blunt.
Step 2: Shape the Wooden Pencil Point
Change to oatmeal yarn.
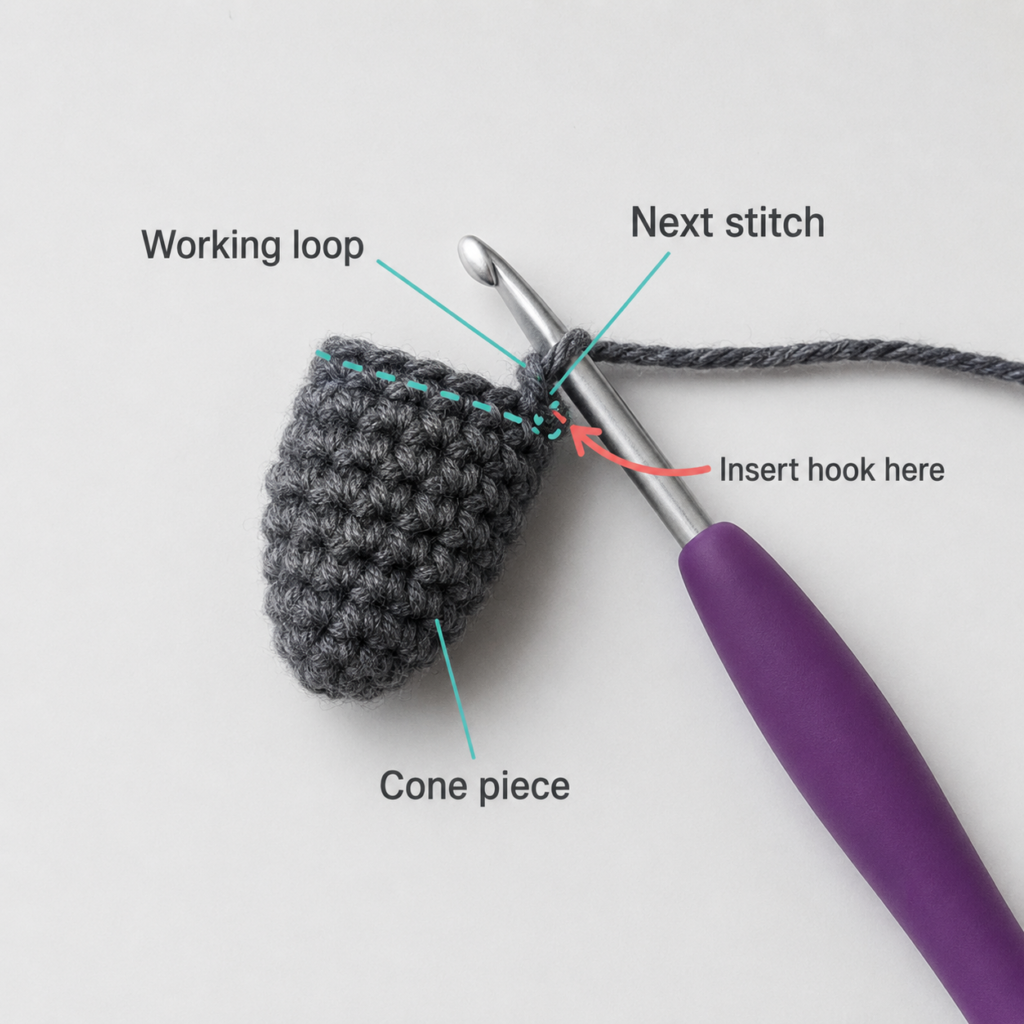
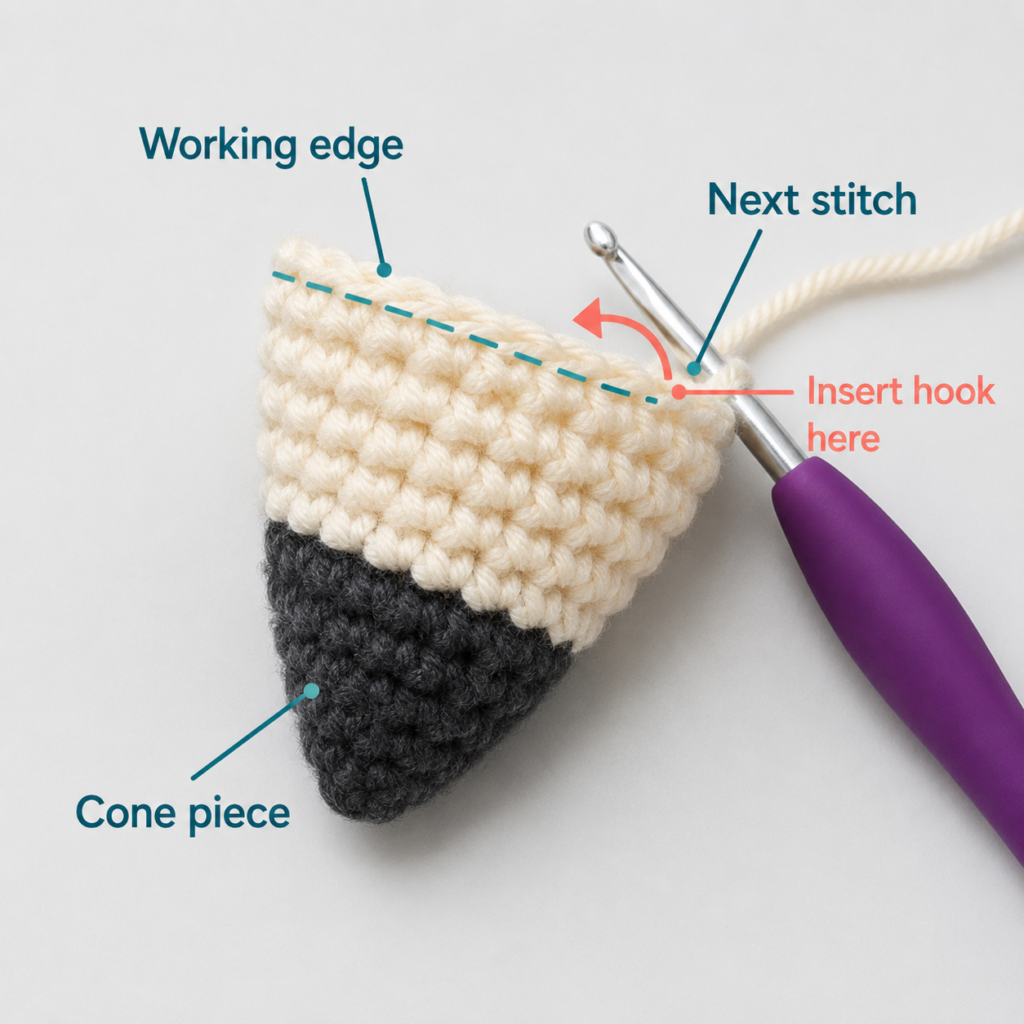
For the cleanest color change, stop before finishing the final charcoal stitch of the previous round. Pull the oatmeal yarn through the final two loops instead.
Now shape the wooden cone.
Rnd 4: Sc around. (12)
Rnd 5: Repeat (sc, inc) around. (18)
Rnd 6: Sc around. (18)
Rnd 7: Repeat (2 sc, inc) around. (24)
Rnd 8: Sc around. (24)
You now have the complete sharpened portion of the pencil.
Beginner tip
Spreading the increases across several rounds makes the transition look like a sharpened pencil instead of a sudden disk.
Common mistake to avoid
Do not stack every increase directly above an increase from the previous increase round if your work begins to develop obvious ridges. Rotate the starting point slightly when necessary.
Step 3: Crochet the Pencil Body
Change to mustard yellow.
From this point forward, you are no longer increasing.
Rnds 9–20: Sc in every stitch around. (24 stitches per round)
Continue for 12 straight rounds.
Your piece should gradually become a narrow tube with the point at one end.
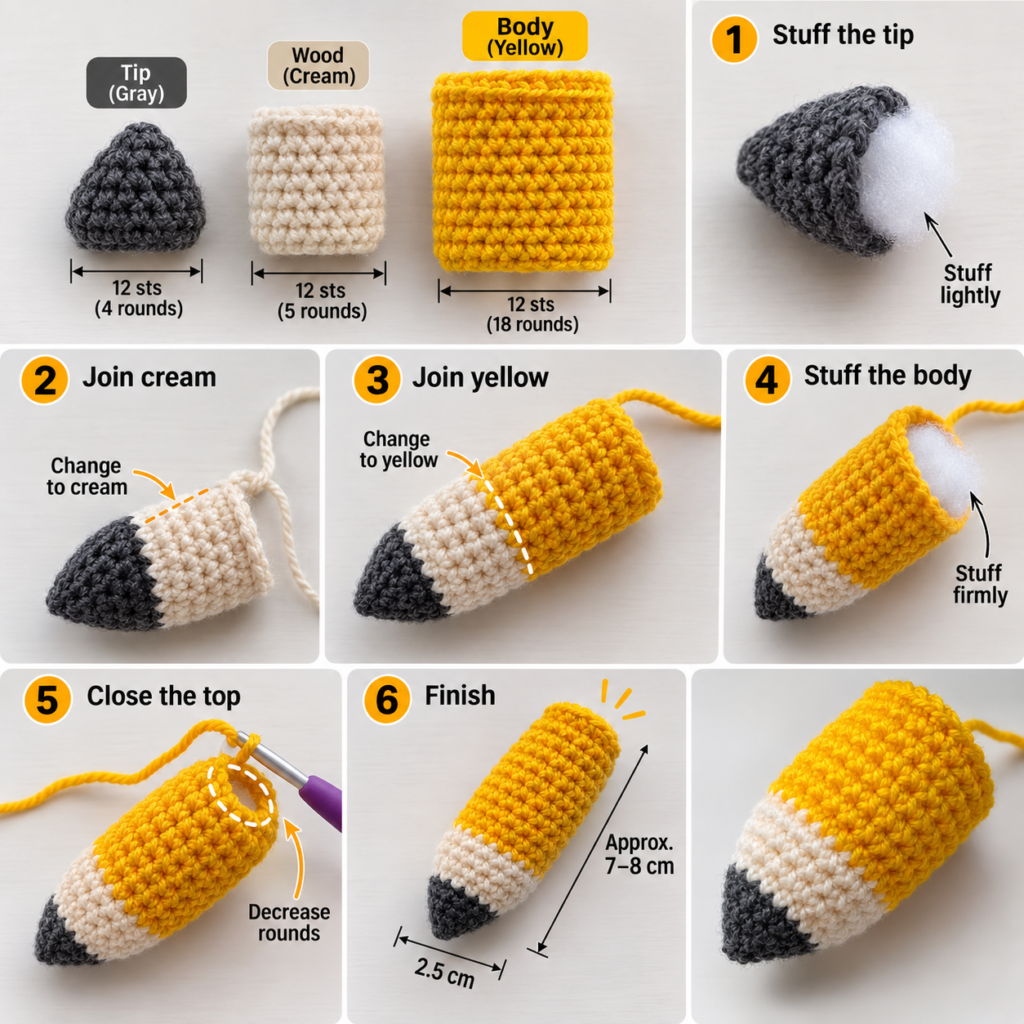
Begin adding small amounts of stuffing after approximately Rnd 13 or when you have enough room to insert it without distorting the fabric.
Beginner tip
Add stuffing in several small pieces rather than inserting one large ball.
A stuffing tool or the blunt end of a crochet hook can help move fiberfill gently toward the pencil point.
Common mistake to avoid
Avoid packing the pointed section so firmly that the wooden cone balloons outward. The goal is a clear pencil silhouette: firm enough to hold its shape, but not stretched.
Step 4: Add the Eyes Before the Opening Gets Smaller
Before adding the ferrule and eraser, decide whether you are using safety eyes or embroidered eyes.
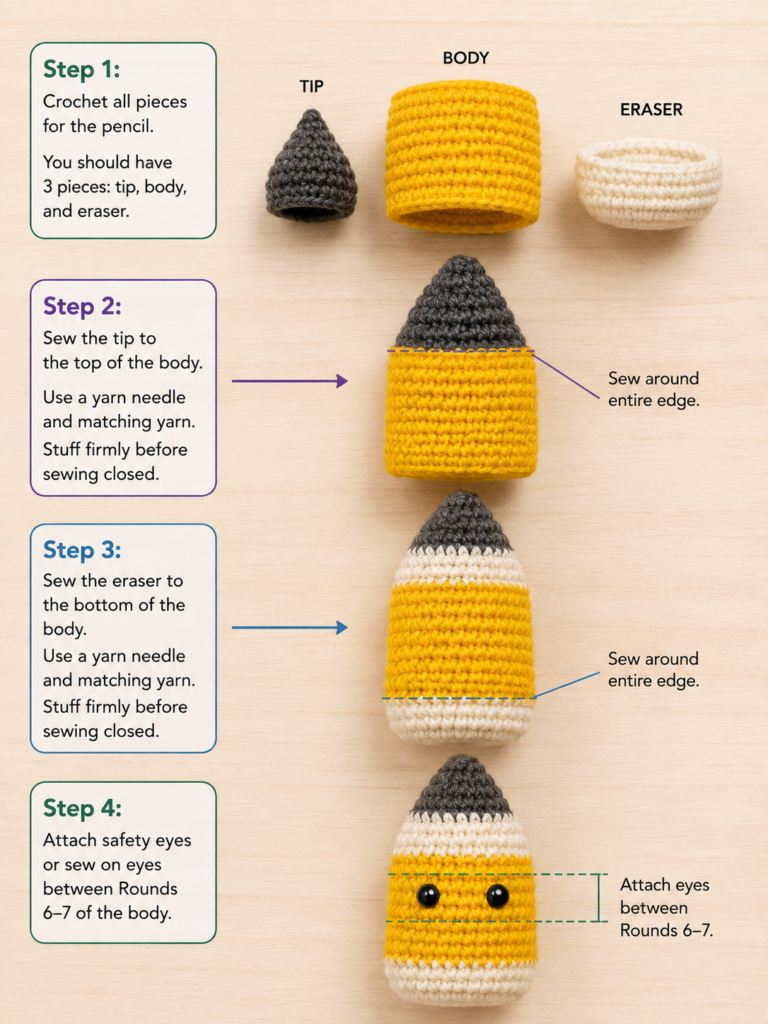
For safety eyes, try positioning them between approximately Rnds 14 and 15, with about 4 visible stitches between the inner edges.
Do not lock the backs immediately.
First:
- Insert both eyes temporarily.
- Look at the pencil straight on.
- Make sure the graphite point is centered above the face.
- Adjust the spacing if needed.
- Only then attach the backs.
If embroidering the eyes, wait until the pencil is fully stuffed and finished.
Beginner tip
Use the line where your color changes naturally drift as the back of the pencil. Put the face on the opposite side.
Common mistake to avoid
Crocheters often position eyes too far apart because the fabric curves around the cylinder. Check the face from directly in front rather than from the side.
Step 5: Crochet the Metal Ferrule
Change to silver-gray yarn.
Rnd 21: BLO sc around. (24)
Rnd 22: Sc normally through both loops around. (24)
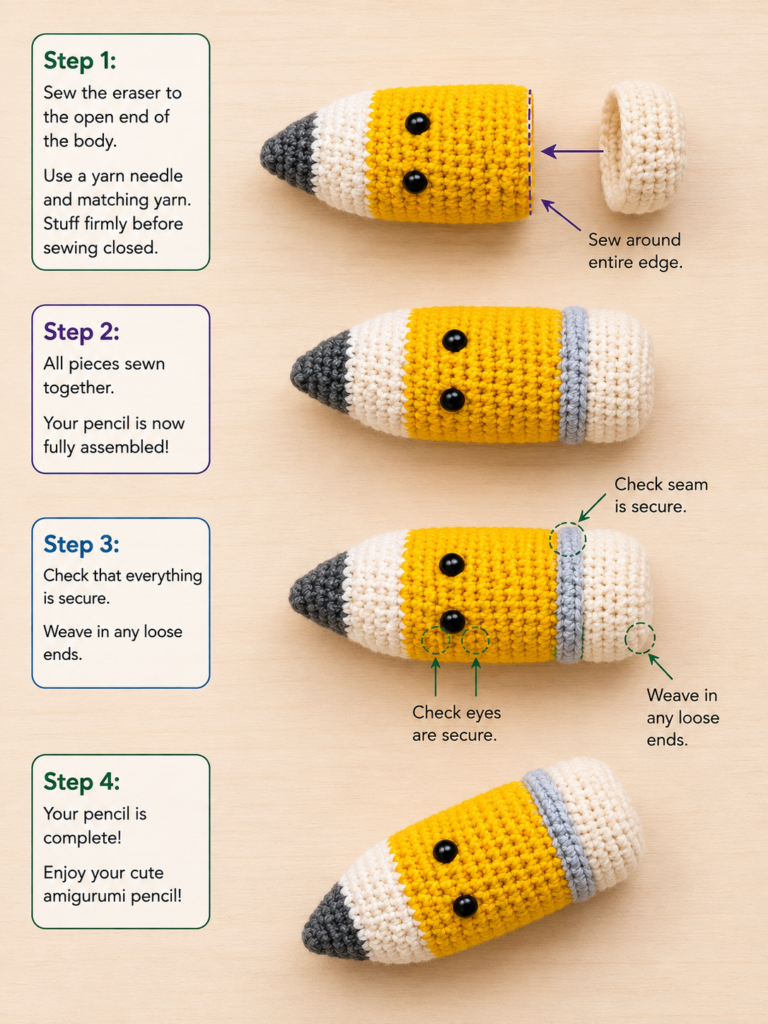
Working the first ferrule round in the back loop creates a small ridge between the yellow body and gray band.
That subtle line helps the ferrule look like a separate piece even though the entire pencil remains one continuous crochet project.
Beginner tip
A crochet stitch has two loops at the top. When instructed to work BLO, insert your hook only under the loop farthest away from you.
Common mistake to avoid
Do not continue working BLO for every ferrule round unless you want a stronger ribbed texture. Return to both loops for Rnd 22.
Step 6: Crochet and Shape the Eraser
Change to dusty rose yarn.
Rnds 23–25: Sc around. (24)
Now begin reducing the circumference.
Rnd 26: Repeat (2 sc, dec) around. (18)
Add more stuffing.
Rnd 27: Repeat (sc, dec) around. (12)
Add your final small amount of stuffing.
Rnd 28: Dec around. (6)
Fasten off, leaving approximately 8 inches of yarn.
How to work an invisible decrease
For a smoother amigurumi surface:
- Insert the hook under the front loop of the next stitch.
- Without yarning over, insert the hook under the front loop of the following stitch.
- Yarn over and pull through the two front loops.
- Yarn over again.
- Pull through both loops on the hook.
The decrease should sit flatter than a traditional sc2tog.
Beginner tip
Before the final round, roll the pencil gently between your palms. This redistributes stuffing and helps reveal areas that need a little more fiberfill.
Common mistake to avoid
Do not continue forcing stuffing through the hole after it becomes tiny. That can stretch the final rounds and create visible gaps.
Step 7: Embroider the Face
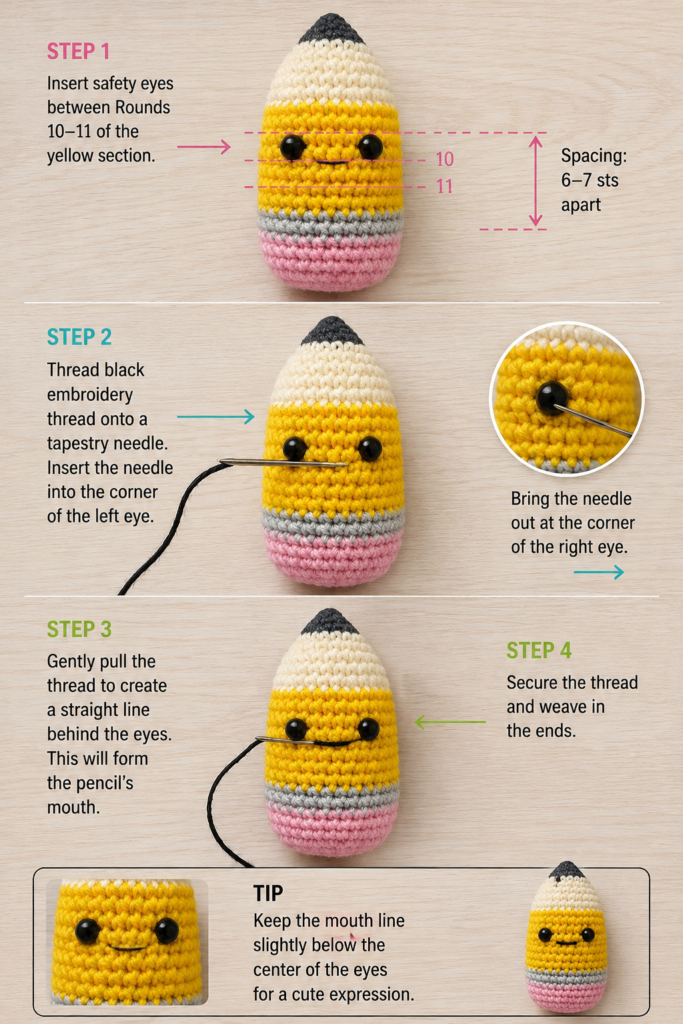
If you did not use safety eyes, embroider the eyes first.
A simple eye can be made by passing black yarn vertically through the same stitch area two or three times.
For the smile:
- Thread a tapestry or embroidery needle with black yarn.
- Enter from the back or bottom of the pencil.
- Bring the needle out at one side of the desired mouth.
- Insert it at the opposite side.
- Before tightening completely, anchor the center of the strand one round lower with a tiny stitch.
- Pull gently until the line forms a shallow smile.
- Hide both yarn ends inside the stuffed body.
Beginner tip
Use crochet stitches as a grid. Instead of judging placement in inches, count stitches and rounds from each eye.
Common mistake to avoid
Do not pull embroidery yarn too tightly. It can sink deeply between stitches and distort the surface of the pencil.
Pattern Notes or Stitch Notes
Turning chain rules
There are no turning chains in the main pencil pattern.
The pencil is worked continuously in a spiral.
Stitch count
The widest part of this design contains 24 stitches.
Once you reach 24 stitches at the end of the wooden point, maintain exactly 24 stitches throughout the yellow body and ferrule until the eraser decreases begin.
Repeat notes
Instructions inside parentheses are repeated around the entire round.
For example:
(2 sc, dec) around
means:
- single crochet in each of the next 2 stitches,
- decrease across the next 2 stitches,
- repeat that sequence until the round is finished.
Right side and wrong side
The right side is the outside surface of the pencil.
Because the project is worked continuously in the round, you should not need to turn the work inside out during construction.
Size adjustment
The easiest way to change the finished size is to change yarn weight and hook size rather than rewriting every stitch count.
For a miniature ornament or keychain, use DK yarn and a smaller hook.
For a larger plush pencil, use bulky or super-bulky yarn with a suitably smaller-than-normal amigurumi hook.
Remember that changing yarn thickness changes stuffing needs and may change whether safety eyes remain proportionate.
Common Beginner Mistakes
1. Stuffing shows between the stitches
Cause: Hook is too large or tension is too loose.
Fix: Move down one hook size for your next attempt. On the current pencil, avoid overstuffing the affected area.
2. Pencil body becomes wider halfway down
Cause: Accidental increases.
Fix: Count the body round. Every straight mustard round should have 24 stitches.
3. Pencil becomes narrower too early
Cause: A skipped stitch or accidental decrease.
Fix: Count back to the last correct round. If the error is recent, unravel and redo it rather than trying to compensate with random increases.
4. Color changes form a visible staircase
Spiral crochet naturally creates a small jog at the color transition.
To reduce it, introduce the new color when pulling through the final loops of the previous stitch and keep your tension even.
Place the transition column at the back of the pencil.
5. The point looks lumpy
Cause: Large pieces of stuffing pushed into the narrow tip.
Fix: Use tiny tufts of fiberfill and insert them with a blunt stuffing tool.
6. Safety eyes are crooked
Cause: Locking the backs before checking the pencil from the front.
Fix: Always test both eye positions first.
7. Decrease rounds have obvious gaps
Cause: Traditional decreases or stretched tension.
Fix: Use invisible decreases through the front loops and avoid overstuffing immediately underneath them.
How to Customize This Crochet Project
Change the pencil body color
Instead of mustard, try:
- lavender
- pastel blue
- sage
- coral
- bright red
- black
- school colors
For a colored-pencil effect, coordinate the graphite tip with the body instead of using charcoal.
Make a striped pencil
Divide the long body into bands.
For example, alternate two or three rounds of mustard with two or three rounds of cream.
Keep the total number of straight body rounds approximately the same if you want the pencil’s proportions to remain similar.
Make it longer
Add additional 24-stitch rounds to the main body before crocheting the ferrule.
Every additional straight round adds length without changing width.
Make the ferrule more textured
Work both gray ferrule rounds BLO for a stronger horizontal ridge.
You can also surface-slip-stitch around the completed gray section using a contrasting silver-colored yarn.
Add a hanging loop
Before closing the eraser completely, secure a crocheted chain loop inside the top.
This turns the pencil into:
- a school-bag charm
- classroom decoration
- keychain
- gift tag
- Christmas ornament for a teacher
Gift ideas
A small crochet pencil works especially well with:
- teacher appreciation gifts
- notebooks
- pencil cases
- bookstore gift cards
- classroom baskets
- back-to-school packages
- graduation gifts for teachers or education majors
Finishing Instructions
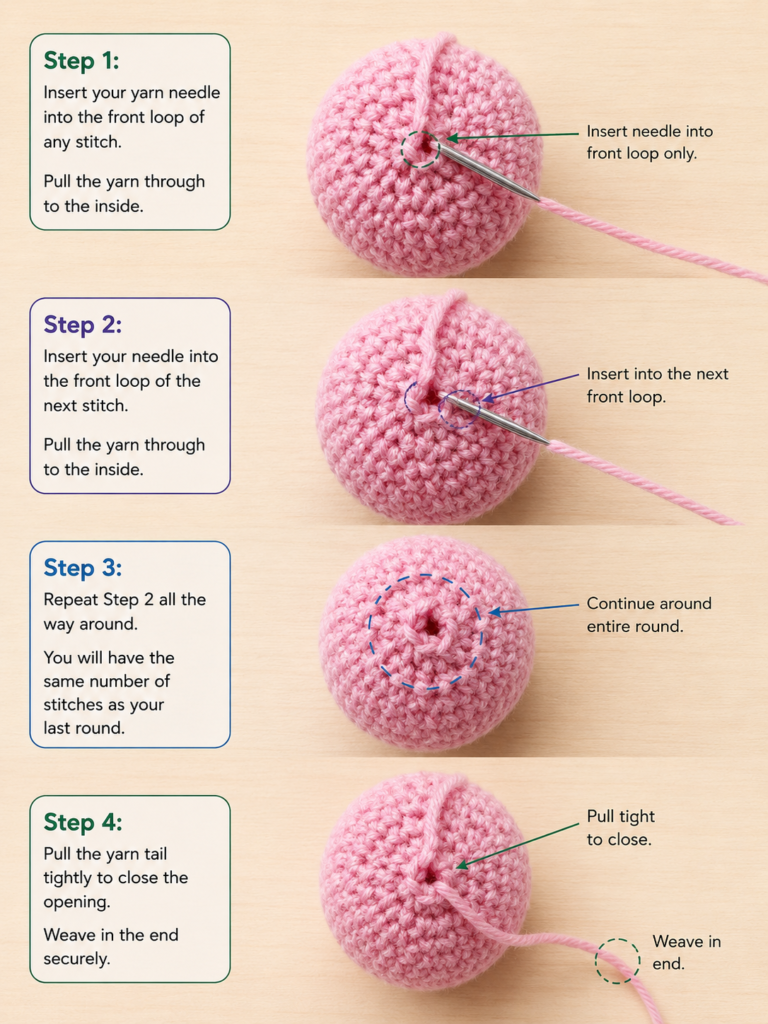
After Rnd 28 you should have six stitches remaining.
Thread the dusty rose yarn tail onto a tapestry needle.
Pass the needle through the front loop only of each remaining stitch.
Once all six loops are threaded, pull the yarn slowly.
The opening should cinch together like a drawstring.
Pass the needle through the center once more, secure the yarn inside the stuffed pencil, and weave the tail through several stitches before trimming it.
Blocking and shaping
Traditional wet blocking is usually unnecessary for stuffed amigurumi.
Instead, shape the pencil manually.
Roll it gently between your palms and massage the stuffing until the body looks straight.
Pinch the graphite end slightly to sharpen the silhouette if required.
Washing and care
Always follow the care instructions for the specific yarn used.
For a stuffed decorative amigurumi, gentle spot cleaning is usually the safest approach.
If machine washing is appropriate for your yarn and stuffing, place the pencil inside a mesh laundry bag and avoid high heat, which can distort acrylic fibers or stuffing.
Quick Printable-Style Summary
Skill level: Beginner / Easy
Finished size: Approximately 4.5–5 inches tall depending on yarn, hook, and tension
Yarn: Medium #4 cotton or smooth acrylic
Hook: 3.25 mm
Stitches: MR, sc, inc, dec, BLO
Construction: One continuous piece from graphite point to eraser
Maximum stitch count: 24 sts
Starting method: 6 sc in a magic ring
Main repeat: Straight single crochet rounds for body, followed by color changes and decrease rounds
Face: Safety eyes or embroidery
Finishing: Stuff firmly but evenly, decrease to six stitches, cinch opening with yarn needle, weave in ends
FAQ
Is a crochet pencil amigurumi pattern good for beginners?
Yes. It is a particularly useful first shaping project because most of the pencil uses single crochet. The main new techniques are simple increases, decreases, continuous-round counting, color changes, and stuffing.
Do I have to use a magic ring?
No.
If you struggle with a magic ring, chain 2 and crochet the first six single crochets into the second chain from your hook.
The center may be slightly less adjustable, so leave a long starting tail that you can tighten securely.
What yarn is best for crochet pencil amigurumi?
Smooth cotton and smooth acrylic are both suitable.
Cotton gives excellent stitch definition and tends to produce a structured surface.
Acrylic can be softer, more economical, and available in more colors.
Avoid highly fuzzy yarn for your first pencil because it makes individual stitches harder to identify.
Why is my stuffing visible?
Your crochet fabric is probably too loose, your hook may be too large, or the pencil may be overstuffed.
Try a smaller hook before adding more stuffing.
Can I make this without safety eyes?
Yes, and embroidered eyes are the preferred option when detachable toy parts would create a safety concern.
Use black yarn or embroidery thread and make two small vertical or round eye shapes.
How can I make a crochet pencil keychain?
Use a lighter yarn and smaller hook for a miniature version, then add a secure yarn loop or metal keychain hardware at the eraser end.
Do not rely on loosely woven yarn ends for the attachment point.
Can I make the pencil longer without making it wider?
Yes.
Simply add more straight 24-stitch rounds to the mustard body before changing to gray.
Do not add more increases unless you also want a wider pencil.
Conclusion
A pencil is an ideal example of how simple amigurumi shaping can produce a recognizable object.
The project starts with just six stitches, expands gradually through the sharpened wooden section, settles into an easy run of straight single crochet rounds, and finishes with two simple color bands and a few decreases.
The most important skills are not complicated stitches. They are keeping your stitch count consistent, controlling stuffing, making clean color changes, and stopping occasionally to check the shape.
Once you have made the basic version, try customizing it into colored pencils, school-color pencils, miniature backpack charms, or larger teacher gifts.