A crochet pillow becomes much more useful when you add one simple detail: a pocket big enough for a favorite book.
This crochet reading pillow pattern is designed for beginners who are comfortable making chains and basic stitches but are ready to create something larger than a washcloth or coaster. Instead of complicated shaping, colorwork, or advanced texture, you’ll crochet three straightforward rectangles: a front panel, a back panel, and a shorter pocket.
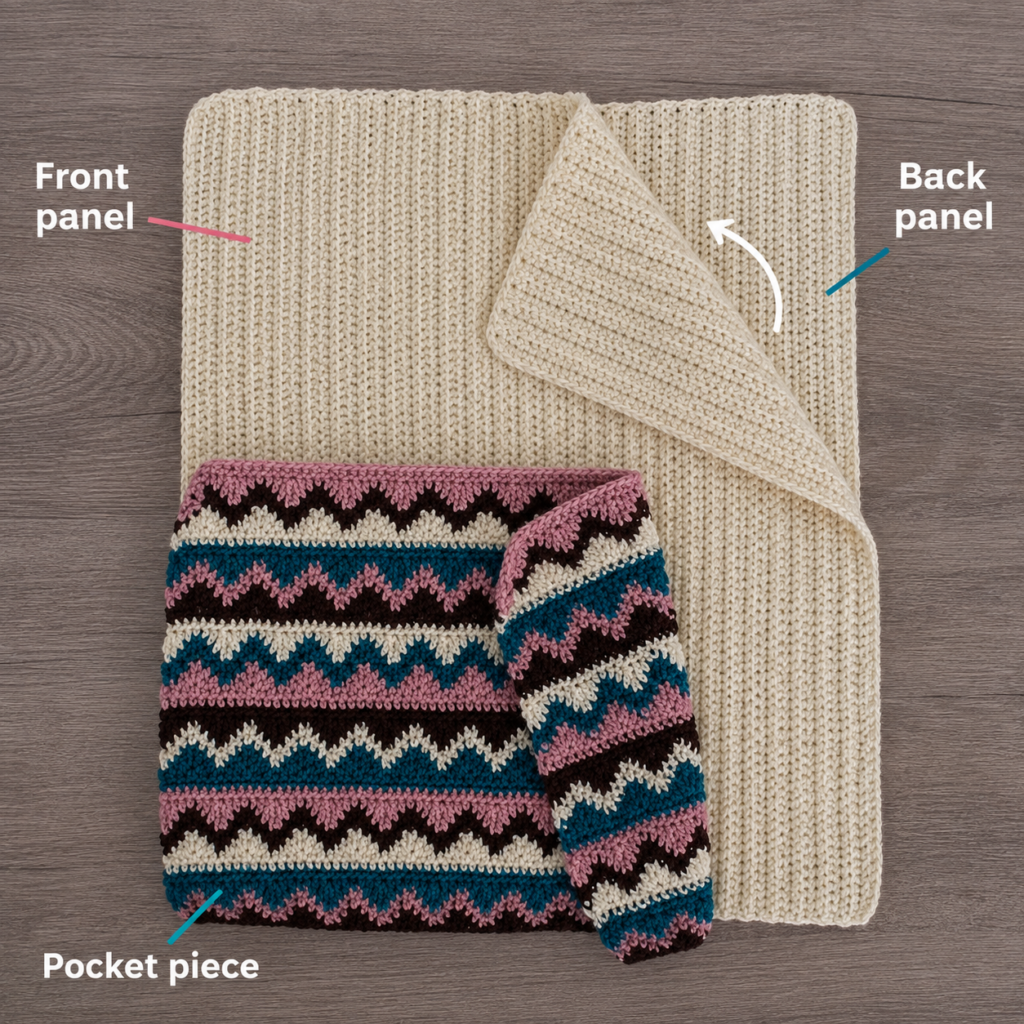
The pieces are then stacked and crocheted together around a standard 16-inch pillow form.
The finished pocket can hold a paperback, children’s storybook, e-reader, small notebook, reading glasses, or even a remote control. It also makes a particularly useful handmade gift when paired with a new book.
The tutorial below uses basic half double crochet for most of the project because it creates fabric that is soft enough for a pillow but dense enough to support a book.
What You’ll Learn
- How to calculate and crochet a square pillow panel.
- How to keep long crochet edges straight.
- How to make two matching pillow panels.
- How to create a sturdy book pocket.
- How to position a crochet pocket without stretching it.
- How to secure several crochet layers with stitch markers.
- How to single crochet the pillow edges together.
- How to insert a pillow form and close the final edge neatly.
- How to resize the design for a different pillow insert.
Finished Size
Designed for a 16 x 16 inch pillow form.
Your unassembled crochet panels should measure approximately 15½–16 inches square. A small amount of negative ease is useful because crochet fabric stretches slightly around the insert.
Finished size will vary according to yarn, hook, gauge, and seam tension.
Materials You’ll Need
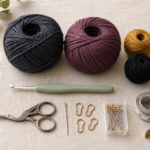
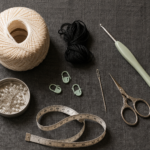
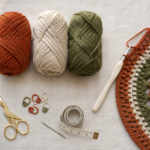
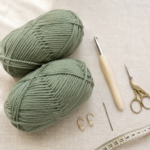
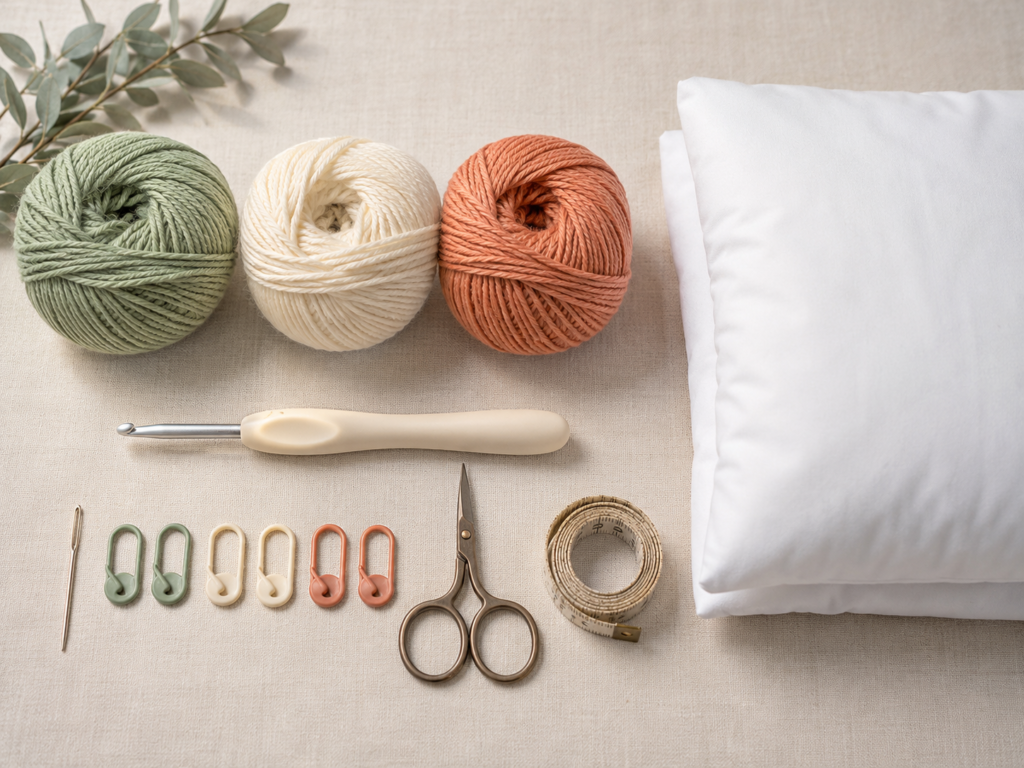
For the sample version described in this tutorial:
- #4 medium/worsted yarn
- Approximately 380–450 yards soft sage green for the main panels
- Approximately 120–150 yards warm cream for the pocket
- Approximately 25–40 yards muted terracotta for the pocket accent
- 5.5 mm crochet hook
- 16 x 16 inch pillow form
- Scissors
- Tapestry needle
- 8–12 locking stitch markers
- Measuring tape
- Optional blocking mats and rust-resistant pins
A washable acrylic or cotton-acrylic yarn works particularly well because a reading pillow is likely to be handled frequently.
The Craft Yarn Council classifies worsted and Aran yarns within its #4 medium category. Its published hook ranges are guidelines rather than guarantees, so checking your actual gauge remains important.
Crochet Abbreviations Used
This tutorial uses US crochet terminology.
- ch = chain
- hdc = half double crochet
- sc = single crochet
- sl st = slip stitch
- st / sts = stitch / stitches
- rep = repeat
- RS = right side
- WS = wrong side
These abbreviations follow commonly used US crochet terminology documented by the Craft Yarn Council.
US/UK Terminology Note
A US half double crochet is called a half treble crochet in UK terminology.
A US single crochet is called a double crochet in UK terminology.
If you are using UK instructions, check the terminology before starting rather than relying only on the abbreviation.
Before You Start
Gauge
Aim for approximately:
13 hdc stitches x 10 rows = 4 inches
Gauge does not need to be as exact as it would be for a fitted sweater, but it directly affects whether your cover fits the pillow insert.
Crochet a small swatch before committing to two full-size panels.
If 13 stitches measure significantly more than 4 inches, try a smaller hook.
If they measure significantly less than 4 inches, try a larger hook.
More important than matching a number perfectly is ensuring that your completed panel measures close to the pillow form.
How to Count Half Double Crochet Stitches
Look along the top of your row for the V-shaped stitch tops.
Each V is one stitch.
Do not accidentally work into the turning chain unless the pattern specifically tells you to do so.
This tutorial treats the turning chain as a height adjustment rather than a stitch.
Keep the Edges Straight
The most common reason a beginner’s rectangular panel narrows is a missed final stitch.
At the end of every row:
- Stop.
- Count your stitches.
- Locate the final V before turning.
- Confirm that your stitch count is still 52.
Put a locking marker into the first and last stitch of the row if you find long rows difficult to count.
How to Avoid Curling
A slight curl during the first few rows is normal.
Serious curling usually points to one of three issues:
- The foundation chain is much tighter than the crochet rows.
- Your hook is too small.
- Your row tension changes dramatically.
Make the starting chains slightly relaxed rather than pulling each chain tightly against the hook shaft.
Choosing Colors
For a calm reading-nook look, use one main color for the pillow and one lighter color for the pocket.
An accent stripe along the pocket opening helps visually separate the pocket from the pillow body.
The tutorial sample uses:
- Sage green — pillow body
- Warm cream — pocket
- Muted terracotta — pocket edge
Step-by-Step Crochet Tutorial
Step 1: Make the Foundation Chain
Using sage-green yarn and a 5.5 mm hook:
Ch 54.
Beginning in the third chain from the hook, work one hdc into every chain.
You should finish with:
52 hdc.
The two skipped chains provide turning height and do not count as a stitch.
Don’t worry if the first row looks slightly shorter than 16 inches before it relaxes. Measure after several rows have been completed.
Beginner tip:
Turn the chain toward you so the V shapes are clearly visible before inserting the hook.
Common mistake to avoid:
Do not count the loop already sitting on your hook as a chain.
Step 2: Crochet Straight Half Double Crochet Rows
For Row 2:
Ch 2 and turn.
Work 1 hdc in the first stitch and each stitch across.
You should still have:
52 hdc.
Repeat this row, maintaining 52 stitches.
After five or six rows, stop and inspect the sides. They should rise vertically rather than slanting inward.
Beginner tip:
Insert a stitch marker into the first and final stitch before working across a long row. Move the markers upward as you crochet.
Common mistake to avoid:
Do not skip the first actual stitch because you assume the ch-2 counts as an hdc. In this tutorial, it does not.
Step 3: Finish the Front Panel
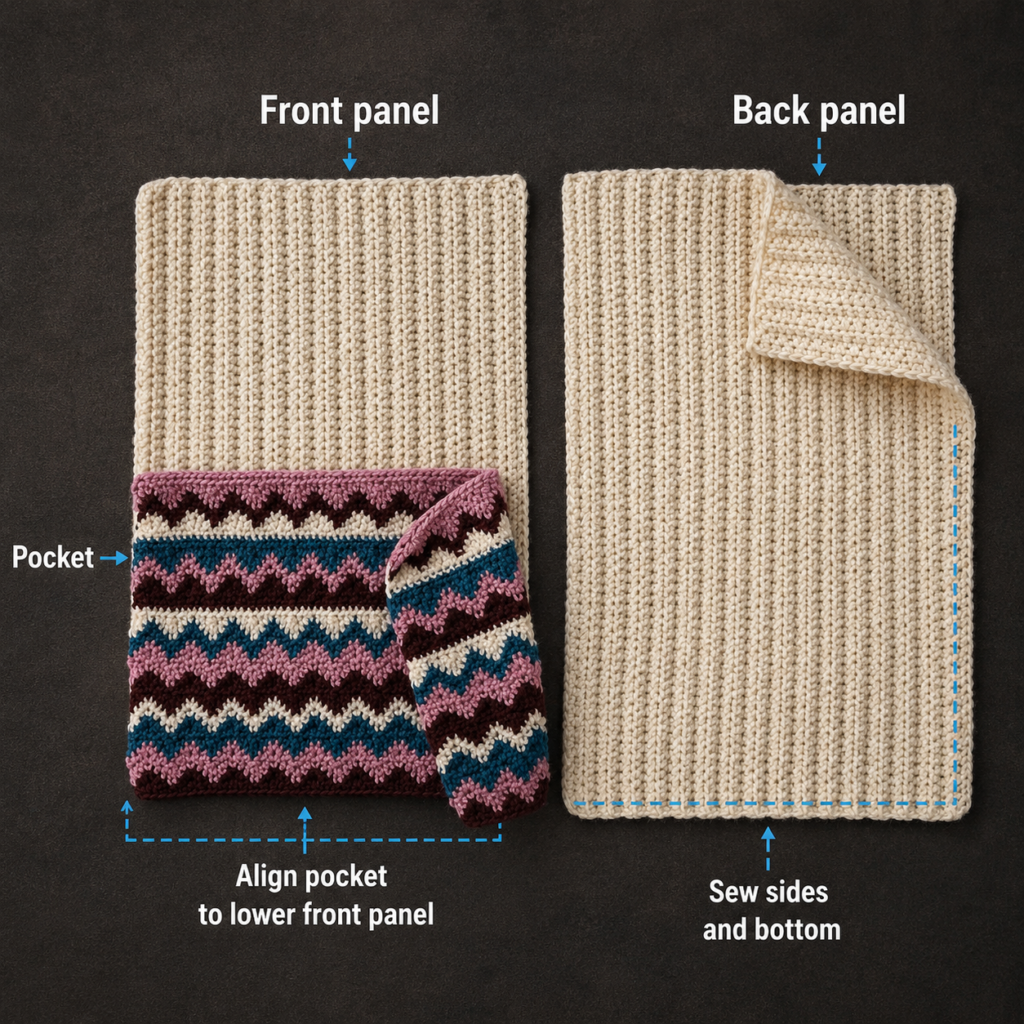
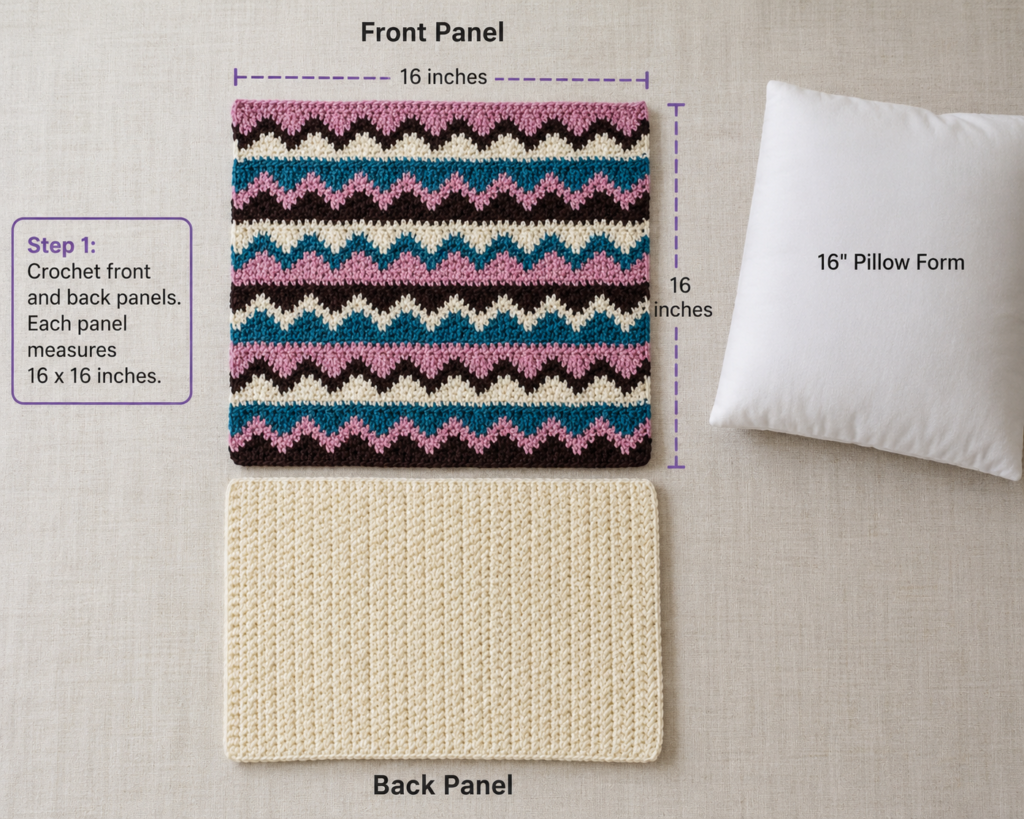
Continue the same hdc row until the piece measures approximately 15½–16 inches tall.
At the suggested gauge, this will be around 40 rows, but use the measurement rather than blindly relying on the row number.
Fasten off, leaving a 6-inch tail.
Lay the panel flat without stretching.
Check:
- Width
- Height
- Straightness of all four edges
Now make a second identical sage panel for the back.
Matching panel dimensions are more important than matching an exact number of rows. If the first panel has 41 rows to reach the correct height, make the second one 41 rows as well.
Beginner tip:
Place the second panel over the first every 10 rows. This quickly shows whether your tension has changed.
Common mistake to avoid:
Don’t intentionally make the back panel larger because you assume the pillow needs extra room. Crochet stretches.
Step 4: Crochet the Book Pocket
The pocket uses the same width as the pillow panels.
With warm cream yarn:
Ch 54.
Starting in the third chain from the hook, work:
52 hdc.
For each following row:
Ch 2, turn, hdc in every stitch across.
Continue in cream until you have completed approximately 20 rows.
Change to muted terracotta.
Work 2 more hdc rows.
The pocket should measure approximately 8½–9 inches tall.
That depth is enough to hold a typical paperback securely without hiding most of the pillow.
Beginner tip:
Count all 52 stitches every few rows. The pocket must remain the same width as the front panel.
Common mistake to avoid:
Don’t make the pocket dramatically tighter than the pillow body. A tight pocket may pull the entire pillow inward after assembly.
Step 5: Reinforce the Pocket Opening
The top of the pocket gets more handling than the other edges, so give it a firmer finish.
Keep the terracotta yarn attached.
Ch 1.
Work 1 sc in each stitch across the top edge.
Fasten off and weave the tail securely through several nearby stitches.
This simple single crochet row reduces stretching without creating a bulky ridge.
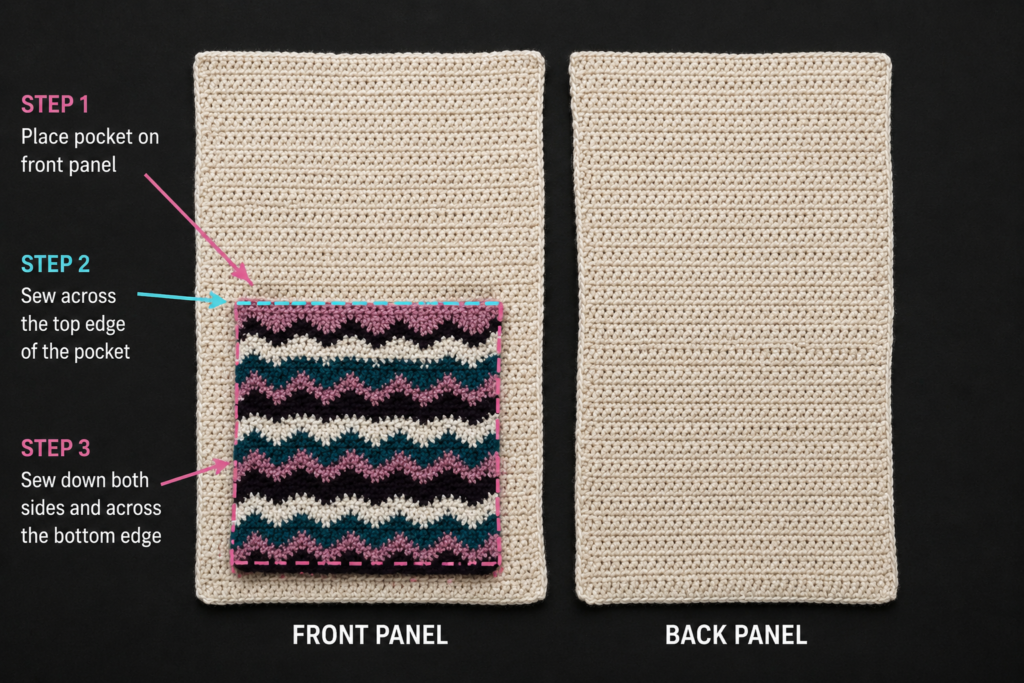
Lay the pocket over the bottom section of the front panel.
The bottom edges and both side edges should line up.
Beginner tip:
Test the pocket with a book before permanent assembly. The book should slide in without forcing the pocket outward.
Common mistake to avoid:
Don’t accidentally seam the upper pocket edge to the pillow. It needs to remain open.
Step 6: Measure and Lightly Block the Pieces
Before joining everything together, compare the pieces one last time.
Your front and back should be very close in size.
The pocket should:
- Match their width.
- Cover approximately the lower 55% of the front panel.
- Lie flat without pulling the main panel inward.
If one panel is slightly uneven, lightly dampen or steam-block it according to the fiber manufacturer’s recommendations.
Do not aggressively stretch the work to force it to 16 inches.
Let every piece dry completely before assembly.
Step 7: Stack the Pillow Layers
Place the back panel flat.
Place the front panel on top, with the side you want visible facing upward.
Position the pocket on the lower front, also facing upward.
The pocket top remains free.
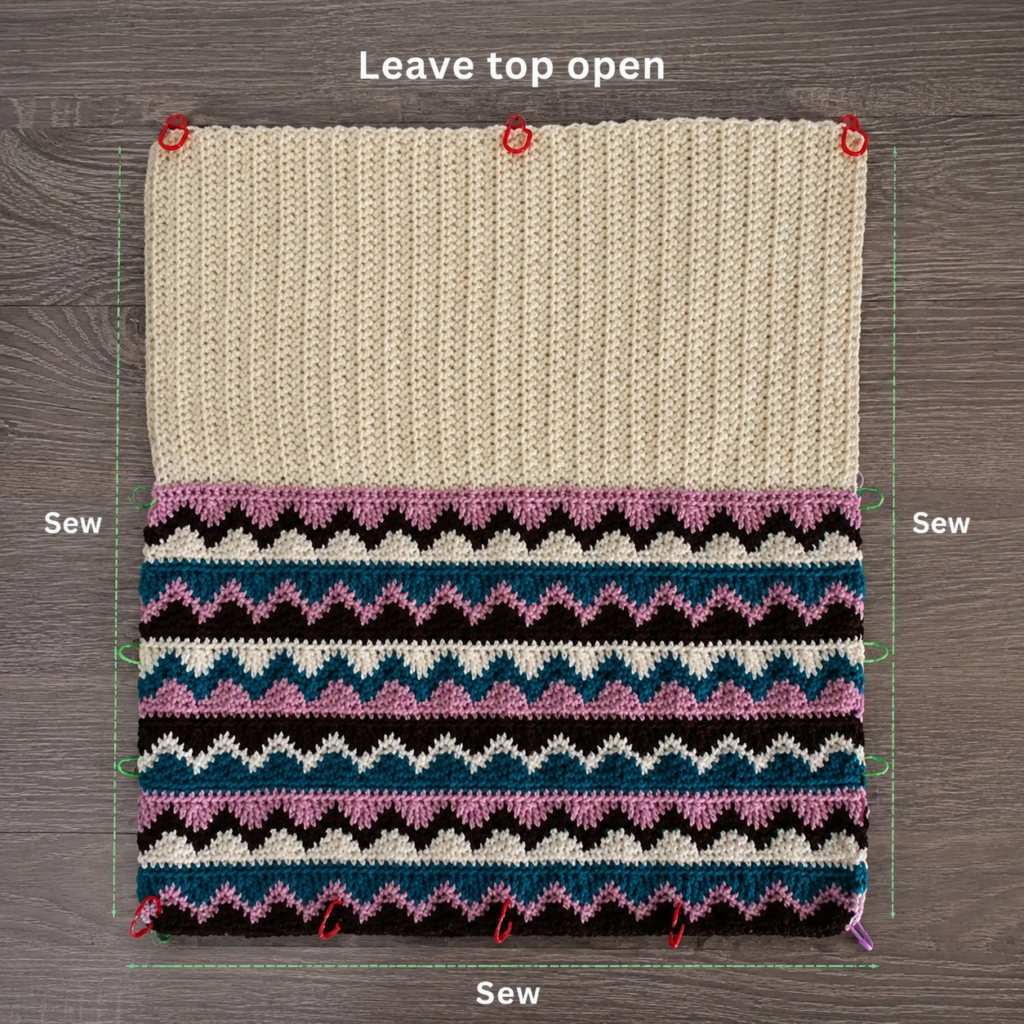
Use locking stitch markers every 2–3 inches around the outer perimeter.
At the lower section, the markers should pass through:
- Front panel
- Back panel
Above the pocket, the markers pass through only:
- Front panel
- Back panel
Check every corner before seaming.
Beginner tip:
Use more stitch markers than you think you need. They prevent one crochet layer from stretching ahead of another.
Common mistake to avoid:
Don’t align the layers only at the four corners. The center of a long crochet edge can shift even when the corners look correct.
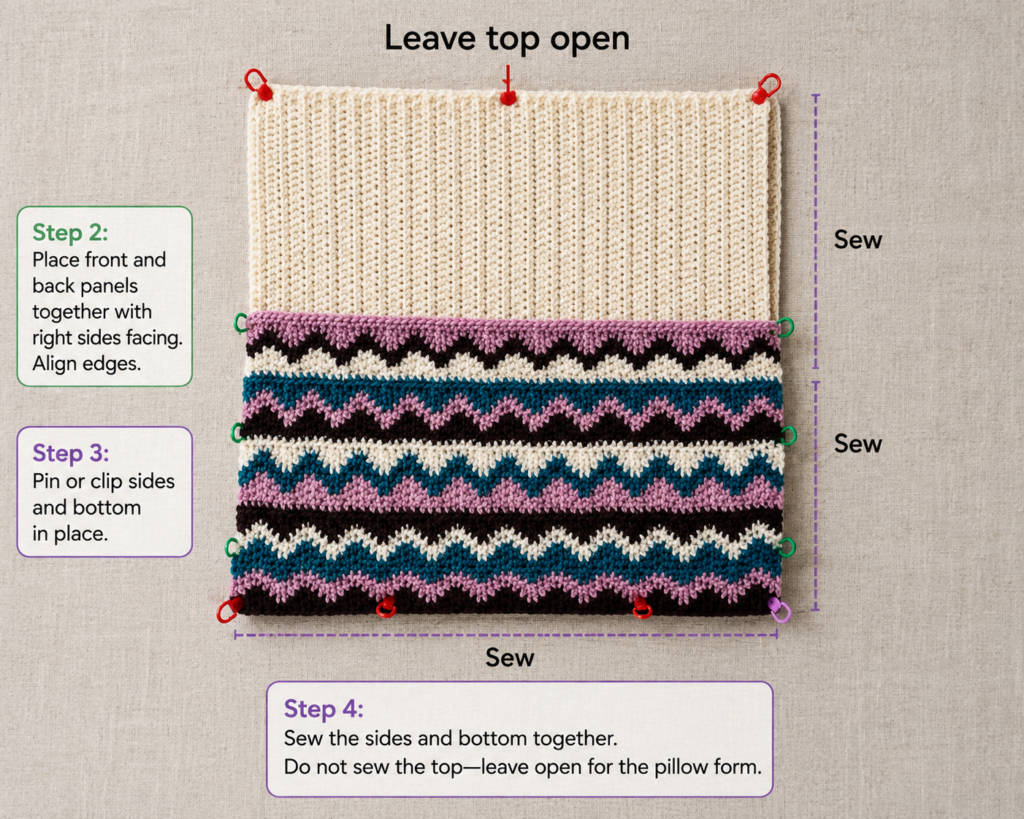
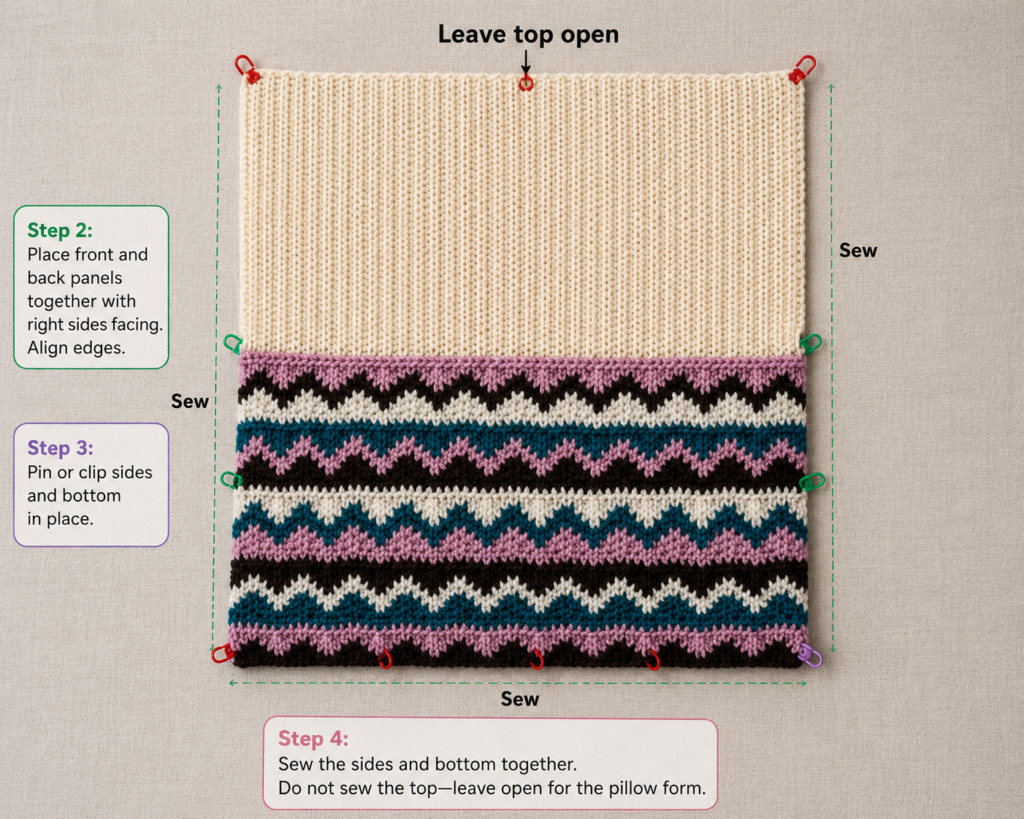
Step 8: Single Crochet Three Sides Together
Join sage yarn at the top-left corner.
Ch 1.
Work single crochet stitches evenly down the left side.
When you reach the portion containing the pocket, make sure the hook passes through all three layers.
Work across the bottom.
Then work upward along the right side.
Try to place approximately one sc into each row end, but allow the fabric to guide you. The seam should lie flat rather than ruffling.
Stop when you reach the top-right corner.
Do not close the top yet.
Remove stitch markers as you reach them.
Beginner tip:
Every few inches, place the project flat on your table. If the seam begins to wave, you are probably adding too many stitches.
Common mistake to avoid:
Missing the pocket layer at one section creates a hole at the side of the pocket. Look at all three layers before pulling each seam stitch through.
Step 9: Insert the Pillow Form
Gently compress the pillow form and slide it through the open top.
Push the two lower pillow corners fully into the crocheted corners first.
Then settle the top corners into place.
Use your fingertips to smooth the seam around the insert.
The cover should look comfortably full but not stretched so tightly that you can see large gaps between stitches.
If you must force the pillow form into the cover, stop and check your measurements before proceeding.
Beginner tip:
Fold the pillow insert slightly in half while putting it inside, then let it expand gradually.
Common mistake to avoid:
Don’t drag a pillow corner aggressively against the crochet seam. It can stretch a single edge stitch.
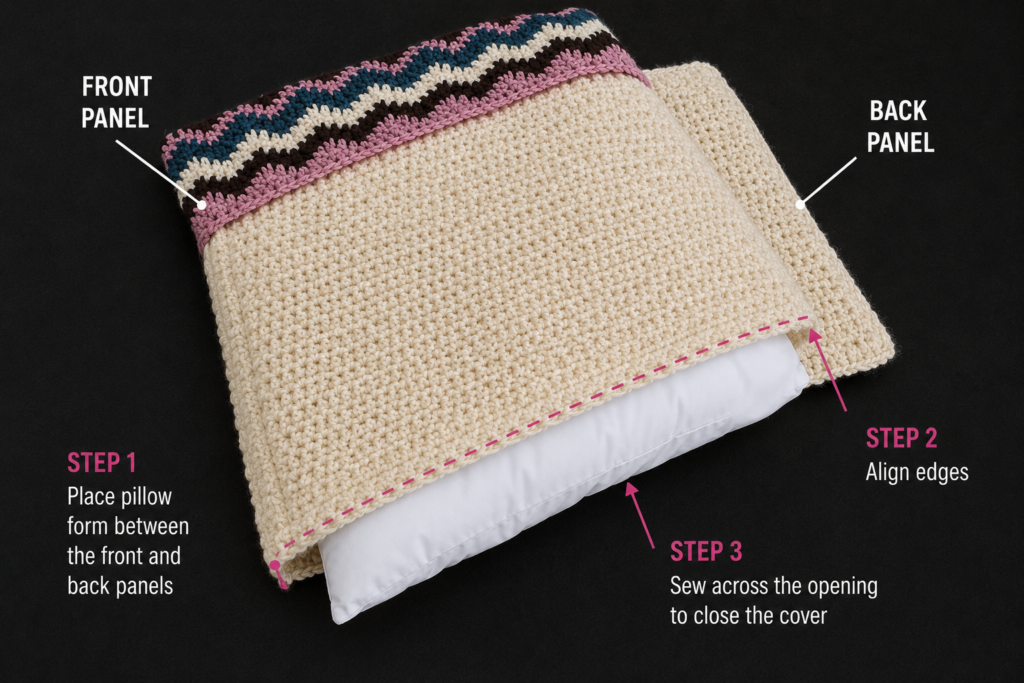
Step 10: Close the Top Edge
Reattach sage yarn at the top-right corner if necessary.
Work single crochet evenly across the top, passing through both the front and back panels.
Because the pocket ends below this point, only two crochet layers are being joined.
At the final corner:
Sl st into the first seam stitch if needed.
Fasten off.
Leave a long enough yarn tail to weave securely into the seam.
Move the pillow filling away from the edge while weaving so that your tapestry needle passes only through crochet stitches.
Your reading pillow is finished.
Pattern Notes
Turning Chain
Ch 2 at the beginning of an hdc row provides height but does not count as a stitch.
Ch 1 before a single crochet edge does not count as a stitch.
Stitch Count
Main panels:
52 hdc per row
Pocket:
52 hdc per row
Keeping these counts consistent prevents narrowing.
Repeat Pattern
Main panel repeat:
Ch 2, turn, hdc in each stitch across.
Pocket repeat:
Same basic hdc row until the final accent and sc edging.
Right Side and Wrong Side
Plain hdc looks acceptable from either side, but choose whichever surface appears neatest as your visible right side.
Once you’ve chosen, keep both pillow-panel right sides oriented consistently.
Size Adjustment
The easiest method is to work from measurements rather than copying the 52-stitch count.
At this tutorial’s gauge:
13 stitches = 4 inches
That equals approximately:
3.25 stitches per inch
For a different pillow width:
Desired width × stitches per inch = approximate stitch count
Then crochet until the panel height matches the width.
For example, an 18-inch pillow would require approximately 58–59 hdc stitches at the same gauge.
Always make a swatch first because two worsted yarns can behave differently even when both are labeled #4. The Craft Yarn Council specifically cautions that yarns within the same weight category are not automatically interchangeable without checking gauge and fabric characteristics.
Common Beginner Mistakes
1. Losing Stitches at the Edges
Problem: Your panel gradually becomes narrower.
Fix: Mark the first and last stitch and count regularly. The turning chain does not replace the first hdc in this tutorial.
2. Making the Foundation Chain Too Tight
Problem: The lower edge is narrower than the rest of the panel.
Fix: Relax your grip while chaining. You can also make the foundation chain with a hook one size larger and switch back to 5.5 mm for the first row.
3. Making the Two Main Panels Different Sizes
Problem: The edges refuse to align during assembly.
Fix: Compare the panels as you work. Match their physical measurements and row counts.
4. Stretching the Pocket During Assembly
Problem: The pocket looks baggy after joining.
Fix: Place it flat without pulling. Use markers every 2–3 inches before seaming.
5. Accidentally Closing the Pocket Opening
Problem: Your seam catches the upper edge of the pocket.
Fix: Remember that only the pocket’s left side, bottom, and right side are secured. The terracotta upper edge stays completely open.
6. Missing One Layer While Seaming
Problem: A small hole appears where the pocket meets the side seam.
Fix: At the lower pillow section, visually confirm that the hook enters front panel + pocket + back panel.
7. Adding Too Many Single Crochet Edge Stitches
Problem: The finished seam ruffles.
Fix: Skip an occasional row end rather than forcing a stitch into every possible gap. Let the seam lie flat naturally.
How to Customize This Crochet Project
Change the Yarn
A soft acrylic yarn makes a practical everyday pillow and is easy to wash.
Cotton creates a crisp stitch definition but may produce a heavier pillow.
A cotton-acrylic blend offers a good balance between structure and softness.
Avoid extremely fuzzy yarn if you’re a beginner because it makes individual stitches harder to see.
Change the Colors
Try:
- Navy + oatmeal + mustard for a library-inspired look.
- Dusty pink + cream + burgundy for a gift.
- Forest green + beige + rust for fall.
- Light blue + white + soft yellow for a child’s reading nook.
- One solid color for a minimalist design.
Make a Taller Pocket
For large picture books, crochet approximately 24–25 pocket rows instead of 22.
Keep at least several inches of the upper pillow visible so the finished project still looks balanced.
Divide the Pocket
After attaching the pocket, you can sew a vertical line through the pocket and front panel to create two compartments.
For example:
- One larger book compartment.
- One narrow compartment for reading glasses or a remote.
Do this before inserting the pillow form.
Add a Decorative Border
Instead of plain sc seams, experiment with:
- Reverse single crochet.
- Small picots.
- A contrasting sc border.
- Crab stitch.
For a beginner’s first pillow, plain sc remains the easiest and most durable option.
Make the Cover Removable
If you expect frequent washing, replace the single back panel with two overlapping back pieces to create an envelope opening.
The same selected source demonstrates an envelope-back variation, although this beginner tutorial intentionally uses the simpler solid-back construction.
Gift Ideas
Place something inside the finished pocket before gifting it:
- Children’s book
- Novel
- Journal
- Coloring book
- E-reader
- Reading glasses case
- Gift card
- Puzzle book
A reading pillow paired with a book works particularly well as a birthday, teacher, holiday, or back-to-school gift.
Finishing Instructions
Fastening Off
After your final seam stitch, cut the yarn leaving approximately a 6-inch tail.
Pull the tail completely through the final loop.
Weaving in Ends
Thread the tail onto a tapestry needle.
Pass it through the dense back portions of several nearby stitches.
Change direction and work through another section.
Trim only after the yarn is secure.
Don’t simply cut a tail close to the final knot.
Blocking
Once the pillow form has been inserted, aggressive blocking is unnecessary.
If you block the individual pieces before assembly, allow them to dry fully.
Shaping
Massage the pillow form into all four corners.
Smooth the seams with your fingertips.
Adjust the book pocket so the upper edge lies straight.
Washing and Care
Always follow the care instructions on your specific yarn label.
Because the beginner version permanently encloses the pillow form, ensure your insert is washable before washing the complete pillow.
For easier laundering, use the envelope-back customization described above.
Quick Printable-Style Summary
Project: Crochet reading pillow with front book pocket
Skill level: Beginner / Easy
Finished size: Fits approximately 16 x 16 inch pillow form
Yarn: #4 medium/worsted
Hook: 5.5 mm
Gauge: Approximately 13 hdc x 10 rows = 4 inches
Main panel starting chain: Ch 54
Main panel stitch count: 52 hdc
Main panels: Make 2, approximately 16 inches square
Pocket starting chain: Ch 54
Pocket stitch count: 52 hdc
Pocket height: Approximately 8½–9 inches
Main stitch: Half double crochet
Pocket edge: Single crochet
Assembly: Position pocket on front panel, stack front and back panels, secure with stitch markers, sc three sides together, insert pillow form, sc final edge closed.
Finishing: Fasten off and securely weave in all yarn tails.
FAQ
Is a crochet reading pillow suitable for beginners?
Yes. A reading pillow can be an excellent first larger project because most of the work consists of simple rectangular panels. This version deliberately uses half double crochet instead of complicated textured stitch repeats.
What size pillow form should I use?
This pattern is written for a 16 x 16 inch insert.
You can resize the pattern for another pillow by making your front and back pieces approximately the same dimensions as the insert.
What is the best yarn for a crochet reading pillow?
A #4 washable acrylic, cotton-acrylic blend, or sturdy cotton works well.
Choose yarn that has enough structure to support a book without becoming uncomfortable when used as a pillow.
How deep should a reading-pillow pocket be?
For a 16-inch pillow, approximately 8½–9 inches is a practical starting point.
A children’s picture book may benefit from a slightly taller pocket, while an e-reader pocket can be shorter.
Can I use single crochet for the whole pillow?
Yes.
Single crochet creates denser fabric, but you’ll need more rows and probably more yarn.
Always work to the desired finished measurements rather than using this tutorial’s hdc row count.
Can I make the cover removable?
Yes. Use two overlapping back sections instead of one solid back panel.
This creates an envelope opening through which the pillow insert can be removed.
Why is my crochet pillow smaller than the insert?
Your gauge is probably tighter than the tutorial gauge.
Measure your panel before assembly rather than assuming the stitch count will produce exactly the same size with every yarn and hook combination.
A slightly smaller cover is acceptable because crochet stretches, but a major size difference should be corrected before assembly.
Conclusion
A reading pillow is one of those crochet projects that manages to be decorative and genuinely useful at the same time.
The construction is approachable: two matching squares, one shorter pocket, and a simple crocheted seam. Yet the finished piece looks substantial enough to give as a handmade gift.
Once you’ve made the basic version, the same construction can become a children’s book pillow, an e-reader cushion, a remote-control pocket pillow, or a personalized reading-nook accessory.
Save the tutorial so you can return to the measurements when you’re ready to experiment with another color combination or a different pillow size.