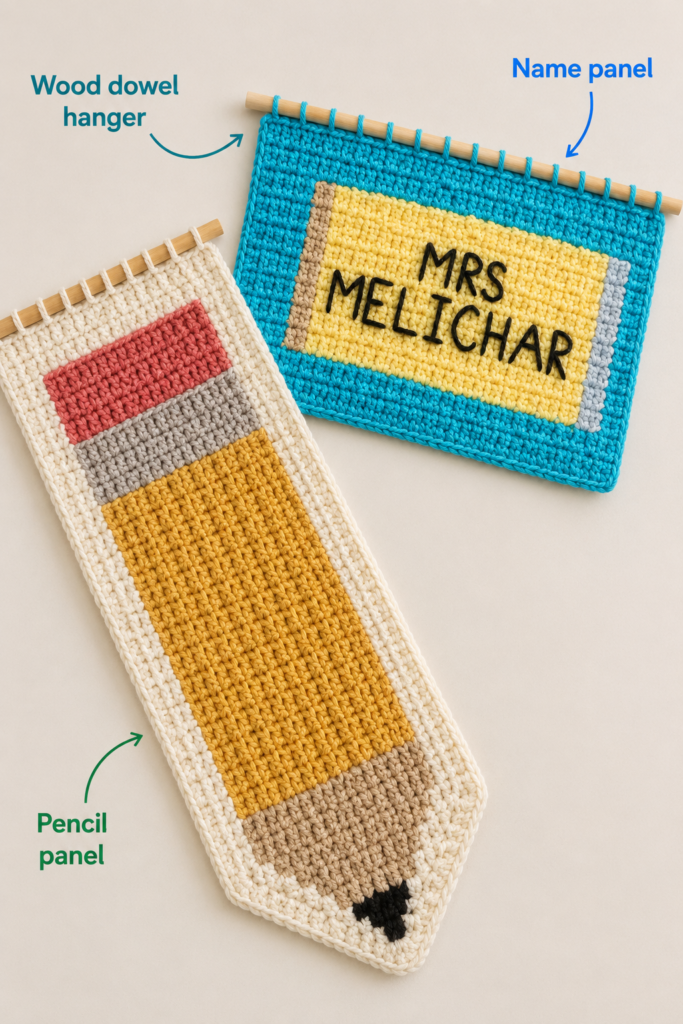
A classroom door is one of the first things students see, so a small handmade decoration can add personality without filling the room with more clutter. This crochet classroom door hanger combines a simple corner-to-corner background with an easy pencil appliqué and a wooden dowel.
The construction is intentionally beginner-friendly. Instead of carrying five yarn colors through a complicated graph, you will crochet the background in one color and make the pencil separately. That gives you plenty of time to learn the C2C rhythm before worrying about decorative details.
You will learn how to start a C2C rectangle, increase and decrease blocks, create a neat border, crochet a simple pencil from basic shapes, sew an appliqué without puckering the background, and finish the piece with a dowel and hanging cord.
The result is approximately 8 x 14 inches / 20 x 36 cm, depending on your gauge, before adding the dowel and cord. It is large enough to be noticed on a classroom door but compact enough to hang from a small removable hook.
What You’ll Learn
- How a basic C2C crochet block is constructed
- How to increase a C2C triangle
- How to turn that triangle into a rectangle
- How to decrease back to one block
- How to count C2C blocks accurately
- How to work a clean single-crochet border
- How to crochet a pencil from simple flat pieces
- How to attach appliqué without stretching the background
- How to attach a dowel
- How to crochet a sturdy hanging cord
- How to block the finished door hanger
Materials You’ll Need
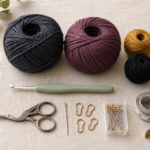
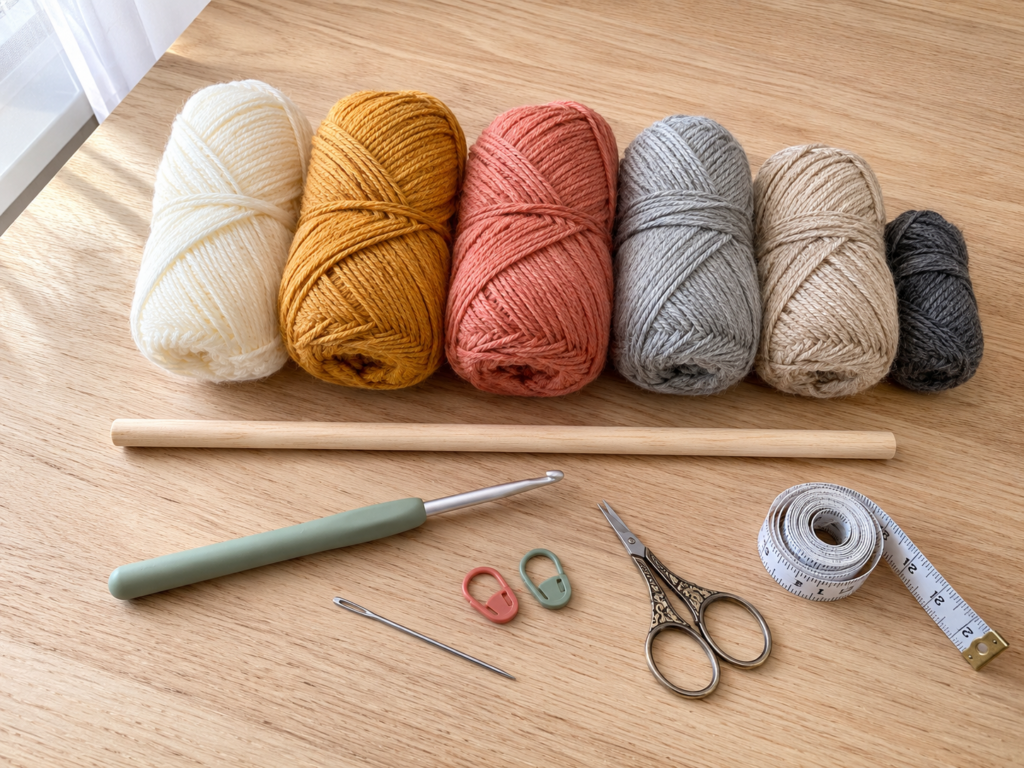
For the sample project, use:
- Approximately 150–180 yards medium #4 worsted yarn in warm cream for the banner, border, and hanging cord
- Small amount of golden mustard yarn for the pencil body
- Small amount of dusty coral for the eraser
- Small amount of soft gray for the ferrule
- Small amount of oat beige for the wooden pencil tip
- A few feet of charcoal yarn for the graphite point or optional personalization
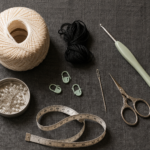
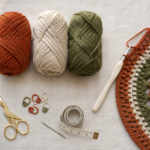
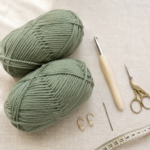
- 4.5 mm or 5 mm crochet hook
- Yarn/tapestry needle
- Scissors
- 10–12 inch natural wooden dowel
- 2 locking stitch markers
- Measuring tape
- Blocking mat and rust-resistant pins, optional
Medium #4 includes yarns commonly described as worsted, afghan, or aran. The Craft Yarn Council lists a range of commonly used hooks for medium yarn, but its sizing chart is a guideline rather than a substitute for the gauge required by an individual project. For this decorative piece, a slightly smaller hook is useful because a firm fabric hangs more neatly.
Crochet Abbreviations Used
This tutorial uses US crochet terminology.
- ch = chain
- dc = double crochet
- hdc = half double crochet
- sc = single crochet
- sl st = slip stitch
- st/sts = stitch/stitches
- sp = space
- rep = repeat
- sc2tog = single crochet two together
- RS = right side
- WS = wrong side
These abbreviations follow common US pattern terminology listed by the Craft Yarn Council. UK terminology differs: for example, a US single crochet is called a UK double crochet, while a US double crochet is a UK treble crochet.
Before You Start
Gauge and tension
Exact gauge is not critical because this project does not need to fit a body, but the finished panel should be reasonably firm.
A useful target is approximately:
4 C2C blocks = 3 inches / 7.5 cm
If four blocks measure much more than 3 inches, try a smaller hook. If they are noticeably smaller and the fabric feels stiff, increase your hook size.
Your final measurements matter more than matching the sample perfectly.
How to count C2C blocks
Do not count individual double crochet stitches.
Instead, look for each small square or “tile.” One C2C block contains a small group of double crochet stitches connected to a chain space.
At the end of every row, count the blocks across the diagonal.
For the first section of this pattern, your counts should be:
1, 2, 3, 4, 5 … until you reach 10.
Keeping the edges straight
Most C2C mistakes happen at the edges rather than in the middle.
Use a stitch marker on the edge where you begin maintaining the final short-side width. That visual reminder helps prevent accidental increases.
Preventing curling
A little curling while you work is normal. Severe curling usually means the working yarn is being pulled too tightly, especially during slip-stitch joins.
Relax your joins and allow the chain spaces to remain open enough for the hook to enter easily.
Choosing colors
A school-themed pencil is easy to recognize with:
- Coral or pink eraser
- Gray ferrule
- Yellow or mustard body
- Tan wooden tip
- Charcoal graphite
But nothing requires a traditional yellow pencil. School colors can make a personalized teacher gift more meaningful.
Beginner note
Practice two or three C2C blocks with scrap yarn before starting if you have never used the technique.
The first few rows often look confusing because the work is very small. Once you have four or five rows, the diagonal block structure becomes much easier to see.
Step-by-Step Crochet Tutorial
Step 1: Make the First C2C Block
Start with the warm cream yarn.
Chain 6.
Work 1 double crochet into the 4th chain from the hook, then 1 double crochet into each of the next 2 chains.
You now have your first C2C block.
The three unused chains at the beginning form the chain space that later blocks will join into.
Do not worry if this first block looks more like a small rectangle than a perfect square. The fabric becomes clearer once additional blocks surround it.
Beginner tip: Hold the first three chains gently between your fingers while making the double crochets. This helps prevent the starting chain from twisting.
Common mistake to avoid: Do not work into the first, second, and third chains from the hook. Those chains need to remain available as the turning-chain space.
Step 2: Increase Until You Have 10 Blocks
Turn your work.
For an increase row:
- Chain 6.
- Double crochet into the 4th, 5th, and 6th chains from the hook. This forms the first new block.
- Bring this block toward the block from the previous row.
- Slip stitch into the previous block’s chain-3 space.
- Chain 3.
- Work 3 double crochets into that same chain-3 space.
Row 2 now contains 2 blocks.
Turn and repeat the same logic.
Each new increase row adds one more block:
- Row 3 = 3 blocks
- Row 4 = 4 blocks
- Row 5 = 5 blocks
- Row 6 = 6 blocks
- Row 7 = 7 blocks
- Row 8 = 8 blocks
- Row 9 = 9 blocks
- Row 10 = 10 blocks
After Row 10, stop increasing the short side of the banner.
You should have a triangular piece with 10 blocks across its longest diagonal.
Beginner tip: Count blocks after every row. Correcting one row is much easier than discovering a missing block eight rows later.
Common mistake to avoid: A slip stitch joins one block to another; it is not supposed to become another tall stitch. Pull it only snug enough to secure the blocks.
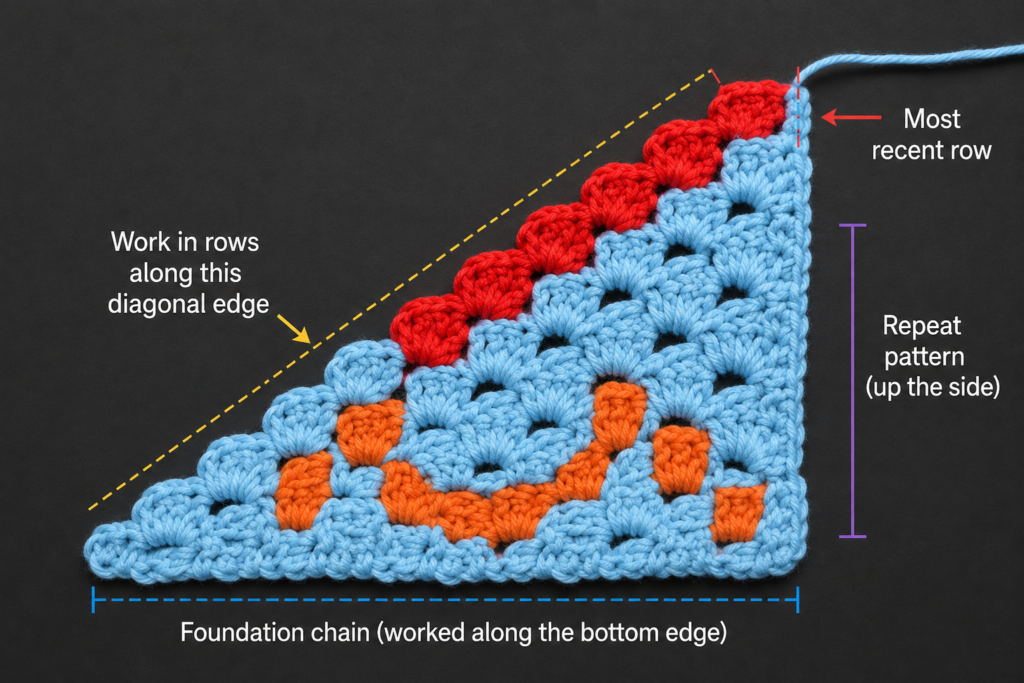
Step 3: Turn the Triangle Into a Rectangle
Now you need the banner to grow longer without becoming taller.
Clip a stitch marker to one of the short-side edges. This is your non-growing edge.
For Rows 11–18, maintain 10 blocks per row.
At the marked edge, decrease instead of increasing.
To begin at a decreasing edge
Turn the piece.
Slip stitch across the tops of the three double crochets of the first block until you reach its chain-3 space.
Slip stitch into that chain space.
Chain 3 and work 3 double crochets into the same space.
Continue working normal C2C blocks across the row.
At the opposite edge
The opposite side still needs to grow in length, so complete the final available block normally.
On the next row, your direction is reversed. The growth and decrease therefore occur at opposite ends of your working row, but the same physical side of the rectangle stays 10 blocks wide.
That is why the stitch marker is so useful.
Continue until the long side measures 18 blocks.
Your working counts during this section remain:
10 blocks, 10 blocks, 10 blocks…
If you suddenly have 9 or 11, stop before continuing.
Beginner tip: Think in terms of the physical edges rather than “left” and “right.” The work flips every row, so left and right keep changing.
Common mistake to avoid: Do not decrease both edges yet. Doing so will immediately start closing the rectangle.
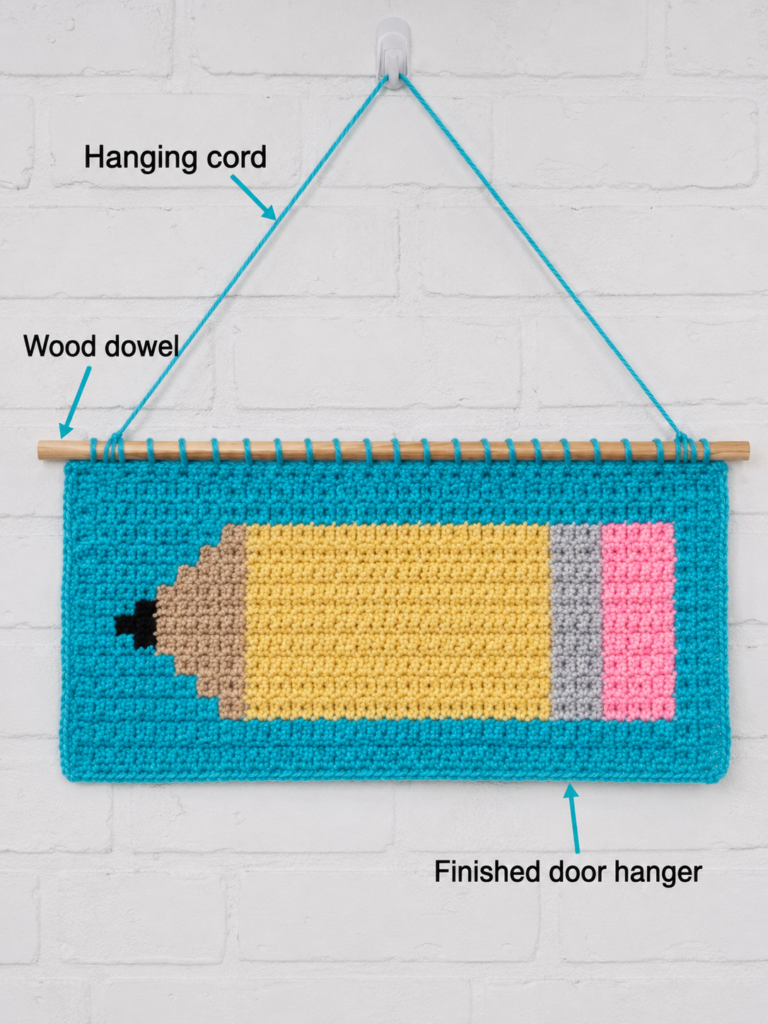
Step 4: Decrease Both Sides and Complete the Base
Once the panel has reached 10 blocks by 18 blocks, both final dimensions are established.
Now decrease at both edges.
At the start of every remaining row:
- Turn.
- Slip stitch across the first block until you reach the next chain-3 space.
- Slip stitch into that space.
- Chain 3.
- Work 3 double crochets in the same space.
- Continue across.
At the far edge, stop after joining to the final available block instead of creating another block beyond it.
Your approximate row counts should now decrease:
- Row 19 = 9 blocks
- Row 20 = 8 blocks
- Row 21 = 7 blocks
- Row 22 = 6 blocks
- Row 23 = 5 blocks
- Row 24 = 4 blocks
- Row 25 = 3 blocks
- Row 26 = 2 blocks
- Row 27 = 1 block
Fasten off after the last block.
Lay the piece flat and check the shape.
You should now have a simple cream rectangle approximately 8 x 14 inches, although your actual size will depend on yarn, hook, and personal tension.
Beginner tip: If you are unsure whether to make another block at the end of a decrease row, compare the new edge with the row below it. The diagonal should move inward, not outward.
Common mistake to avoid: Do not pull the final decrease joins extremely tight. A tight corner can make the finished rectangle curve.
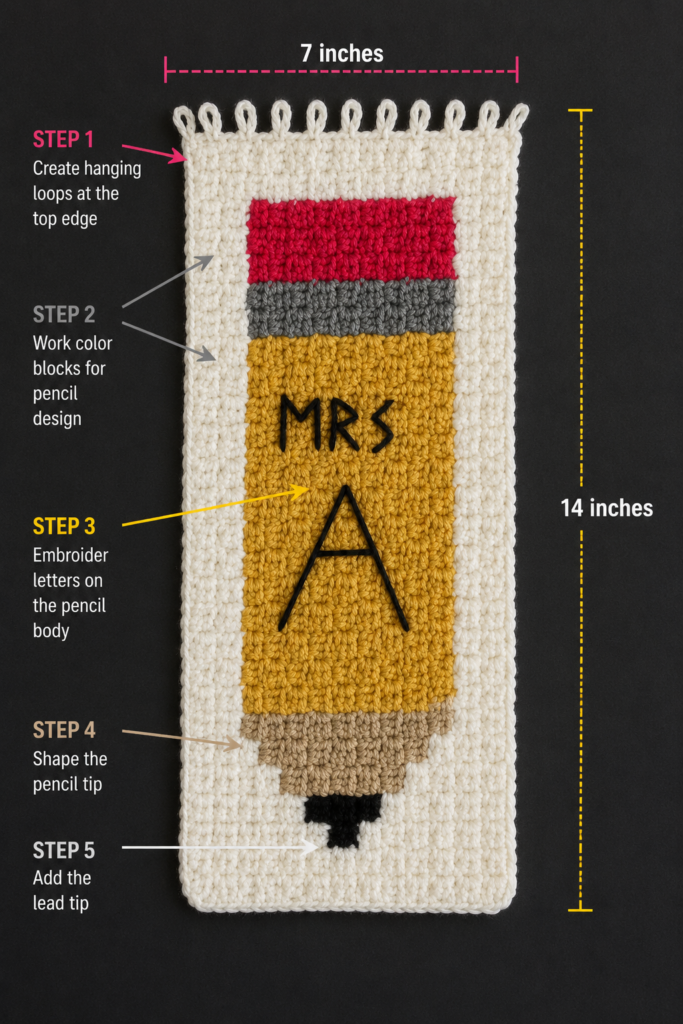
Step 5: Crochet the Pencil Appliqué
The pencil is made separately. This is much easier for beginners than changing colors repeatedly inside the C2C panel.
All pieces use half double crochet unless otherwise stated.
Golden mustard pencil body
Chain 6.
Row 1: Hdc in the 2nd chain from the hook and in each remaining chain. 5 hdc.
Rows 2–22: Chain 1, turn, hdc in each stitch across. 5 hdc.
Fasten off with a long tail for sewing.
Dusty coral eraser
Chain 6.
Row 1: Hdc in the 2nd chain from the hook and across. 5 hdc.
Rows 2–5: Chain 1, turn, hdc across. 5 hdc.
Fasten off.
Soft gray ferrule
Chain 6.
Row 1: Hdc in the 2nd chain from hook and across. 5 hdc.
Rows 2–4: Chain 1, turn, hdc across. 5 hdc.
Fasten off.
Oat-beige wooden tip
Chain 6.
Row 1: Hdc in the 2nd chain from the hook and across. 5 hdc.
Row 2: Chain 1, turn. Hdc2tog, hdc in the center stitch, hdc2tog. 3 sts.
Row 3: Chain 1, turn. Work the remaining 3 stitches together to create the final point.
Fasten off.
If a three-stitch hdc decrease feels awkward, you can instead use single crochet for the last row and work the three loops together carefully.
Add the graphite
Thread a small amount of charcoal yarn onto a tapestry needle.
Cover just the pointed end of the beige triangle with two or three neat satin-style stitches.
Do not make the black area too large. Leaving visible beige around it helps the piece read as a sharpened pencil.
Arrange the parts in this order:
Eraser → ferrule → mustard body → wooden tip
Do not sew them to the banner yet.
Beginner tip: Block or gently flatten the four pieces before assembly. Straight edges are much easier to align.
Common mistake to avoid: Keep every rectangular component 5 stitches tall. If one is 4 or 6 stitches tall, the sections will not line up cleanly.
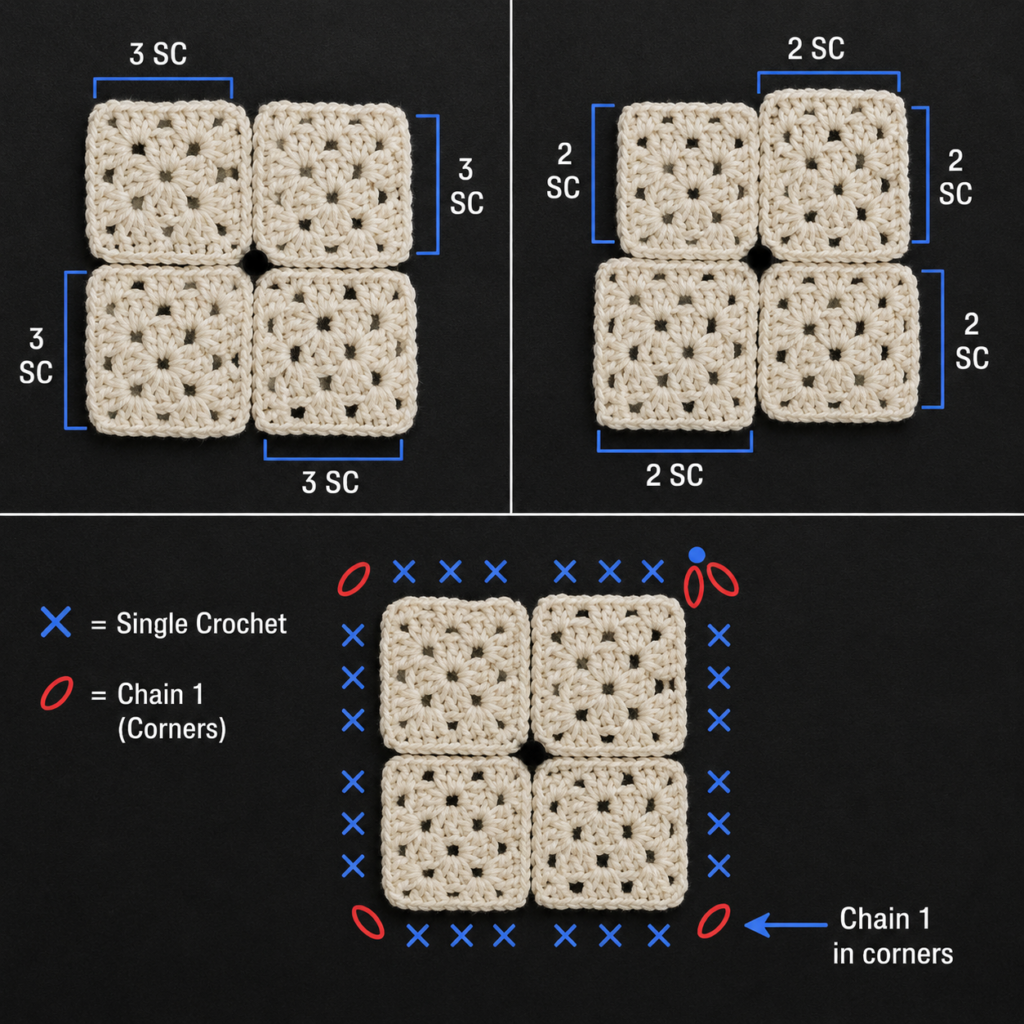
Step 6: Add a Single-Crochet Border
The natural edge of C2C crochet has small steps and chain spaces. A border gives the door hanger a more deliberate frame and also creates an easier edge for attaching the dowel.
Join warm cream yarn at any corner.
Chain 1.
Work single crochet evenly around the entire piece.
For each C2C block along the side, begin with roughly 2 single crochets per block edge, then adjust if necessary.
At each corner, work:
sc, ch 1, sc
into the corner area.
The goal is more important than a rigid stitch number:
- If the edge begins to flare or ruffle, you have too many stitches.
- If the edge pulls inward, you have too few.
- If it lies flat, your spacing is correct.
When you return to the beginning, slip stitch to the first single crochet.
Fasten off unless you want to use the same yarn tail for later finishing.
Beginner tip: Stop every few inches and lay the work down. Crochet fabric tells you quickly whether the border spacing is working.
Common mistake to avoid: Do not force identical stitch placement into every irregular edge opening. C2C sides vary slightly; visual spacing matters more than putting the hook through a specific strand every time.
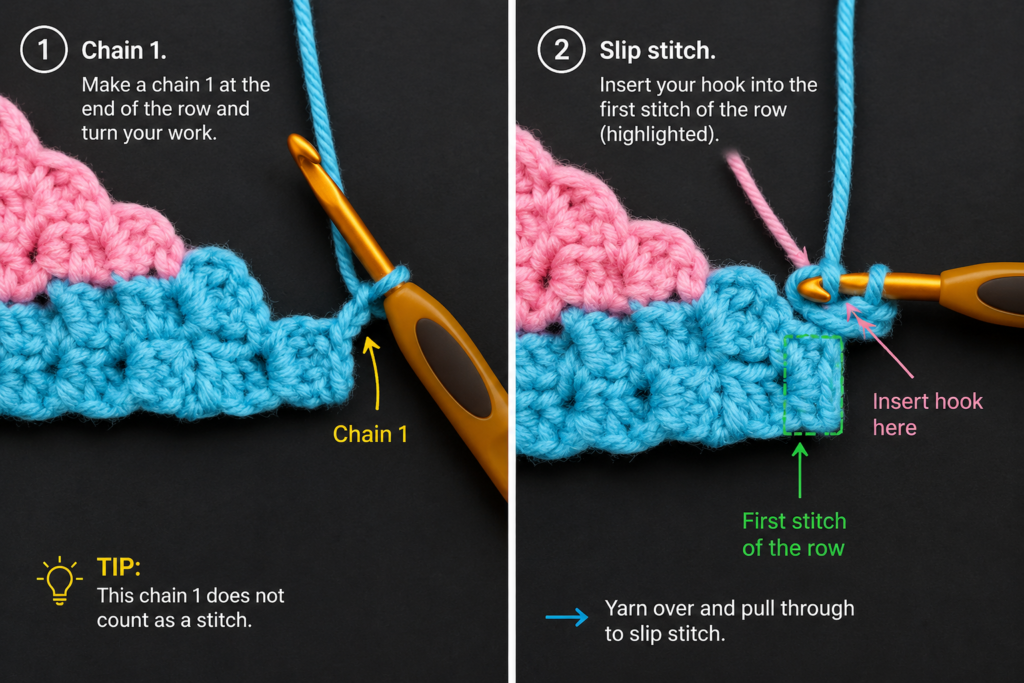
Step 7: Assemble and Sew the Pencil Appliqué
First join the pencil pieces to one another.
Place the short edge of the coral eraser against the gray ferrule and sew them together with matching yarn.
Join the other side of the ferrule to the mustard pencil body.
Finally, sew the wide edge of the beige triangle to the other end of the mustard body.
Weave in the joining ends on the back.
Now lay the complete pencil across the cream banner.
A horizontal position is easiest, but a very slight upward angle can make the design feel more playful.
Leave at least 1–1½ inches of background visible around the pencil.
Pin the appliqué temporarily with locking stitch markers or small safety pins.
Thread a tapestry needle with matching yarn and sew around the appliqué using small stitches.
Try to catch only part of the cream crochet fabric instead of passing completely through large gaps. This keeps the stitching neat on the back.
Do not pull each sewing stitch tightly. The appliqué should sit on the surface, not gather it.
Every few inches, stop and flatten the banner.
Optional personalization
Once the pencil is attached, you can add:
- A teacher’s initial
- Classroom number
- Grade number
- Small apple
- Star
- School-color stripes
If adding embroidered lettering, sketch the word on paper first and compare its width with the actual pencil before threading the needle.
Beginner tip: Sewing from the middle toward each end can prevent a long appliqué from shifting sideways.
Common mistake to avoid: Never hold the base stretched while sewing. When it relaxes later, the appliqué will buckle.
Step 8: Attach the Wooden Dowel and Make the Hanging Cord
Center the wooden dowel along the top edge.
The dowel should extend slightly beyond both sides of the banner.
Thread a tapestry needle with cream yarn.
Starting near one top corner, pass the yarn through the border and around the dowel.
Repeat across the entire top edge to create evenly spaced whipstitches.
Keep these stitches firm enough to support the banner but not so tight that the top edge gathers.
Secure the yarn and weave in the end.
Crochet the hanging cord
With cream yarn:
Chain approximately 55.
Hold the chain against the dowel and check its hanging length.
Add or remove chains now if needed.
For a stronger cord, slip stitch back into every chain.
Fasten off, leaving a sewing tail at both ends.
Tie or sew one end securely around each end of the dowel.
Before hanging the project on a door, lift it by the cord and give it a gentle pull. Nothing should slip.
Safety note: Use a placement that does not interfere with a classroom door handle, locking hardware, closer, window, emergency signage, or required fire-egress equipment. Follow the school’s rules for door decorations and removable hooks.
Beginner tip: Crochet the cord longer than you think you need and test it against the actual door before permanently securing both ends.
Common mistake to avoid: Do not attach the cord only to the crocheted fabric if the dowel is available. Letting the dowel support the weight reduces stretching along the top edge.
Step 9: Block, Shape, and Hang the Door Hanger
Before hanging the finished piece, check all four sides.
If the C2C blocks or appliqué are slightly uneven, blocking can make a substantial difference.
For acrylic yarn, a simple spray-blocking method is suitable:
- Lay the banner on a blocking mat or clean towel.
- Shape it into a straight rectangle.
- Pin the corners and edges if necessary.
- Lightly mist it with room-temperature water.
- Allow it to dry completely before removing the pins.
Blocking is the finishing process of shaping crochet or knitting to improve its dimensions and appearance. Lion Brand advises following the yarn label and notes that acrylic fibers are heat-sensitive, so avoid direct high-heat treatment.
If you used cotton, wet blocking is another option.
Once dry, trim stray yarn fibers, check the appliqué seams, inspect the hanging cord, and put the piece on its hook.
Pattern Notes or Stitch Notes
Turning-chain rules
For the C2C section, the beginning chains are part of the block construction rather than ordinary row-height turning chains.
For the half-double-crochet appliqué pieces, the chain 1 at the beginning of a row does not count as a stitch.
Stitch and block counts
The C2C background follows three stages:
- Rows 1–10: increase from 1 to 10 blocks
- Rows 11–18: maintain 10 blocks while lengthening the rectangle
- Rows 19–27: decrease from 9 to 1 block
The finished background is 10 x 18 C2C blocks.
Repeat pattern
Inside each ordinary C2C section:
- Slip stitch to the next chain space
- Chain 3
- Work 3 dc into that chain space
Repeat across as needed.
Right side and wrong side
The C2C base is reversible enough that you can choose whichever surface looks neater as your right side.
Make that decision before sewing the pencil on.
Once the appliqué is attached, the opposite surface becomes the permanent back.
Size adjustment
For a taller banner, increase beyond 10 blocks before beginning the rectangular section.
For a longer banner, simply work more rows while maintaining the short-side block count.
For example:
- 8 x 16 blocks = smaller door sign
- 10 x 18 blocks = sample size
- 12 x 22 blocks = larger classroom display
If you change the base size significantly, adjust the pencil length proportionally.
Common Beginner Mistakes
1. Accidentally adding an 11th block
This usually happens immediately after the short side has reached its final width.
Fix: Mark the non-growing edge and count every rectangle-stage row. The count should remain 10.
2. Beginning the final decreases too early
If both sides start decreasing while the panel is still short, you will make a square or short rectangle.
Fix: Do not begin decreasing both edges until the long dimension has reached 18 blocks.
3. Pulling slip-stitch joins too tightly
Very tight joins make the C2C fabric rigid and can distort the diagonal edges.
Fix: Use relaxed slip stitches. They only need to secure one block to another.
4. A ruffled border
Too many single crochets cause the edge to wave.
Fix: Remove a few border stitches and redistribute them more evenly.
5. A border that pulls inward
Too few stitches make the border shorter than the C2C edge.
Fix: Add another stitch in selected side spaces until the piece rests flat.
6. A puckered pencil appliqué
This happens when the sewing yarn is pulled tight or the background is stretched during sewing.
Fix: Lay the banner flat and use small, relaxed sewing stitches.
7. Crooked pencil sections
If the eraser, ferrule, and body are joined while twisted, the completed pencil will never sit completely flat.
Fix: Arrange every component on a table first, with all right sides facing upward, before sewing the sections together.
8. Weak hanging cord
A plain chain can stretch with use.
Fix: Slip stitch back through the chain to create a thicker cord, and anchor both ends securely to the dowel.
How to Customize This Crochet Project
Change the yarn colors
A classic school pencil uses yellow, but this design also works beautifully in:
- School colors
- Rainbow shades
- Pastel pink and lavender
- Sage and terracotta
- Blue and gold
- Neutral Montessori-inspired colors
Keep the eraser, ferrule, wooden tip, and graphite visually distinct if you want the pencil silhouette to remain immediately recognizable.
Change the size
Because the base uses C2C blocks, resizing is straightforward.
For a narrow classroom-door window area, make fewer blocks.
For a wall or bulletin-board display, make the rectangle larger.
Add a different border
After the first single-crochet edging, you could add:
- Second round of single crochet in a school color
- Reverse single crochet
- Simple scallops
- Alternating color border
- Surface-slip-stitch accent line
For a door hanger, avoid an extremely heavy border because it can pull the sides downward.
Add texture
Use back-loop-only single crochet for a subtle ridged second border.
The pencil body can also be worked in BLO half double crochet for a lightly ribbed effect.
Personalize it
Try adding:
- Teacher initial
- Classroom number
- Grade level
- Tiny crochet apple
- Star appliqué
- Mini rainbow
- Small book appliqué
If adding letters, keep them large and simple. Thin cursive details can disappear against textured crochet.
Gift ideas and uses
The finished project can work as:
- Back-to-school teacher gift
- Teacher appreciation gift
- Classroom door decoration
- Homeschool room decoration
- Reading-corner sign
- Library decoration
- Craft-room door hanger
- School-office decoration
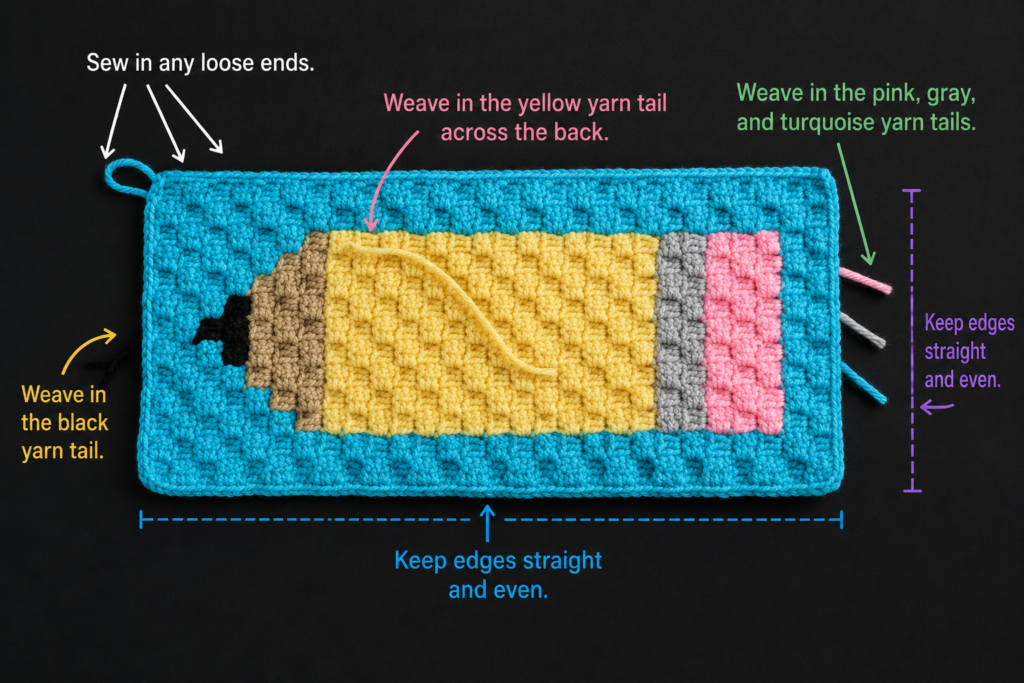
Finishing Instructions
Once every decorative element is attached:
- Fasten off all remaining yarn.
- Thread each tail into a tapestry needle.
- Weave each tail through several nearby stitches on the wrong side.
- Reverse direction once before trimming the tail; this helps prevent it from working free.
- Check that the pencil edges sit flat.
- Straighten the border.
- Block the banner if needed.
- Allow it to dry completely.
- Attach the dowel and cord if you removed them during blocking.
- Test the cord before displaying the piece.
Washing and care
Always follow the yarn manufacturer’s care label.
For a decorative door hanger, frequent washing should not be necessary. Dust can usually be removed with a gentle shake or lint roller.
If washing becomes necessary, remove the wooden dowel first. Hand wash or use the yarn-label-recommended method, reshape while damp, and dry flat.
Avoid ironing acrylic crochet directly.
Quick Printable-Style Summary
Project: Crochet Classroom Pencil Door Hanger
Skill level: Easy / advanced beginner
Finished size: Approximately 8 x 14 inches, excluding dowel and hanging cord
Yarn: Medium #4 worsted
Hook: 4.5–5 mm
Main stitches: ch, sl st, sc, hdc, dc
Background: Solid-color C2C rectangle
Starting method: Chain 6 and form the first C2C block with 3 double crochets
Rows 1–10: Increase to 10 blocks
Rows 11–18: Maintain 10 blocks while extending the long side
Rows 19–27: Decrease both edges to 1 block
Border: One round of single crochet
Pencil: Separate HDC eraser, ferrule, body, and tapered wooden point
Assembly: Sew pencil sections together, then stitch finished appliqué to C2C base
Hanging: Whipstitch top border to 10–12 inch wooden dowel and attach crocheted cord
Finishing: Weave ends, block flat, test hanging cord
FAQ
Is this crochet classroom door hanger suitable for a complete beginner?
It is best for a beginner who already knows chain and double crochet or is willing to learn C2C carefully. The individual stitches are simple; the main new skill is understanding how the blocks connect diagonally.
The separate pencil appliqué is intentionally straightforward.
Do I have to use C2C crochet?
No. A plain rectangle made in single crochet or half double crochet could replace the C2C base.
However, C2C gives the background an attractive block texture and creates a useful visual grid if you later want to add initials or simple embroidery.
Can I use cotton yarn?
Yes.
Cotton creates excellent stitch definition and often hangs very neatly. Acrylic is lighter and generally economical for larger classroom decorations.
A cotton-acrylic blend is also a good option.
Can I make the door hanger without a wooden dowel?
Yes.
You can create two sturdy crocheted hanging loops along the top corners, although the top edge may stretch more over time.
The dowel distributes the weight across the full width and helps the rectangle remain straight.
How can I make the pencil longer?
Simply add more half-double-crochet rows to the mustard body.
Keep the eraser, ferrule, and wooden tip unchanged unless you are dramatically enlarging the entire project.
Why is my C2C rectangle becoming a square?
You probably continued increasing both sides after reaching the desired short-side width.
Once you have 10 blocks, one physical edge must stop growing while the opposite edge continues.
Use a marker on that edge until your long dimension reaches 18 blocks.
How can I make the door hanger more personalized without embroidering letters?
Try adding a contrasting border, school colors, a crochet apple, a star, a small book appliqué, or a second miniature pencil.
That gives the project a classroom-specific look without requiring lettering.
Conclusion
A classroom decoration does not need complicated colorwork to feel custom. Starting with one solid C2C rectangle lets you concentrate on learning the block construction, and the separate pencil appliqué provides the school theme without turning every row into a color-changing exercise.
Once you understand the 10-by-18-block background, you can reuse the same basic format for many other classroom door hangers: apples, books, crayons, rainbows, letters, school mascots, or seasonal decorations.
Save the tutorial for back-to-school crochet planning, and keep the basic banner measurements handy—the same background can become an entire collection of handmade classroom signs.