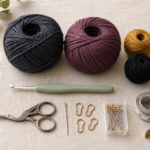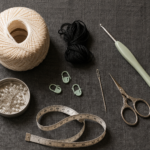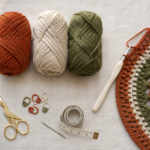
A crochet wall tapestry does not need to be large, complicated, or packed with difficult color changes to make an empty wall feel more interesting.
This mini version is designed specifically for newer crocheters. You will make a small rectangular panel using mostly single crochet, add raised bobbles to create a simple geometric diamond, finish the bottom with soft fringe, and mount the top onto a wooden dowel.
The project is small enough to finish without committing to dozens of skeins or weeks of work, but it still introduces several techniques you can reuse in larger crochet wall hangings later.
The finished tapestry works well above a desk, beside a bookshelf, on a gallery wall, in a craft room, or as a handmade housewarming gift.
This is an original pattern and tutorial. The Love & Stitch wall-hanging article referenced above was used only to research the photographic sequence that makes a wall-hanging tutorial understandable: foundation, texture development, fringe, dowel attachment, and final presentation. The stitch counts, row arrangement, color palette, wording, and motif below are new.
What You’ll Learn
By the end of this tutorial, you will know how to:
- crochet a small rectangular wall tapestry in rows;
- keep 25 stitches consistent across the entire panel;
- recognize the right and wrong sides of textured crochet;
- make a beginner-friendly bobble stitch;
- position bobbles to create a simple diamond motif;
- prevent your tapestry edges from becoming narrower or wider;
- add fringe without complicated knots;
- block the crochet panel before assembly;
- attach crochet fabric neatly to a wooden dowel;
- add a simple hanging cord;
- customize the size and texture for future wall hangings.
Materials You’ll Need
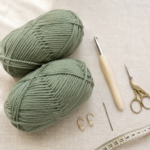
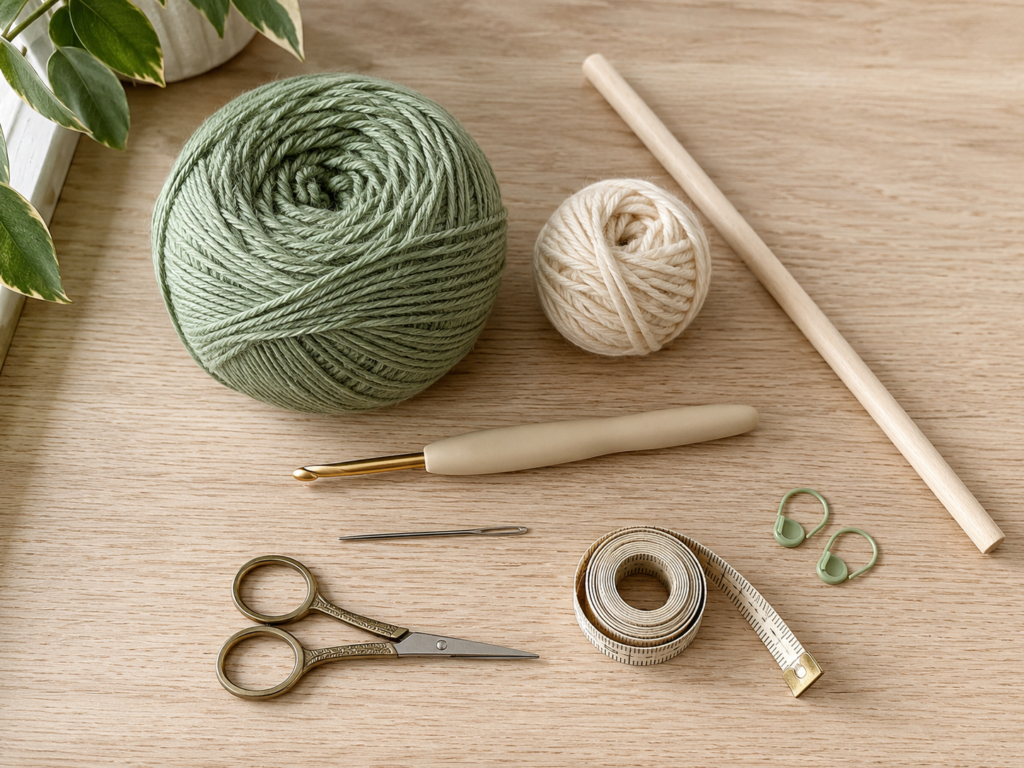
For the sample version, use:
- Main yarn: approximately 100–120 yards of medium #4 worsted-weight yarn in muted sage green
- Fringe yarn: approximately 25–35 yards of warm cream worsted-weight yarn
- Crochet hook: 4.5 mm
- Wooden dowel: approximately 9–10 inches long
- Yarn or tapestry needle
- Sharp scissors
- Measuring tape
- 2 stitch markers, optional but useful
- Blocking mat and rust-resistant pins, optional
- Steam source, optional and only when appropriate for your fiber
A smooth cotton-acrylic blend is particularly useful for a first wall hanging because it gives the piece definition without making the bobbles fuzzy.
The Craft Yarn Council classifies worsted and aran yarns in the medium-weight category, although recommended hooks are only general guidelines rather than fixed rules.
Crochet Abbreviations Used
This tutorial uses standard U.S. crochet terminology.
- ch = chain
- sc = single crochet
- bo = bobble stitch
- st / sts = stitch / stitches
- rep = repeat
- RS = right side
- WS = wrong side
- yo = yarn over
The Craft Yarn Council maintains a useful standardized abbreviation list and also documents differences between U.S. and U.K. terminology.
US/UK terminology note
The main stitch in this tutorial is a U.S. single crochet.
In U.K. terminology, that stitch is called a double crochet.
Do not substitute a U.S. double crochet when following this pattern, or your tapestry will become significantly taller and more open.
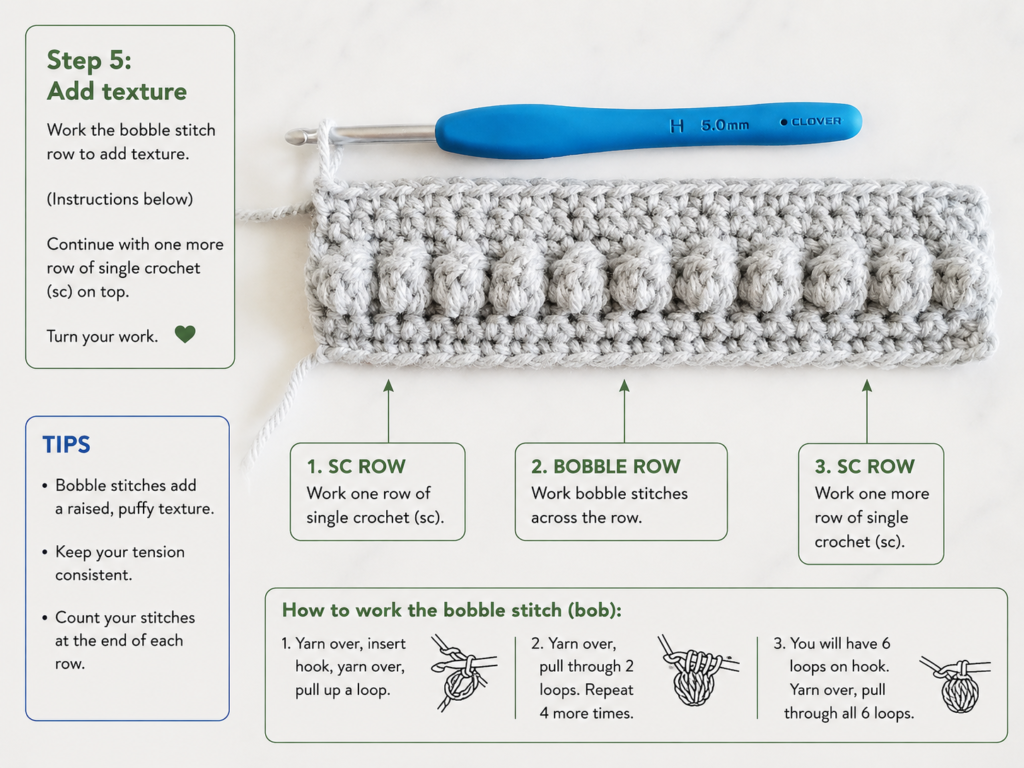
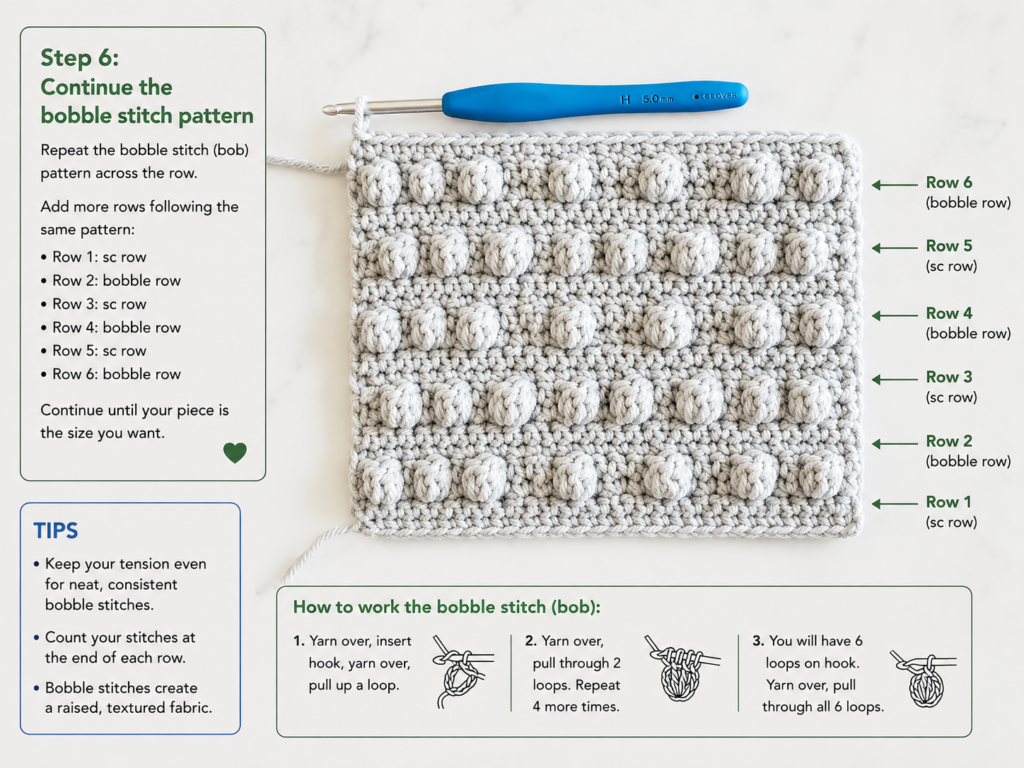
Special Stitch: Bobble
For this project, one bobble is made from four partially completed double crochets joined together.
To make bo:
- Yarn over.
- Insert the hook into the indicated stitch.
- Yarn over and pull up a loop.
- Yarn over and pull through the first two loops.
- Leave the remaining loops on the hook.
- Repeat that partial double-crochet sequence three more times into the same stitch.
- You should now have five loops on your hook.
- Yarn over and pull through all five loops.
The bobble tends to bulge away from you while you crochet it. In this pattern, the textured rows are deliberately positioned on wrong-side rows so the bobbles naturally face the right side of the finished tapestry.
Before You Start
Gauge and tension
Exact gauge is not critical because the tapestry does not need to fit a body.
As a useful target, aim for roughly:
15–17 single crochet stitches = 4 inches
Your fabric should feel compact enough to hang neatly without large gaps between stitches.
If your fabric feels extremely stiff, move up by 0.5 mm.
If the stitches are loose enough that the dowel or wall behind the tapestry is clearly visible through them, try a slightly smaller hook.
Finished size
With medium #4 yarn and a 4.5 mm hook, expect approximately:
- Panel width: 6.5–7.5 inches
- Panel height before fringe: 7–8 inches
- Total height with fringe: approximately 10–11 inches
- Dowel width: approximately 9–10 inches
These are approximate because yarn thickness and personal tension vary.
How to count your stitches
This tapestry contains 25 stitches in every row.
Count at the end of each row, especially while learning.
The first and last stitches are easy to miss because the edge stitches can rotate slightly toward the side.
If helpful, place one stitch marker into the first stitch and one into the last stitch of every row.
How to keep the edges straight
At the end of each row:
- Chain 1.
- Turn your work.
- Work the first single crochet directly into the first stitch.
- Do not work into the turning chain.
- Make sure your final stitch goes into the last actual single crochet.
For this pattern, the turning chain does not count as a stitch.
How to avoid curling
A small amount of curling during the first few rows is normal.
More serious curling can come from:
- a foundation chain that is much tighter than the crochet rows;
- extremely tight single crochet;
- accidental decreases at the row edges;
- a hook that is too small for the yarn.
Blocking at the end will correct mild unevenness.
Choosing colors
A single-color panel makes the stitch texture easiest to learn.
This tutorial uses:
- muted sage green for the crochet panel;
- warm cream for fringe and hanging cord;
- light natural birch for the dowel.
Once you understand the construction, try terracotta, dusty rose, mustard, oatmeal, deep forest green, or two-tone versions.
Step-by-Step Crochet Tutorial
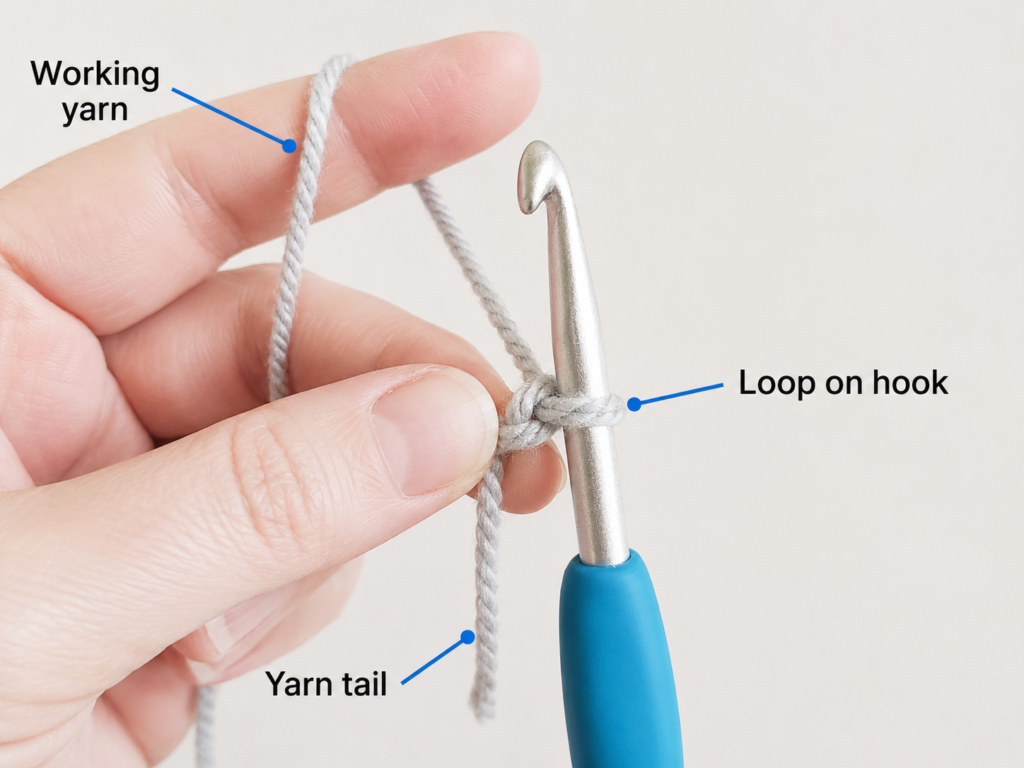
Step 1: Make the Foundation Chain and First Row
Make a slip knot with the sage green yarn.
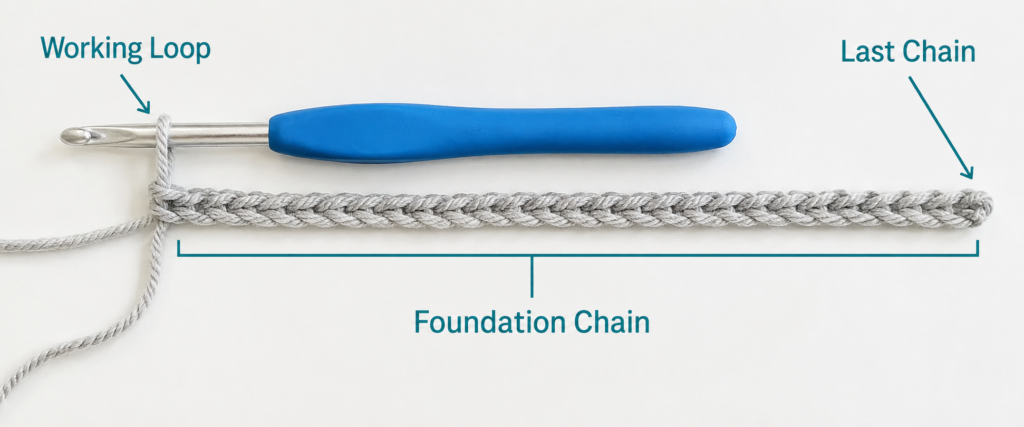
Chain 26.
Keep the chains relaxed and approximately equal in size.
For Row 1, insert your hook into the second chain from the hook and make one single crochet.
Continue working one single crochet into every remaining chain.
You should have:
Row 1: 25 sc
Chain 1 and turn.
For a cleaner lower edge, you may work Row 1 into the back bumps of the foundation chain. This is optional; beginners can work into the usual top loops if that feels more comfortable.
Beginner tip
After finishing about ten stitches, stop and check your foundation chain.
If it is pulling into a curved crescent, your chain may be tighter than your single crochet stitches.
You can restart the chain more loosely or make only the foundation chain with a 5 mm hook before returning to the 4.5 mm hook.
Common mistake to avoid
Do not crochet into the chain immediately below the working loop. That is the first chain from the hook and is skipped.
Step 2: Build the Plain Base and First Bobble Band
Work:
Rows 2–3: sc in every stitch across.
25 sts per row.
At the end of Row 3, chain 1 and turn.
Row 4 creates the first horizontal texture band.
Row 4:
Sc in the first stitch.
Then repeat:
bo in next st, sc in next st
across the row.
You should complete 12 bobbles separated by single crochet stitches, with 25 stitches total.
Chain 1 and turn.
Use your fingertip to gently push any bobble that is hiding on the wrong side toward the right side of the fabric.
Beginner tip
Do not tighten the loops of a bobble aggressively.
The four partial double crochets need enough room to gather into a rounded bump.
Common mistake to avoid
A bobble uses one stitch from the previous row, even though you yarn over and enter that stitch several times.
Do not move into new stitches during the construction of one bobble.
Step 3: Add Plain Rows Before the Center Motif
Work:
Rows 5–7: sc in each stitch across.
25 sts.
These plain rows give the first bobble band breathing room and make the final design easier to read.
Do not worry if the bobble row looks slightly tighter than the plain single crochet rows. Light blocking will help even the fabric.
Beginner tip
Run your finger along both side edges every few rows.
If one edge suddenly steps inward, you probably missed the final stitch of a row.
If an edge suddenly extends outward, you may have worked into the turning chain.
Step 4: Crochet the Lower Half of the Diamond
The diamond is made from bobbles separated by plain single crochet rows.
All bobble rows still contain exactly 25 stitches.
Row 8
Sc in the first 12 sts,
bo in the next st,
sc in the final 12 sts.
You now have one bobble centered in the panel.
Row 9
Sc in all 25 sts.
Row 10
Sc in next 10 sts,
bo,
sc in next 3 sts,
bo,
sc in final 10 sts.
Row 11
Sc in all 25 sts.
Row 12
Sc in next 8 sts,
bo,
sc in next 3 sts,
bo,
sc in next 3 sts,
bo,
sc in final 8 sts.
Row 13
Sc in all 25 sts.
Row 14
This is the widest point of the diamond.
Sc in next 6 sts,
bo,
sc in next 3 sts,
bo,
sc in next 3 sts,
bo,
sc in next 3 sts,
bo,
sc in final 6 sts.
You should still have 25 stitches.
Beginner tip
Before crocheting a bobble row, count the plain stitches described before the first bobble.
That is much easier than trying to judge the position visually after the row is complete.
Common mistake to avoid
Do not accidentally add a chain between the bobble and the following single crochet.
Complete the bobble, then work directly into the next instructed stitch.
Step 5: Mirror the Diamond Back Toward the Center
After the widest row, reverse the placement sequence.
Row 15
Sc in all 25 sts.
Row 16
Sc in next 8 sts,
bo,
sc in next 3 sts,
bo,
sc in next 3 sts,
bo,
sc in final 8 sts.
Row 17
Sc in all 25 sts.
Row 18
Sc in next 10 sts,
bo,
sc in next 3 sts,
bo,
sc in final 10 sts.
Row 19
Sc in all 25 sts.
Row 20
Sc in next 12 sts,
bo,
sc in final 12 sts.
The center diamond is now complete.
Row 21
Sc across all 25 stitches.
Look at the panel from several feet away.
You should see a clear raised diamond floating between the lower and upper areas of plain crochet.
Beginner tip
If one bobble seems smaller than the others, gently roll it between your fingertips instead of pulling on the surrounding stitches.
Common mistake to avoid
Do not judge the diamond only while the fabric is stretched in your hands.
Lay it flat before deciding that the motif is uneven.
Step 6: Add the Top Bobble Band
Now balance the design with one more full texture band.
Row 22
Sc in first st.
Repeat:
bo in next st, sc in next st
across the row.
You will again have 12 bobbles and 25 total stitches.
The two full bobble bands now frame the center diamond.
Beginner tip
Compare this band with Row 4.
If your second band is noticeably wider, your tension may have loosened as you became more comfortable.
That is common. Try to return to the same relaxed yarn tension you used near the beginning rather than pulling harder.
Step 7: Finish the Top of the Panel
Work:
Rows 23–25: sc in every stitch across.
After Row 25, do not make another turning chain.
Cut the yarn, leaving a tail approximately 30–36 inches long.
Pull the tail through the final loop.
This long tail will later be used to attach the tapestry to the dowel, reducing the number of ends you have to weave in.
The crochet portion is complete.
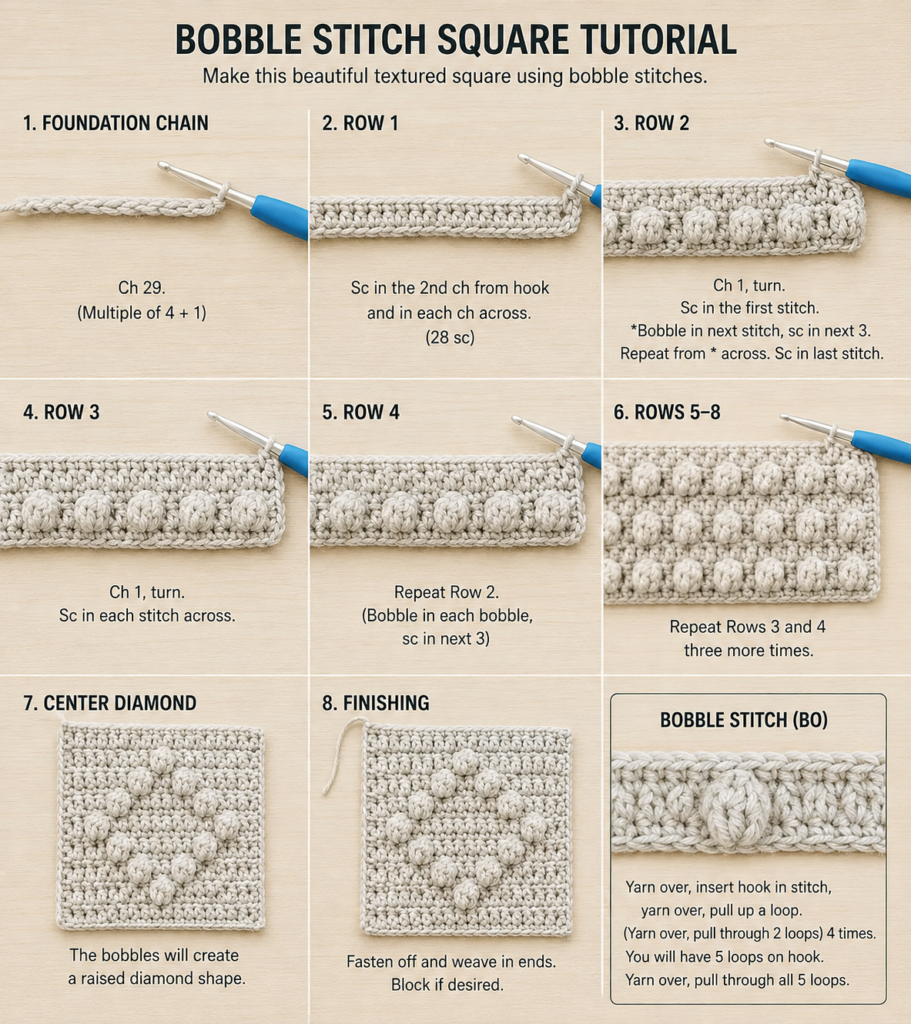
Step 8: Block the Panel and Add Fringe
Before attaching the dowel, check the rectangle.
If the sides lean slightly or the corners curl, block it.
Basic blocking
For washable yarn:
- Lightly dampen the panel or use the blocking method recommended for your fiber.
- Place it flat on a blocking surface.
- Square the corners.
- Pin the perimeter without stretching the fabric aggressively.
- Allow it to dry completely.
If using acrylic yarn and steam, never press a hot iron directly onto the crochet.
Always check the yarn manufacturer’s care instructions first.
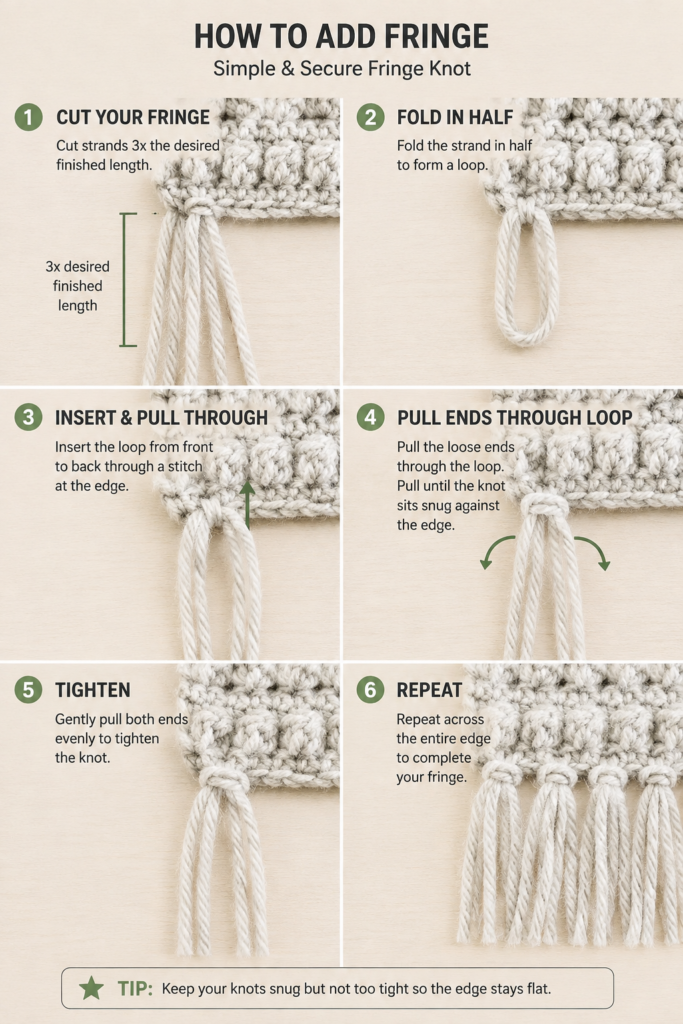
Cut the fringe
Cut cream yarn into pieces approximately 10 inches long.
For each fringe bundle, use three strands.
Fold the three strands together in half.
You now have a folded loop at one end and six loose tails at the other.
Attach each bundle
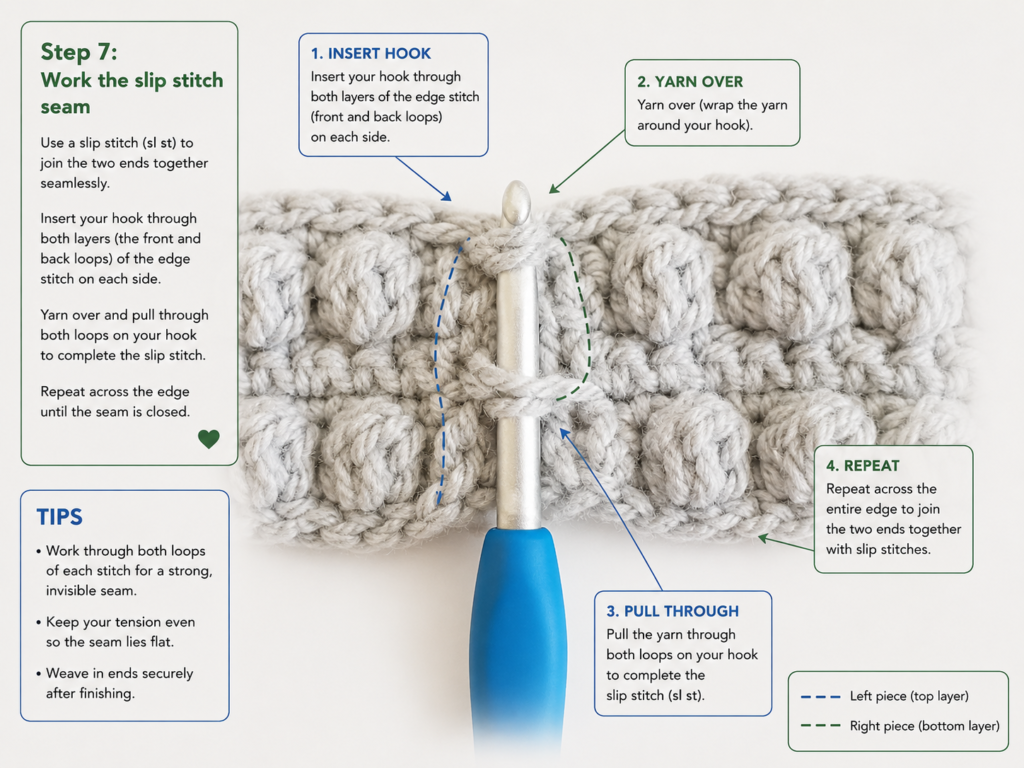
Insert your crochet hook through one foundation stitch along the bottom edge.
Catch the folded center of the three fringe strands.
Pull the loop approximately 1–2 inches through the crochet edge.
Pass all six tails through that loop.
Pull gently to tighten.
Repeat across the bottom.
For a lighter look, add fringe to every second foundation stitch.
For fuller fringe, use every stitch.
Beginner tip
Attach all the fringe before trimming it.
Trying to cut every bundle to its final length individually usually produces an uneven lower edge.
Step 9: Attach the Tapestry to the Wooden Dowel
Lay the crochet panel right side up.
Place the wooden dowel horizontally above the top edge.
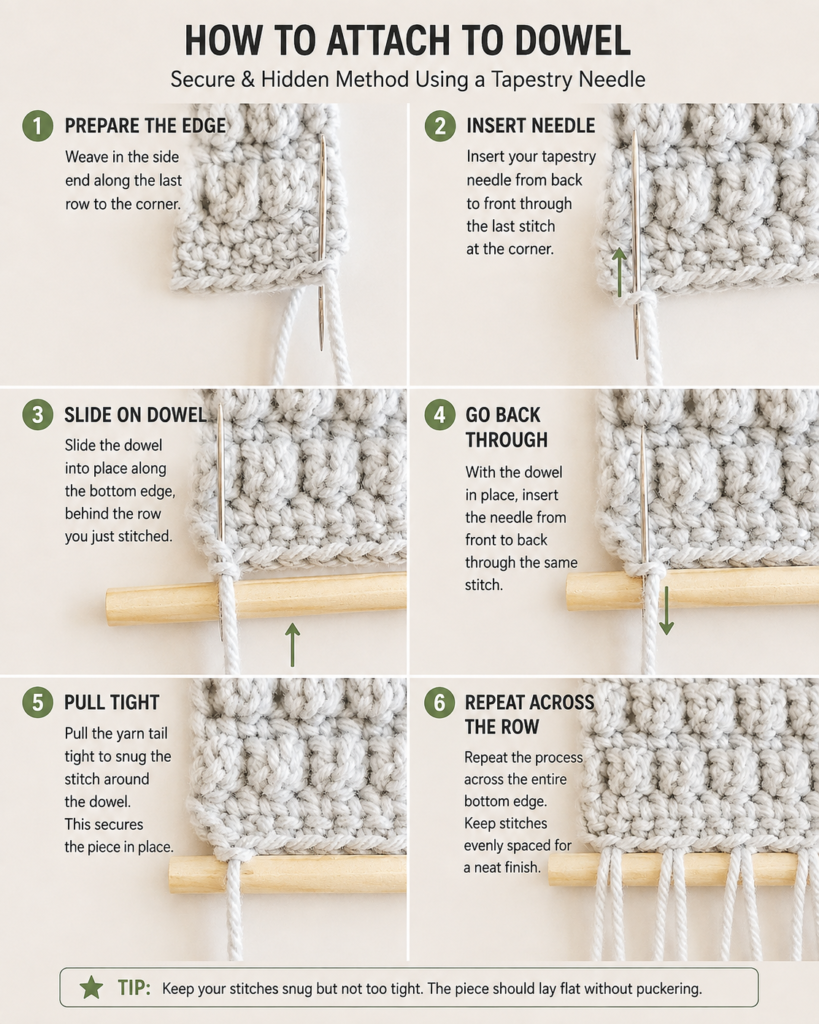
Thread the long sage tail you left after Row 25 onto your tapestry needle.
Starting at one corner:
- Bring the needle through the first top stitch.
- Pass the yarn up and over the dowel.
- Bring the needle back through the next top stitch.
- Pull until the loop around the dowel sits neatly but does not squeeze the crochet fabric.
- Continue across the entire top edge.
Try to keep each wrap approximately equal in tension.
The crochet panel should hang straight beneath the dowel rather than gathering like a curtain.
At the final stitch, secure the yarn on the back and weave the remaining tail through several stitches.
Beginner tip
Do not pull the attachment yarn tightly enough to compress the wooden rod against the fabric.
A tiny amount of movement between the dowel and crochet creates a cleaner hanging line.
Common mistake to avoid
Avoid skipping random top stitches.
Uneven attachment spacing can make one part of the panel sit higher than the other.
Step 10: Add the Hanging Cord and Trim the Fringe
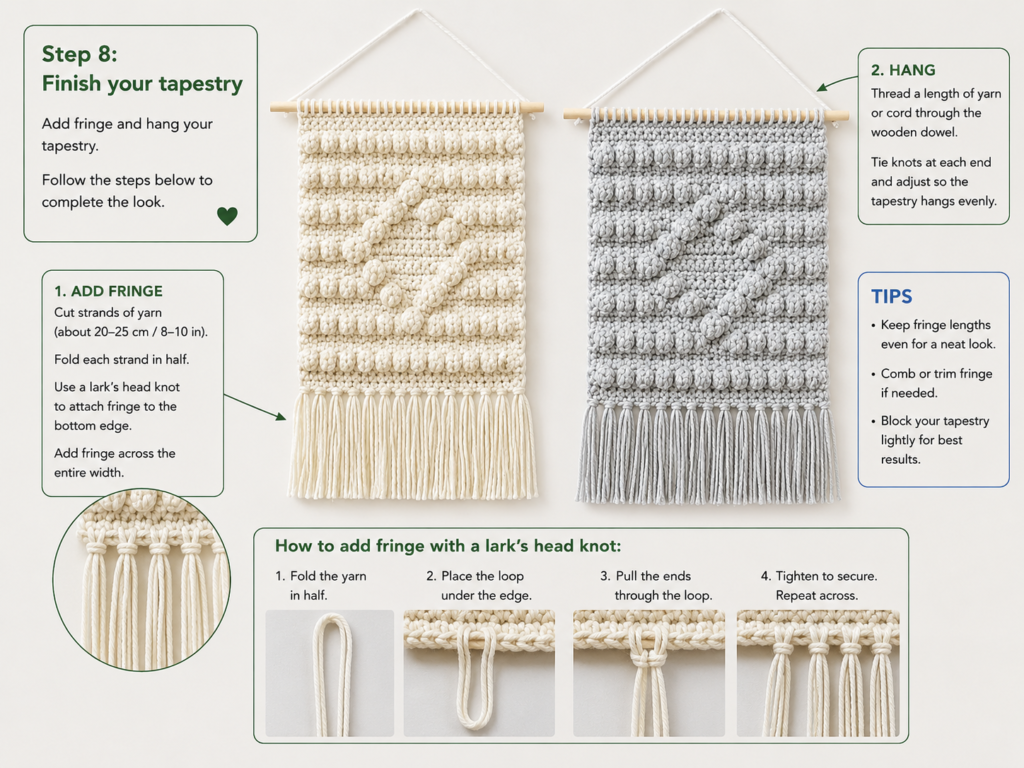
Cut a piece of cream yarn approximately 18–22 inches long.
Tie one end securely near the left end of the dowel.
Tie the other end near the right end.
Before tightening the second knot completely, lift the tapestry by the cord and check its hanging position.
Shorten the cord if you want the tapestry closer to the nail or wall hook.
Weave or trim the small knot tails neatly.
Now hang the piece temporarily and comb the fringe gently with your fingers.
Use sharp scissors to trim the cream fringe into:
- a straight horizontal edge;
- a shallow V;
- a deep V;
- a curved arch;
- a stepped geometric edge.
For the beginner sample, keep it straight.
Place the tapestry on a wall and inspect it from several feet away.
Your mini crochet wall tapestry is finished.
Pattern Notes or Stitch Notes
Turning chain
Chain 1 at the end of each row except the final row.
The chain 1:
- gives enough height to turn;
- does not count as a stitch;
- is not worked into on the following row.
Stitch count
Every completed row should contain:
25 stitches
A bobble occupies one stitch position even though the hook enters that stitch several times.
Right side and wrong side
Treat Row 1 as the right side.
The bobble rows are positioned on even-numbered rows so you work them primarily from the wrong side and the raised texture naturally projects toward the right side.
If a bobble remains pushed backward, gently push it toward the front with a fingertip.
Repeat structure
The tapestry can be understood as five visual sections:
- Plain base
- Full bobble band
- Central diamond
- Full bobble band
- Plain top
This makes the pattern easier to check visually.
Size adjustment
To make the panel wider without redesigning the motif, add an equal number of single crochet stitches to both sides.
For example, adding 4 stitches to the total width means adding 2 plain stitches before and after each motif row.
For a much larger tapestry, swatch first and redraw the bobble motif on graph paper.
Common Beginner Mistakes
1. Losing stitches at the sides
Problem: The tapestry becomes narrower toward the top.
Cause: The last stitch of one or more rows was skipped.
Fix: Mark the first and last stitch of each row and count to 25.
2. Accidentally increasing
Problem: The sides flare outward.
Cause: You are probably crocheting into the turning chain as though it were an extra stitch.
Fix: Remember that the chain 1 does not count as a stitch in this pattern.
3. Bobbles appearing on the wrong side
Problem: The diamond texture looks recessed.
Fix: Push each bobble gently toward the designated right side. Check the work after every textured row.
4. Tight bobbles
Problem: Bobbles look like small knots instead of rounded raised stitches.
Cause: The yarn-over loops were pulled too tightly.
Fix: Keep the partial double-crochet loops slightly taller and relaxed.
5. Wavy panel
Problem: The rectangle ripples.
Cause: Inconsistent tension or an overly tight foundation chain.
Fix: Lightly block the finished piece. If the foundation edge is dramatically shorter than the top, redo the starting chain more loosely.
6. Uneven fringe
Problem: Fringe bundles have different finished lengths.
Fix: Cut all strands around the same template, attach everything first, hang the tapestry, and perform one final trim.
7. Dowel gathering
Problem: The top edge bunches around the rod.
Cause: The sewing yarn was pulled too tightly or attachment stitches were spaced unevenly.
Fix: Loosen the wraps and maintain approximately equal spacing across all 25 top stitches.
How to Customize This Crochet Project
Change the yarn
A smooth worsted yarn creates a clean, graphic tapestry.
For a more rustic result, try:
- recycled cotton;
- lightly textured wool;
- tweed yarn;
- cotton-linen blend.
Avoid extremely fuzzy novelty yarn for your first attempt because it makes stitch counting harder.
Change the colors
Try:
- terracotta panel + cream fringe;
- mustard panel + oatmeal fringe;
- dusty rose + natural cotton;
- cream panel + black fringe;
- forest green + beige;
- charcoal + ivory.
For a minimalist look, use the same yarn color for both panel and fringe.
Add a contrast-color diamond
If you understand color changes, work only the bobble stitches in a contrasting yarn.
Carry the unused yarn lightly along the back rather than pulling it tightly.
This turns the texture motif into a stronger tapestry-style focal point.
Make it wider
Increase the foundation chain by an even number.
Keep the diamond centered by distributing the added stitches equally on both sides.
Make it taller
Add extra plain single crochet rows:
- below the first bobble band;
- above the final bobble band;
- or around the central diamond.
Change the fringe
Instead of straight cream fringe, try:
- alternating two colors;
- graduated V-shaped fringe;
- extra-long bohemian fringe;
- twisted cord fringe;
- no fringe at all.
Border options
A border is not necessary, but if your edges look uneven, add one round of single crochet around the panel before attaching fringe and the dowel.
Use approximately one stitch per row along the vertical sides and adjust spacing so the border lies flat.
Texture options
After making this version, experiment with:
- puff stitches;
- front-post stitches;
- popcorn stitches;
- surface crochet;
- simple color blocks.
Avoid combining too many textures in a mini tapestry. Small wall pieces usually look strongest when one feature is clearly dominant.
Gift ideas
A mini wall tapestry makes a useful handmade gift for:
- housewarmings;
- dorm rooms;
- nursery décor;
- craft-room décor;
- teacher gifts;
- office décor;
- holiday gift exchanges.
Because the piece is small, it is also practical for using leftover yarn.
Finishing Instructions
Fastening off
After the final crochet row, leave a long tail if you intend to sew directly to the dowel.
Otherwise, cut the yarn approximately 6 inches from the hook, pull it through the active loop, and tighten gently.
Weaving in ends
Thread each end onto a tapestry needle.
Weave through the backs of several stitches, change direction once, then pass through several additional stitches.
Avoid cutting directly beside the first pass because the end may loosen later.
Blocking
Blocking is especially useful for wall hangings because straight edges are more noticeable when a piece is displayed vertically.
Shape the rectangle gently rather than stretching the bobble motif.
Let the piece dry completely before mounting it.
Fringe
Attach all fringe, hang the tapestry temporarily, then perform the final trim while gravity is pulling the strands downward.
Dowel
Use a dowel slightly wider than the panel.
A 7-inch panel usually looks balanced on a 9–10-inch rod.
Washing and care
Follow the instructions on your yarn label.
For most decorative wall pieces, frequent washing is unnecessary.
Dust can usually be removed by:
- gentle shaking outdoors;
- a very low suction vacuum held nearby;
- careful spot cleaning appropriate for the fiber.
Avoid aggressive brushing because it can fuzz the bobbles and fringe.
Quick Printable-Style Summary
Project: Mini Textured Crochet Wall Tapestry
Skill level: Easy / confident beginner
Finished panel: Approximately 6.5–7.5 inches wide × 7–8 inches tall
Yarn: Medium #4 worsted weight
Hook: 4.5 mm
Main stitches: ch, sc, bo
Starting chain: Ch 26
Row stitch count: 25 sts throughout
Pattern summary
- Rows 1–3: sc
- Row 4: full bobble band
- Rows 5–7: sc
- Row 8: 1 centered bobble
- Row 9: sc
- Row 10: 2 bobbles
- Row 11: sc
- Row 12: 3 bobbles
- Row 13: sc
- Row 14: 4 bobbles
- Row 15: sc
- Row 16: 3 bobbles
- Row 17: sc
- Row 18: 2 bobbles
- Row 19: sc
- Row 20: 1 centered bobble
- Row 21: sc
- Row 22: full bobble band
- Rows 23–25: sc
- Fasten off with a long tail
- Block
- Add fringe
- Sew to dowel
- Add hanging cord
FAQ
Is this crochet mini wall tapestry pattern suitable for beginners?
Yes, especially for someone who already understands chain and single crochet.
The only new decorative technique is the bobble stitch, and the small project size gives you repeated practice without requiring a large time commitment.
What yarn is best for a crochet wall tapestry?
A smooth worsted-weight cotton, cotton blend, or acrylic works well.
Smooth yarn makes both the stitch count and raised texture easier to see.
A yarn with enough structure also helps the tapestry hang flat.
Do I need to make a gauge swatch?
Not necessarily.
Gauge is not critical for wall décor because there is no body measurement to match.
However, crochet a few rows and check that you like the density before completing the entire tapestry.
Why is my crochet wall hanging curling?
The most common reasons are:
- tight starting chain;
- very tight tension;
- hook too small;
- inconsistent row width.
Light blocking usually corrects minor curling.
Can I make this wall tapestry without bobbles?
Yes.
Replace every bobble with one single crochet.
You will keep the same stitch count, but the fabric will become a plain rectangular hanging.
Alternatively, replace the bobbles with puff stitches if you prefer softer texture.
How do I keep the tapestry from becoming wider?
Count 25 stitches at the end of each row.
Do not crochet into the chain-1 turning chain.
Stitch markers placed in the first and last stitch are especially helpful.
Can I make the pattern larger?
Yes.
Increase the width by adding stitches equally to both sides of the motif, and add extra plain rows to increase height.
If you scale the diamond itself, graph the motif first so the spacing remains symmetrical.
Conclusion
A mini crochet wall tapestry is an excellent bridge between practicing stitches and creating finished home décor.
You get enough repetition to improve your single crochet tension, enough texture to learn bobbles, and enough finishing work to practice blocking, fringe, and simple assembly—all in a project that can realistically be completed in an afternoon.
Once you have made the sage-and-cream version, keep the same 25-stitch base and experiment with your own textures, colors, fringe shapes, and geometric motifs.
Save the tutorial so you can return to the finishing steps when you make your next crochet wall hanging.