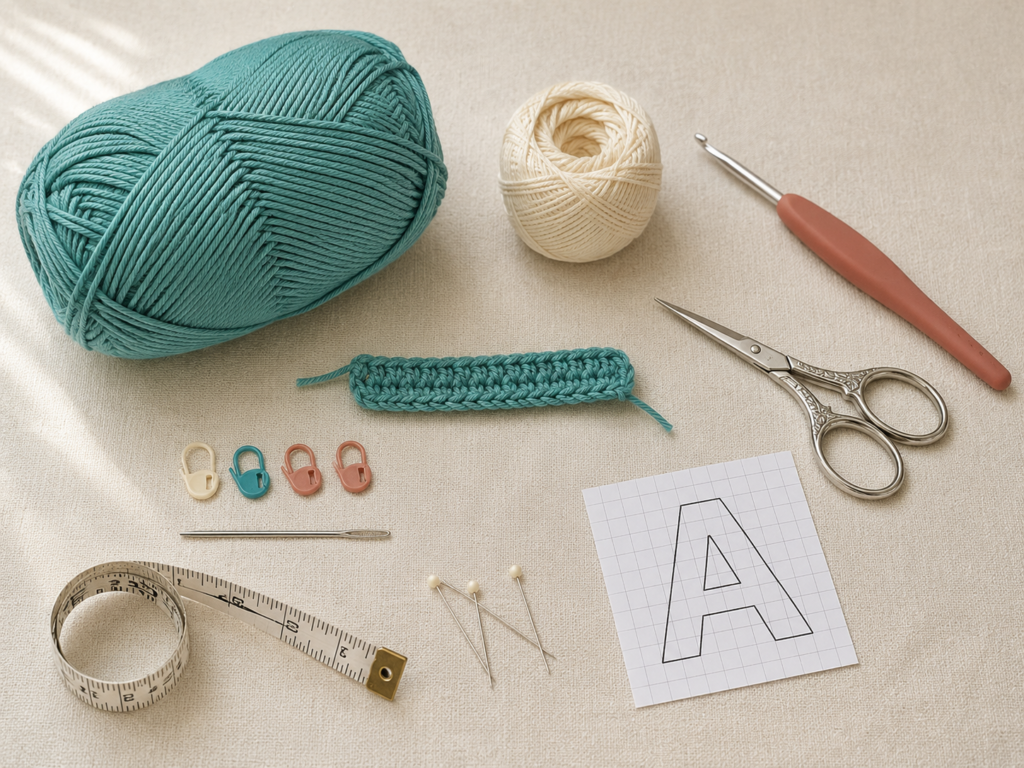
Crochet letters are one of the simplest ways to turn an ordinary handmade project into something personal. A plain baby blanket can become a name blanket. A simple tote can carry an initial. A few letters joined to a cord can become a birthday banner, classroom display, nursery sign, or handmade alphabet-learning set.
The difficult part is not usually making one letter. It is making several letters that have the same height, stroke width, spacing, and visual style.
This beginner crochet alphabet letters pattern solves that problem with a modular construction method. Instead of learning 26 unrelated patterns, you will crochet four reusable stroke lengths. Those strokes can be arranged as straight lines, diagonals, crossbars, curves, and loops to construct every uppercase letter from A to Z.
The complete tutorial begins with an uppercase A because it teaches the three most important skills: crocheting a firm stroke, joining two pieces at an angle, and positioning a crossbar. You will then learn how to create rounded letters such as B, D, O, and P, followed by continuous curved letters such as C, S, and U.
This is an original assembly-based method. It is not a reproduction of the photographed reference patterns.
What You’ll Learn
- How to crochet a firm, narrow alphabet stroke
- How to keep every letter approximately the same height
- How to make short, medium, long, and extra-long components
- How to assemble the uppercase letter A
- How to construct rounded letters with loops
- How to shape curved letters without twisting the crochet
- How to join components neatly
- How to block letters so they lie flat
- How to adapt the modular components to all 26 uppercase letters
- How to resize the alphabet for blankets, bags, banners, and décor
Materials You’ll Need
- DK or light worsted cotton yarn
- Approximately 5–10 yards of yarn per letter
- 3.5 mm crochet hook
- Scissors
- Blunt yarn or tapestry needle
- Stitch markers
- Measuring tape
- Rust-resistant blocking pins
- Foam blocking mat or folded towel
- Optional four-inch paper grid
- Optional matching sewing thread for very discreet joins
- Optional removable fabric glue for positioning only
Cotton is especially useful for alphabet appliqués because its stitch definition makes the edges easy to see. It also responds well to blocking. A smooth cotton-acrylic blend can be substituted when you want a softer result.
Crochet Abbreviations Used
- ch = chain
- sc = single crochet
- sl st = slip stitch
- st/sts = stitch/stitches
- rep = repeat
- inc = increase by working 2 sc in one stitch
- sc2tog = single crochet 2 stitches together
- RS = right side
- WS = wrong side
This tutorial uses US crochet terminology. In UK terminology, the US single crochet is called double crochet. The Craft Yarn Council maintains a standardized abbreviation list and a US/UK terminology comparison.
Finished Size
Using DK cotton and a 3.5 mm hook, the sample uppercase letters measure approximately:
- Height: 4 inches
- Width: 2½–3½ inches, depending on the letter
- Stroke width: approximately ⅜–½ inch
Letters such as I and J are naturally narrower. M, W, and O are wider.
Gauge and Tension
Exact gauge is not essential because these letters are not fitted garments. Consistency is important, however.
A useful target is approximately 20 single crochet stitches per 4 inches when measured along a straight foundation chain. Before starting a complete name or alphabet, make one long test stroke and measure it.
Use firm, comfortable tension. Extremely loose stitches make the letters floppy and uneven. Extremely tight chains make the first row difficult to work and cause long components to curl.
The Craft Yarn Council classifies DK as a category 3 light yarn, but its published hook ranges are guidelines rather than guarantees. Your own tension and the yarn’s construction still determine the best hook.
The Four Modular Stroke Sizes
The pattern uses four basic lengths:
| Code | Foundation chain | Approximate use |
|---|---|---|
| S | Ch 9 | Small crossbar, serif, short diagonal |
| M | Ch 14 | Medium horizontal, small loop |
| L | Ch 19 | Main vertical or diagonal stroke |
| XL | Ch 25 | Wide horizontal, large loop, continuous curve |
These numbers are starting points. Add or remove chains when your personal gauge produces a different measurement.
Before You Start
Make a sizing grid
Draw a rectangle approximately 3 inches wide and 4 inches tall on plain paper. Place it under a clear blocking mat or protect it with a plastic sleeve.
Every letter does not need to fill the entire width, but the top and bottom should align with the four-inch height.
Check your foundation chain
The chain should lie straight without being stretched. Hold it horizontally and check that every chain is similar in size.
Step-by-Step Crochet Tutorial
Step 1: Crochet a Reusable Alphabet Stroke
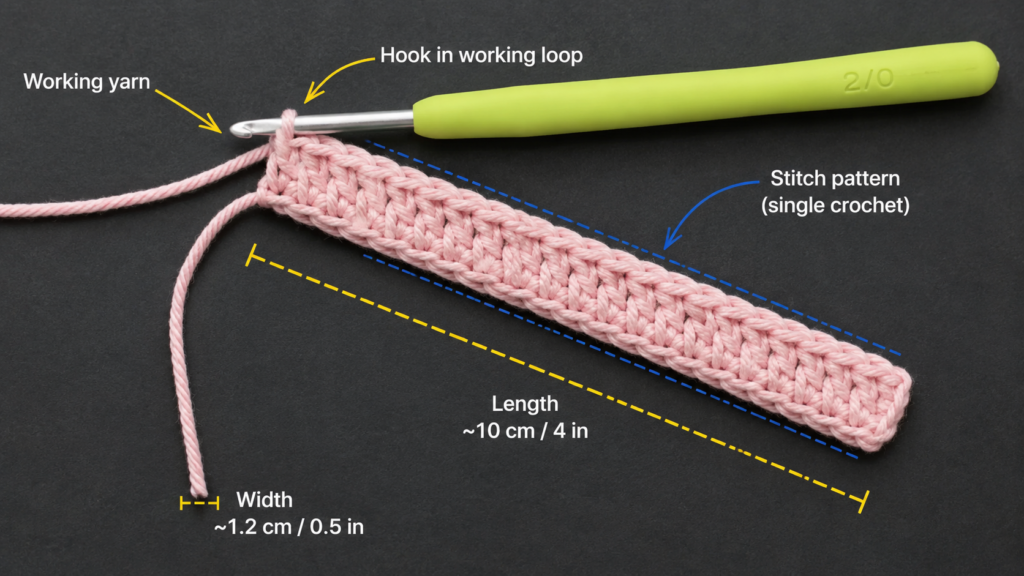
Every component begins with the same narrow, two-sided stroke.
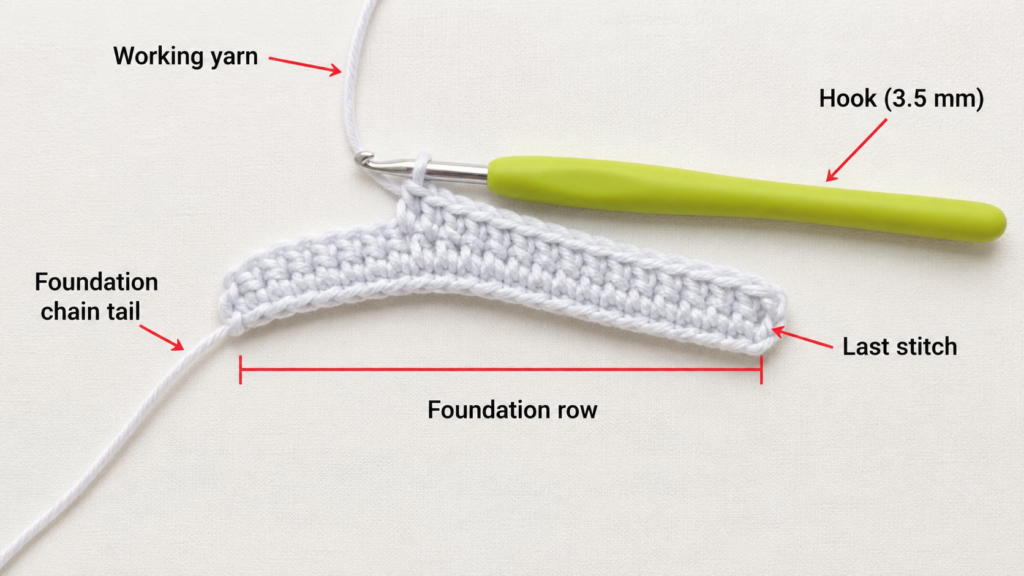
- Chain the number listed for your chosen component.
- Work 2 sc in the second chain from the hook.
- Work 1 sc in each chain until one chain remains.
- Work 3 sc in the final chain.
- Rotate the work so you can crochet along the unused loops on the underside of the foundation chain.
- Work 1 sc in each unused loop.
- When you return to the first chain, work 1 additional sc into the same chain that already contains the first 2 sc.
- Join with a sl st to the first sc.
- Fasten off, leaving a tail at least 8 inches long for assembly.
The extra stitches at each end create a narrow oval rather than a sharp rectangle. The finished component should be flexible enough to bend slightly but firm enough to hold a straight edge.
Beginner tip
Work into the back bumps of the foundation chain when possible. This leaves a cleaner unused edge for the return side.
Common mistake to avoid
Do not accidentally turn the work as though you were beginning a normal second row. Rotate it and continue around the underside of the same chain.
Step 2: Complete the Opposite Side
As you work back along the unused chain loops, compare both sides of the strip. They should have similar tension and length.
If the second side is shorter, you may have skipped a foundation loop. If it is noticeably longer, one or more loops probably contain two stitches unintentionally.
Place a stitch marker in the first stitch when the component is long. This makes the final slip-stitch join easier to locate.
Beginner tip
Keep the foundation chain visible between your fingers. Move your thumb after every two or three stitches instead of gripping the entire strip tightly.
Common mistake to avoid
Do not insert the hook around the complete chain. Use the unused loop only. Working around the whole chain can pull the two sides together and create a thick cord instead of a flat stroke.
Step 3: Make the Components for Letter A
For one uppercase A, crochet:
- Two L strokes
- One S stroke
Place the two long strokes diagonally on the sizing grid. Their upper ends should overlap by approximately ½ inch. The lower ends should sit approximately 2½–3 inches apart.
Thread one long yarn tail through the tapestry needle. Sew through corresponding edge loops at the top overlap. Make several small whip stitches rather than one large stitch.
Turn the letter over and secure the yarn on the wrong side.
Beginner tip
Pin the pieces to the grid before sewing. Check the height and lower-leg spacing from directly above.
Common mistake to avoid
Do not pull the sewing yarn tightly enough to bunch the crochet. The join should hold the parts together without narrowing the strokes.
Step 4: Add the Letter A Crossbar
Place the S stroke horizontally between the two legs. Position it slightly below the visual center of the letter—usually about 1½–1¾ inches above the lower edge.
Sew the ends of the crossbar behind the diagonal strokes. Hiding the ends underneath produces a cleaner front.
Step 5: Prepare a Straight Spine for Rounded Letters
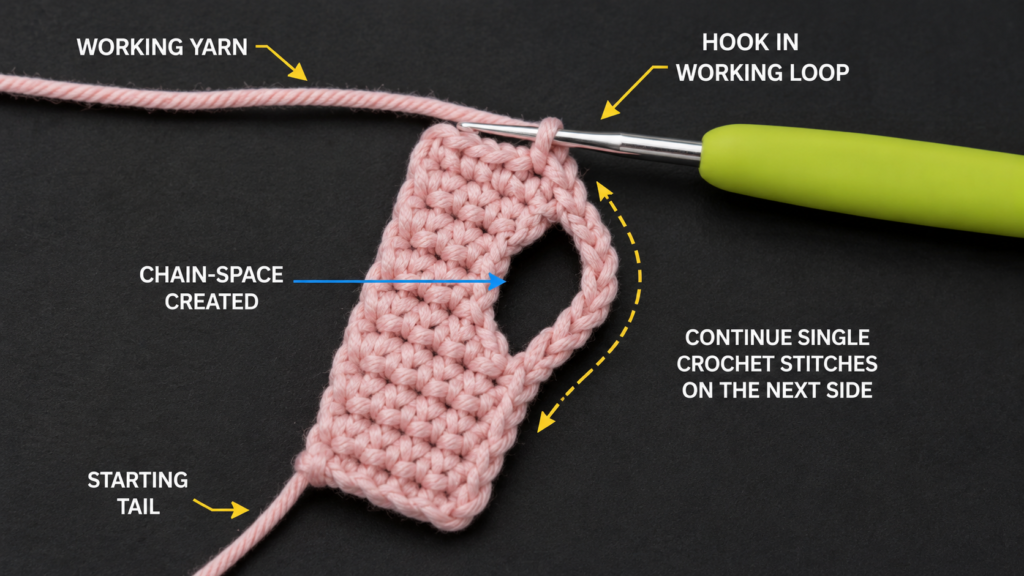
Letters B, D, P, and R begin with one L stroke positioned vertically.
Crochet the stroke as before. Place it on the left side of the sizing grid with the top and bottom aligned to the four-inch marks.
For B and R, mark the center of the spine with a removable stitch marker. This indicates where the upper bowl ends and the lower section begins.
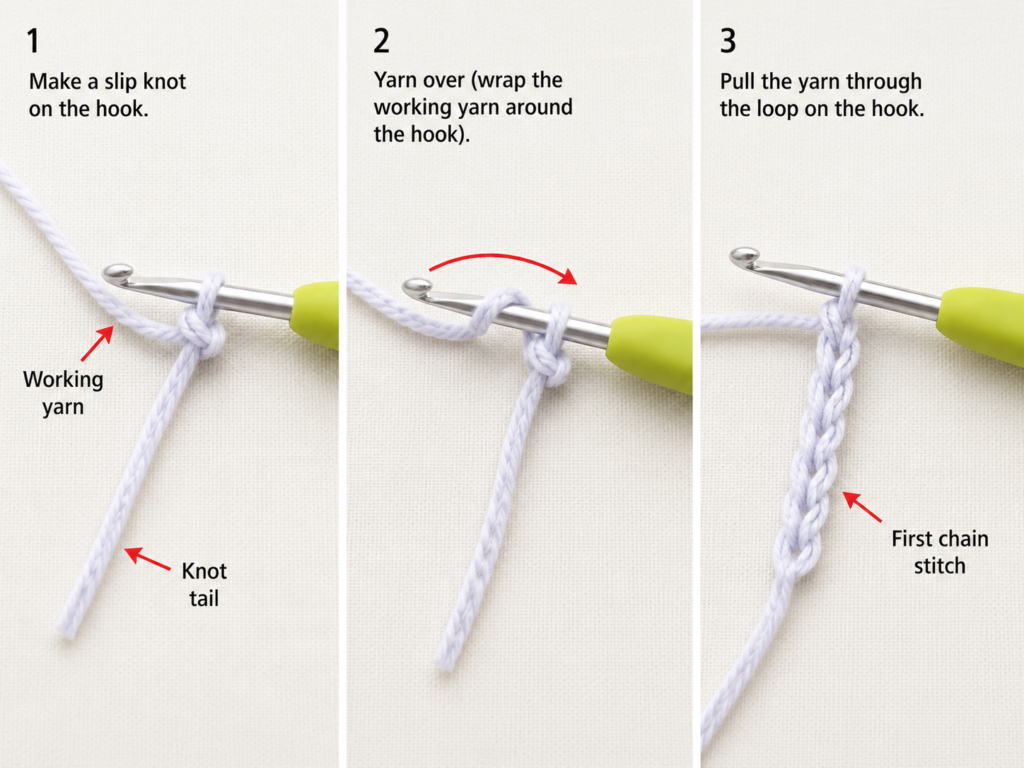
Step 6: Form a Rounded Loop
For a D, crochet one XL stroke. Curve it into a broad bowl with its ends touching the top and bottom of the spine.
For an O, join the two ends of an XL stroke to make a loop and shape it into an oval.
For a P, use one M stroke for the upper loop.
For a B, use two M strokes. Make the upper bowl slightly smaller by overlapping its ends farther onto the spine.
Pin the curve at three points before sewing:
- Top join
- Widest point of the curve
- Bottom join
Beginner tip
Shape the loop without pulling it. Stretching one section creates thin spots and changes the stitch size.
Common mistake to avoid
Do not make the loop perfectly circular. Most uppercase rounded letters look better with a slightly flatter vertical profile.
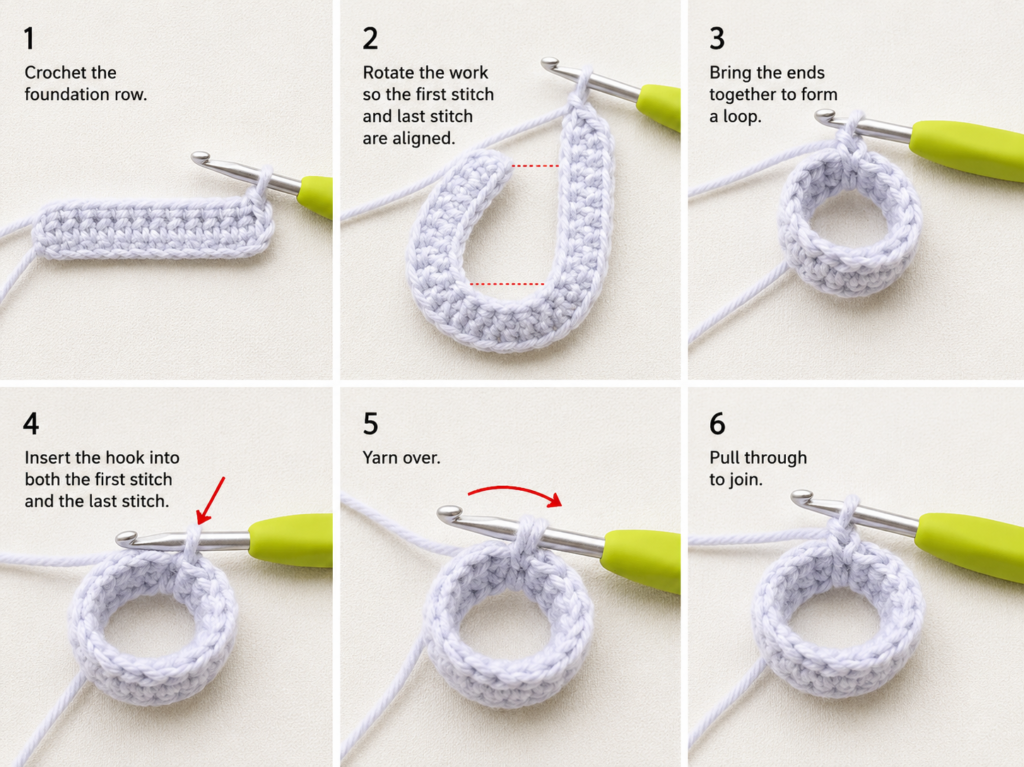
Step 7: Assemble the Letter B
Place one M loop against the upper half of the spine and the second against the lower half.
Attach the upper loop at:
- Top of spine
- Center marker
Attach the lower loop at:
- Center marker
- Bottom of spine
The middle joins may overlap slightly. Sew through all layers at the center so the structure remains stable.
Beginner tip
Step back and look at the letter before weaving in the tails. The upper bowl should usually be a little smaller than the lower one.
Common mistake to avoid
Avoid attaching both loops with their widest points at exactly the same distance from the spine. A slightly fuller lower bowl creates a more recognizable B.
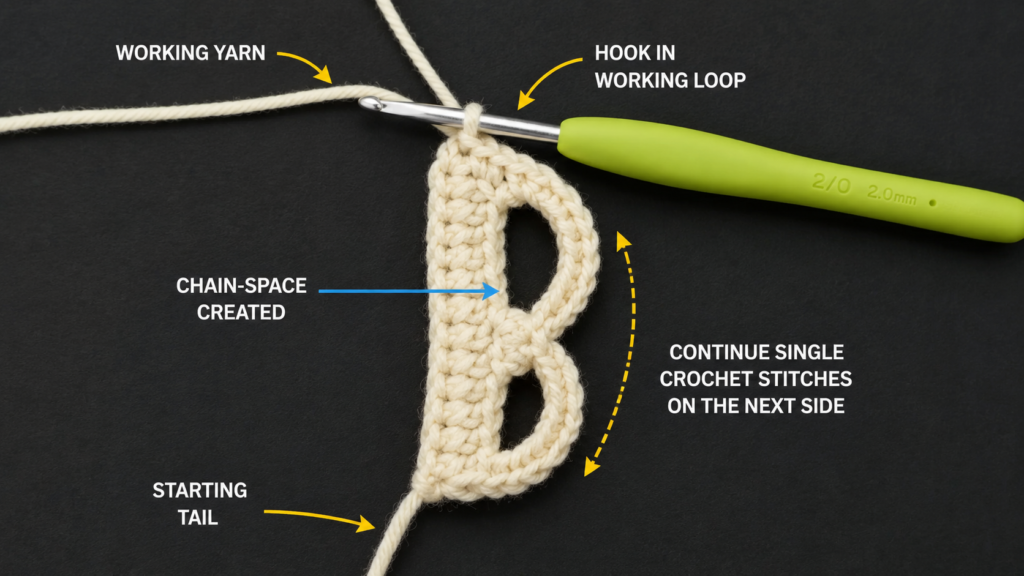
Step 8: Shape Continuous Curved Letters
Letters C, G, J, S, and U can be made from one long stroke.
For a C, curve an XL stroke into an open oval.
For G, begin with the same C shape and add an S stroke horizontally near the lower-right opening.
For J, use an L or XL stroke. Keep the upper section straight and curve the lower end to the left.
For S, pin one XL stroke into two opposing curves.
For U, pin an XL stroke into a broad U with two straight upper sides.
Lightly dampen the component before pinning if it resists the shape. Allow it to dry completely before removing the pins.
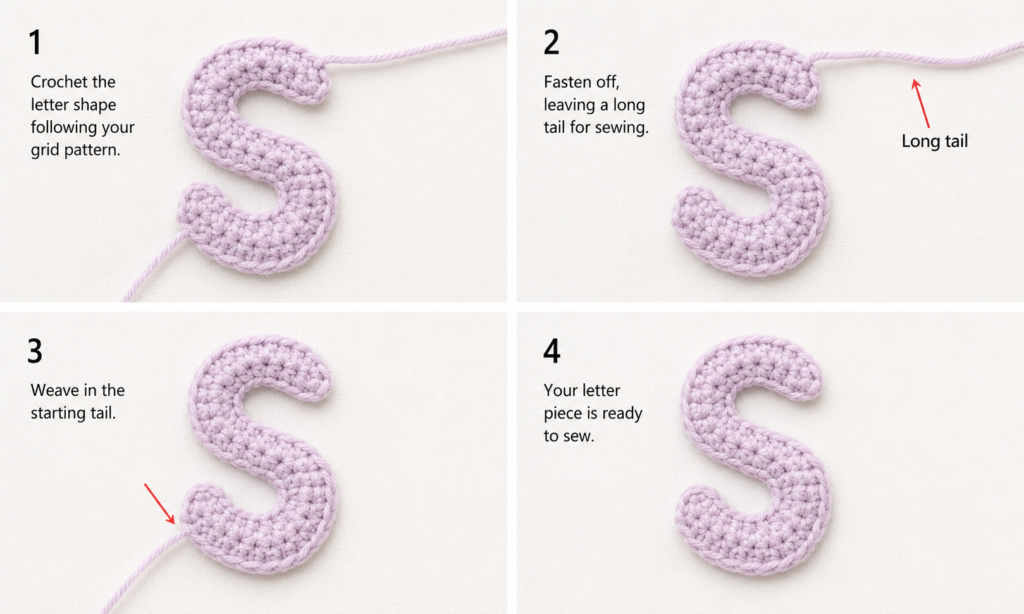
Step 9: Correct a Difficult Curve
A long strip may twist or resist a tight curve. Try these corrections in order:
- Reposition the pins gradually instead of forcing one sharp bend.
- Dampen and block the strip.
- Add one or two discreet whip stitches on the wrong side of the inner curve.
- When crocheting a custom curved stroke, place an increase on the outer edge.
- Use a slip stitch or sc2tog on the inner edge only when additional shaping is necessary.
Avoid adding several increases in one place. This can create a bump instead of a smooth curve.
A–Z Modular Letter Guide
Use the component codes below as an assembly map rather than a strict chart. Adjust the overlap to fit your sizing grid.
| Letter | Suggested components | Assembly idea |
|---|---|---|
| A | 2 L + 1 S | Two diagonal legs with a short crossbar |
| B | 1 L + 2 M | Vertical spine with two rounded loops |
| C | 1 XL | Block into an open oval |
| D | 1 L + 1 XL | Spine with one large loop |
| E | 1 L + 2 M + 1 S | Spine, top and bottom bars, shorter center bar |
| F | 1 L + 1 M + 1 S | Spine, top bar and center bar |
| G | 1 XL + 1 S | C-shaped curve with short inward bar |
| H | 2 L + 1 M | Parallel spines with center crossbar |
| I | 1 L + 2 M | Vertical center with top and bottom bars |
| J | 1 L or XL + 1 M | Curved lower stroke with top bar |
| K | 1 L + 2 M | Spine with upper and lower diagonals |
| L | 1 L + 1 M | Vertical stroke with lower horizontal |
| M | 2 L + 2 M | Two verticals with two inward diagonals |
| N | 2 L + 1 XL | Two verticals with a long diagonal |
| O | 1 XL | Join ends and block into an oval |
| P | 1 L + 1 M | Spine with one upper loop |
| Q | 1 XL + 1 S | O-shaped loop with short diagonal tail |
| R | 1 L + 1 M + 1 M | Spine, upper loop and lower diagonal |
| S | 1 XL | Pin into two opposing curves |
| T | 1 L + 1 XL | Vertical center and wide top bar |
| U | 1 XL | Block into a broad U |
| V | 2 L | Two diagonals joined at bottom |
| W | 4 M or L | Four connected diagonal strokes |
| X | 2 XL | Two crossing diagonals |
| Y | 2 M + 1 L | Two upper diagonals and one lower stem |
| Z | 2 M + 1 XL | Top, diagonal center and bottom |
Pattern and Stitch Notes
Turning-chain rules
The basic stroke is worked around a foundation chain rather than in turned rows. No turning chain is needed unless you choose to add a second round.
Stitch count
The exact count is less important than the measured component length. Record any chain-number adjustments so all later letters match.
Repeat pattern
Every stroke uses the same sequence:
- Foundation chain
- Single crochet along one side
- Extra stitches at the end
- Rotate
- Single crochet along the underside
- Join and fasten off
Right side and wrong side
Choose the smoothest side as the right side. Place joining knots and most sewing stitches on the wrong side.
Size adjustment
Change the entire component system proportionally:
- Mini letters: fingering yarn and 2.25–2.75 mm hook
- Standard appliqués: DK yarn and 3.5 mm hook
- Large banner letters: worsted yarn and 4.5–5 mm hook
- Oversized décor letters: bulky yarn and 6.5–8 mm hook
Make a test L stroke before committing to a full set.
Common Beginner Mistakes
1. The foundation chain is too tight
Problem: The stroke curls before shaping.
Fix: Make the chain with a hook 0.5 mm larger, then return to the project hook for the single crochet stitches.
2. The component twists while working the underside
Problem: The chain is rotated incorrectly.
Fix: Lay the first side flat before beginning the underside. Confirm that all unused loops face upward.
3. Similar letters have different heights
Problem: Components were assembled without a grid.
Fix: Pin each letter inside the same measured rectangle before sewing.
4. The joins look bulky
Problem: Too many layers overlap, or the sewing yarn is too thick.
Fix: Overlap only one or two stitches. Separate the yarn plies or use matching sewing thread when necessary.
5. Curves form sharp corners
Problem: The strip was forced around one pin.
Fix: Use several pins to distribute the curve gradually.
6. Rounded letters collapse inward
Problem: The loop is too short or attached under tension.
Fix: Use a longer component and attach it without stretching.
7. Crossbars sit too high or too low
Problem: Placement was estimated while holding the letter.
Fix: Lay the letter flat and compare it to nearby letters before sewing.
8. Letters curl after attachment
Problem: The appliqué and base fabric have incompatible tension.
Fix: Block the letters first. Pin them to the base without stretching either layer, then sew around the perimeter.
How to Customize This Crochet Project
Change the yarn
Smooth cotton creates crisp educational letters and décor. Acrylic produces softer appliqués for blankets. Wool can create a slightly felted appearance when carefully blocked.
Use the same fiber or compatible care requirements when attaching letters to a washable project.
Add color changes
Try:
- One color for the entire alphabet
- Alternating two-color letters
- Cream crossbars on colored letters
- Rainbow names
- School or team colors
- A contrasting outline worked in slip stitch
- Variegated yarn for playful classroom letters
Change the size
To make each letter larger, add chains to every component in the same proportion. For example, increasing each stroke by approximately 25 percent keeps the alphabet visually balanced.
Add a border
A surface slip-stitch outline can strengthen the edges. Use a smaller hook and avoid tight tension.
Add texture
For thicker tactile letters, crochet a second identical set and sew corresponding letters together around the edges. Insert a thin piece of washable felt before closing if the letters will be used as an educational matching set.
Project ideas
- Baby name blanket
- Nursery wall banner
- Classroom alphabet garland
- Personalized tote
- Initial patch
- Birthday banner
- Holiday word ornament
- Crochet name puzzle
- Quiet-book letters
- Monogrammed cushion
- Handmade gift tag
- Refrigerator magnets
For magnets or children’s learning sets, secure every small component permanently. Magnets and detachable pieces should not be given to babies or children who may put them in their mouths.
Finishing Instructions
Fastening off
Cut the yarn, leaving an 8-inch tail when the component will be joined. Pull the tail completely through the final loop.
Weaving in ends
Thread the tail through the yarn needle. On the wrong side:
- Pass beneath several nearby stitch backs.
- Change direction.
- Pass beneath another group of stitches.
- Trim only after the yarn is secure.
Avoid carrying a dark tail through a pale contrasting section.
Blocking
Pin each completed letter to its sizing grid.
For cotton:
- Lightly mist the letter with clean water.
- Shape every edge and curve.
- Allow it to dry completely.
- Remove the pins only when the yarn is fully dry.
For acrylic, use minimal steam held above the work without touching the yarn. Excessive heat can permanently flatten or damage synthetic fibers.
Attaching letters
Position the complete word before sewing any individual letter permanently.
Use stitch markers or safety pins to check:
- Spelling
- Baseline
- Spacing
- Centering
- Distance from the project edge
Whip stitch around the edge using matching yarn. Catch only a small amount of the base fabric so the stitches remain discreet on the reverse.
Washing and care
Follow the yarn label for washing and drying. Including a spare yarn label with a handmade gift helps the recipient care for the finished item correctly.
Quick Printable-Style Summary
Skill level: Beginner to easy
Finished height: Approximately 4 inches per letter
Yarn: DK or light worsted smooth cotton
Hook: 3.5 mm
Stitches: Chain, single crochet, slip stitch, optional increase and decrease
Starting method: Crochet a foundation chain for each modular component, then work single crochet around both sides of the chain.
Component sizes:
- S: Ch 9
- M: Ch 14
- L: Ch 19
- XL: Ch 25
Basic repeat:
Work along the first side of the chain, place extra stitches at the end, rotate, work along the unused underside loops, join, and fasten off.
Assembly:
Arrange components on a four-inch grid, pin, join with small whip stitches, and keep seams on the wrong side.
Finishing:
Weave in ends, block to measurement, arrange the complete word, and sew the letters to the finished project.
FAQ
Can a complete beginner crochet alphabet letters?
Yes. Start with straight letters such as I, L, T, and H. Make A after you are comfortable joining components. Leave S, G, and rounded letters until you have practiced shaping longer strips.
What stitch works best for crochet letters?
Single crochet produces a dense, clearly defined stroke. Slip stitch is helpful for joins and optional outlines.
What yarn makes the clearest letters?
Smooth cotton or a cotton-acrylic blend produces crisp stitch definition. Fuzzy, eyelash, or highly textured yarn can obscure the letter shape.
How do I make all my letters the same size?
Use one yarn, one hook, consistent tension, fixed component chain counts, and the same blocking grid for every letter.
Can I attach crochet letters to a blanket?
Yes. Block the letters first, arrange the complete word, pin everything in place, and whip stitch around the edges with compatible yarn.
How do I make smaller crochet alphabet letters?
Use thinner yarn and a smaller hook, or reduce every component proportionally. Test one A and one O before making the complete set.
How do I stop curved letters from twisting?
Use a relaxed foundation chain, work consistently into the unused chain loops, block with several pins, and distribute curves gradually.
Can these letters be used without attaching them to fabric?
Yes, although freestanding letters may need additional firmness. Use cotton, crochet two layers together, add a thin felt insert, or apply an appropriate fabric stiffener.
Should I use glue or sew the pieces?
Sewing is the most durable choice for washable items. Fabric glue can temporarily hold pieces during positioning, but it should not replace secure stitching on blankets, children’s items, garments, or frequently handled décor.
Conclusion
A crochet alphabet becomes much easier when you stop treating every letter as a completely separate pattern. Straight lines, diagonals, loops, crossbars, and curves repeat throughout the alphabet.
Begin with the four reusable stroke lengths. Make one letter A to practice angled assembly, one B to practice rounded loops, and one S to practice continuous shaping. Once those three letters lie flat and match your sizing grid, the remaining alphabet becomes a process of arranging familiar components in new combinations.
Save your final chain counts, hook size, yarn name, and finished measurements. Those notes will allow you to reproduce matching letters later when you need another name, date, banner, or personalized gift.





