Handmade teacher gifts do not need to be large, expensive, or complicated. The best teacher gifts are often the small useful things: a bookmark, a mug cozy, a pouch, a keychain, a desk accessory, or something that feels personal without taking over the teacher’s classroom.
This easy crochet pencil bookmark is designed for exactly that kind of gift. It is quick, lightweight, school-themed, and practical. A teacher can use it in a planner, lesson notebook, classroom read-aloud book, journal, or favorite novel. It also works well as a back-to-school gift, teacher appreciation gift, end-of-year thank-you gift, librarian gift, homeschool teacher gift, or small craft-fair item.
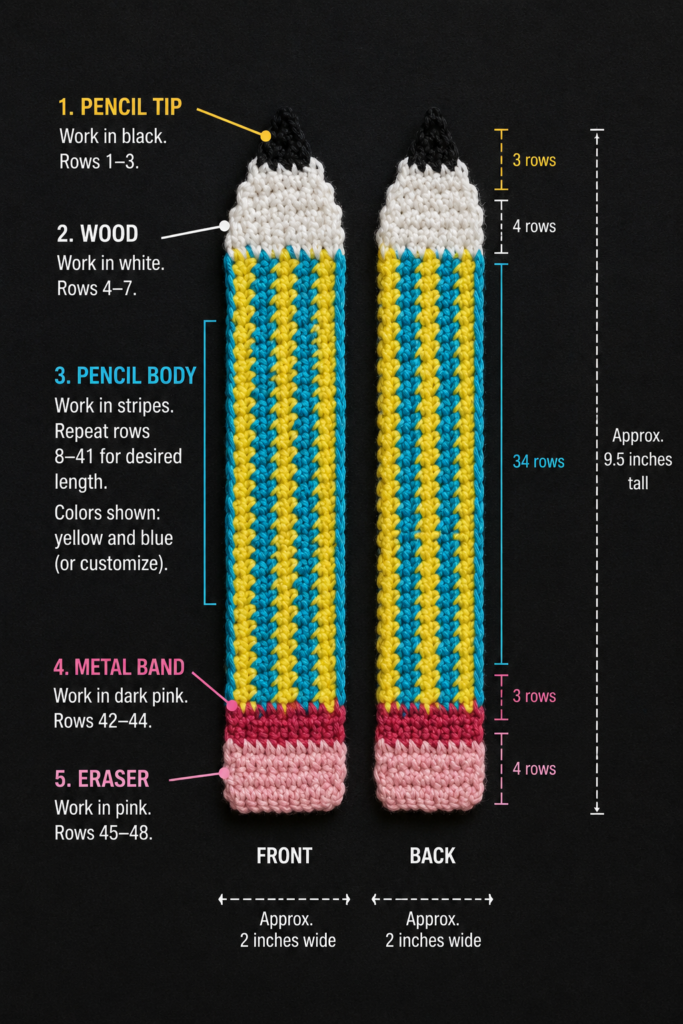
This tutorial is a project-style crochet teacher gift pattern. You will make a flat pencil-shaped bookmark in simple rows, add color changes for the pencil tip, wooden section, yellow body, ferrule, and eraser, then finish it with a clean border and optional tassel.
The selected visual reference source uses a pencil bookmark as a beginner crochet project and notes that this type of bookmark can work well for teacher appreciation and back-to-school gifting. This article creates a new original version with different stitch counts, yarn choices, finishing details, and gift styling.
What You’ll Learn
- How to crochet a flat pencil-shaped bookmark.
- How to start with a small pencil tip.
- How to increase gradually to create a triangle point.
- How to change colors neatly.
- How to keep narrow crochet edges straight.
- How to add a simple single crochet border.
- How to weave in ends without adding bulk.
- How to add an optional tassel.
- How to turn one bookmark into a polished crochet teacher gift.
Materials You’ll Need
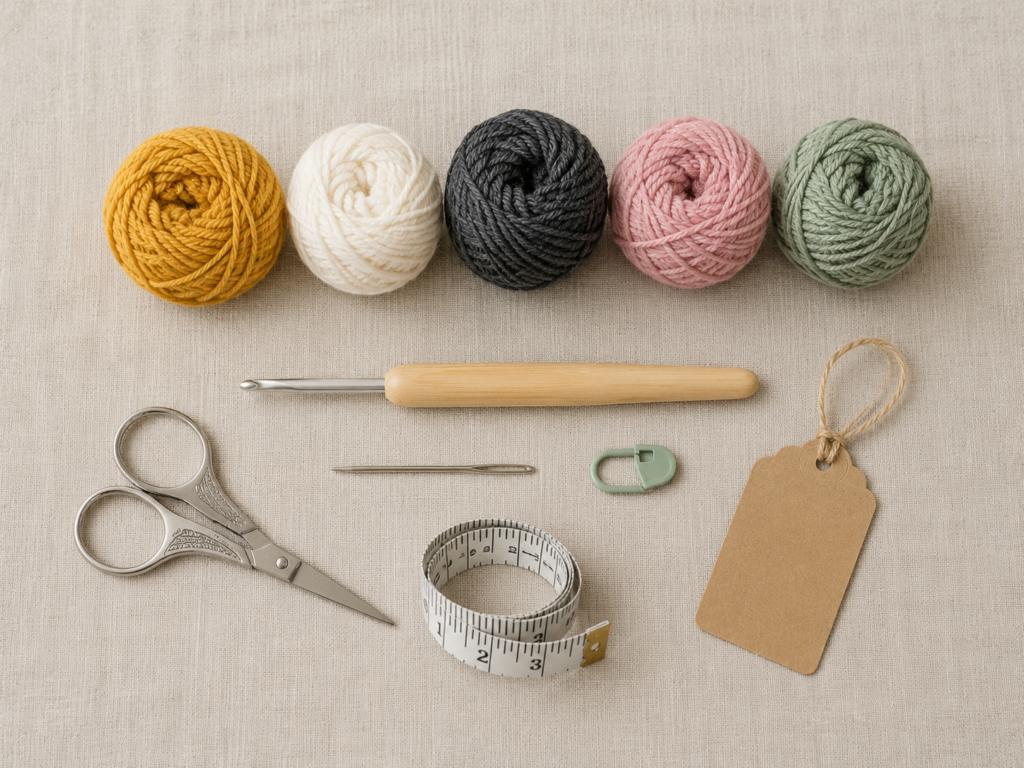
For one crochet pencil bookmark:
- Sport-weight cotton yarn in charcoal gray for the pencil tip.
- Sport-weight cotton yarn in warm cream for the wooden pencil section.
- Sport-weight cotton yarn in mustard yellow for the pencil body.
- Sport-weight cotton yarn in warm gray for the ferrule.
- Sport-weight cotton yarn in soft blush pink for the eraser.
- Optional muted sage green yarn for a tassel.
- 3.0 mm crochet hook.
- Tapestry needle.
- Scissors.
- Measuring tape.
- Stitch marker, optional.
The selected reference tutorial uses lightweight cotton-style yarn and basic stitches for a pencil bookmark, and it notes that cotton is useful because it is strong, durable, and lays flat for bookmarks. For this original version, sport-weight cotton is recommended because it creates a bookmark that is visible and giftable but not overly bulky between book pages.
Finished Size
Approximate finished size using sport-weight cotton yarn and a 3.0 mm hook:
Length: 8.5–9 inches
Width: 1.1–1.3 inches
The reference pencil bookmark source gives a finished size of about 9.5 inches long and 1.5 inches wide for its own version. This original version is intentionally a little narrower so it can sit more comfortably inside a book or planner.
Crochet Abbreviations Used
This pattern uses U.S. crochet terminology.
- ch = chain
- sc = single crochet
- sl st = slip stitch
- st/sts = stitch/stitches
- rep = repeat
- inc = increase, meaning 2 stitches worked into the same stitch
- RS = right side
- WS = wrong side
The Craft Yarn Council lists common crochet abbreviations including ch for chain stitch, sc for single crochet, and sl st for slip stitch.
Before You Start
Gauge and tension
Gauge is not strict for this project. The main goal is to create a bookmark that is flat, narrow, and flexible.
A good working gauge is approximately:
6 sc stitches = 1.1–1.3 inches wide
If your bookmark is much wider, use a smaller hook or thinner yarn. If it feels stiff and tight, use a slightly larger hook.
How to count rows
This pencil bookmark is made in short horizontal rows from the graphite tip upward to the eraser.
Each time you turn the work, you complete one new row.
To count rows more easily, look at the side edge. Each row creates one small ridge or side bump.
How to keep the bookmark edges straight
Because this is a narrow project, uneven edges show quickly.
At the start of every row:
- Ch 1.
- Turn.
- Work the first sc into the first stitch, not into the turning chain.
The turning chain does not count as a stitch in this original pattern.
How to choose colors
Classic pencil colors work best for teacher gifts:
- Charcoal or black for the graphite point.
- Cream or tan for the wooden section.
- Yellow or mustard for the pencil body.
- Gray or silver for the ferrule.
- Pink or blush for the eraser.
For a softer modern classroom look, use mustard, oatmeal, warm gray, blush, and sage.
Step-by-Step Crochet Tutorial
Step 1: Start the Pencil Tip
With charcoal gray yarn, ch 2.
Row 1
Work 2 sc in the second chain from the hook.
Stitch count: 2
Row 2
Ch 1, turn.
Work 2 sc in each stitch across.
Stitch count: 4
Row 3
Ch 1, turn.
Work 2 sc in the first stitch, sc in each middle stitch, then 2 sc in the last stitch.
Stitch count: 6
You should now have a small triangle. This is the graphite point of the pencil.
Beginner tip:
If the triangle looks tiny at first, that is normal. The bookmark begins small and grows quickly once you add the cream and yellow sections.
Common mistake to avoid:
Do not add extra chains between rows. Use only ch 1 to turn, then work directly into the first stitch.
Step 2: Add the Wooden Pencil Section
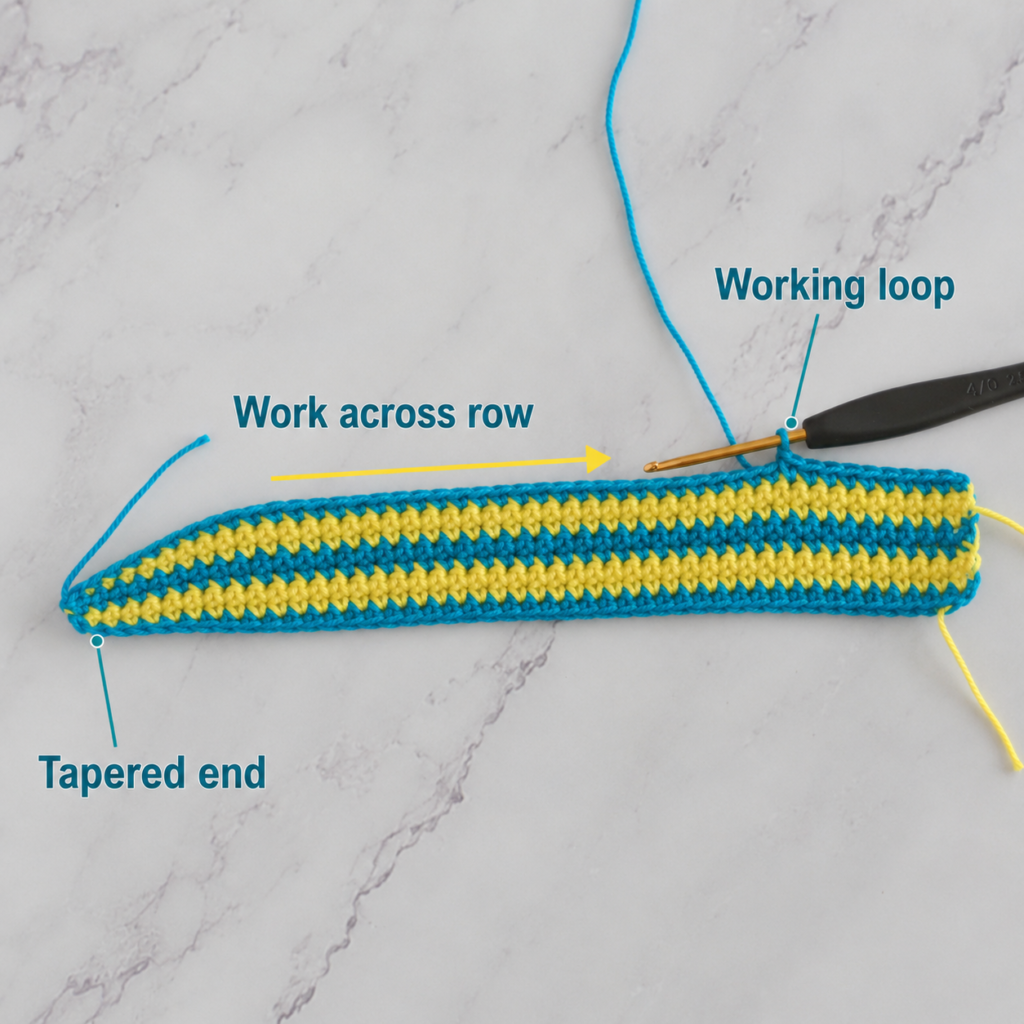
Change to warm cream yarn.
Row 4
Ch 1, turn.
Sc in each stitch across.
Stitch count: 6
Row 5
Ch 1, turn.
Sc in each stitch across.
Stitch count: 6
This short cream section represents the exposed wooden part of the pencil.
Beginner tip:
When changing color, finish the final pull-through of the last charcoal stitch with the new cream yarn. This creates a cleaner transition.
Common mistake to avoid:
Do not tie a bulky knot at the color change. Secure the tails later by weaving them into the wrong side.
Step 3: Crochet the Yellow Pencil Body
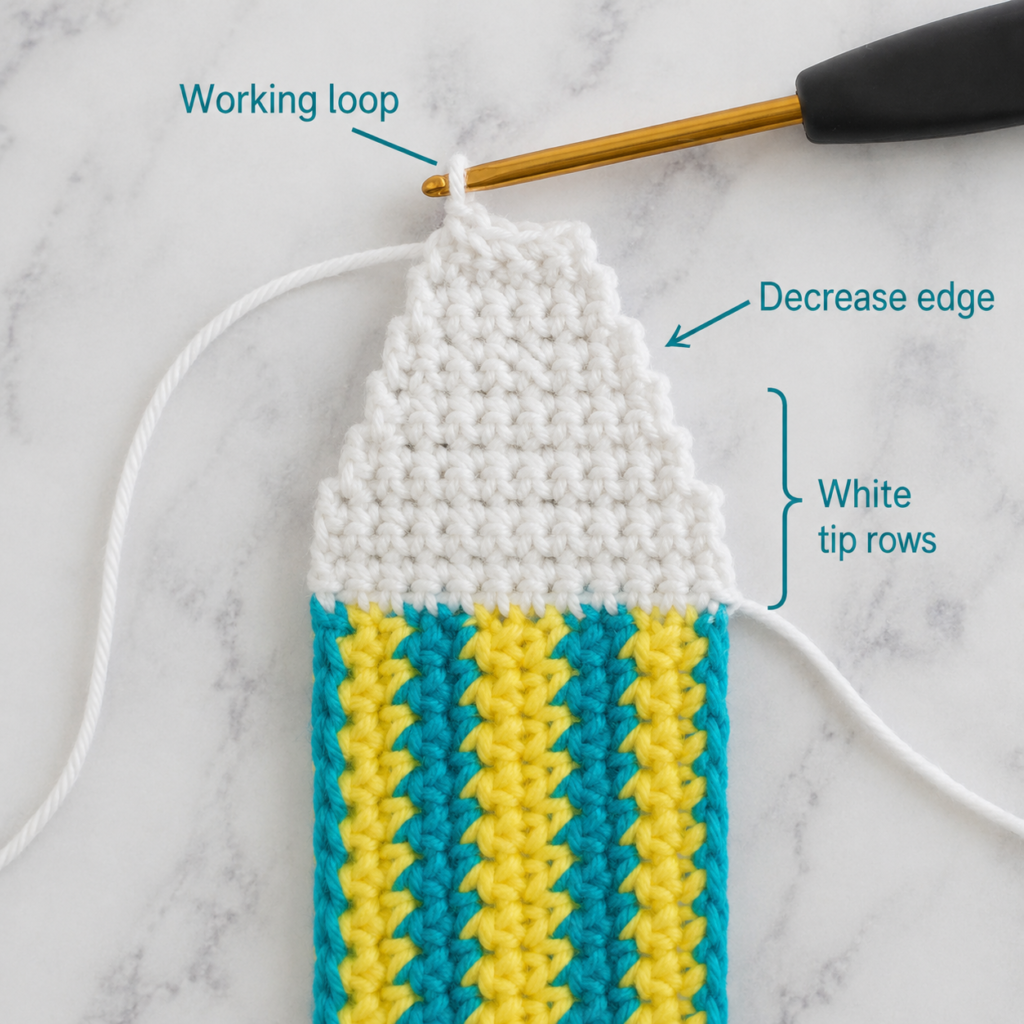
Change to mustard yellow yarn.
Rows 6–34
Ch 1, turn.
Sc in each stitch across.
Stitch count per row: 6
Work until the yellow section measures approximately 5.5–6 inches long from the top of the cream section.
You can make this section longer or shorter depending on the type of book, notebook, or planner the teacher will use.
Beginner tip:
Lay the bookmark flat every five rows. Narrow pieces can twist while you work, especially if your tension is tight.
Common mistake to avoid:
Do not accidentally increase at the edges. Every yellow row should still have 6 stitches.
Step 4: Add the Ferrule Section
Change to warm gray yarn.
The ferrule is the metal-looking part between the pencil body and the eraser.
Rows 35–38
Ch 1, turn.
Sc in each stitch across.
Stitch count per row: 6
Fasten off the gray yarn after Row 38.
Beginner tip:
If you want the ferrule to look more decorative, you can surface-embroider two short horizontal lines later using a slightly darker gray yarn.
Common mistake to avoid:
Avoid making the gray section too long. A short ferrule looks more like a pencil; a very long one can make the bookmark look unbalanced.
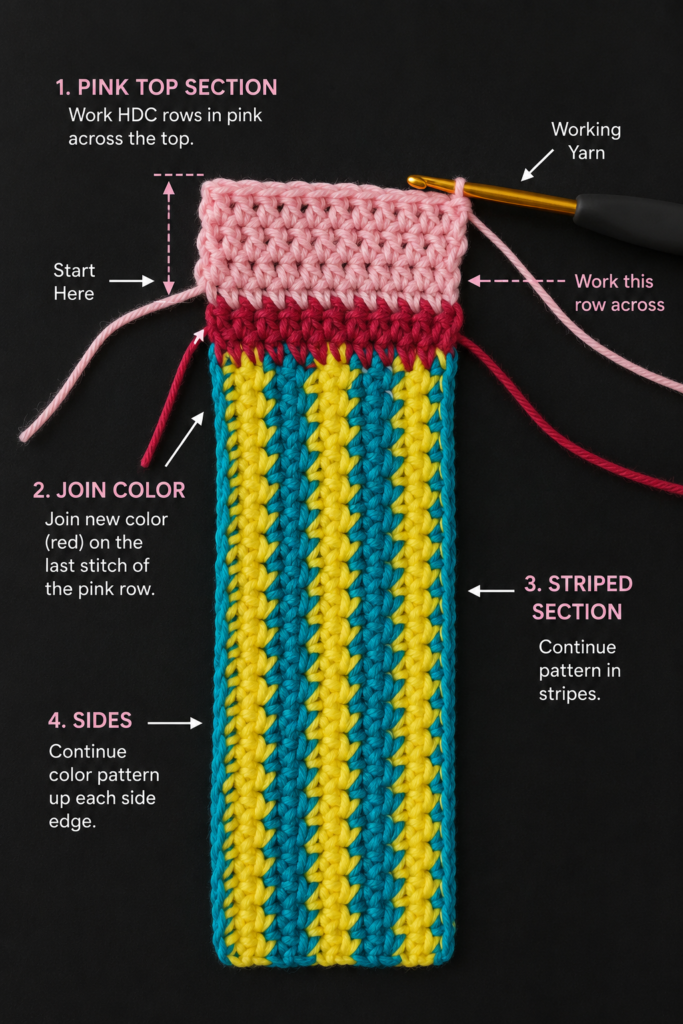
Step 5: Crochet the Eraser
Change to soft blush pink yarn.
Rows 39–44
Ch 1, turn.
Sc in each stitch across.
Stitch count per row: 6
Fasten off, leaving a tail long enough to weave in securely.
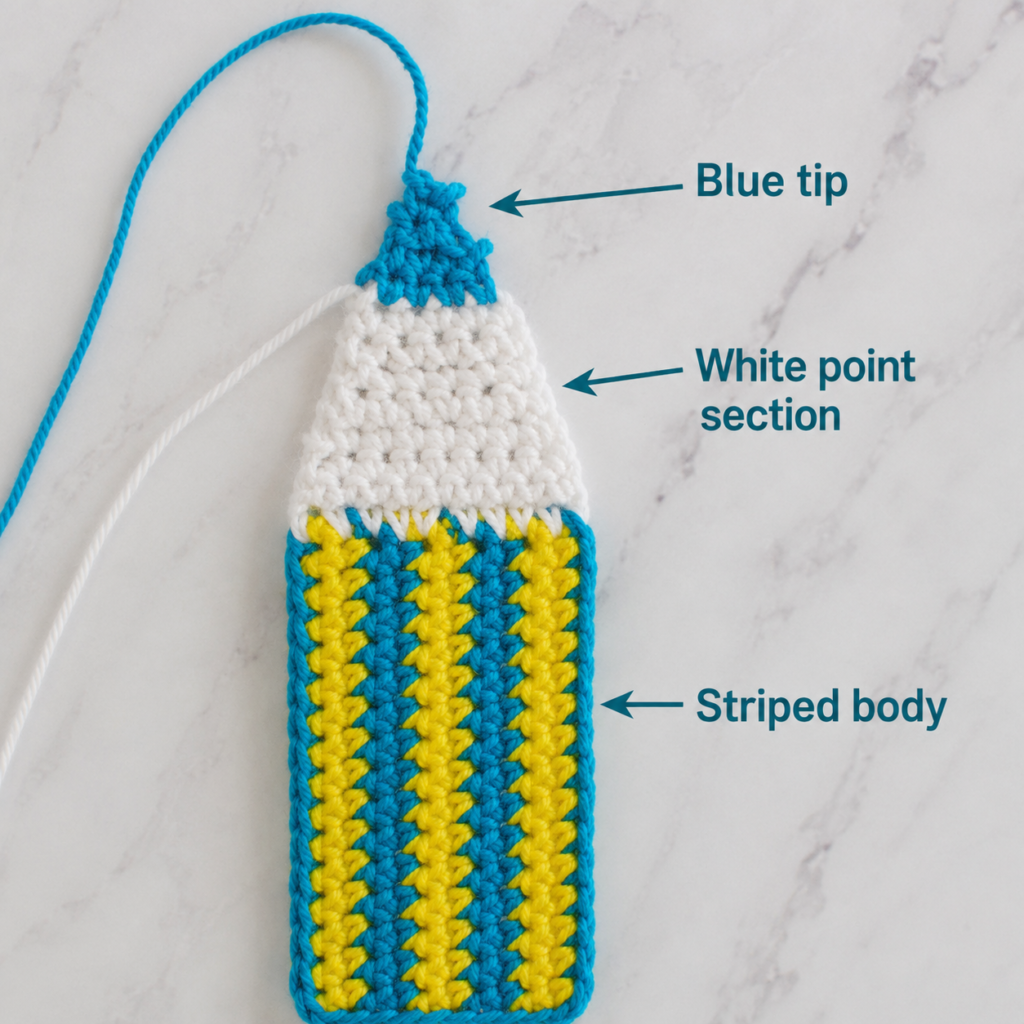
The bookmark should now look like a flat pencil with a point at one end and an eraser at the other.
Beginner tip:
If you want a shorter bookmark, reduce the yellow section before changing to gray and pink. Keep the tip, wood, ferrule, and eraser sections proportional.
Common mistake to avoid:
Do not switch to the border before checking the total length. Once the border is added, length adjustments are harder.
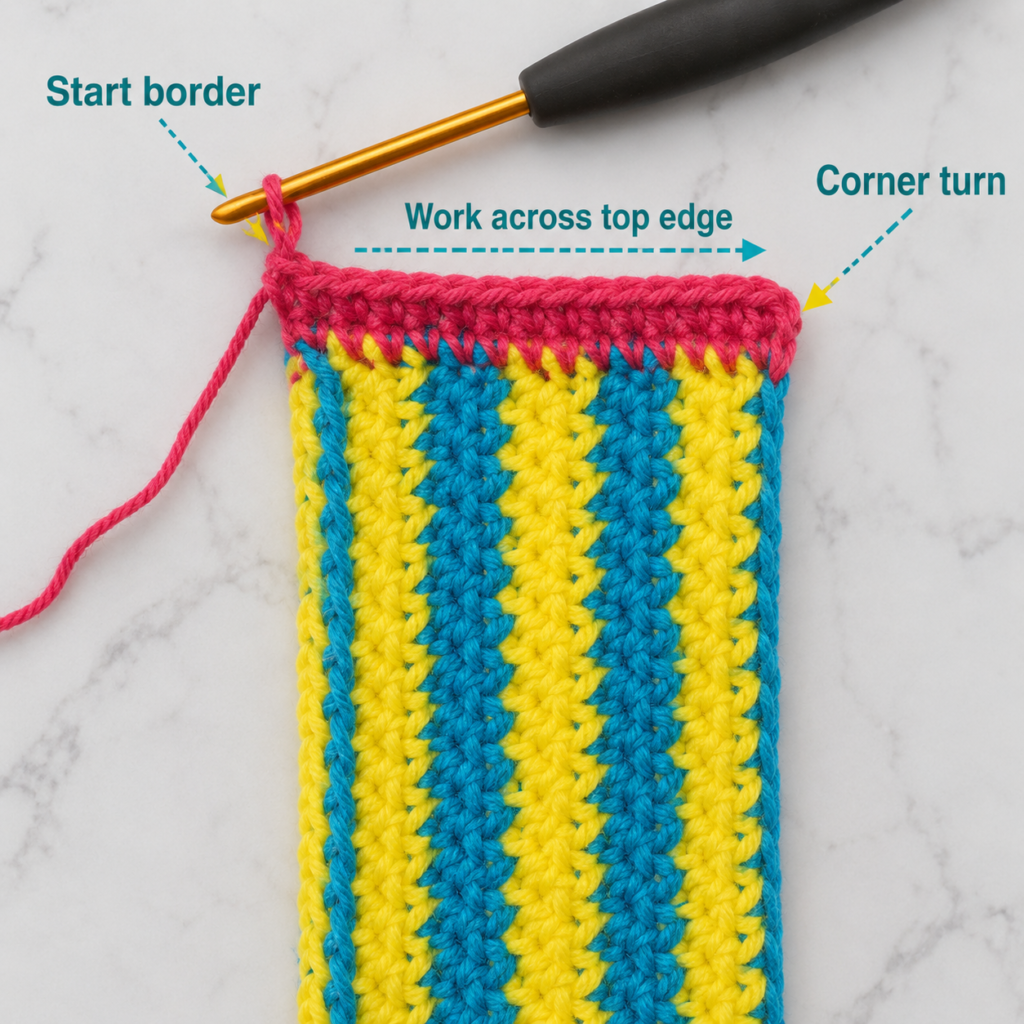
Step 6: Add a Simple Border
A border makes the bookmark look more finished and helps straighten the edges.
Join mustard yellow or warm cream yarn at one upper corner.
Ch 1.
Work single crochet evenly around the bookmark:
- 1 sc in each stitch across the top.
- 1 sc into the side of each row down the first long edge.
- 2 sc carefully around the point if needed.
- 1 sc into the side of each row up the second long edge.
- Join with a sl st to the first border stitch.
Fasten off.
If your border ruffles, you may have placed too many stitches along the side edges. If the border pulls inward, you may have placed too few.
Beginner tip:
For a neat side edge, do not force one stitch into every tiny yarn strand. Aim for one border stitch per row end.
Common mistake to avoid:
Do not overwork the pencil point. Too many stitches at the pointed end can make it look rounded instead of pencil-shaped.
Step 7: Add an Optional Tassel
A tassel is optional, but it makes the bookmark feel more like a complete teacher gift.
Cut 6–8 strands of muted sage yarn, each approximately 8 inches long.
Fold the strands in half.
Insert your hook through the top center of the eraser.
Pull the folded loop partly through.
Pass the strand ends through the loop and pull gently to secure.
Trim the tassel evenly.
Beginner tip:
Keep the tassel light. A heavy tassel can pull the bookmark out of thinner paperback pages.
Common mistake to avoid:
Do not pull the tassel so tightly that it distorts the eraser section.
Pattern Notes or Stitch Notes
Turning chain rules
The ch 1 at the beginning of each row does not count as a stitch.
Work the first sc directly into the first stitch of the row.
Stitch count
After the pencil tip is shaped, every straight row should have 6 stitches.
If a row has 5 or 7 stitches, correct it before continuing.
Repeat pattern
For the long body sections, the repeat is simple:
Ch 1, turn, sc in each stitch across.
Row notes
This project is worked in flat rows from the pencil tip toward the eraser.
The border is worked in one round around the outside edge.
Right side and wrong side
Choose the neater-looking side as the right side before adding the border and tassel.
Weave in most yarn tails on the wrong side.
Size adjustment notes
To make the bookmark longer, add more mustard yellow rows.
To make it shorter, remove mustard yellow rows.
To make it wider, begin with a larger pencil tip and maintain more stitches across each row, but remember that a wide bookmark may be bulky inside books.
Common Beginner Mistakes
1. The pencil tip looks crooked
Cause: Uneven increases or tight tension at one edge.
Fix: Count each row carefully and keep your turning chain loose.
2. The bookmark gets wider without meaning to
Cause: Extra stitches at the beginning or end of rows.
Fix: Every straight row after the tip should have 6 stitches.
3. The side edges look bumpy
Cause: Inconsistent turning chains or uneven row tension.
Fix: Keep the ch 1 relaxed and always work the first sc into the first stitch.
4. The color changes look bulky
Cause: Knotting every color change.
Fix: Change color on the final pull-through, then weave the tails into the wrong side later.
5. The border ruffles
Cause: Too many stitches along the long side edges.
Fix: Use approximately one border stitch per row end, then adjust slightly only where needed.
6. The bookmark curls
Cause: Tight tension, small hook, or border tension that is too firm.
Fix: Gently block the bookmark flat and use a relaxed hand when crocheting the border.
7. The tassel is too heavy
Cause: Too many strands or very thick yarn.
Fix: Use fewer strands, thinner yarn, or skip the tassel for a very lightweight bookmark.
How to Customize This Crochet Teacher Gift
Change the yarn
Fine cotton creates the flattest bookmark.
Sport-weight cotton makes the project easier to see and photograph.
DK cotton works too, but the finished bookmark will be thicker.
Change the colors
Try these teacher-gift palettes:
- Classic yellow pencil: charcoal, cream, yellow, gray, pink.
- Soft classroom neutral: taupe, oatmeal, mustard, gray, blush.
- Bright school colors: red, blue, yellow, white, black.
- Pastel teacher gift: lavender, cream, blush, sage, pale gray.
- Rustic handmade style: burnt orange, tan, cocoa, dusty rose.
Add embroidery
You can embroider small short lines on the gray ferrule to make it look more like metal.
Avoid adding readable words inside the crochet photo prompts unless you are designing a separate graphic.
Turn it into a gift set
Pair the bookmark with:
- A paperback novel.
- A teacher planner.
- A notebook.
- A gift card.
- A pen set.
- A small thank-you card.
- A handmade mug cozy.
Make a classroom batch
If making multiple gifts, crochet in batches:
- Make all pencil tips.
- Add all cream sections.
- Crochet all yellow bodies.
- Add all ferrules.
- Add all erasers.
- Border and finish each bookmark.
Batching helps every bookmark stay closer in size and saves time switching yarns repeatedly.
Finishing Instructions
Fasten off after the border and pull the yarn tail through the last loop.
Use a tapestry needle to weave each tail into the wrong side of the bookmark.
For best results:
- Weave the tail under several stitches.
- Change direction.
- Weave under several more stitches.
- Trim close to the fabric.
Do not trim tails immediately after a color change. Short tails are harder to secure neatly.
To block the bookmark, lightly mist it with water, shape it flat with your fingers, pin it gently if needed, and let it dry completely.
Avoid strong heat if using acrylic or synthetic yarn.
Quick Printable-Style Summary
Project: Crochet Pencil Bookmark Teacher Gift
Skill level: Beginner to Easy
Finished size: Approximately 8.5–9 inches long by 1.1–1.3 inches wide
Yarn: Sport-weight cotton or fine cotton
Hook: 3.0 mm
Stitches: Chain, single crochet, slip stitch
Starting method: Ch 2 and increase into a small pencil point
Main repeat: Ch 1, turn, sc across
Construction: Flat rows from pencil tip to eraser
Finishing: Add a single crochet border, weave in ends, block flat, attach optional tassel
Gift idea: Pair with a notebook, planner, book, gift card, or thank-you note
FAQ
Is a crochet bookmark a good teacher gift?
Yes. A crochet bookmark is useful, lightweight, affordable, and easy to personalize. It works especially well for teachers who use planners, notebooks, books, or classroom read-aloud materials.
How long does it take to crochet a pencil bookmark?
Most beginners can make one in about 45–90 minutes after understanding the color changes. Faster crocheters may finish one in less time.
What yarn is best for a crochet bookmark?
Cotton is a strong choice because it creates clear stitches, lies fairly flat, and is durable. Fine cotton makes the thinnest bookmark, while sport-weight cotton is easier for beginners to handle.
Can I make this without a tassel?
Yes. The tassel is optional. Leaving it off creates a flatter, simpler bookmark that may be better for thin books.
Can I use acrylic yarn?
Yes, but acrylic can be stretchier and bulkier depending on the yarn. Use a light acrylic and a small hook if you want the bookmark to stay slim.
Can I sell finished pencil bookmarks made from this article?
This article provides an original beginner-friendly tutorial. For selling finished items, use your own photos, your own descriptions, and avoid using any reference images from the selected source unless you have permission.
How can I make this teacher gift look more polished?
Block the bookmark flat, trim the tassel evenly, package it with a kraft card, and pair it with a handwritten note or a small planner.
Conclusion
A crochet pencil bookmark is one of the most practical crochet teacher gifts because it is small, useful, recognizable, and easy to customize. You can make one in classic yellow pencil colors, create a soft modern version with muted yarns, or batch several bookmarks for multiple teachers and school staff.
The key is to keep the bookmark flat and narrow. Use lightweight cotton, count each row carefully, keep every straight section at 6 stitches, and block the finished piece before gifting.
Once you finish one bookmark, the same structure can become a full set: pencil bookmarks, apple bookmarks, planner bands, mug cozies, classroom garlands, or small crochet pouches for pens and supplies.





