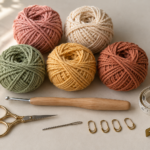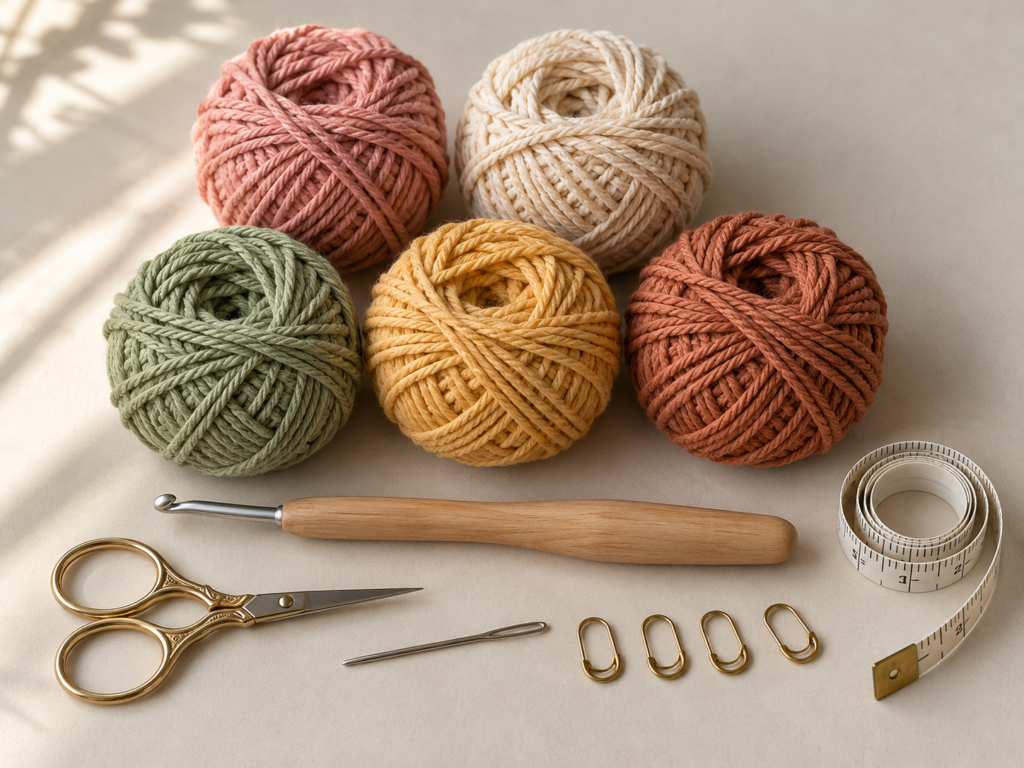
There is something satisfying about finding a use for all those little balls of yarn tucked away in your crochet basket. Maybe you have half a skein left from a baby blanket, a few yards of cotton from a dishcloth, or several colors you loved but never found another project for.
This crochet scrap yarn bag pattern turns those leftovers into a small, colorful shoulder bag you can actually use.
You don’t need to buy a perfectly matching set of yarn. In fact, the different colors are what make this project interesting. A little pink next to sage green, an unexpected stripe of mustard, or a leftover length of terracotta can all become part of the finished design.
The bag is worked mainly in single crochet, so it has a compact, practical texture. You’ll start by crocheting around a foundation chain to form a narrow oval base. From there, you’ll continue working in rounds to build the sides, finish the upper opening, and add a matching shoulder strap.
The instructions below are designed for a confident beginner who knows how to make a chain and a single crochet stitch. If you’ve made a washcloth or a simple scarf, you’re ready to try this bag.
This tutorial includes step-by-step construction guidance, stitch counts, beginner tips, and a photography plan for each major stage.
What You’ll Learn
By the end of this project, you’ll know how to:
- Choose leftover yarn that works well together in one crochet project.
- Crochet around both sides of a foundation chain.
- Make a narrow oval base without sewing separate pieces.
- Build a colorful bag using continuous single crochet rounds.
- Change yarn colors while keeping the stitches tidy.
- Create a simple, sturdy crocheted shoulder strap.
- Reinforce the strap attachment points.
- Finish your bag neatly and adjust the size for future projects.
Crochet Scrap Yarn Bag Pattern Details
| Detail | Specification |
|---|---|
| Skill level | Confident beginner |
| Finished size | Approximately 8–10 in wide × 7–8 in tall (20–25 × 18–20 cm), depending on gauge |
| Bag construction | Oval foundation with sides worked continuously |
| Yarn | Approx. 250–350 yd total DK cotton yarn |
| Crochet hook | 4.0 mm |
| Main stitch | Single crochet |
| Strap | One crocheted shoulder strap |
| Estimated time | 5–8 hours |
| Sewing | Minimal, for attaching the strap |
| Terminology | US crochet terms |
The measurements are approximate planning targets, not tested finished dimensions. Since different leftovers produce different gauges, use your measuring tape and adjust the height or strap length as needed.
Materials You’ll Need
The best part about this crochet scrap yarn bag is that you probably already have most of the supplies.
Yarn
Gather approximately 250–350 yards of DK-weight cotton yarn in several colors.
For this tutorial, the suggested palette is:
- Oatmeal cream for the starting foundation.
- Dusty rose for the strap and several rounds of the body.
- Sage green for calm, earthy stripes.
- Muted terracotta for warmer contrast.
- Soft mustard for small pops of color.
You do not need equal quantities of every color. One shade might last for ten rounds while another only makes one or two.
Cotton yarn is my first choice for this bag because it has relatively little stretch and gives single crochet stitches a defined appearance. A cotton blend can also work. Acrylic scraps are usable, but the finished bag may be softer and more prone to stretching.
If your yarn scraps are different thicknesses, try to keep the main body within one yarn-weight category. Mixing very fine yarn with chunky yarn without compensating for thickness can create uneven sides.
Other supplies
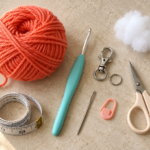
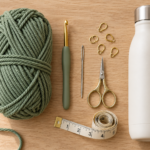
You’ll also need a 4.0 mm crochet hook, scissors, a blunt tapestry needle, two or four stitch markers, and a measuring tape.
A smaller hook may be useful if your stitches are unusually loose. Optional supplies include a fabric lining, a magnetic snap, or a decorative button.
Crochet Abbreviations Used
This pattern is written in US crochet terminology.
| Abbreviation | Meaning |
|---|---|
| ch | Chain |
| sc | Single crochet |
| sl st | Slip stitch |
| st / sts | Stitch / stitches |
| rnd | Round |
| BLO | Back loop only |
| rep | Repeat |
| RS | Right side |
| WS | Wrong side |
In UK terminology, a US single crochet is called a UK double crochet. Make sure you follow the US instructions throughout this tutorial.
Before You Start
1. Sort your yarn scraps
Lay the yarn out on a table before you begin.
Separate the scraps into groups based on thickness. You don’t need to measure every strand, but comparing the yarn side by side will help you avoid dramatic changes in fabric density.
Try placing your chosen colors next to each other. For a softer bag, choose several muted shades. For a cheerful scrap-yarn project, mix bright colors with one or two neutrals.
2. Decide how to arrange the colors
You can change color whenever a strand runs out, or plan a more deliberate stripe sequence.
For this beginner version, it is easier to change yarn at the end of a round. That creates organized stripes without requiring you to manage too many yarn ends in the middle of a row.
If a strand is too short to complete a round, save it for another project or join it securely and finish the round with the new color.
3. Check your tension
Make a small square of single crochet using the yarn and hook you plan to use.
For a bag, your stitches should be relatively firm. If the fabric has large holes or stretches easily, try a smaller hook.
If your fingers feel strained or you cannot insert the hook comfortably, loosen your tension or try a slightly larger hook.
4. Understand how to count single crochet stitches
Look at the top of your crocheted fabric. Every completed single crochet stitch forms a small V.
Each V counts as one stitch.
When working in continuous rounds, place a marker into the first stitch of each round. Move it as you begin the next round.
This is especially helpful when you’re concentrating on changing colors.
5. Know what to expect from the bag base
The base begins as a straight foundation chain. You work single crochet stitches along one side, place extra stitches in the last chain, then continue along the opposite side.
This makes a narrow oval rather than a flat rectangle.
Because the project uses a shallow oval base, it is best suited to lightweight personal items rather than heavy shopping loads.
Step-by-Step Crochet Scrap Yarn Bag Tutorial
Step 1: Make the foundation chain
Start with your oatmeal cream yarn.
Make a slip knot and place it on your 4.0 mm crochet hook.
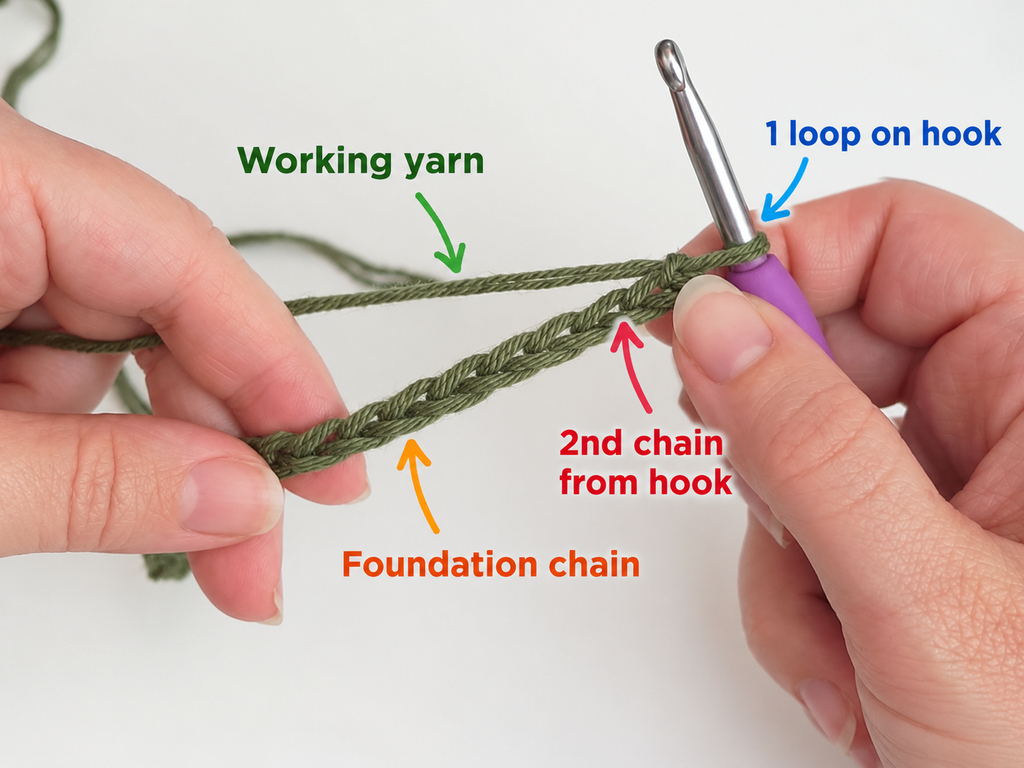
Chain 31.
Try to make every chain approximately the same size. If one chain is noticeably tighter than the others, relax your grip and adjust it before continuing.
Hold the chain horizontally and make sure it is not twisted.
The first chain nearest your hook will be skipped when you begin the next step. You will start single crocheting in the second chain from the hook.
Beginner tip: Lay the foundation chain flat on the table before starting the first stitch. This makes it easier to identify the correct side.
Common mistake to avoid: Do not pull the foundation chain too tightly. A stiff starting chain can make the first round curl or cause the base to bend.
Step 2: Crochet along the first side
Now turn the chain into the beginning of your bag base.
Insert your hook into the second chain from the hook.
Yarn over and pull a loop through the chain. You should have two loops on your hook.
Yarn over again and pull through both loops.
That is your first single crochet stitch.
Continue working one single crochet into each of the next 28 chains.
At this point, you should have completed 29 single crochets, and one unworked chain should remain at the far end.
Do not turn your work in the usual way. You are going to crochet around the end of the chain instead.
Beginner tip: Count the stitches before reaching the last foundation chain. Correcting a missed stitch now is easier than correcting the base after several rounds.
Common mistake to avoid: Avoid accidentally making two stitches in the same chain along the straight section. Save your increases for the rounded end.
Step 3: Crochet around the end of the foundation
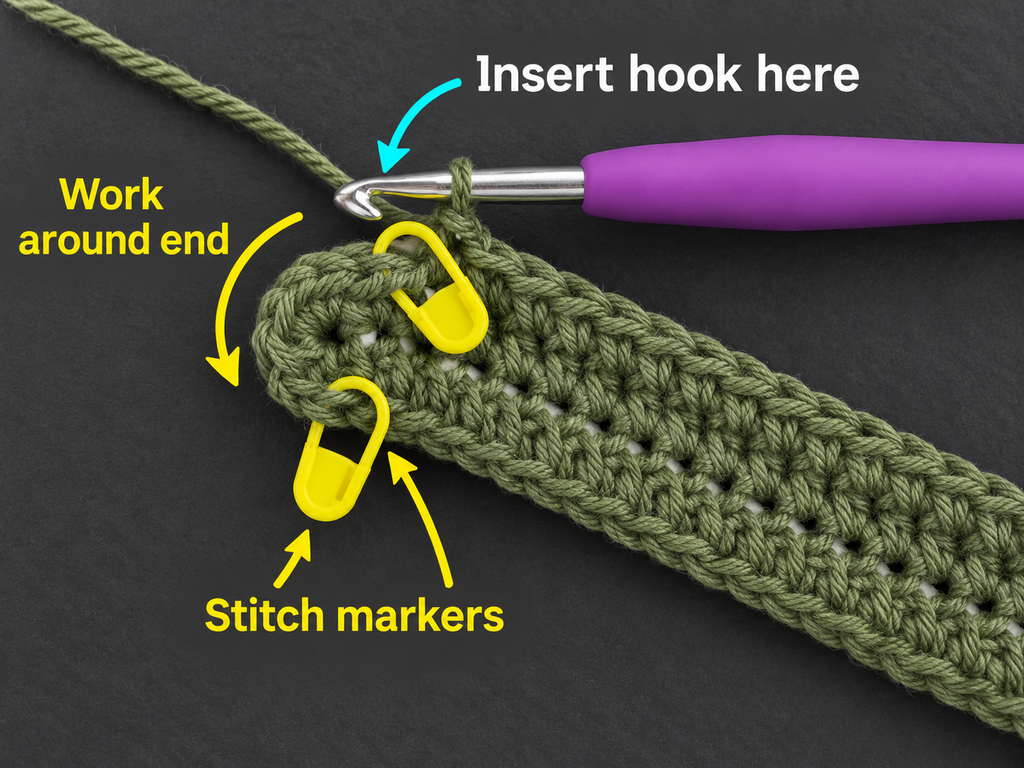
You have reached the final chain at the end of the foundation.
Work three single crochet stitches into that last chain.
These extra stitches allow your crochet to bend around the end without creating a sharp corner.
Now rotate your work slightly so that the underside of the starting chain faces you.
You should see small loops where the chain was formed.
Working into the available loops on the opposite side, make one single crochet in each of the next 28 chains.
When you reach the starting end, work two single crochets into the same chain that already holds your first stitch.
You have now completed your first oval round.
Round 1 stitch count: 62 single crochet stitches.
The count comes from 29 stitches along the first side, three at the far end, 28 along the opposite side, and two additional stitches at the starting end.
Place a stitch marker into the first stitch of the next round.
Beginner tip: The opposite side of the foundation chain may feel tighter than the first side. Use the tip of the hook gently rather than forcing it through the yarn.
Common mistake to avoid: Do not add extra stitches randomly along the straight edges. The extra stitches belong at the rounded ends.
Step 4: Complete the base and begin the bag sides
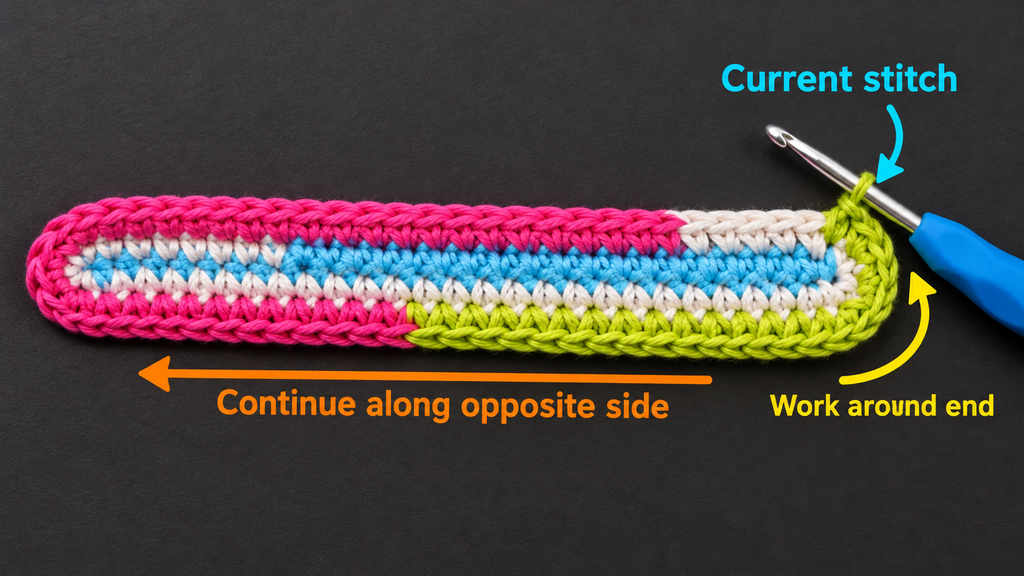
Your first round should look like a long, narrow oval.
The next round will stabilize the base.
Round 2: Work one single crochet into each of the 62 stitches around.
Do not increase.
You should still have 62 stitches at the end of the round.
For the next round, you can create a subtle fold line that makes the sidewalls turn upward.
Round 3: Work one single crochet in the back loop only of every stitch around.
You will have 62 stitches again.
If you’re unfamiliar with the back loop, look at the top of a single crochet stitch. You will see two loops forming a V. The back loop is the loop farther away from you.
Working into this loop creates a small ridge at the transition between the bottom and sidewalls.
This ridge helps define where the bag starts rising.
Your base is intentionally shallow. You do not need a deep bottom gusset for this lightweight shoulder bag.
Beginner tip: If you want a softer transition, skip the back-loop round and continue crocheting through both loops.
Common mistake to avoid: Do not make extra corner increases in Round 2 or Round 3. That would change the size of the bag opening and create a wider base than intended.
Step 5: Build the colorful body of the bag
Now comes the fun part: turning your leftover yarn into colorful stripes.
From Round 4 onward, work one single crochet in each stitch around, inserting your hook under both top loops.
Each round should contain 62 single crochet stitches.
Do not increase or decrease.
Continue working in a continuous spiral. The stitch marker will help you identify the start of each round.
You can change color after any complete round or continue with one color until you run out of yarn.
For a balanced design, try repeating the five-color palette in a loose sequence:
Cream, sage, dusty rose, cream, terracotta, mustard, sage, and dusty rose.
You can repeat colors more often, use two or three consecutive rounds of the same shade, or introduce a completely different leftover color.
The goal is not to create identical stripes. A scrap yarn bag should show the variety of yarn you have available.
How to change yarn colors
When you’re ready to change colors, stop before completing the final single crochet of the old color.
Insert the hook into the next stitch, yarn over with the old yarn, and pull up a loop.
You now have two loops on the hook.
Drop the old working yarn, pick up the new color, yarn over, and pull the new color through both loops.
Your new color is ready for the next stitch.
Leave approximately a 5–6 inch tail on both yarn ends so you can weave them in securely.
This method keeps the color change neater than tying large knots in the middle of the fabric.
Because the bag is made in spiral rounds, color changes may create a small visible step. That is normal. You can position the changes near one side of the bag to make them less noticeable.
How tall should the bag be?
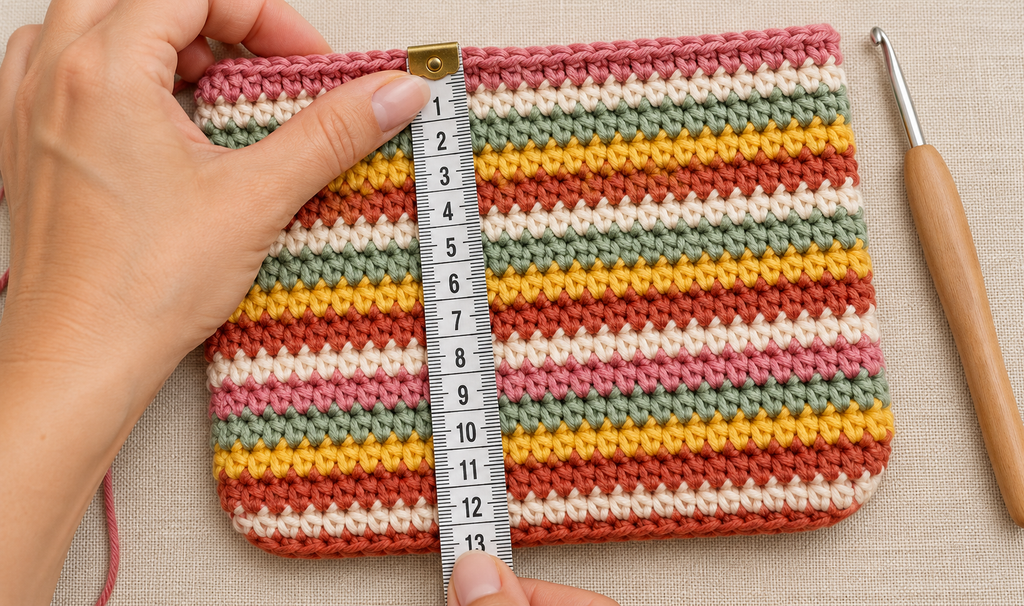
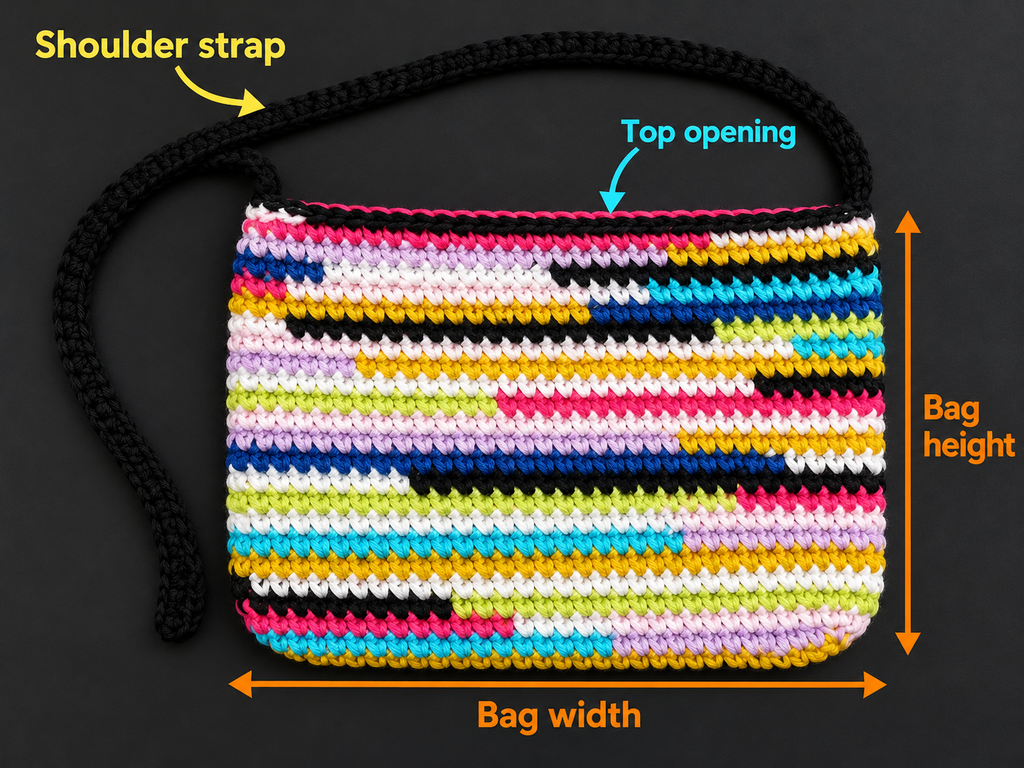
Continue crocheting until the body measures approximately 7–8 inches from the bottom to the upper edge.
The number of rounds will depend on your tension.
Measure the bag while it lies flat and gently smooth the fabric before deciding whether to stop.
Remember that the upper edging will add a small amount of height.
Beginner tip: After every five rounds, count the stitches and check both sides of the bag. That helps catch mistakes before the bag becomes uneven.
Common mistake to avoid: Do not add an accidental stitch where one spiral round meets the next. Follow the stitch marker and maintain 62 stitches throughout.
Step 6: Check the stitch texture and straighten the bag
Before finishing the top, take a moment to inspect your work.
Place the bag flat on the table with the bottom facing downward.
The top edge should have approximately the same width on both sides, and the body should have a relatively even rectangular shape with rounded lower corners.
Look closely at the single crochet stitches.
Each stitch should have two visible loops at the top, and the rows should form a compact fabric without large gaps.
If the bag looks uneven, first check whether you accidentally skipped or added stitches.
If your stitch count is correct, variations in yarn thickness or tension may be responsible.
A gentle adjustment by hand is often enough to improve the appearance. You do not need perfect factory-like rows for a handmade scrap project.
How to correct a small mistake
If you notice a loose stitch in the most recent round, undo a few stitches until you reach it.
Rework the stitch with more even tension.
If you notice a small uneven section many rounds below, assess whether it affects the shape or strength of the bag. Minor cosmetic variations can remain, but dropped stitches that produce a hole or weaken the fabric should be corrected.
Beginner tip: Check the fabric in daylight. It is easier to spot missed stitches and unintended gaps when the yarn colors are clearly visible.
Common mistake to avoid: Don’t keep pulling on the bag to make uneven stitches disappear. Excessive stretching may distort the fabric further.
Step 7: Finish the top opening
Once the bag reaches your desired height, it’s time to neaten the upper edge.
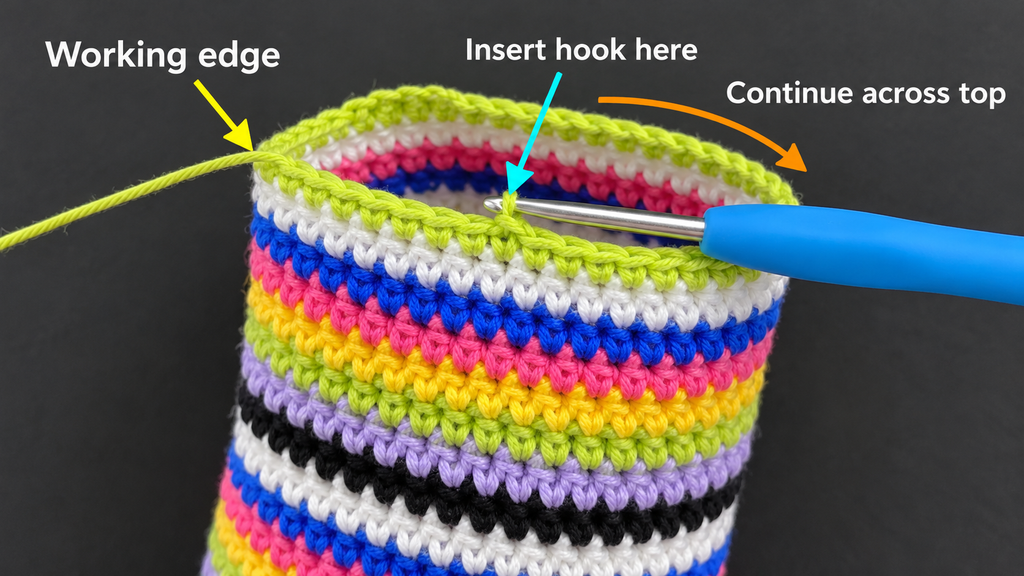
Finish the final single crochet round.
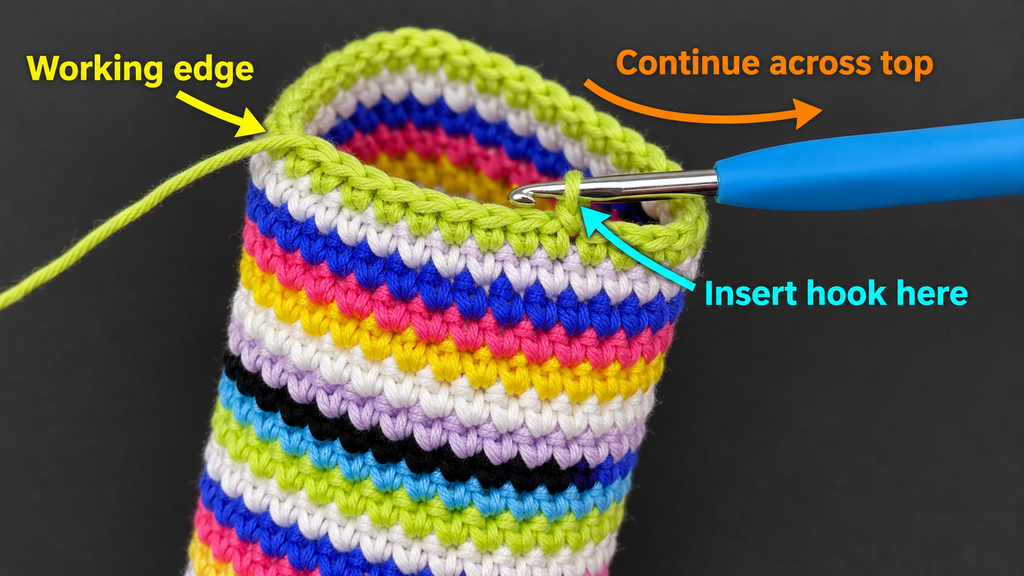
Work one slip stitch into each stitch around the opening.
A slip stitch is made by inserting the hook into the next stitch, yarning over, and pulling the yarn through both the stitch and the loop already on the hook.
Keep your tension relaxed enough that the top edge does not draw inward.
When you reach the end, fasten off and pull the yarn tail through the final loop.
Use your yarn needle to weave the tail into the inside of the bag.
A neat top edge makes the bag appear more finished and helps the opening retain its shape.
If you would like a slightly more substantial rim, you can work an additional full single crochet round before the slip stitch edging.
Beginner tip: Try your top edge over your hand before fastening off. It should have enough flexibility to open comfortably.
Common mistake to avoid: Making slip stitches too tightly can create an opening noticeably smaller than the bag body. If this happens, undo the edging and work it with looser tension.
Step 8: Crochet the shoulder strap
A handmade strap completes your scrap yarn bag and makes it practical for everyday use.
For this project, we’ll use a simple crocheted strap made with single crochet.
Choose one of your more abundant yarn colors. Dusty rose works especially well with the suggested palette, but cream or sage green would also look beautiful.
You will make one long strap and sew its ends securely to opposite sides of the bag.
Crochet strap pattern
Foundation: Chain 101.
Row 1: Single crochet into the second chain from the hook. Work one single crochet into every remaining chain. (100 sc)
Rows 2–5: Chain 1, turn. Work one single crochet into each stitch across. (100 sc)
Fasten off, leaving approximately 12 inches of yarn at each end for sewing.
The strap should be approximately five single crochet rows wide, with a length determined by your gauge. At 16 single crochets per 4 inches, 100 stitches would produce approximately 25 inches before the strap stretches.
Try holding the strap against the bag to decide whether this length is comfortable for you.
For a longer crossbody strap, increase the foundation chain. For a shorter shoulder strap, reduce the number of chains.
Because this is a lightweight bag, avoid making the strap extremely thin. A wider strap distributes the weight more comfortably.
Attach the strap
Turn the bag inside out.
Lay it flat and identify the two upper side positions.
Place one end of the crocheted strap against the inside of the first side, overlapping the bag by approximately 1–1.5 inches.
Use your tapestry needle and the long yarn tail to sew the strap securely through multiple stitches.
Sew around the edges of the overlapping section, then add several diagonal reinforcement stitches.
Repeat on the opposite side.
Before completing the second attachment, check that the strap is not twisted.
Turn the bag right side out and gently pull on the strap to test the attachment.
Beginner tip: Use the same sturdy yarn for sewing that you used to crochet the strap. It helps the attachment blend into the design.
Common mistake to avoid: Do not attach the strap through only one stitch of the bag. Spread the load across several stitches to reduce tearing or stretching.
Pattern Notes and Stitch Counts
Keep these notes nearby while crocheting:
| Section | Instructions | Stitch Count |
|---|---|---|
| Foundation | Chain 31 | 31 chains |
| Base Round 1 | Crochet around both sides of chain | 62 sc |
| Base Round 2 | Single crochet around | 62 sc |
| Base Round 3 | BLO single crochet around | 62 sc |
| Bag body | Repeat single crochet rounds | 62 sc each round |
| Top edge | Slip stitch around | 62 sl st |
| Strap foundation | Chain 101 | 101 chains |
| Strap Rows 1–5 | Single crochet across | 100 sc per row |
Turning chains: The bag body is crocheted continuously, so no turning chain is needed for the rounds. For the strap, chain 1 at the end of each row, turn, and do not count that chain as a stitch.
Right side and wrong side: The outside of the bag is the right side. Keep the same side facing outward throughout the spiral rounds.
Repeat pattern: Continue working one single crochet in each stitch around until your desired bag height is reached. There are no increases in the bag body.
Size adjustment: To make the bag wider, add chains to the foundation. When using the same oval-base construction, a starting chain of \(N\) stitches produces \(2N\) single crochets in the first round with the end treatment described above. Increasing or decreasing the foundation length changes the width without requiring a different stitch pattern.
For a taller bag, simply crochet more rounds.
Common Beginner Mistakes and How to Fix Them
1. The base is curling
If the foundation chain was made too tightly, the base may curl before the sidewalls are complete.
Try loosening your chain tension or making the starting chain with a slightly larger hook.
A little curling is normal once the body begins growing upward.
2. The bag gets wider as you work
This usually happens when you accidentally add stitches near the beginning of a round.
Count the stitches. Your total should remain 62.
Use a stitch marker to identify the first stitch of every round.
3. The bag leans to one side
An uneven bag may be caused by inconsistent tension or a change in yarn thickness.
Try using scraps of comparable weight.
Also check that you aren’t skipping stitches or accidentally crocheting two stitches into one space.
4. The color changes look untidy
A visible step where one stripe meets the next is normal when working in a spiral.
To reduce its appearance, place color changes near the side of the bag and keep your yarn tails on the inside.
Weave in the tails carefully without pulling the fabric out of shape.
5. The stitches have large holes
Loose stitches can make the bag stretchy and unsuitable for carrying smaller items.
Try using a smaller hook, especially if your yarn is soft or slippery.
You should be able to identify every single crochet stitch without seeing large gaps between them.
6. The upper opening is too tight
This often happens during the slip stitch edging.
Undo the edging and repeat with more relaxed tension.
The top should retain enough flexibility to open without being stretched forcefully.
7. The shoulder strap stretches
Cotton straps generally stretch less than many acrylic alternatives, but any crocheted strap can lengthen under weight.
Work the strap tightly, reinforce the attachments, and avoid making the bag excessively heavy.
For extra durability, you can sew a strip of woven fabric or cotton tape to the underside of the strap.
How to Customize This Crochet Scrap Yarn Bag
One of the best things about a leftover yarn project is that you can make several bags using the same basic pattern without creating two that look exactly alike.
Try different color combinations
For a vintage-inspired bag, combine mustard, rust, cream, and olive green.
For a softer everyday look, choose pastel pink, beige, sage, and pale lavender.
You can also make a colorful rainbow bag by changing yarn after every round.
If you prefer a more organized appearance, repeat the same three-color sequence throughout the body.
Make a larger tote bag
To create a bigger version, increase the number of foundation chains and crochet more body rounds.
For a wider, more spacious base, add properly distributed increases around both curved ends in the early rounds, rather than simply increasing along the straight sections.
A larger tote also benefits from wider straps and a fabric lining.
Change the bag texture
Single crochet makes a dense, beginner-friendly fabric, but you can experiment with other stitches once you’re comfortable with the construction.
Try working through the back loop only on selected rounds to create subtle ridges.
You could also alternate standard single crochet rounds with decorative textured rounds, provided your stitch count and gauge remain compatible.
If you use an open stitch pattern, consider lining the bag so smaller items cannot fall through the fabric.
Add a contrasting border
A solid-colored border can make a colorful bag feel more coordinated.
Cream is a lovely choice because it helps separate the different stripe colors.
Dark brown, navy blue, or charcoal can create a bolder finish.
Simply work one or two additional rounds in your chosen border color before fastening off.
Make a matching pouch
If you have yarn left over, use the same technique to make a small pouch for coins, lip balm, or crochet notions.
Reduce the foundation chain, crochet fewer rounds, and finish the top with a zipper or button closure.
It makes a lovely companion to the larger bag.
Turn it into a gift
A handmade scrap yarn bag can make a thoughtful birthday, holiday, or Mother’s Day present.
Choose colors that match the recipient’s wardrobe and add a small handmade tag.
You can also fill the bag with yarn, crochet hooks, or a handmade washcloth to create a crochet-themed gift set.
Finishing Instructions
Once the strap is attached, spend a little time giving the bag a polished finish.
Fasten off and weave in all ends
Check the inside of the bag for loose yarn tails.
Thread each tail through a tapestry needle and weave it through several stitches on the inside of the fabric.
Change direction at least once to help secure the yarn.
Trim the remaining tail only after it is firmly woven in.
Do not simply cut the tails close to the knots. Crochet fabric moves when carried, and poorly secured ends can eventually loosen.
Shape the bag
Lay the finished bag flat on a clean surface.
Smooth the sides gently with your hands and straighten the strap.
If one corner looks uneven, adjust the fabric without stretching it forcefully.
The shape should resemble a compact rectangular purse with a slightly rounded bottom.
Block the crochet bag if necessary
Blocking is optional, but it can improve the appearance of uneven stitches.
For cotton yarn, lightly dampen the bag and gently shape it.
If the yarn manufacturer allows wet blocking, you can wash the bag carefully and reshape it while damp.
Do not stretch the fabric beyond its natural dimensions.
Allow it to dry completely before using it.
Avoid hanging the bag while wet, as the weight of the water may cause the fabric and strap to lengthen.
Washing and care
Always check the care instructions for every yarn used in the project.
If you’re mixing yarn brands or fiber types, follow the care instructions for the most delicate material.
For a bag with cotton yarn, gentle hand washing in cool water is often a sensible option, provided the specific yarn labels permit it.
Press out excess water with a clean towel, reshape the bag, and dry it flat.
Check the strap
Before using your bag, test the strap with a lightweight object inside.
Look for loose stitches, pulling at the attachment points, or excessive stretching.
Repair any weak areas before carrying the bag regularly.
This pattern is intended for lightweight everyday belongings such as a phone, wallet, small notebook, keys, or a few crochet supplies. It is not designed for transporting heavy groceries.
Quick Printable-Style Crochet Pattern Summary
Easy Scrap Yarn Shoulder Bag
Skill level: Confident beginner
Finished size: Approximately 8–10 inches wide and 7–8 inches high, depending on tension
Yarn: DK cotton scraps, approximately 250–350 yards
Hook: 4.0 mm (G/6)
Stitches: Chain, single crochet, slip stitch, back loop only
Foundation: Chain 31
Base: First oval round, 62 sc; one round of 62 sc; one BLO round of 62 sc
Body: Continue 62 sc per round until desired height, changing colors as preferred
Edging: Slip stitch in every stitch around top
Strap: Chain 101, work 100 sc for 5 rows
Assembly: Securely sew strap ends to opposite inside edges of bag
Finishing: Weave in tails, shape, and gently block if necessary
Frequently Asked Questions
Can I crochet a bag using different types of leftover yarn?
Yes, but try to choose yarns with similar thicknesses and compatible care instructions.
If one yarn is much thinner than the others, you may need to hold two strands together to achieve a similar fabric thickness.
The goal is to keep the bag body evenly structured even when the colors and yarn brands change.
What is the best yarn for a scrap yarn crochet bag?
Cotton is an excellent choice because it creates defined stitches and generally holds its shape better than very stretchy fibers.
DK or worsted-weight cotton works well for many bags, although you should select a hook size that produces a firm fabric.
For this particular pattern, DK cotton with a 4.0 mm hook is the suggested starting point.
Is this crochet scrap yarn bag pattern suitable for beginners?
Yes, especially for crocheters who already know how to chain and make a single crochet stitch.
The most challenging step is working around the foundation chain to create the oval base.
Once that is complete, the body uses simple repeated single crochet rounds.
How much scrap yarn do I need to make the bag?
A small shoulder bag may use approximately 250–350 yards of DK yarn, depending on the finished size, gauge, and strap.
You do not need all the yarn in one continuous skein.
Gather multiple scraps and combine them throughout the project.
Can I make the bag bigger?
Yes.
Increase the length of the foundation chain to make the bag wider, and work more rounds to make it taller.
Remember that a larger bag may need stronger straps, more structured yarn, or a lining to support the extra weight.
Do crochet bags need a fabric lining?
A lining is optional for this design.
The single crochet fabric is fairly dense, so it can hold many everyday objects.
However, if you want to carry smaller items or prevent the bag from stretching, a simple cotton fabric lining is a useful addition.
How do I stop my crochet bag from stretching?
Use a relatively firm stitch tension, choose less stretchy yarn, and reinforce the shoulder strap.
Avoid carrying heavy items and consider adding a fabric lining.
You can also strengthen the crocheted strap by sewing cotton tape to its underside.
Conclusion
A pile of leftover yarn might not look very exciting at first, but it can become something beautiful and useful with just a little planning.
This easy crochet scrap yarn bag pattern is a lovely way to practice your single crochet stitches, learn how to work around a foundation chain, and experiment with colors you already have.
The finished bag doesn’t need perfectly matched stripes. That’s part of its handmade charm.
Once you’ve completed your first version, try another combination of leftovers, make the bag a little taller, or experiment with a contrasting strap.
Save this pattern for your next stash-busting crochet session, and consider making a matching little pouch with any scraps you still have left.