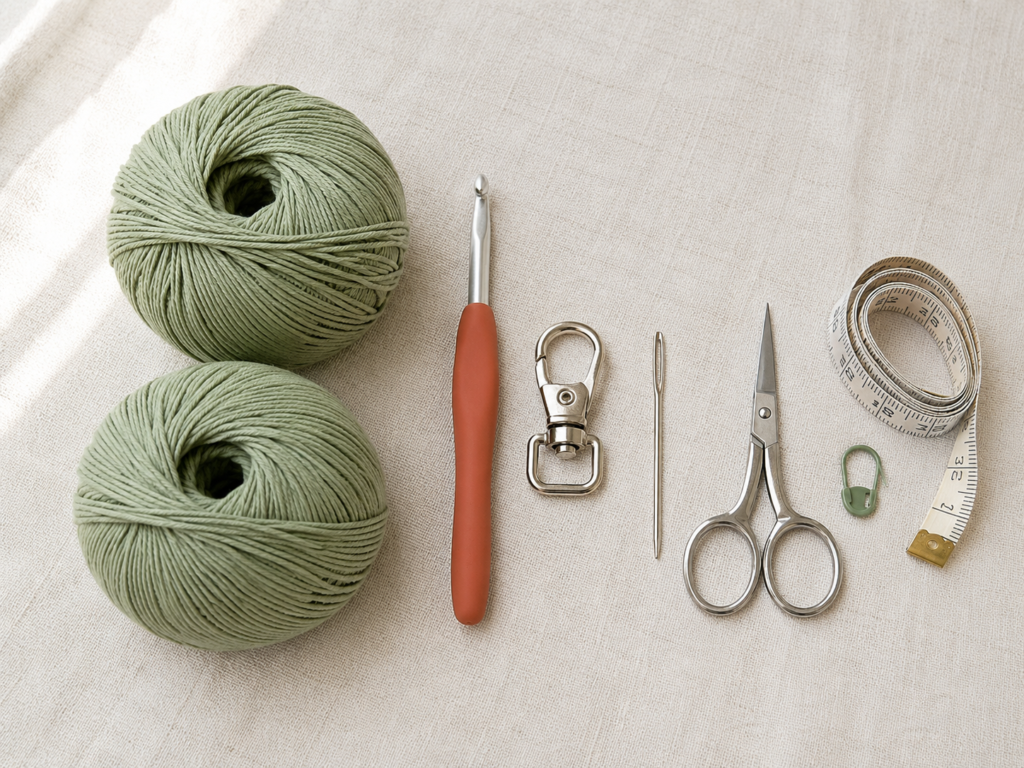
A crochet lanyard is one of those small projects that becomes surprisingly useful once you make it. It can keep your keys within reach, hold an ID badge, clip to a small pouch or work as a wrist strap for a wallet. It also uses very little yarn, so it is an excellent project for leftover cotton.
This beginner crochet lanyard pattern uses Romanian cord. Despite its polished, rope-like appearance, Romanian cord is created with one simple repeating movement. You begin with two chains, make one single crochet and then continue working into the newest side bar.
There are no long rows to count and no turning chains to remember. You simply continue until the cord reaches the length you need.
The finishing process is just as important as the crochet. Because keys and badges place repeated pressure on the hardware, this tutorial shows how to sew the cord ends together, reinforce the seam and cover the joined area with firm yarn wraps.
What You’ll Learn
- How to select yarn that will not stretch excessively
- How to hold two strands of cotton yarn together
- How to begin Romanian crochet cord
- How to identify the newest side bar
- How to keep the cord straight and evenly tensioned
- How to adjust the lanyard to any length
- How to attach a swivel clasp securely
- How to reinforce and conceal the joined section
- How to finish and care for the completed lanyard
Finished Sizes
This pattern is measured by length rather than stitch count.
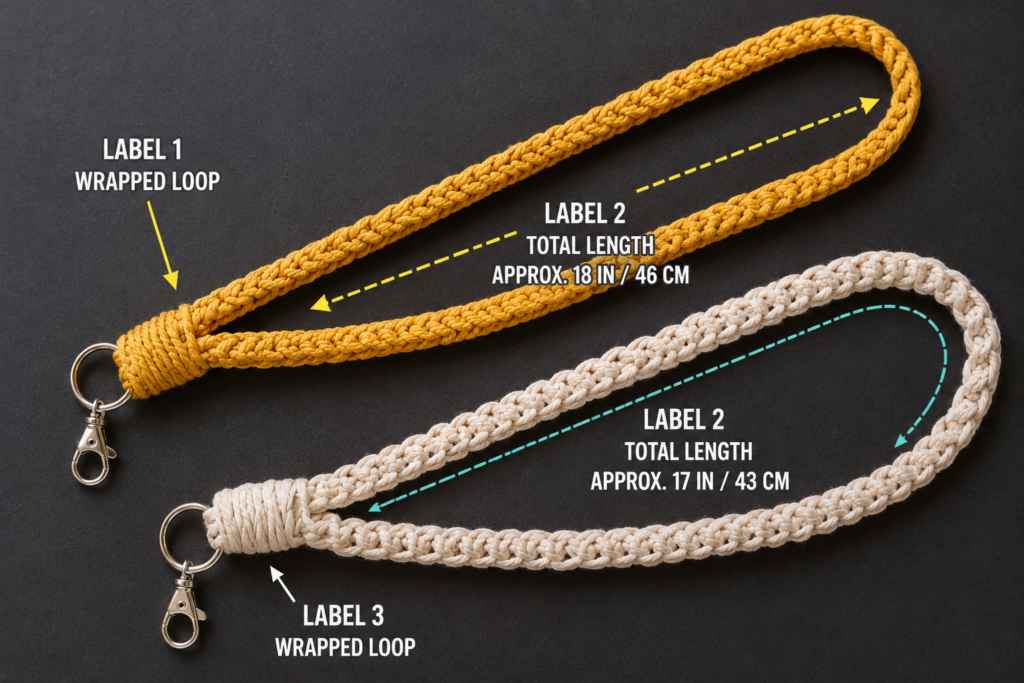
Wrist lanyard: Crochet the cord to approximately 11–12 inches.
Short neck lanyard: Crochet the cord to approximately 30 inches.
Standard adult neck lanyard: Crochet the cord to approximately 34–36 inches.
Measure the cord without stretching it. Cotton can relax slightly with use, so stop about half an inch shorter when your cord feels especially soft or flexible.
For a neck lanyard, consider adding a purpose-built breakaway safety connector. A closed crochet loop should not be used as a child’s neck lanyard.
Materials You’ll Need
- Medium-weight number 4 cotton yarn
- Approximately 25–35 yards for a wristlet
- Approximately 60–95 yards for a neck-length lanyard
- 6 mm crochet hook
- Silver swivel clasp, lobster clasp or key ring
- Blunt yarn needle
- Scissors
- Measuring tape
- Removable stitch marker, optional
- Commercial breakaway connector for a neck lanyard, optional
Use two strands of medium-weight cotton held together throughout the tutorial. Alternatively, use one strand of soft 3–5 mm braided cotton cord and adjust the hook size until the stitches are firm without becoming difficult to pull through.
The Craft Yarn Council lists medium-weight yarn as worsted, Afghan or Aran weight. Its hook-size chart is a guideline rather than a strict substitution rule, so this project intentionally uses a larger hook with doubled yarn to create a flexible cord rather than a flat single-crochet fabric.
Crochet Abbreviations Used
- ch = chain
- sc = single crochet
- st/sts = stitch/stitches
- rep = repeat
- sl st = slip stitch
- yo = yarn over
This tutorial uses US crochet terminology. In UK terminology, the US single crochet is called a double crochet. Standard crochet abbreviations and US-to-UK term differences are documented by the Craft Yarn Council.
Before You Start
Gauge and tension
A traditional flat gauge swatch is unnecessary because you will measure the cord directly. The important measurement is its thickness and firmness.
Your completed cord should:
- Bend without feeling stiff
- Hold its rounded shape
- Return to position when lightly stretched
- Show similar-sized stitches along its entire length
- Fit through or around your selected hardware
If the stitches are loose and open, use a smaller hook. If pulling each loop through is uncomfortable, move up one hook size or relax your grip.
Holding the yarn double
Pull one strand from each of two balls, or use both the outer and center strand of one ball. Treat the two strands as though they were one thicker strand.
Check periodically that both strands are entering every stitch. Missing one strand can create a thin, weak section.
Counting stitches
Romanian cord is easier to size by inches than by stitch count. If you want matching lanyards, count your repeated cord stitches or record the completed length before joining.
Right side and wrong side
Romanian cord is rounded and has no conventional right or wrong side. It does develop a repeating line of V-shaped stitches. Rotate the work in the same direction after every stitch so those V shapes remain orderly.
Preventing curling
A small amount of curling is normal while the cord is attached to the hook. Severe spiraling usually means:
- You are rotating in different directions
- Some stitches are considerably tighter than others
- You inserted the hook into the wrong side loop
- You accidentally skipped a rotation
Pause every few inches and let the cord hang freely. It should relax into a mostly straight line.
Step-by-Step Crochet Tutorial
Step 1: Make the Slip Knot and Two Chains
Hold the two yarn strands together. Leave a starting tail approximately 8 inches long and make a slip knot.
Place the slip knot on the 6 mm hook. Tighten it only enough to sit securely around the hook shaft.
Chain two:
- Yarn over with both strands.
- Pull through the loop on the hook.
- Repeat once more.
You should now have two visible chains below the working loop.
Beginner tip: Hold the base of the chains between your thumb and index finger. Keeping your fingers close to the hook makes the small starting section easier to control.
Common mistake to avoid: Do not pull the chains excessively tight. You must insert the hook into the second chain during the next step.
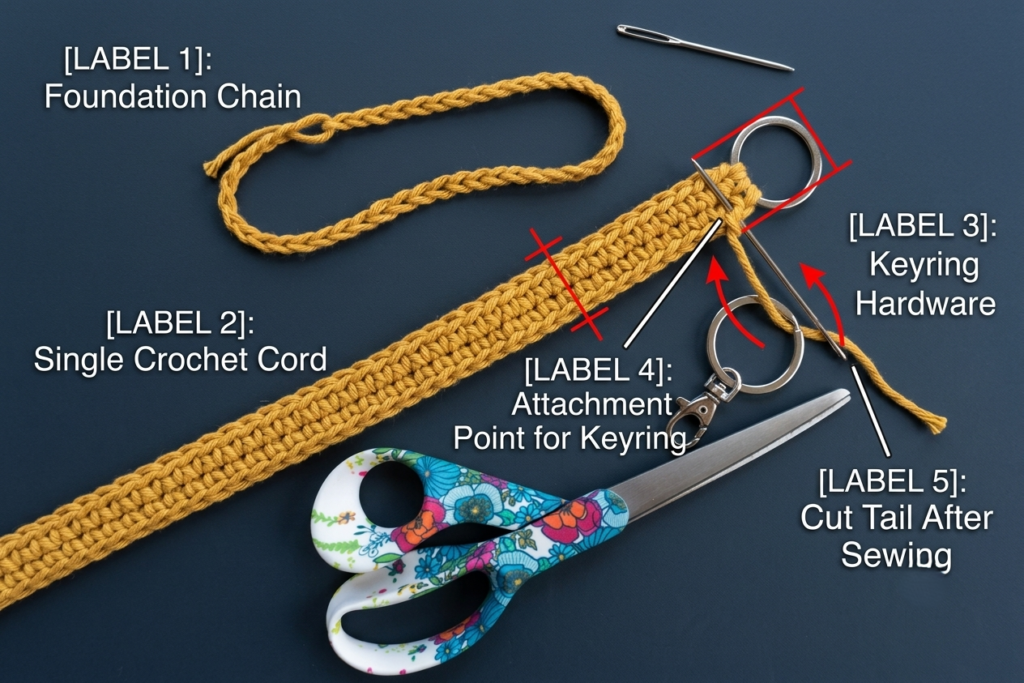
Step 2: Make the First Single Crochet
Insert the hook into the second chain from the hook.
Yarn over with both strands and pull a loop through the chain. You should have two loops on the hook.
Yarn over again and pull through both loops. This creates one single crochet.
The first stitch may look like a small knot rather than a recognizable cord. That is normal. The rounded structure becomes more obvious after several repetitions.
Beginner tip: Keep your thumb and index finger directly beneath the completed stitch. This prevents the small beginning from flipping away while you locate the side loop.
Common mistake to avoid: Confirm that both yarn strands passed through the foundation chain. If one strand was missed, undo the stitch and remake it.
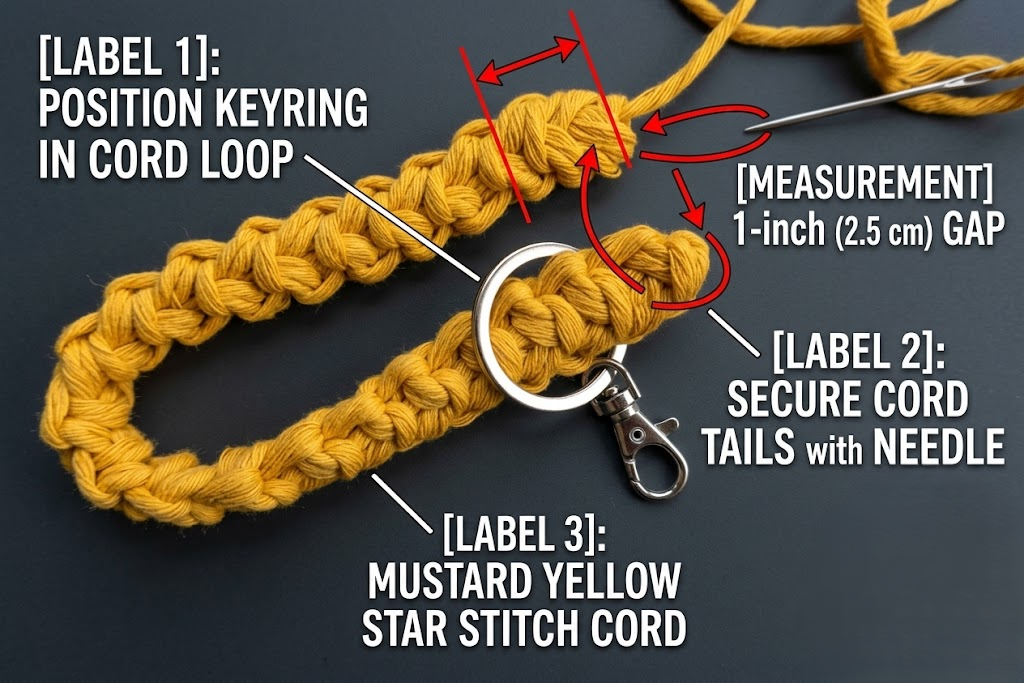
Step 3: Rotate the Work and Find the Side Bar
Turn the small crochet piece clockwise.
Look at the left side of the single crochet. You should see a small horizontal strand or bump along the side edge. This is the side bar used to form the next stitch.
The side bar is not the working loop currently on your hook. It sits below the hook on the side of the completed stitch.
Insert the hook under that side bar.
Yarn over and pull up a loop. You now have two loops on the hook.
Yarn over and pull through both loops.
You have made the first true cord repetition.
Beginner tip: Use bright yarn while learning. Side bars are considerably harder to identify in black, navy or fuzzy yarn.
Common mistake to avoid: Do not insert the hook through the center of the previous stitch. The hook should pass beneath the newest horizontal bar on the side.
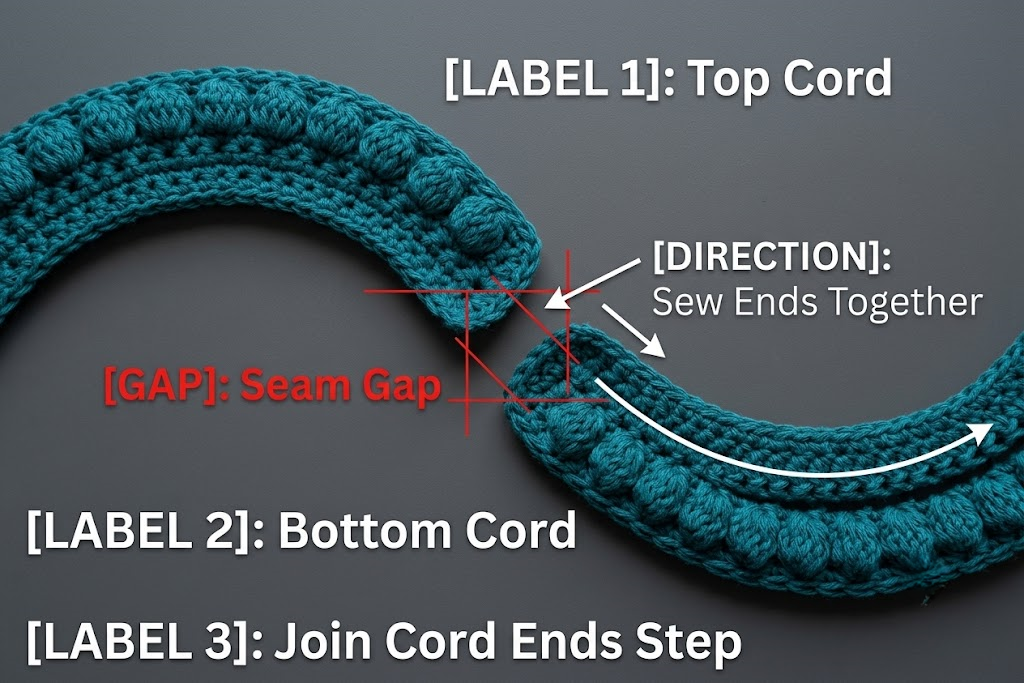
Step 4: Repeat the Romanian Cord Stitch
Continue with the same sequence:
- Rotate the work clockwise.
- Find the newest horizontal bar along the left side.
- Insert the hook under that bar.
- Yarn over and pull up one loop.
- Yarn over and pull through both loops.
Repeat these five actions for the entire cord.
After four or five stitches, the work should begin to resemble a narrow rounded braid. One edge will show tidy V shapes while the opposite side appears slightly more textured.
The important point is to use the newest side bar each time. Do not move farther down the cord or return to an older stitch.
Beginner tip: Say “turn, find, insert, pull up, finish” quietly as you work. A repeated verbal cue can help establish the movement.
Common mistake to avoid: Rotating the cord counterclockwise once and clockwise the next time disrupts the stitch path. Choose one direction and use it consistently.
Step 5: Check the Tension Every Few Inches
Stop after approximately 3 inches and inspect the cord.
Run your fingers along it. The width should remain consistent, and no stitch should feel dramatically tighter or looser than its neighbors.
If the cord becomes too tight:
- Enlarge the working loop slightly before inserting the hook
- Hold the yarn less firmly with your yarn hand
- Pull each new loop up to the full diameter of the hook shaft
- Move up to a 6.5 mm hook if necessary
If the cord becomes too loose:
- Keep your working loop close to the hook throat
- Reduce unnecessary slack between the yarn hand and hook
- Move down to a 5.5 mm hook
Do not stretch the cord while checking it. Stretching can temporarily hide loose sections.
Beginner tip: Correct tension early. Undoing 2 inches is much easier than remaking a full neck lanyard.
Common mistake to avoid: Do not pull the working yarn sharply after every stitch. This closes the side bar and makes the next insertion unnecessarily difficult.
Step 6: Continue to the Required Length
Continue repeating the Romanian cord stitch until the cord reaches the size you need.
Measure from the beginning of the cord to the base of the current working loop. Let the cord rest naturally on the table.
Recommended lengths:
- Key tab: 4–6 inches
- Wristlet: 11–12 inches
- Short badge lanyard: 30 inches
- Standard adult lanyard: 34–36 inches
These measurements are flexible. Measure an existing comfortable lanyard when creating a custom size.
Once the cord reaches the required length, make one final stitch. Cut the yarn, leaving a 24–30-inch tail for sewing and wrapping.
Pull the entire tail through the final loop to fasten off.
Do not weave in the long tail.
Beginner tip: A longer sewing tail is easier to manage than a tail that runs out halfway through the hardware attachment.
Common mistake to avoid: Do not measure while pulling on the cord. Measure it relaxed so the finished lanyard does not become longer than intended.
Step 7: Position the Lanyard and Check for Twists
Lay the cord on a flat surface.
Bring the two ends toward each other to form a loop. Follow the V-shaped edge around the complete loop with your fingers. The same edge should remain visible without suddenly flipping.
For a wristlet, confirm that your hand passes comfortably through the loop before sewing.
Place the two ends side by side. Their tips should be even.
Slide the swivel clasp ring over one end, or pass one cord end through the hardware ring. Move the clasp down until it rests at the point where the two ends meet.
Beginner tip: Clip a stitch marker to the outward-facing side of the first end. Follow that side around the loop to confirm it has not twisted.
Common mistake to avoid: Once the ends are sewn and wrapped, correcting a twist requires removing the entire finishing section.
Step 8: Sew the Cord Ends Together
Thread the long finishing tail through a blunt yarn needle.
Hold both cord ends together beneath the ring. Insert the needle through the dense center of the first cord end and then through the second end.
Pull the yarn through firmly, but do not crush the cord.
Pass the needle back through both ends in the opposite direction. Repeat until you have made approximately six to eight reinforcing passes.
Place some stitches horizontally and others diagonally. The joined section should feel stable when lightly pulled.
Where possible, take one or two sewing passes around the hardware ring as well as through the cord. This helps prevent the ring from sliding away from the reinforced section.
Beginner tip: Use pliers only if your yarn needle becomes difficult to pull through. Grip the needle near its center, not its eye.
Common mistake to avoid: Sewing only through the outer loops creates a weaker attachment. Pass through the dense center of both cord ends.
Step 9: Test and Reinforce the Seam
Before wrapping the join, hold the clasp in one hand and the crochet loop in the other. Pull gently.
The ends should not separate or shift noticeably.
Add more sewing passes when:
- The cords slide independently
- The hardware ring moves below the sewn section
- One end begins to angle away from the other
- The joined area feels soft when squeezed
Do not rely on the decorative wraps alone. The internal sewing should carry the load; the outer wraps support and conceal it.
Beginner tip: A square-like sewing path works well: across the cords, down one side, back across and up the opposite side.
Common mistake to avoid: Do not test the clasp by pulling as hard as possible. A gentle stability test is enough before the final wraps.
[IMAGE SLOT 11]
Source page URL:
https://hearthookhome.com/how-to-crochet-a-lanyard-keychain/
Reference image URL only — do not republish unless you own rights:
https://hearthookhome.com/wp-content/uploads/2022/05/key-chain-lanyard-crochet-tutorial-13.jpg
Consistency note: The same cream cord and clasp continue through the reference assembly sequence.
Midjourney prompt:
Realistic close-up crochet tutorial photo showing several reinforcing sewing passes through two joined dusty sage cord ends beneath a silver clasp, blunt needle making a final diagonal pass, adult hand supporting the seam, pale oatmeal linen tabletop, natural window light, crisp stitch and hardware detail, no text, no watermark, no logo, no distorted fingers –ar 4:3 –v 6
Alt text: Reinforced seam joining the crochet cord beneath the lanyard clasp.
Suggested file name: reinforce-crochet-lanyard-join.jpg
Step 10: Wrap the Joined Section
Bring the yarn tail to the top of the sewn area, directly beneath the hardware ring.
Wrap the yarn firmly around both joined ends. Place each new wrap beside the previous wrap rather than on top of it.
Continue until the complete sewn section is covered. Eight to fourteen wraps are usually enough, depending on yarn thickness.
The wrap should be:
- Firm enough to stabilize the joint
- Neat and parallel
- Wide enough to conceal the sewing
- Narrow enough to remain flexible
Do not pull so tightly that the joined section bends or becomes thinner than the rest of the cord.
Beginner tip: Rotate the lanyard instead of repeatedly moving your yarn hand around the cord. This often produces smoother wraps.
Common mistake to avoid: Overlapping the wraps randomly creates a bulky knot. Place them in an orderly band.
Step 11: Secure and Hide the Tail
Thread the remaining tail through the yarn needle again if necessary.
Insert the needle beneath several of the completed wraps. Push it through approximately half the width of the wrapped section.
Pull the tail through carefully.
Insert the needle back beneath the wraps in the opposite direction. This second pass helps lock the tail.
Trim the excess yarn close to the wraps. Gently massage the wrapped section so the cut end disappears beneath the surrounding strands.
Inspect the clasp one final time. Open and close it several times to make sure the crochet does not obstruct the clasp mechanism.
Beginner tip: Do not cut the tail until it has passed beneath the wraps in two directions.
Common mistake to avoid: Avoid pushing the needle through the metal clasp mechanism. Work only through the yarn and beneath the wraps.
Pattern Notes and Stitch Notes
- This project is worked as one continuous cord.
- There are no conventional rows or rounds.
- Rotate the work clockwise after every completed stitch.
- Work into the newest horizontal side bar.
- The working loop on the hook does not count as a completed stitch.
- The beginning tail can be woven into the first 1–2 inches of cord before assembly.
- Measure the cord relaxed rather than stretched.
- Stitch count is optional because the finished length determines size.
- Romanian cord does not have a traditional right or wrong side.
- For matching lanyards, record yarn, hook size, cord length and total stitch count.
- Cotton produces a firmer result than highly elastic yarn.
- Smooth yarn is easier for beginners than fuzzy, brushed or novelty yarn.
Common Beginner Mistakes
1. Inserting the hook into an older side bar
What happens: The cord develops a lump or side branch.
Fix: Undo stitches until the cord becomes regular. Always use the side bar closest to the working loop.
2. Rotating in inconsistent directions
What happens: The V-shaped pattern changes direction and the cord spirals.
Fix: Rotate clockwise after every stitch. Place a small reminder card beside your workspace while learning.
3. Pulling the working loop too tight
What happens: The next side bar becomes difficult to locate and the cord feels stiff.
Fix: Pull each loop up to the full diameter of the hook shaft before completing the stitch.
4. Missing one strand of doubled yarn
What happens: A thin or loose section appears.
Fix: Undo the affected stitch. Confirm both strands are captured during every yarn over and insertion.
5. Stretching the cord while measuring
What happens: The finished lanyard becomes longer than expected.
Fix: Lay it flat and allow it to relax before measuring.
6. Joining a twisted loop
What happens: The lanyard constantly turns while worn.
Fix: Trace one edge around the complete loop before sewing. Use a marker to identify the outward-facing edge.
7. Using only decorative wraps to secure the clasp
What happens: The hardware loosens with repeated use.
Fix: Sew through both cord ends several times before wrapping.
8. Making the wrapped section too bulky
What happens: The clasp attachment feels stiff and uncomfortable.
Fix: Place parallel wraps side by side. Stop as soon as the internal sewing is covered.
How to Customize This Crochet Project
Change the yarn
Cotton is recommended for a practical lanyard because it provides structure and clear stitch definition.
Other options include:
- Braided recycled cotton cord
- Cotton-acrylic blend
- Firm ribbon yarn
- Smooth bulky yarn
- Mercerized cotton held double
Avoid extremely stretchy yarn unless the lanyard will carry only a lightweight badge.
Change the color
Use one solid color for a polished result or change colors along the cord.
To change color:
- Stop before completing the final yarn-over of a stitch.
- Use the new color to pull through the remaining loops.
- Continue with the new color.
- Leave tails long enough to weave securely into the cord.
Try:
- School colors
- Company colors
- Neutral sage and cream
- Rainbow sections
- One contrasting section near the clasp
- Scrap-yarn stripes
Change the size
This pattern does not require a fixed multiple. Continue until the cord reaches the required length.
Possible sizes:
- 4-inch zipper pull
- 6-inch key tab
- 11-inch wristlet
- 18-inch bag handle
- 30-inch short badge lanyard
- 36-inch adult neck lanyard
Change the hardware
The wrapped attachment works with:
- Swivel clasps
- Lobster clasps
- Split key rings
- D-rings
- Badge clips
- Small carabiner-style craft clasps
The hardware ring must be wide enough to accommodate both cord ends without forcing them into a sharp bend.
Add texture
For additional decoration:
- Thread wooden beads onto the yarn before beginning
- Add one bead every few inches
- Attach a tassel beside the clasp
- Add a small crocheted flower
- Use a metallic strand with the cotton
- Embroider contrasting stitches over the completed cord
Do not place bulky beads directly against the neck.
Gift and use ideas
A crochet lanyard makes a useful handmade gift for:
- Teachers
- Nurses
- Office staff
- Students
- Craft-fair customers
- Gym members
- Travelers
- Volunteers
- Conference attendees
It can hold keys, an ID badge, a small card pouch, a stitch-marker case or a lightweight wallet.
Finishing Instructions
Weave the beginning tail through the center of the cord for approximately 1–2 inches. Change direction once and weave it back through several stitches.
Trim the excess close to the cord.
No aggressive blocking is necessary. If the lanyard curls, lightly dampen the crochet portion and lay it in a relaxed line on a towel. Avoid soaking the metal hardware unnecessarily.
Wash according to the yarn label. For most cotton lanyards, gentle hand washing and air drying preserve the hardware and wrapped joint better than repeated machine washing.
Before regular use:
- Inspect the sewn joint
- Confirm the wraps do not slide
- Test the clasp mechanism
- Check that no cut yarn ends are visible
- Confirm the cord is comfortable against the skin
Quick Printable-Style Summary
Skill level: Beginner
Yarn: Medium-weight cotton held double
Hook: 6 mm
Hardware: Swivel clasp, lobster clasp or key ring
Stitches: Chain and single crochet-based Romanian cord
Starting method: Slip knot, chain two, single crochet in second chain
Repeat: Rotate clockwise, insert under newest side bar, pull up a loop, yarn over and pull through both loops
Wristlet length: 11–12 inches before joining
Neck length: 30–36 inches before joining
Finishing: Align ends, sew through both ends, reinforce around hardware, wrap joined area and hide tail beneath wraps
Care: Hand wash gently and air dry
Frequently Asked Questions
Can a complete beginner make this crochet lanyard?
Yes. A beginner who can make a chain and single crochet can learn the cord movement. The first few stitches require concentration because the side bar is small, but the repetition becomes easier once the cord begins to grow.
What is the best yarn for a crochet lanyard?
Smooth cotton or cotton-blend yarn is a strong choice because it produces visible stitches and moderate structure. Holding medium-weight yarn double creates a substantial cord without requiring specialty macramé supplies.
Can I use acrylic yarn?
Yes, but acrylic may stretch more under the weight of keys or a badge. Use a smaller hook for a firmer result and test the cord before attaching valuable items.
How long should a crochet lanyard be?
A wristlet is commonly made approximately 11–12 inches before joining. Neck lanyards can range from about 30 to 36 inches, depending on the wearer and where the badge should sit.
Why is my Romanian cord twisting?
A mild twist is normal while working. Severe twisting usually means you changed rotation direction, inserted into inconsistent loops or used uneven tension.
Can I attach the clasp without sewing?
You could crochet directly around some hardware, but sewing and wrapping provide more control with a dense Romanian cord. The joined area should be tested before carrying keys or electronics.
Is a crochet neck lanyard safe for children?
A permanently closed loop is not recommended for a young child. Use a commercially manufactured breakaway connector designed to separate under pressure, and supervise its use.
Conclusion
Once you understand how to locate the newest side bar, this crochet lanyard becomes a calm, repetitive project. The rounded cord looks more complicated than it is, and the measurement-based construction makes it easy to create wristlets, key tabs and longer badge lanyards from the same basic method.
Take time with the hardware attachment. A neatly sewn and wrapped joint gives the finished lanyard a professional appearance while helping it withstand everyday use.
Save the tutorial with your easy crochet patterns so you can return to the cord technique whenever you need a quick practical gift.






