Small crochet appliqués are ideal when you want a satisfying project without committing to a large blanket, garment, or amigurumi toy. This crochet mushroom applique pattern turns a few grams of leftover yarn into a flat woodland patch that can be sewn onto a bag, sweater, hat, garland, blanket, journal cover, or handmade card.
The mushroom is constructed from two simple pieces. You will crochet a broad cap in rows, make a tapered stem separately, embroider a few spots, and sew the components together. Because the motif remains flat, you do not need stuffing, complicated shaping, or three-dimensional assembly.
The pattern is written in US crochet terms and includes a stitch count after every row. A confident beginner who can make single crochet stitches, work two stitches into one stitch, and crochet two stitches together should be able to complete it comfortably.
What You’ll Learn
- How to widen a flat crochet shape with row-end increases
- How to create a gently curved mushroom-cap edge with mixed-height stitches
- How to shape a tapered stem using sc2tog decreases
- How to count the first and last stitches of short rows
- How to embroider simple spots without puckering the crochet fabric
- How to center and sew two appliqué components together
- How to block a small motif so it lies neatly against another project
Finished Size
Using DK-weight cotton yarn and a 3.5 mm hook, the completed mushroom measures approximately:
- Width: 7.5–8.5 cm / 3–3.35 inches
- Height: 8–9 cm / 3.15–3.5 inches
Your exact size will depend on the yarn, hook, and personal tension.
Materials You’ll Need
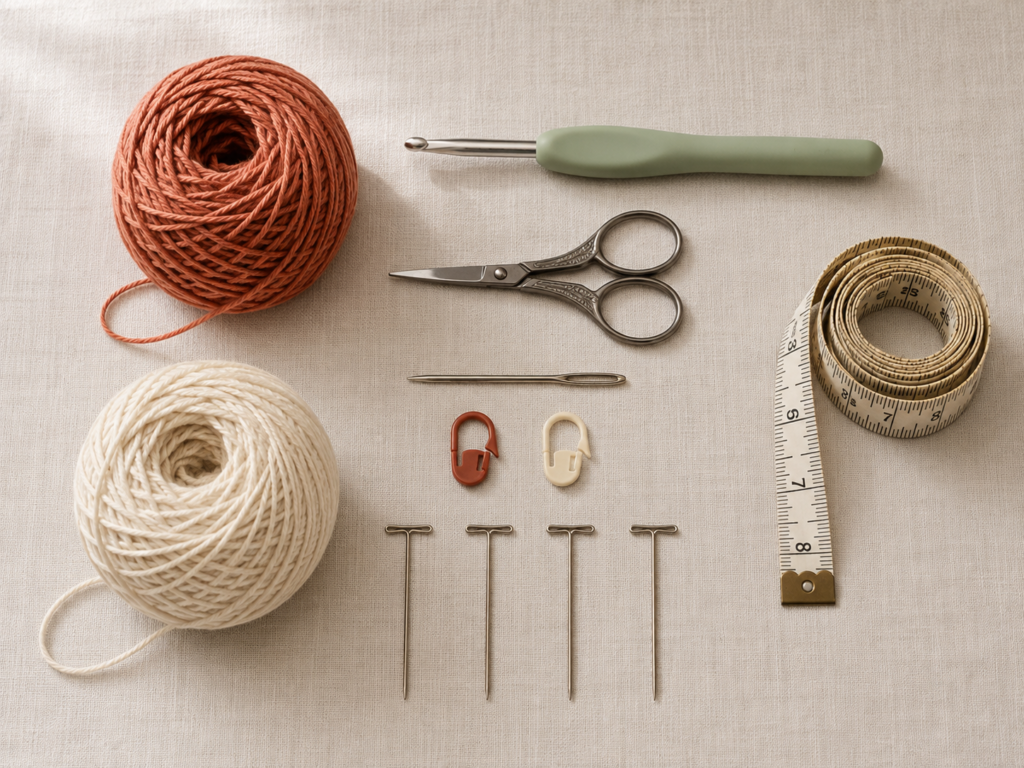
- Small amount of muted terracotta DK-weight cotton yarn for the cap
- Small amount of warm cream DK-weight cotton yarn for the stem
- Additional cream yarn for the spots
- 3.5 mm crochet hook
- Blunt tapestry needle
- Small embroidery scissors
- One or two locking stitch markers
- Measuring tape
- Blocking mat or folded towel
- Rustproof blocking pins
- Sewing thread and needle if attaching the appliqué to fabric
A smooth cotton or cotton-acrylic yarn makes the stitches easy to see and helps the finished patch keep a defined shape. The Craft Yarn Council classifies DK and light-worsted yarn in category 3, although individual yarns within one category are not automatically interchangeable. Hook recommendations are guidelines, so adjust the hook when necessary to obtain a firm fabric.
Crochet Abbreviations Used
- ch = chain
- sc = single crochet
- hdc = half double crochet
- dc = double crochet
- sl st = slip stitch
- st / sts = stitch / stitches
- sc2tog = single crochet two stitches together
- inc = increase by working two stitches into one stitch
- rep = repeat
The Craft Yarn Council maintains standardized crochet abbreviations and also identifies differences between US and UK terminology.
US and UK Terminology Note
This pattern uses US terms.
- US single crochet = UK double crochet
- US half double crochet = UK half treble crochet
- US double crochet = UK treble crochet
Confirm which terminology a pattern uses before beginning because stitches with the same names can mean different techniques in different systems.
Before You Start
Gauge and tension
Exact gauge is not essential for an appliqué, but the fabric should be firm enough to hold its shape. Loose stitches can make the cap stretch and cause the stem to look uneven.
After Cap Row 6, the fifteen-stitch row should measure approximately 7.5–8.5 cm wide.
Use a smaller hook when:
- Large gaps appear between stitches
- The embroidery yarn disappears into the fabric
- The cap feels floppy
- The motif stretches when lifted
Use a larger hook when:
- It is difficult to insert the hook
- The fabric curls tightly
- Your hands become strained
- The stitches look compressed
Metric hook measurements are more reliable than letter designations because letter and number sizing can vary among manufacturers.
How to count the stitches
The turning chain does not count as a stitch anywhere in this pattern.
The first stitch is the small V directly beneath the active loop after you turn. The last stitch can hide beside the turning chain from the previous row, so place a locking marker in the first stitch of each row when necessary.
Count the completed row before moving on. Correcting one missed stitch immediately is much easier than reshaping the cap several rows later.
Right side and wrong side
Because the cap and stem are worked back and forth, both surfaces are usable. Choose the side that looks smoother as the right side.
Keep that selected side facing upward when adding the spots. During assembly, turn the motif over and sew from the wrong side whenever possible.
Avoiding curling
A slight curve is normal in a small appliqué. Severe curling usually means:
- The starting chain was too tight
- The row-end increases were pulled tight
- The mixed-height stitches in the final cap row were worked with uneven tension
Keep the starting chain relaxed and slide each loop onto the full shaft of the hook before completing the stitch.
Choosing colors
Classic toadstool colors include red and cream, but mushrooms can be rust, mustard, dusty rose, brown, sage, plum, gray, or blue.
For a readable design, choose enough contrast between the cap and spots. A cream stem also shows more clearly against a medium or dark cap.
Step-by-Step Crochet Tutorial
Step 1: Crochet the Top of the Mushroom Cap
With the terracotta yarn, make a slip knot and chain 6.
Cap Row 1
Starting in the second chain from the hook, work 1 sc in each chain across.
Stitch count: 5 sc
Chain 1 and turn.
This narrow first row forms the upper center of the cap. The tail should remain at one top corner and the working yarn should be ready for the first widening row.
Beginner tip:
Turn the foundation chain slightly toward you so you can see the back bumps. Working into the back bumps is optional, but it creates a tidy upper edge.
Common mistake to avoid:
Do not work into the chain directly beneath the loop on the hook. Begin in the second chain from the hook.
Step 2: Widen the Cap With Increases
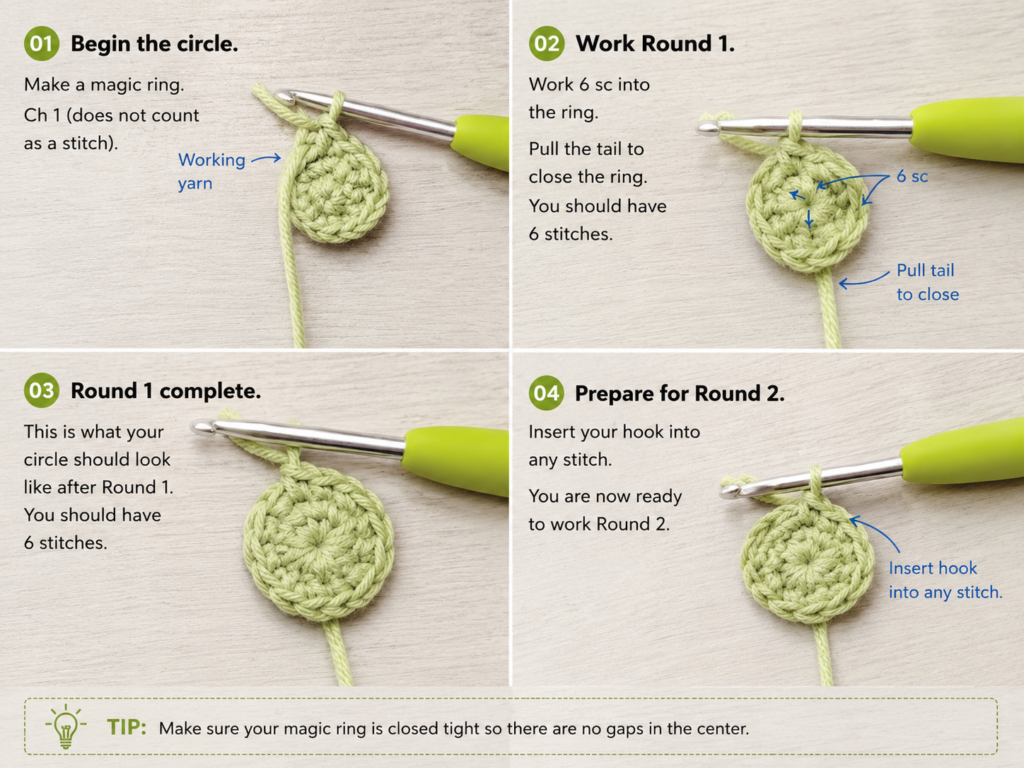
The cap widens by placing two single crochet stitches in both the first and last stitches of each increase row.
Cap Row 2
Work 2 sc in the first stitch.
Work 1 sc in each of the next 3 stitches.
Work 2 sc in the last stitch.
Stitch count: 7 sc
Chain 1 and turn.
Cap Row 3
Work 2 sc in the first stitch.
Work 1 sc in each of the next 5 stitches.
Work 2 sc in the last stitch.
Stitch count: 9 sc
Chain 1 and turn.
The two-stitch increases should sit directly above one another at both edges. This creates a balanced slope rather than pushing the cap toward one side.
Beginner tip:
Place a marker in the first stitch after working the first increase. Before making the final increase, count the center stitches and confirm that only one unworked stitch remains.
Common mistake to avoid:
Do not place the second increase into the turning chain. It belongs in the last actual single crochet stitch.
Step 3: Continue Widening the Cap
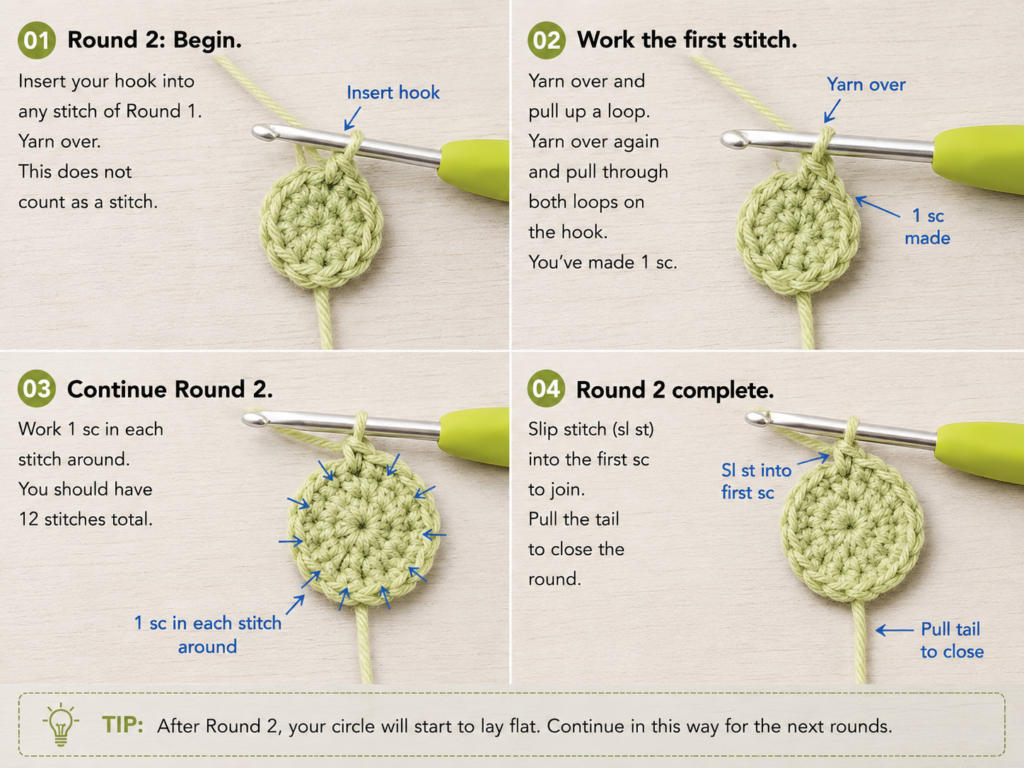
Continue the same increase rhythm.
Cap Row 4
Work 2 sc in the first stitch.
Work 1 sc in each of the next 7 stitches.
Work 2 sc in the last stitch.
Stitch count: 11 sc
Chain 1 and turn.
Cap Row 5
Work 2 sc in the first stitch.
Work 1 sc in each of the next 9 stitches.
Work 2 sc in the last stitch.
Stitch count: 13 sc
Chain 1 and turn.
Cap Row 6
Work 2 sc in the first stitch.
Work 1 sc in each of the next 11 stitches.
Work 2 sc in the last stitch.
Stitch count: 15 sc
Chain 1 and turn.
Cap Row 7
Work 1 sc in every stitch across.
Stitch count: 15 sc
Chain 1 and turn.
Row 7 stabilizes the full width before you create the curved lower edge. Lay the piece flat. Both sides should slope outward at a similar angle.
Beginner tip:
Count the stitches after every increase row: 11, 13, and 15. The predictable two-stitch growth makes mistakes easy to detect.
Common mistake to avoid:
If one edge looks steeper, compare the stitch counts at the beginning and end of the rows. You may have missed an increase on one side.
Step 4: Shape the Lower Edge of the Cap
The final cap row uses short stitches near the corners and taller stitches through the center. This produces a gentle downward curve without adding another row of width.
Cap Row 8
Do not count the turning chain as a stitch.
- Sl st in the first stitch
- Sc in the next stitch
- Hdc in each of the next 2 stitches
- Dc in each of the next 7 stitches
- Hdc in each of the next 2 stitches
- Sc in the next stitch
- Sl st in the final stitch
Stitch count: 15 stitches
Fasten off, leaving a 15 cm / 6-inch tail.
Gently smooth the cap with your fingers. The center of the lower edge should extend slightly farther than the corners.
Beginner tip:
Keep the first and last slip stitches loose. Tight slip stitches can pull the corners inward and make the cap cup.
Common mistake to avoid:
Do not add a turning chain between the different stitch groups. Work continuously across the row.
The cap sequence is now:
- Row 1: 5
- Row 2: 7
- Row 3: 9
- Row 4: 11
- Row 5: 13
- Row 6: 15
- Row 7: 15
- Row 8: 15 mixed-height stitches
Step 5: Start the Mushroom Stem
With warm cream yarn, chain 8.
Stem Row 1
Starting in the second chain from the hook, work 1 sc in each chain across.
Stitch count: 7 sc
Chain 1 and turn.
Stem Row 2
Work 2 sc in the first stitch.
Work 1 sc in each of the next 5 stitches.
Work 2 sc in the last stitch.
Stitch count: 9 sc
Chain 1 and turn.
This increase creates a gently wider lower stem.
Beginner tip:
The foundation-chain edge is the bottom of the stem. Place a removable marker near this edge if you are likely to turn the piece around accidentally.
Common mistake to avoid:
Do not cut the yarn after Row 2. The stem continues upward in the same piece.
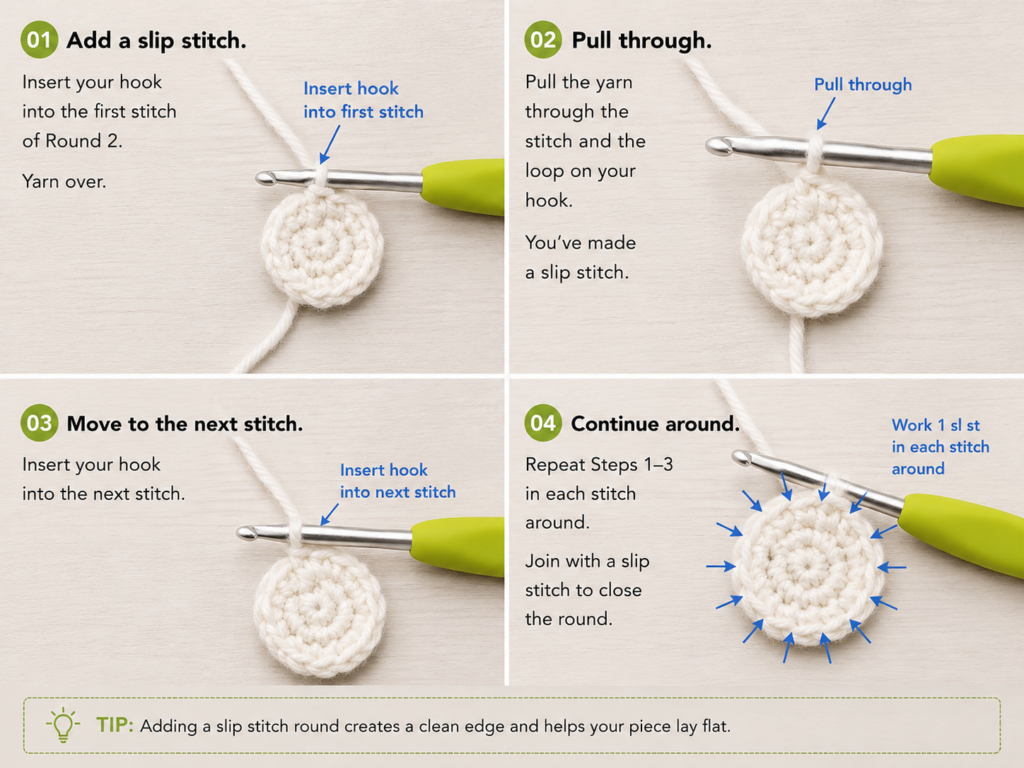
Step 6: Shape the Tapered Stem
Stem Row 3
Work 1 sc in each stitch across.
Stitch count: 9 sc
Chain 1 and turn.
Stem Row 4
Work 1 sc in each stitch across.
Stitch count: 9 sc
Chain 1 and turn.
Stem Row 5
Work sc2tog over the first 2 stitches.
Work 1 sc in each of the next 5 stitches.
Work sc2tog over the final 2 stitches.
Stitch count: 7 sc
Chain 1 and turn.
Stem Row 6
Work 1 sc in each stitch across.
Stitch count: 7 sc
Chain 1 and turn.
Stem Row 7
Work sc2tog over the first 2 stitches.
Work 1 sc in each of the next 3 stitches.
Work sc2tog over the final 2 stitches.
Stitch count: 5 sc
Fasten off, leaving a tail approximately 30 cm / 12 inches long for assembly.
The top of the stem should now be narrower than its base. The final five-stitch edge will sit behind the cap.
How to make sc2tog:
- Insert the hook into the next stitch.
- Yarn over and pull up a loop.
- Insert the hook into the following stitch.
- Yarn over and pull up a loop.
- Yarn over and pull through all three loops.
Beginner tip:
After each decrease row, gently stretch the top edge sideways. This makes the five or seven remaining stitch tops easier to identify.
Common mistake to avoid:
Do not complete an ordinary single crochet before moving to the second stitch of the decrease. Both stitches must remain partially worked until the final yarn-over.
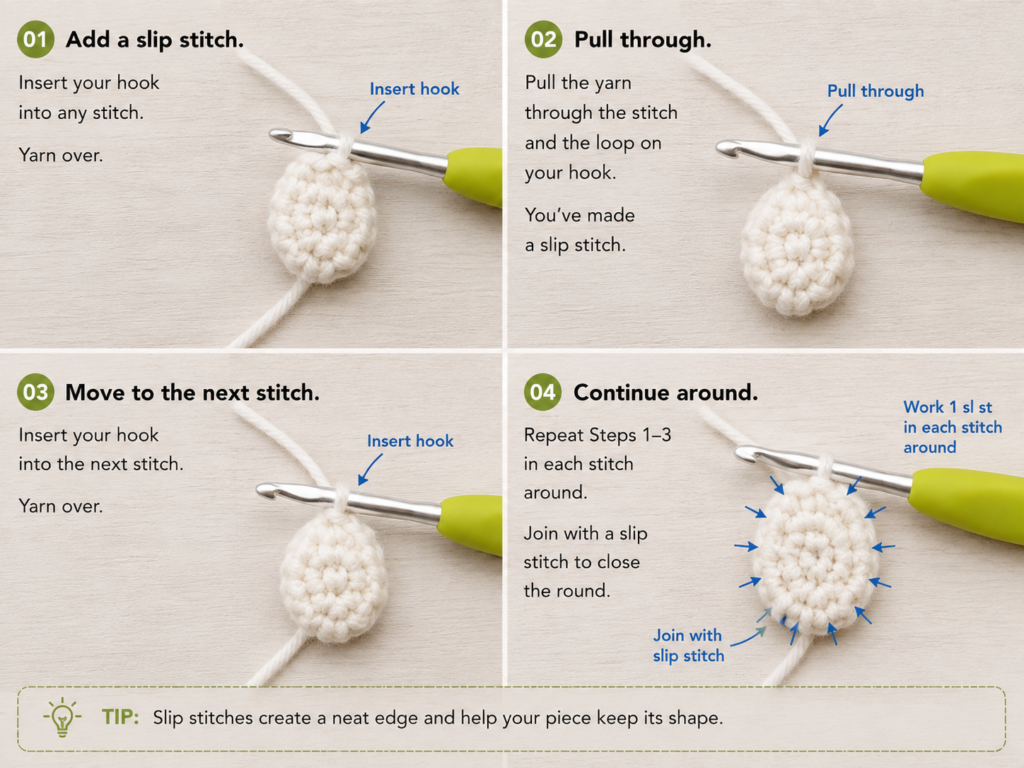
Step 7: Embroider the Mushroom Spots
Thread approximately 45 cm / 18 inches of cream yarn onto the tapestry needle.
Bring the needle from the wrong side to the right side of the cap. Choose a location at least one full stitch away from the edge.
Pass the needle horizontally under one stitch or across the width of one stitch. Return the needle to the wrong side close to the original entry point. Repeat once through the same area when you want a fuller oval.
Make five to seven spots in varied sizes. Avoid arranging them in perfectly straight rows; slight asymmetry gives the mushroom a more natural look.
Secure the yarn on the back by passing it beneath several existing crochet loops. Do not tie a bulky knot.
Beginner tip:
Place the cap flat on the table after every two spots. This makes it easier to evaluate the overall spacing.
Common mistake to avoid:
Do not pull the embroidery yarn until it sinks into the cap. The spot should rest on the surface without gathering the surrounding stitches.
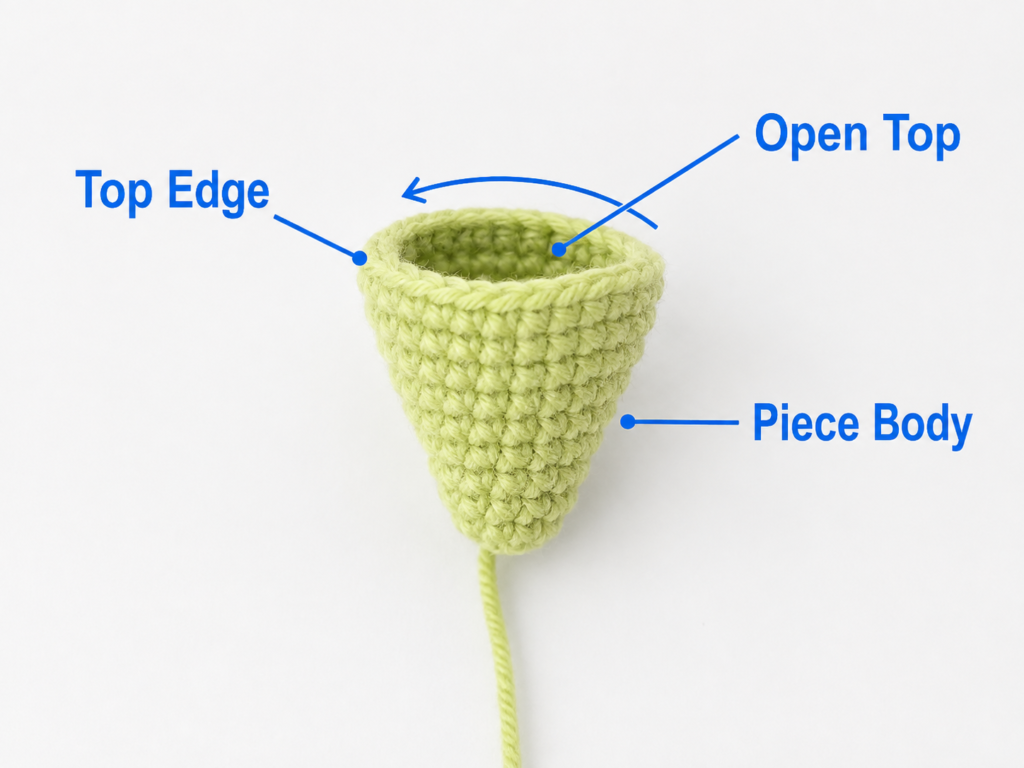
Step 8: Sew the Stem to the Cap
Place the cap right side down.
Place the stem behind it with the stem’s right side also facing down. The narrow five-stitch stem edge should overlap the center of the cap by approximately 1 cm / ⅜ inch.
Before sewing, turn the pieces over temporarily and inspect the front. Check that:
- The stem is centered beneath the cap
- The lower stem points straight down
- An equal amount of cap extends to both sides
- The stem does not cover too much of the curved lower edge
Turn the work back to the wrong side.
Using the long cream stem tail, make small whip stitches through the upper stem edge and the back loops of the cap. Avoid pushing the needle through to the visible front surface whenever possible.
Sew across the complete top of the stem. Add one small securing stitch at each upper stem corner.
Pass the yarn beneath several stitches on the wrong side and trim the excess.
Beginner tip:
Use two locking stitch markers to hold the stem temporarily. One marker can secure each upper corner while you verify the position from the front.
Common mistake to avoid:
Do not sew through the full thickness of the cap with large, tight stitches. The sewing yarn may become visible between the terracotta stitches or cre
ate a ridge on the front.
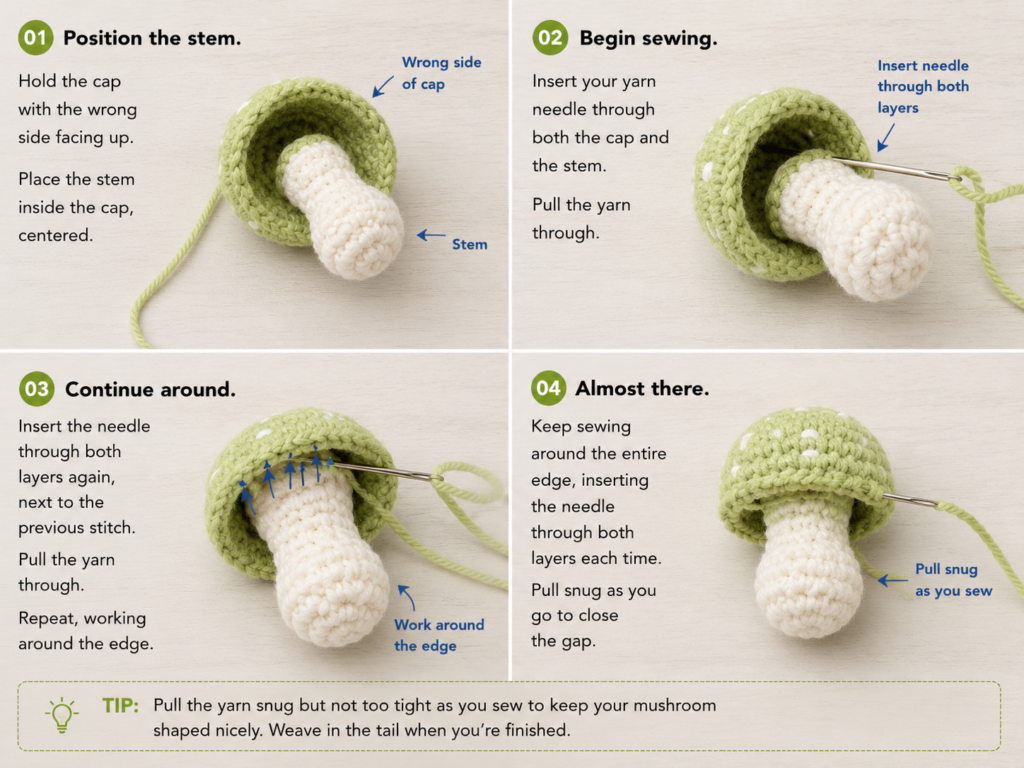
Step 9: Weave In the Remaining Ends
Thread each remaining tail separately onto the tapestry needle.
Pass the tail beneath four to six stitches on the wrong side. Change direction and pass beneath several more stitches. Trim close to the fabric without cutting the crochet stitches.
Do not carry a terracotta tail through the cream stem or a cream tail across a large terracotta area. Keep each end hidden within matching yarn whenever possible.
Turn the mushroom right side up and smooth it with your fingers.
At this point, the motif may have slightly raised corners or a wavy lower edge. Gentle blocking will correct most small irregularities.
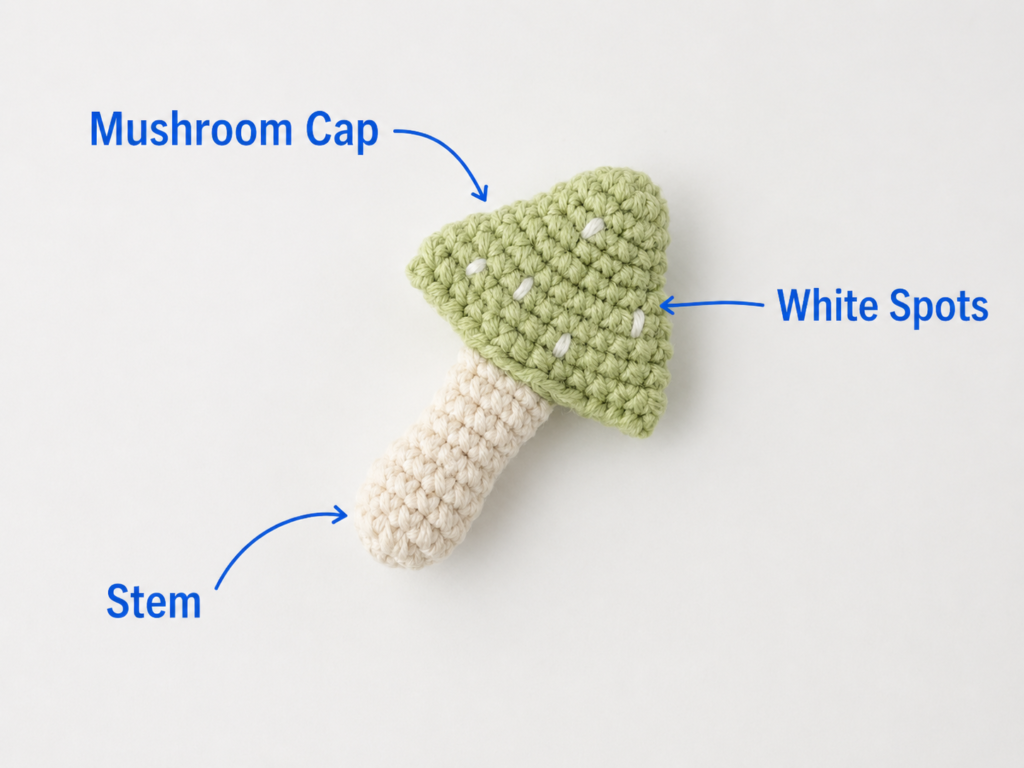
Pattern Notes and Stitch Notes
Turning-chain rule
The chain 1 at the beginning of a row does not count as a stitch.
Work the first stitch into the first actual stitch of the previous row.
Increase rule
“2 sc in the first stitch” means both single crochet stitches are worked into the same stitch.
Each cap increase row adds:
- One stitch at the beginning
- One stitch at the end
- Two stitches in total
Decrease rule
Sc2tog turns two existing stitches into one completed stitch.
Each stem decrease row removes:
- One stitch from the beginning
- One stitch from the end
- Two stitches in total
Stitch-count checkpoints
Cap
- Row 1: 5
- Row 2: 7
- Row 3: 9
- Row 4: 11
- Row 5: 13
- Row 6: 15
- Row 7: 15
- Row 8: 15
Stem
- Row 1: 7
- Row 2: 9
- Row 3: 9
- Row 4: 9
- Row 5: 7
- Row 6: 7
- Row 7: 5
Right side and wrong side
There is no structurally mandatory right side. Select the cleaner surface before adding spots.
The final sewing seam should remain on the chosen wrong side.
Repeat notes
There is no long repeat sequence. Cap Rows 2–6 use the same increase principle with a growing number of center stitches.
Size adjustment notes
For a smaller mushroom
- Use sport-weight yarn and a 2.75–3.25 mm hook.
- Alternatively, stop widening the cap after Row 5 at 13 stitches.
- Work one plain row of 13 stitches.
- Shape the bottom with: sl st, sc, hdc 2, dc 5, hdc 2, sc, sl st.
- Begin the stem with chain 7 instead of chain 8.
For a larger mushroom
- Use worsted-weight yarn and a 4–4.5 mm hook.
- Add one or two additional increase rows to the cap.
- Continue adding two stitches per increase row.
- Make the stem one or two rows longer.
- Add two foundation chains if the larger cap requires a broader stem.
Make a larger test motif before preparing several identical appliqués. Yarn behavior can vary even within one standardized weight category.
Common Beginner Mistakes
1. The cap leans to one side
Cause: An increase was missed at one row edge.
Fix: Count each row before continuing. The cap increases by exactly two stitches per widening row.
2. One cap corner is tight and curled
Cause: The slip stitch at the beginning or end of Cap Row 8 was pulled too tightly.
Fix: Undo the final row and remake the slip stitches with relaxed loops.
3. The stem becomes wider at the top
Cause: The stem was turned upside down during assembly.
Fix: The five-stitch edge belongs beneath the cap. The foundation-chain edge forms the lower stem.
4. The sc2tog decrease leaves an open gap
Cause: The loops were pulled too high or the hook was much larger than the yarn requires.
Fix: Keep the pulled-up loops level with the surrounding stitches and complete the decrease with even tension.
5. The spots pucker the cap
Cause: The embroidery yarn was pulled too tightly.
Fix: Insert the needle beneath the surface stitches and stop pulling as soon as the yarn rests flat.
6. The cream sewing yarn shows on the front
Cause: The needle passed through the full depth of the cap.
Fix: Catch only the back loops or back bars of the terracotta stitches.
7. The motif puckers when attached to a bag or blanket
Cause: The appliqué was stretched while sewing or the attachment stitches were too tight.
Fix: Pin the appliqué in its natural shape and sew with relaxed, evenly spaced stitches.
How to Customize This Crochet Project
Change the cap color
Try:
- Brick red with ivory spots
- Mustard with cream spots
- Plum with pale pink spots
- Sage with natural beige spots
- Cocoa brown with golden spots
- Dusty blue with white spots
Make several mushrooms in related autumn colors for a garland or woodland blanket.
Change the spots
Instead of six embroidered ovals, use:
- Three large spots
- Several tiny seed stitches
- French knots
- Small surface-crochet circles
- No spots for a simple forest mushroom
Avoid beads, buttons, or loosely attached decorations when the appliqué will be used on an item intended for a baby or young child.
Add a cap border
Join a contrasting yarn at one lower corner and work relaxed slip stitches around the outer cap edge.
A border can improve definition, but tight slip stitches may cause curling. Move up one hook size for the border when necessary.
Add texture
For a subtle ridge, work Cap Row 7 in the back loop only.
For a smoother patch, work every stitch through both loops as written.
Make a longer stem
Add plain single crochet rows before the decrease rows. This produces a tall woodland mushroom rather than a compact toadstool.
Turn it into a patch
Sew the motif to:
- Denim jackets
- Canvas tote bags
- Crochet hats
- Plain sweaters
- Children’s blankets
- Pencil cases
- Fabric book covers
Use washable yarn when the finished item will be laundered regularly.
Make a garland
Crochet five to seven mushrooms, block them to matching dimensions, and attach them to a long chain with leaves, acorns, or pumpkins between them.
Make a gift tag
Use thinner yarn and a smaller hook. Sew the miniature mushroom to a felt circle or heavy cardstock tag.
Finishing Instructions
Fastening off
After the final stitch, cut the yarn while leaving the specified tail. Pull the cut end completely through the remaining loop.
Weaving in ends
Weave each tail beneath multiple stitches on the wrong side. Change direction at least once so the end is less likely to work free.
Blocking
Place the mushroom on a blocking mat or folded towel.
Gently arrange:
- The top edge of the cap
- Both cap corners
- The curved lower edge
- The stem sides
- The lower stem edge
Pin outside the stitches rather than splitting the yarn.
For cotton, lightly mist the motif and allow it to dry fully. For acrylic or blended yarn, follow the care instructions on the yarn label. Do not press a hot iron directly onto the crochet fabric.
Washing and care
Wash according to the yarn label and the care requirements of the item to which the appliqué is attached.
A securely sewn cotton appliqué can generally be washed with the base item, but delicate embroidery details benefit from gentle washing and air drying.
Attaching the appliqué to another project
Position the mushroom and secure it temporarily with pins.
Using matching sewing thread or fine yarn:
- Sew around the outer edge of the cap.
- Sew around the complete stem.
- Add one or two hidden stitches near the center when the appliqué lifts away from the base fabric.
- Keep all stitches relaxed enough for the fabric to lie flat.
For stretchy garments, place the garment in its natural unstretched position before attaching the motif.
Quick Printable-Style Summary
Project: Flat crochet mushroom applique
Skill level: Easy / advanced beginner
Finished size: Approximately 7.5–8.5 cm wide and 8–9 cm tall
Yarn: DK-weight cotton in terracotta and cream
Hook: 3.5 mm
Main stitches: Ch, sc, hdc, dc, sl st, sc increase, sc2tog
Starting method:
Cap begins with chain 6. Stem begins with chain 8.
Cap counts:
5, 7, 9, 11, 13, 15, 15, 15
Stem counts:
7, 9, 9, 9, 7, 7, 5
Assembly:
Overlap the narrow stem edge behind the central lower edge of the cap and whip stitch securely.
Decoration:
Add five to seven cream embroidered spots.
Finishing:
Weave in all ends, block lightly, and sew the appliqué flat to the chosen project.
FAQ
Can a complete beginner make this crochet mushroom applique?
A new crocheter should first be comfortable making chains and single crochet stitches. The increases are simply two single crochets worked into one stitch. The sc2tog decrease requires a few extra steps, but it is explained in the tutorial.
What yarn is best for a crochet mushroom applique?
Smooth cotton or cotton-acrylic yarn is particularly useful because it provides visible stitches and defined edges. DK yarn creates a medium-sized patch without making the motif bulky.
Can I use worsted-weight yarn?
Yes. Worsted yarn will make a larger mushroom. Try a 4–4.5 mm hook and check that the fabric remains firm enough to hold its shape.
Why is my mushroom cap curling?
The most common causes are a tight starting chain, tight row-end increases, or tight slip stitches in the final cap row. Blocking can correct mild curling, but severe curling should be fixed by remaking the tight section.
Do I need to block a small appliqué?
Blocking is not mandatory, but it improves the cap outline, straightens the stem, and helps the patch lie neatly against a bag, blanket, or garment.
Can I glue the mushroom pieces together?
Sewing is recommended. It creates a flexible, washable join and avoids a stiff adhesive area. A sewn motif is also easier to attach securely to another textile.
How should I attach the mushroom to a baby blanket?
Sew around the full cap and stem edges with secure, closely spaced stitches. Avoid buttons, beads, or other detachable embellishments. Inspect the appliqué periodically for loose yarn or damaged attachment stitches.
Conclusion
This crochet mushroom applique pattern is small enough for a single crafting session but includes several useful shaping techniques. The cap introduces controlled increases and mixed-height stitches, while the stem provides simple decrease practice. Embroidered spots and a sewn join complete the design without stuffing or complicated construction.
Once the first mushroom is finished, experiment with autumn shades, miniature versions, longer stems, contrasting borders, or groups of mushrooms for a woodland garland. The same basic motif can become a bag patch, blanket decoration, sweater embellishment, gift tag, or seasonal ornament.





