A crochet maple leaf is one of those small projects that feels much more impressive than the amount of yarn it requires. With one short length of yarn, you can make a pointed autumn motif for a garland, table setting, wreath, gift tag, cardigan, tote bag, or seasonal wall hanging.
This original crochet maple leaf pattern begins with a small circular center. Five graduated chain spaces are then added around the upper edge. The spaces become the framework for two small lower lobes, two taller side lobes, and one large center lobe.
Working the points into chain spaces makes the placement easier to see than it would be if every tall stitch had to be counted into the center round. You will still practice several crochet heights, but each group has a clear beginning, peak, and ending.
The tutorial uses US crochet terminology and includes stitch-count checkpoints, detailed explanations, consistent image placements, finishing guidance, and fixes for common problems.
What You’ll Learn
By completing this maple leaf, you will learn how to:
- Crochet a flat circular center.
- Identify and count the tops of stitches.
- Build five graduated chain spaces.
- Work multiple stitches into one chain space.
- Use stitch height to shape a pointed motif.
- Make compact two-chain and three-chain picots.
- Create defined valleys with slip stitches.
- Add a narrow crocheted stem.
- Block a small motif into a balanced shape.
- Adjust the leaf’s size, fiber, color, and texture.
Materials You’ll Need
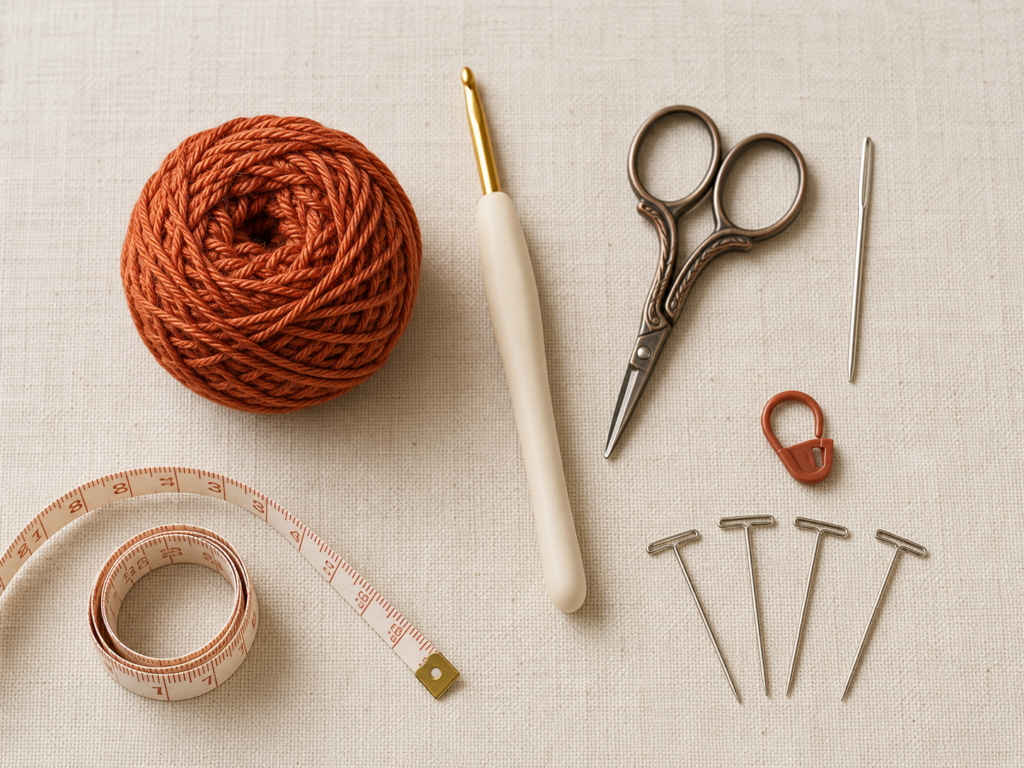
- Approximately 20–25 yards of DK-weight yarn
- 3.5 mm crochet hook
- Small embroidery scissors
- Blunt tapestry needle
- One locking stitch marker
- Measuring tape, optional
- Blocking mat and rustproof pins, optional
Yarn recommendation
A smooth cotton or cotton-blend yarn is ideal because it makes the stitch anatomy easy to see and holds the pointed shape well. A lightly twisted wool or acrylic DK yarn can also work, but fuzzy or heavily textured yarn may hide the picots and stitch tops.
The Craft Yarn Council classifies DK or light worsted yarn in its light yarn category. Hook recommendations on yarn-weight charts are guidelines rather than fixed rules, so a slightly smaller hook may be used when a firmer decorative motif is desired.
For this tutorial, use a muted burnt-sienna yarn so the stitch photography remains visually consistent.
Crochet Abbreviations Used
- MR = magic ring
- ch = chain
- sc = single crochet
- hdc = half double crochet
- dc = double crochet
- tr = treble crochet
- dtr = double treble crochet
- trtr = triple treble crochet
- sl st = slip stitch
- st/sts = stitch/stitches
- sp = space
- rep = repeat
The abbreviations in this tutorial follow standard US crochet terminology. The Craft Yarn Council maintains a broader abbreviation list and a comparison of common US and UK terms.
Special Stitches
Two-chain picot
Chain 2. Insert the hook into the first chain you made and complete a slip stitch.
Three-chain picot
Chain 3. Insert the hook into the first chain you made and complete a slip stitch.
Double treble crochet
Yarn over three times. Insert the hook into the indicated space and pull up a loop. Yarn over and pull through two loops four times.
Triple treble crochet
Yarn over four times. Insert the hook into the indicated space and pull up a loop. Yarn over and pull through two loops five times.
Keep the yarn overs close to the hook shaft. Allowing them to spread along the handle can create uneven tall stitches.
Before You Start
Gauge and tension
Exact gauge is not critical because this is a decorative motif rather than a fitted garment. As a useful checkpoint, the center should measure approximately 1½ inches across after Round 2.
A larger center usually means your final leaf will also be larger. If the center cups upward, your stitches may be too tight. If it ripples heavily, they may be too loose.
How to count the center stitches
Look for the small V shape at the top of each stitch. Insert the hook under both loops of that V unless the instructions say otherwise.
Place a locking stitch marker in the first stitch of Round 2. Move it only after the round has been counted and joined.
How to keep the leaf symmetrical
The center chain-nine space must sit directly opposite the future stem. Lay the framework flat before beginning the lobes. You should see this order:
- Small chain-five space
- Chain-seven space
- Large chain-nine space
- Chain-seven space
- Small chain-five space
If the chain-nine space leans to one side, recheck the skipped stitches before continuing.
How to avoid curling
Do not pull the chain arches tightly. They need enough room to hold several stitches.
When working a complete lobe into one chain space, slide the finished stitches gently along the chain so they are distributed rather than stacked in one place.
Some temporary curling is normal before blocking.
Right side and wrong side
The side facing you while the lobes are made will be treated as the right side. The final yarn tails should be woven into the opposite side.
US and UK terminology
This pattern uses US terms. A US single crochet is called a double crochet in UK terminology, and a US double crochet is called a treble crochet in UK terminology. Check every pattern’s terminology note before starting.
Step-by-Step Crochet Tutorial
Step 1: Crochet the Center Round
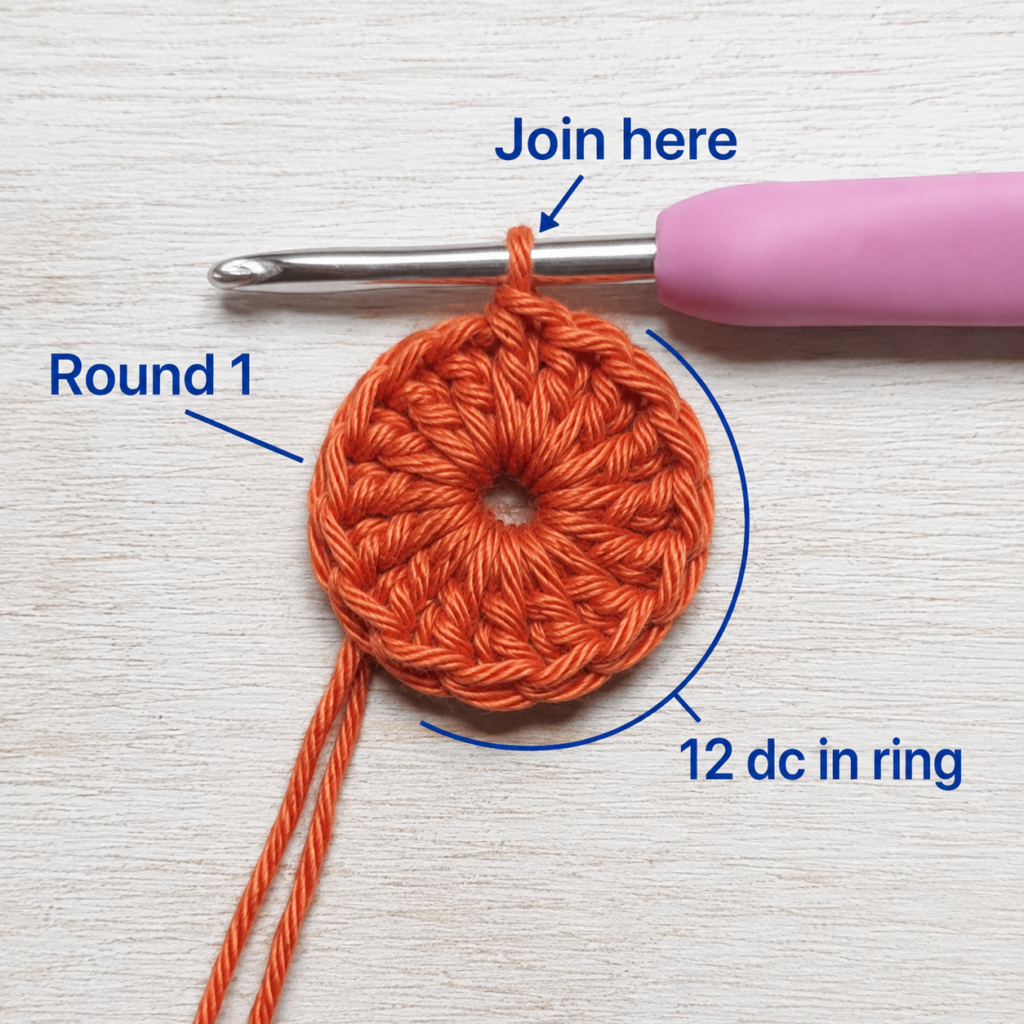
Make a magic ring.
Chain 1. This chain raises the hook to the correct height but does not count as a stitch.
Work 10 half double crochet stitches into the ring.
Pull the yarn tail gradually until the center closes. Join with a slip stitch to the first half double crochet.
Stitch count: 10 hdc
The center should look like a small, flat wheel. Do not tighten the ring so aggressively that the stitches overlap.
Beginner tip:
Count the stitches before joining. The chain 1 is not included in the count.
Common mistake to avoid:
Do not join into the chain 1. Joining there creates an extra space and makes Round 2 harder to count.
Step 2: Expand the Circular Center
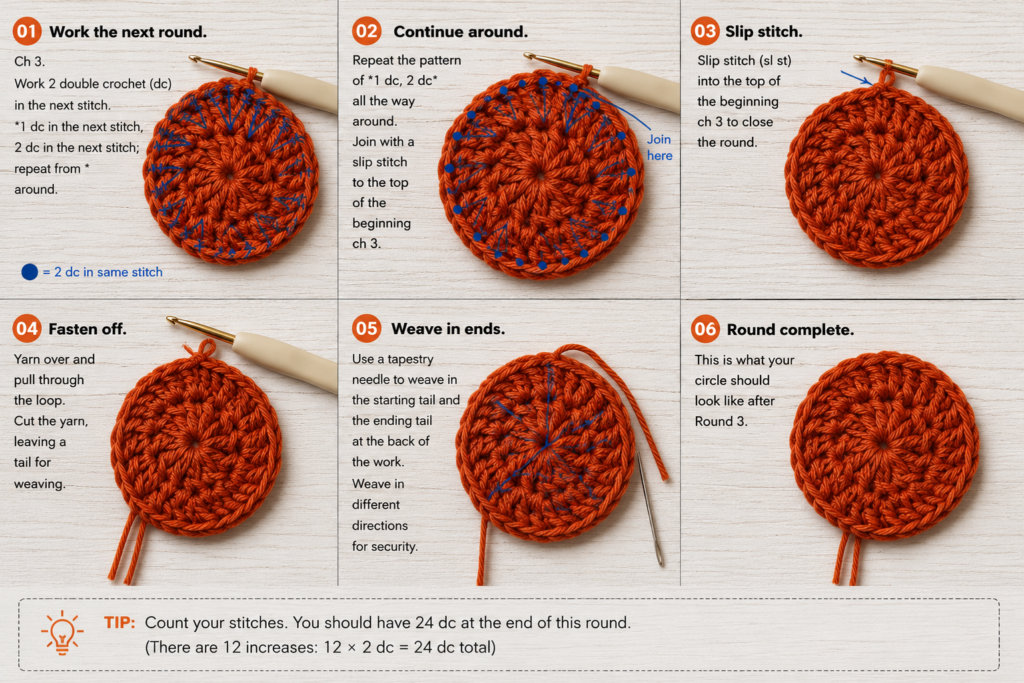
Chain 1. Work 2 single crochet stitches into the first stitch.
Continue working 2 single crochet stitches into every stitch around.
Join with a slip stitch to the first single crochet.
Stitch count: 20 sc
The circle should lie reasonably flat. A slight curve can be corrected during blocking, but a tightly cupped circle should be remade with looser tension or a slightly larger hook.
Beginner tip:
Say the stitch numbers aloud in pairs: “one-two, one-two.” This makes it easier to confirm that every stitch received an increase.
Common mistake to avoid:
Do not work into the joining slip stitch from Round 1. It is not one of the ten half double crochet stitches.
Step 3: Build the Five-Lobe Framework
The next round creates five chain spaces. The spaces establish the width and height of each lobe before the decorative stitches are added.
Chain 1 and work 1 single crochet in the same stitch.
Then work the following sequence:
- Chain 5, skip the next 2 stitches, and single crochet in the next stitch.
- Chain 7, skip the next 3 stitches, and single crochet in the next stitch.
- Chain 9, skip the next 3 stitches, and single crochet in the next stitch.
- Chain 7, skip the next 3 stitches, and single crochet in the next stitch.
- Chain 5, skip the next 2 stitches, and single crochet in the next stitch.
- Single crochet in the final unworked stitch.
- Join to the first single crochet with a slip stitch.
You should now have:
- Five chain spaces
- Seven anchor single crochet stitches
- One chain-nine space centered at the top
- Two adjacent single crochet stitches at the bottom for the stem area
Lay the work flat and untwist each arch.
Beginner tip:
Count the chains in every arch before making the next anchor stitch. It is easier to correct a short chain now than after the lobes are filled.
Common mistake to avoid:
Do not crochet into the individual chains during the next steps. Each complete lobe is worked around its chain space.
Step 4: Shape the First Small Lower Lobe
Work all of the following stitches around the first chain-five space:
- 1 sc
- 1 hdc
- 1 dc
- 1 tr
- Two-chain picot
- 1 tr
- 1 dc
- 1 hdc
- 1 sc
Slip stitch into the next anchor single crochet.
The stitch heights rise gradually to the treble stitches, form a small point, and then descend in reverse order.
The slip stitch after the lobe pulls the fabric downward and creates a visible valley.
Beginner tip:
Slide the completed stitches slightly along the chain space as you work. This gives each stitch enough room to stand upright.
Common mistake to avoid:
Do not make the picot with loose chains. A loose picot may look like a loop rather than a pointed tip.
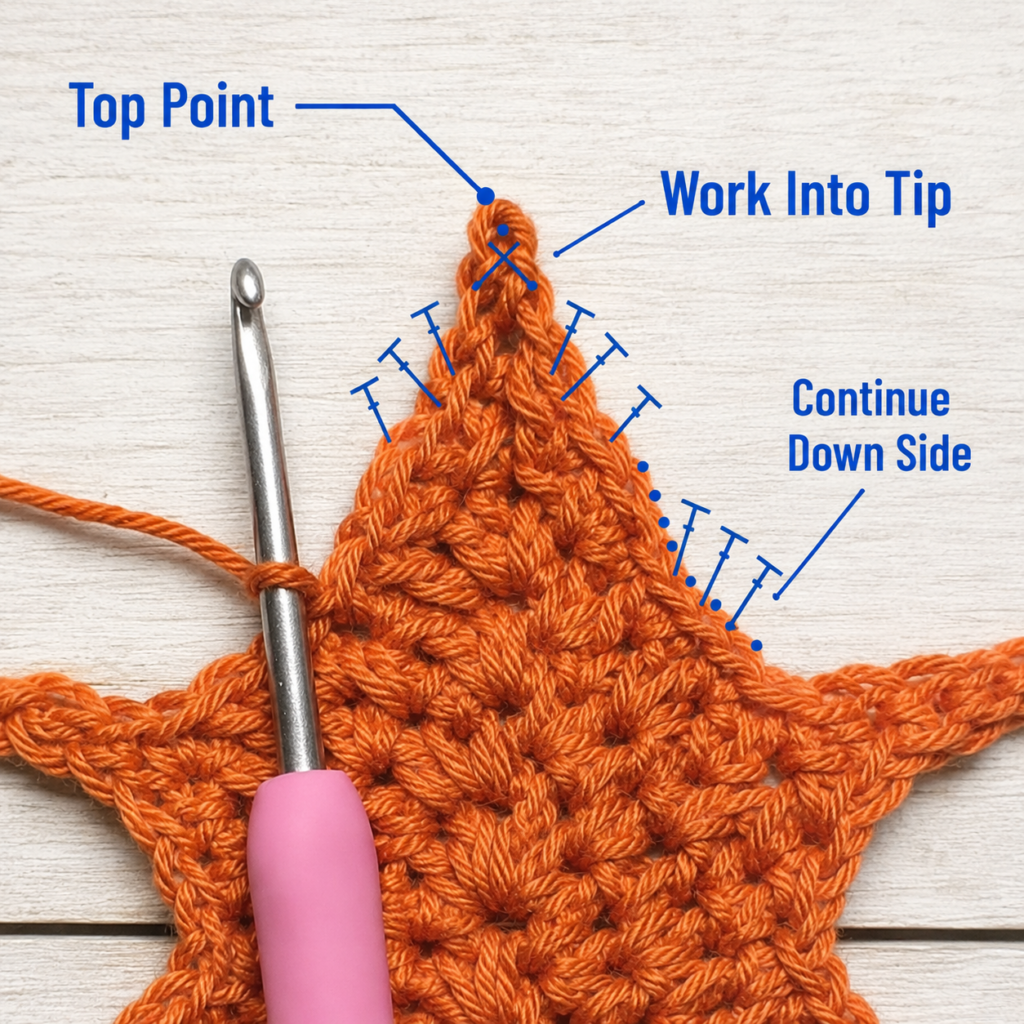
Step 5: Make the First Tall Side Lobe
Work the following stitches around the first chain-seven space:
- 1 sc
- 1 hdc
- 1 dc
- 1 tr
- 1 dtr
- Three-chain picot
- 1 dtr
- 1 tr
- 1 dc
- 1 hdc
- 1 sc
Slip stitch into the next anchor single crochet.
This lobe is taller than the first one because it includes double treble stitches and a larger picot.
Pause after the slip stitch and compare the two completed points. The second point should be noticeably taller without looking stretched.
Beginner tip:
When making the double treble stitches, pause after each pull-through-two movement. This helps prevent accidentally pulling through four loops at once.
Common mistake to avoid:
Do not omit the valley slip stitch. Without it, the first two lobes may merge into one broad rounded section.
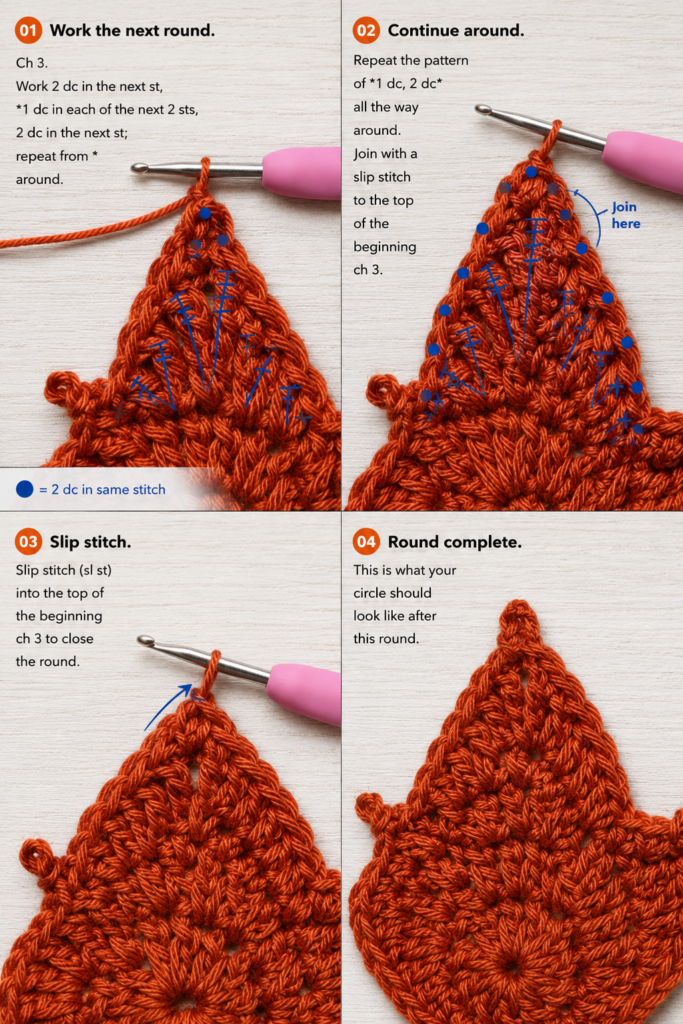
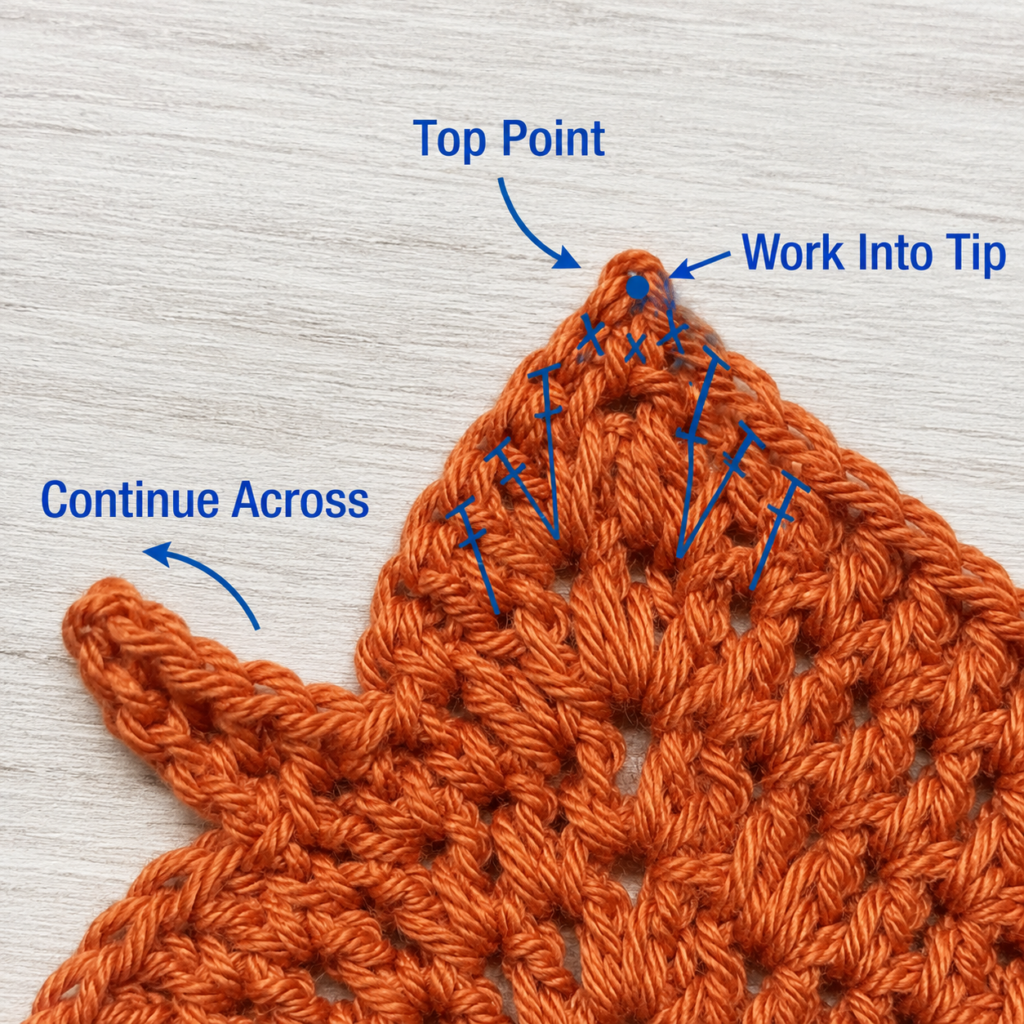
Step 6: Crochet the Large Center Lobe
The chain-nine space becomes the highest point of the leaf.
Work the following stitches around that space:
- 1 sc
- 1 hdc
- 1 dc
- 1 tr
- 1 dtr
- 1 trtr
- Three-chain picot
- 1 trtr
- 1 dtr
- 1 tr
- 1 dc
- 1 hdc
- 1 sc
Slip stitch into the next anchor single crochet.
The two triple treble stitches sit on either side of the picot. They form the narrow central peak.
Tall stitches naturally feel less stable than single or double crochet. Hold the base of the active stitch between your thumb and middle finger while completing each yarn-over sequence.
Beginner tip:
Count the pull-through-two movements. A triple treble requires five pull-through-two movements after the loop has been drawn through the chain space.
Common mistake to avoid:
Do not pull the working loop tight before starting a tall stitch. A cramped first loop can make the remaining pull-through movements difficult.
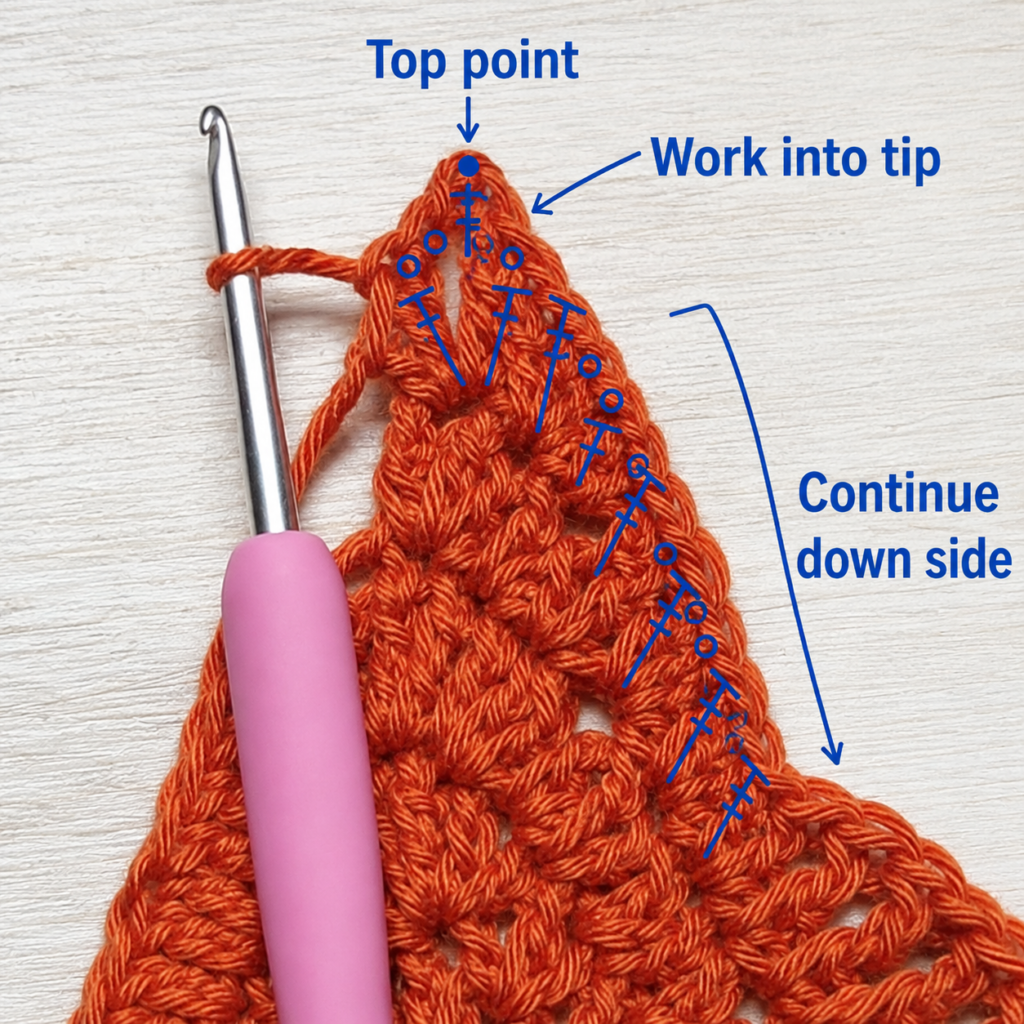
Step 7: Mirror the Lobes on the Second Side
The remaining chain spaces are worked in reverse order.
Second tall side lobe
Around the next chain-seven space, work:
- 1 sc
- 1 hdc
- 1 dc
- 1 tr
- 1 dtr
- Three-chain picot
- 1 dtr
- 1 tr
- 1 dc
- 1 hdc
- 1 sc
Slip stitch into the next anchor single crochet.
Final small lower lobe
Around the final chain-five space, work:
- 1 sc
- 1 hdc
- 1 dc
- 1 tr
- Two-chain picot
- 1 tr
- 1 dc
- 1 hdc
- 1 sc
Slip stitch into the anchor single crochet at the base.
Your leaf should now have five points:
- Two small lower lobes
- Two matching tall side lobes
- One large center lobe
Beginner tip:
Place the leaf flat after each completed lobe. Compare it with the corresponding point on the opposite side.
Common mistake to avoid:
Do not reverse the actual stitch order on the second side. Repeat the same increasing-then-decreasing sequence inside each chain space.
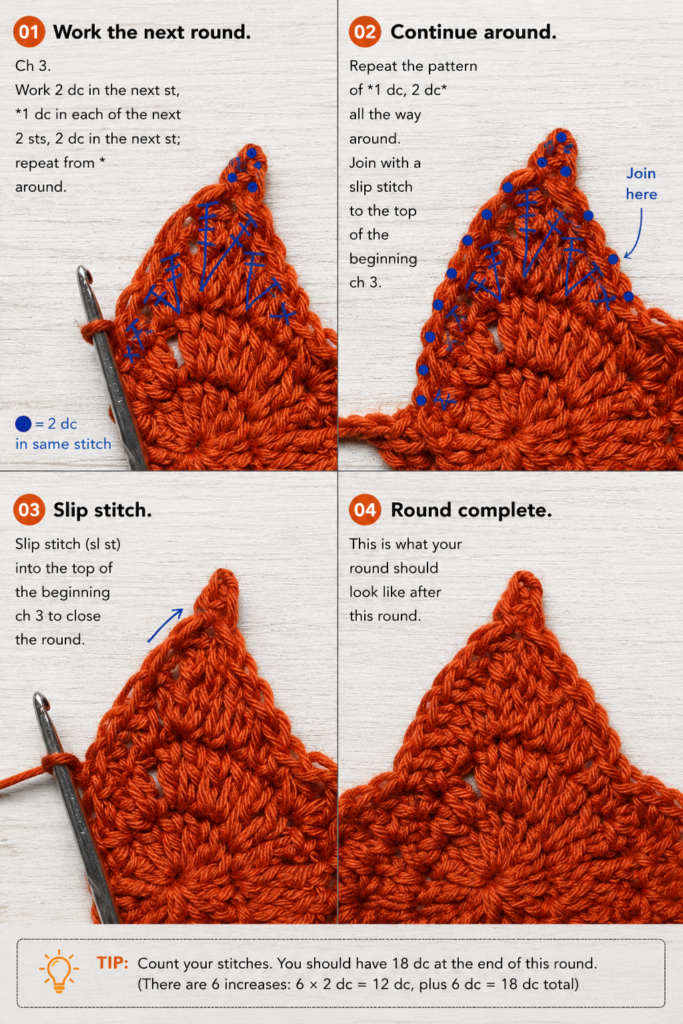
Step 8: Add the Stem
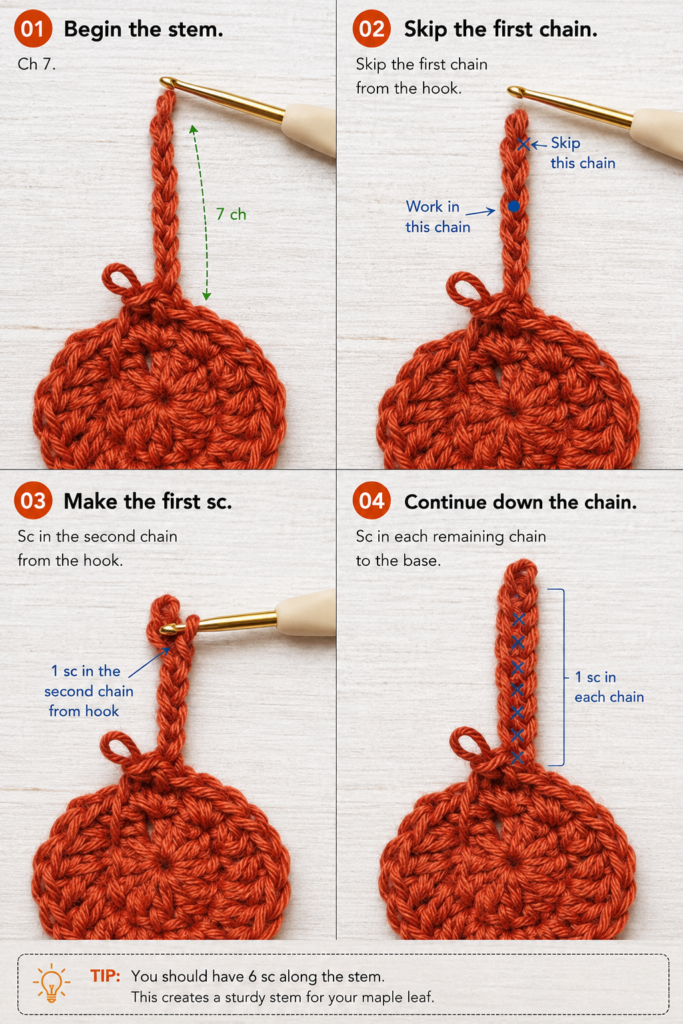
From the final base anchor, chain 9.
Slip stitch into the second chain from the hook. Slip stitch into each of the remaining seven chains.
The stem will contain eight slip stitches.
Slip stitch into the final single crochet at the bottom of the center. Make one additional slip stitch toward the first anchor if needed to secure the stem neatly.
Cut the yarn, leaving a 5-inch tail. Pull the tail through the active loop.
The stem may curve slightly. That is normal and can be adjusted during blocking.
Beginner tip:
Keep the chain loose enough that you can insert the hook through each chain on the return path.
Common mistake to avoid:
Avoid tightening the stem slip stitches excessively. Tight stitches can cause the chain to twist into a cord.
Step 9: Weave In the Ends
Turn the leaf so the wrong side faces upward.
Thread the center tail onto a tapestry needle. Pass it under several nearby stitches, change direction, and pass it under another group of stitches.
Repeat with the finishing tail near the stem. Avoid pulling the tails so tightly that the center or stem becomes distorted.
Trim the remaining yarn close to the fabric.
Step 10: Block and Shape the Leaf
Blocking helps the center lie flat and makes the five points more distinct.
Check the yarn label before choosing a blocking method. Yarn labels normally include fiber and care information, and the Craft Yarn Council recommends keeping the label so the finished item can be cared for correctly.
For a wet-blocked cotton leaf:
- Dampen the leaf with cool or lukewarm water.
- Press it gently between two towels.
- Place it right side up on a blocking mat.
- Pin the center lobe first.
- Pin both tall side lobes.
- Pin both small lower lobes.
- Straighten or gently curve the stem.
- Allow the leaf to dry completely before removing the pins.
Do not stretch one side farther than the other. Measure from the center ring to each matching side point to check the balance.
Pattern Notes and Stitch Notes
- The pattern is worked in joined rounds.
- Beginning chain-1 stitches do not count as stitches.
- Round 1 contains 10 half double crochet stitches.
- Round 2 contains 20 single crochet stitches.
- Round 3 contains five chain spaces and seven anchor single crochet stitches.
- Every lobe is worked around a chain space rather than into individual chains.
- Slip stitches between lobes create the valleys.
- The chain-nine space must be centered opposite the bottom stem area.
- The right side is the side facing you while the outer lobes are worked.
- There is no conventional turning chain because the motif is not worked in back-and-forth rows.
- Gauge is adjustable, but the center should remain flat.
- A two-chain picot is used on each small lobe.
- A three-chain picot is used on both tall side lobes and the center lobe.
- The center lobe uses the tallest stitches.
- The first and final small lobes should match.
- The two chain-seven side lobes should match.
Easier tall-stitch option
A beginner who finds triple treble crochet difficult may replace both trtr stitches in the center lobe with double treble crochet.
The resulting center point will be slightly shorter and rounder, but the motif will still resemble a maple leaf.
Size adjustment notes
The easiest way to change the finished size is to change the yarn and hook together.
- Fingering yarn with a 2.5–3 mm hook creates a small appliqué.
- DK yarn with a 3.5 mm hook creates a medium decoration.
- Worsted yarn with a 4–4.5 mm hook creates a larger coaster-sized motif.
- Bulky yarn creates a substantial ornament or trivet, although the fabric should be tested before using it near hot cookware.
Common Beginner Mistakes
1. Counting the beginning chain as a stitch
The chain 1 at the start of Rounds 1 and 2 does not count.
Fix:
Place the marker in the first actual hdc or sc rather than in the chain.
2. Finishing Round 2 with the wrong stitch count
A missing increase shifts every chain space in Round 3.
Fix:
Confirm that Round 2 contains exactly 20 single crochet stitches before adding the framework.
3. Placing the chain-nine space off center
The largest lobe may lean to one side.
Fix:
Count the Round 3 anchors. The chain-nine space should be the third of five chain spaces.
4. Working into each chain instead of the chain space
This makes the lobe difficult to shape and may leave unused chains.
Fix:
Insert the hook beneath the whole chain arch. Work every stitch for that lobe around the arch.
5. Forgetting the valley slip stitch
Adjacent lobes may blend together.
Fix:
After completing each lobe, slip stitch into the anchor single crochet before beginning the next chain space.
6. Making loose picots
The points may look rounded or looped.
Fix:
Make the picot chains at your normal tension and secure the slip stitch into the first chain.
7. Making tall stitches too tightly
The center lobe may become stiff and difficult to complete.
Fix:
Keep the working loop close to the hook’s shaft but not compressed. Pull through only two loops at a time.
8. Overcrowding the chain spaces
Stitches may twist or sit on top of one another.
Fix:
Slide the completed stitches along the chain arch while you work.
9. Pulling the stem slip stitches too tightly
The stem may spiral.
Fix:
Use relaxed slip stitches or temporarily switch to a hook 0.5 mm larger for the return path.
10. Skipping blocking
The leaf may look irregular even when the stitch counts are correct.
Fix:
Lightly block the points into position and allow the motif to dry completely.
How to Customize This Crochet Project
Change the yarn fiber
Cotton creates crisp points and visible stitch definition. Wool produces a softer, more organic leaf. Acrylic is economical and available in many autumn shades.
Select the blocking and washing method according to the yarn label rather than treating every fiber the same way.
Use seasonal color combinations
Try:
- Burnt sienna
- Pumpkin orange
- Mustard yellow
- Deep olive
- Forest green
- Burgundy
- Copper brown
- Rust and cream variegated yarn
- Red and white for Canada-themed decorations
For a natural garland, make several leaves in related colors rather than making every leaf identical.
Make a smaller leaf
Use fingering-weight cotton and a 2.5 or 2.75 mm hook. The same instructions will create a smaller, more delicate appliqué.
Make a larger leaf
Use worsted-weight yarn and a 4 or 4.5 mm hook. Check that the center stays flat before continuing.
Add an outline
After completing the stem, join a contrasting yarn in a lower valley. Work loose slip stitches around the outer edge.
Do not tighten the outline. A tight slip-stitch border will pull the points inward.
Add embroidered veins
Thread a tapestry needle with a contrasting yarn.
Use surface stitches to make:
- One line from the stem toward the center point
- One diagonal line toward each tall side point
- One shorter diagonal line toward each lower point
Keep the embroidery relaxed so the leaf remains flat.
Create a two-color leaf
Make the center and framework in one shade. Join a second shade before working the five lobes.
A dark center with copper points gives the leaf a strong autumn look.
Turn the leaf into a garland
Crochet several leaves and block them before assembly.
Make a long chain and attach each stem with a slip stitch or yarn needle. Leave a consistent gap between leaves so the points do not overlap excessively.
Use it as an appliqué
Sew the leaf onto:
- Tote bags
- Cardigans
- Denim jackets
- Pillow covers
- Placemats
- Fabric gift bags
- Autumn banners
- Crochet baskets
Place a few small stitches around the circular center and at the lobe valleys. The points can remain free for a slightly dimensional effect.
Gift and décor ideas
A finished maple leaf can be used as:
- A fall gift tag
- A Thanksgiving place card decoration
- A bookmark embellishment
- A wreath component
- A table-scatter decoration
- A napkin-ring accent
- A seasonal ornament
- A brooch after adding a secure pin back
- A classroom autumn display
- A scrapbook or craft-journal decoration
Finishing Instructions
- Fasten off with a tail long enough for secure weaving.
- Weave both ends into the wrong side.
- Inspect the five points and valleys.
- Lightly dampen the motif if the fiber permits wet blocking.
- Pin the central point first.
- Align the two side points evenly.
- Shape the two small lower lobes.
- Straighten or curve the stem.
- Let the leaf dry completely.
- Store or attach it only after it has dried.
For washing, follow the care instructions printed on the yarn label. When giving the leaf as part of a gift, include a note describing the fiber and recommended care.
Quick Printable-Style Summary
Skill level: Easy advanced beginner
Finished size: Approximately 4½ inches wide and tall with DK yarn
Yarn: 20–25 yards of DK-weight cotton or cotton blend
Hook: 3.5 mm
Starting method: Magic ring
Round 1: 10 hdc
Round 2: Increase in every stitch for 20 sc
Round 3: Create chain spaces of 5, 7, 9, 7, and 5 chains
Small lobes: sc, hdc, dc, tr, two-chain picot, tr, dc, hdc, sc
Side lobes: sc, hdc, dc, tr, dtr, three-chain picot, dtr, tr, dc, hdc, sc
Center lobe: sc, hdc, dc, tr, dtr, trtr, three-chain picot, trtr, dtr, tr, dc, hdc, sc
Valleys: Slip stitch into the anchor sc after every lobe
Stem: Chain 9 and slip stitch back along 8 chains
Finishing: Weave in ends and lightly block the five points
Frequently Asked Questions
Is this crochet maple leaf pattern suitable for complete beginners?
It is best for an advanced beginner who already knows how to chain, single crochet, half double crochet, and double crochet.
The tall stitches are explained, and they are worked into open chain spaces rather than difficult-to-find individual stitches. A complete beginner may wish to practice treble and double treble crochet on a small swatch first.
Why is my crochet maple leaf curling?
Temporary curling can result from the number of stitches worked into each chain space. It may also happen when the chain arches or tall stitches are too tight.
Relax the tension, distribute the stitches along each space, and block the completed leaf. If the center forms a deep cup before the lobes are added, remake the center with a larger hook.
Can I make the leaf without a magic ring?
Yes. Chain 4 and join the first chain with a slip stitch to form a small ring. Work the 10 half double crochet stitches into that ring.
The opening may remain slightly more visible than it would with an adjustable magic ring.
What yarn works best for a crochet maple leaf?
Smooth DK cotton is particularly effective because it creates clean points and makes the stitch structure easy to see.
Fingering yarn works for tiny appliqués, while worsted yarn produces larger decorations. Match the hook to the yarn and adjust it slightly if the fabric is too loose or too stiff.
Can I use this pattern to make a coaster?
Worsted cotton with a 4–4.5 mm hook can produce a coaster-sized leaf.
Because the shape has pointed edges and small openings, it may not support every cup as evenly as a solid round coaster. Test the finished size and stability before regular use.
How do I make the picots look sharper?
Use controlled chain tension and insert the hook into the first chain rather than into the lobe stitch below it.
During blocking, place one pin immediately beyond each picot and pull only until the point becomes defined.
How many leaves do I need for a garland?
The number depends on the garland length and spacing.
For a small mantel garland, begin with 8–12 leaves. Block all the leaves before deciding on the final spacing because blocking can increase their width.
Conclusion
This crochet maple leaf pattern turns a simple center circle and five chain spaces into a detailed autumn motif. The graduated arches make the leaf’s structure easy to understand: the small spaces form the lower lobes, the medium spaces create the side lobes, and the longest space supports the dramatic central point.
Make one leaf to practice the stitch sequence, then try several in rust, mustard, burgundy, olive, and brown. Once the lobes are blocked, the motifs can be used individually or combined into garlands, wreaths, table decorations, gift embellishments, and seasonal appliqués.
Save the tutorial with your autumn crochet ideas so you can return to the stitch sequence when you are ready to make a complete set.





