A lace shrug can look like a complicated garment, but its construction can be surprisingly simple. Instead of shaping separate fronts, a back, sleeve caps, and a neckline, this tutorial begins with one flat rectangle. Once the rectangle reaches the correct measurements, you fold it, sew two short seams, and finish the openings with simple crochet bands.
The result is a lightweight layer that works over a camisole, summer dress, fitted shirt, or sleeveless evening outfit.
This original crochet lace shrug pattern uses a repetitive V-stitch. After the first row, every body row is worked in exactly the same way. That makes the project suitable for a confident beginner who already knows how to chain and make a double crochet.
The open stitches give the fabric a lace-like appearance without requiring complicated motifs. You will also learn how to measure the rectangle, keep both edges straight, form the armholes, add cuffs, and create a neat band around the body opening.
What You’ll Learn
- How to choose a shrug size using finished measurements
- How to crochet a loose foundation chain
- How to make and recognize a crochet V-stitch
- How to maintain the same number of lace repeats
- How to crochet a large rectangle without sloping edges
- How to block openwork crochet
- How to fold and seam a rectangle into a shrug
- How to add cuffs directly around the armholes
- How to add a simple collar and front band
- How to customize the length, width, and sleeve finish
Skill Level
Confident beginner
You should be comfortable making chains, double crochet stitches, single crochet stitches, half double crochet stitches, and slip stitches.
Finished Sizes
Measurements below refer to the blocked rectangle before it is folded.
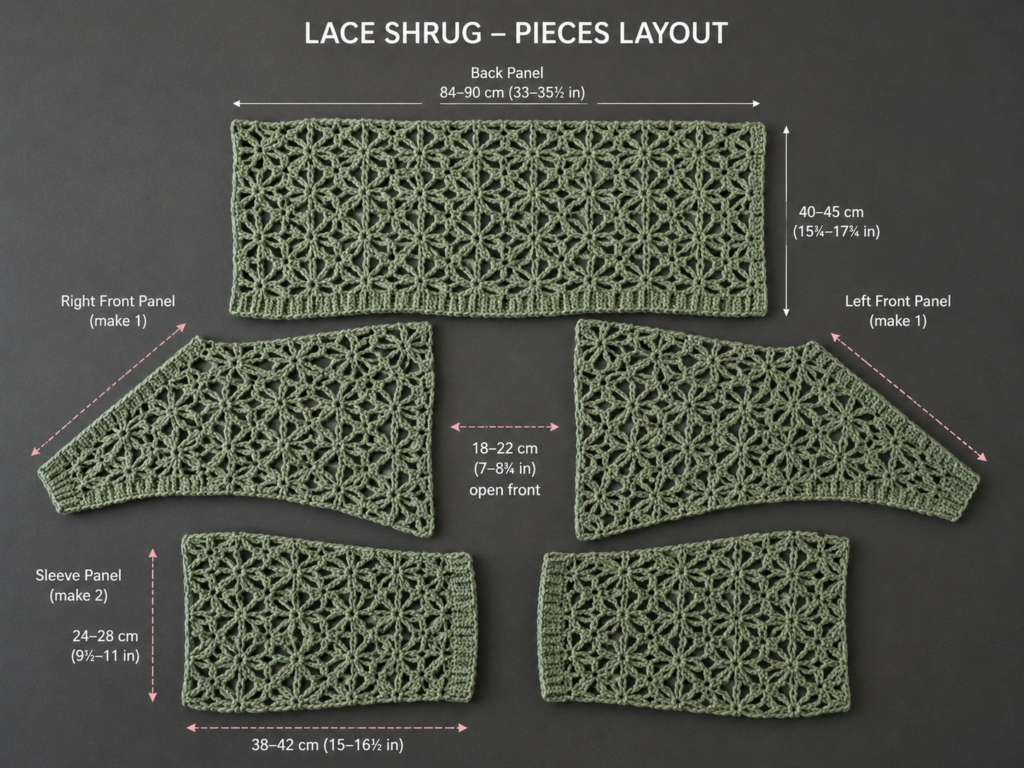
S/M
- Rectangle width: approximately 34 inches
- Rectangle height: approximately 24 inches
- Suggested armhole opening: 7–7.5 inches
L/XL
- Rectangle width: approximately 38 inches
- Rectangle height: approximately 27 inches
- Suggested armhole opening: 8–8.5 inches
2XL/3XL
- Rectangle width: approximately 42 inches
- Rectangle height: approximately 30 inches
- Suggested armhole opening: 9–9.5 inches
This is a relaxed garment with substantial ease. Compare the rectangle measurements with a loose shrug or cocoon cardigan that already fits you well before committing to a size.
Materials You’ll Need
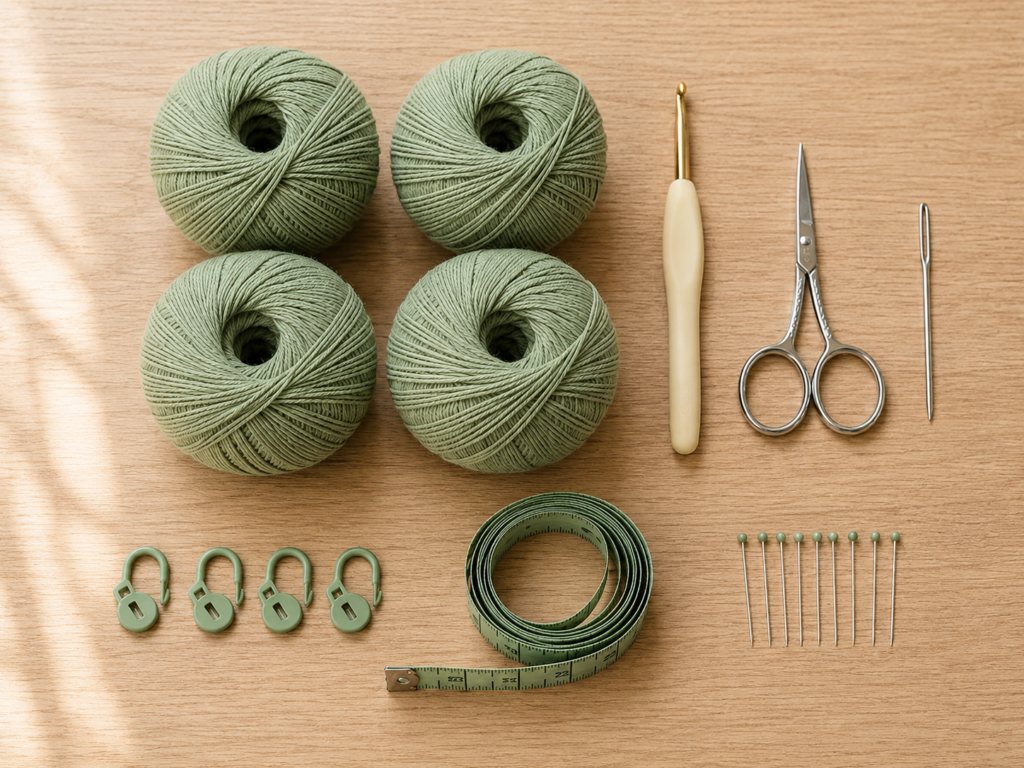
- Sport-weight or light DK cotton-blend yarn
- Approximately 900–1,100 yards for S/M
- Approximately 1,100–1,350 yards for L/XL
- Approximately 1,350–1,600 yards for 2XL/3XL
- 3.75 mm crochet hook
- Scissors
- Blunt tapestry needle
- Four or more locking stitch markers
- Flexible measuring tape
- Blocking mats or a clean padded surface
- Rustproof blocking pins
- Optional row counter
Cotton-bamboo, cotton-acrylic, and smooth mercerized cotton yarns are good options because they help the lace hang cleanly. Avoid an extremely stiff cotton or a fuzzy yarn that hides the openings.
The millimeter measurement is the most reliable way to identify a hook because letter and number sizing can vary among manufacturers. Always adjust the hook after checking your blocked gauge.
Crochet Abbreviations Used
- BLO = back loop only
- ch = chain
- dc = double crochet
- hdc = half double crochet
- rep = repeat
- sc = single crochet
- sk = skip
- sl st = slip stitch
- sp = space
- st/sts = stitch/stitches
- V-st = V-stitch:
(dc, ch 1, dc)worked in the same stitch or space
This tutorial uses US crochet terms. A US single crochet is called a double crochet in UK terminology, while a US double crochet is called a treble crochet in UK terminology.
Gauge
After light blocking:
- Four V-stitches measure approximately 4 inches
- Seven rows measure approximately 4 inches
Gauge is more important for the fabric’s drape than for achieving an exact fitted measurement. Your lace should open easily without becoming loose and stringy.
Make a swatch that contains at least six V-stitches and eight rows. Block it using the same method you intend to use for the finished shrug.
A smaller swatch may not reveal the true drape of the yarn.
Before You Start
Count V-stitches, not individual double crochets
Each V-stitch contains two double crochets separated by one chain. Counting every double crochet quickly becomes confusing. Instead, count the chain-one openings along the row.
Each row should have the same number of V-stitches.
Keep the foundation chain loose
The foundation edge must stretch as easily as the final row. A tight chain will pull the first edge inward and may prevent the blocked rectangle from becoming square.
Crochet the chain with relaxed hands. You may also use a hook 0.5 mm larger for the foundation chain and return to the main hook for Row 1.
Mark the edge stitches
The body has one plain double crochet at each edge. Place a marker in both edge stitches for the first several rows. Missing the final double crochet is the most common reason a rectangle begins narrowing.
Measure after the fabric relaxes
Open lace often becomes wider and longer after blocking. Base your final sizing decision on a blocked swatch rather than the unblocked fabric.
Choose a yarn with memory and drape
The yarn should hold visible stitch shapes while still falling softly. A stiff yarn can make the shrug stand away from the body. An excessively slippery yarn may cause the armholes and collar to stretch.
Step-by-Step Crochet Tutorial
Step 1: Choose Your Size and Prepare a Gauge Swatch
Select the size according to the finished rectangle measurements rather than your usual store-bought clothing size.
To test the stitch, chain 32.
Work the first lace row and repeat row described in Steps 3 and 4. Continue until your swatch contains at least eight rows. Fasten off, soak or spray the swatch, and pin it without overstretching.
When dry, measure four V-stitches across and seven rows vertically.
If four V-stitches measure more than 4 inches, try a smaller hook. If they measure less than 4 inches and the fabric feels dense, try a larger hook.
Beginner tip:
Write down the hook size and blocked gauge. Do not rely on memory after starting the full rectangle.
Common mistake to avoid:
Do not measure while the swatch is still pinned or damp. Wait until it is completely dry and released from the pins.
Step 2: Make the Foundation Chain
Using the main hook or a hook 0.5 mm larger, chain:
- S/M: 144 chains
- L/XL: 160 chains
- 2XL/3XL: 176 chains
All starting counts are multiples of four.
Place a stitch marker every 20 chains as you work. The markers divide the chain into manageable sections and make recounting much faster.
Once you reach the correct count, lay the chain on the table and check that it is not twisted.
Beginner tip:
Count the chains from the hook toward the beginning knot. The loop currently on the hook is not counted as a chain.
Common mistake to avoid:
Do not pull the working yarn tightly after every chain. The chain should remain flexible and easy to see.
Step 3: Crochet the First Lace Row
The first row establishes the V-stitch pattern and the plain double crochet stitches at both edges.
Row 1:
- Make one double crochet in the sixth chain from the hook.
- Chain 1.
- Make another double crochet in the same chain. This forms the first V-stitch.
- Skip the next three chains.
- Work
(dc, ch 1, dc)in the following chain. - Repeat Steps 4–5 until two chains remain.
- Skip the next chain.
- Make one double crochet in the final chain.
- Turn.
You should now have one plain double crochet at each side and an uninterrupted row of V-stitches between them.
The unused chains at the beginning create the first edge double crochet and spacing needed for the pattern.
Beginner tip:
Place a marker in the first and last plain double crochet. These are the edge stitches you must preserve in every row.
Common mistake to avoid:
Do not place the next V-stitch immediately after the previous one. Three foundation chains must be skipped between V-stitches.
Step 4: Establish the Repeating Lace Row
After Row 1, the body is made by repeating one row.
Row 2:
- Chain 3 and turn. The chain 3 counts as the first edge double crochet.
- Work one V-stitch in the chain-one space at the center of every V-stitch across.
- Make one double crochet in the top of the beginning chain from the previous row.
- Turn.
Repeat Row 2 for the remainder of the body.
Always insert the hook into the open chain-one space between the two double crochets. Do not work the new V-stitch into either double crochet leg.
After several rows, the V-stitches should form tidy vertical columns.
Beginner tip:
Pause after every row and count the chain-one spaces. If the number changes, correct the row before continuing.
Common mistake to avoid:
The final double crochet belongs in the top chain of the turning chain. Missing it removes one edge stitch and makes the rectangle slope inward.
Step 5: Continue Until the Rectangle Reaches the Required Height
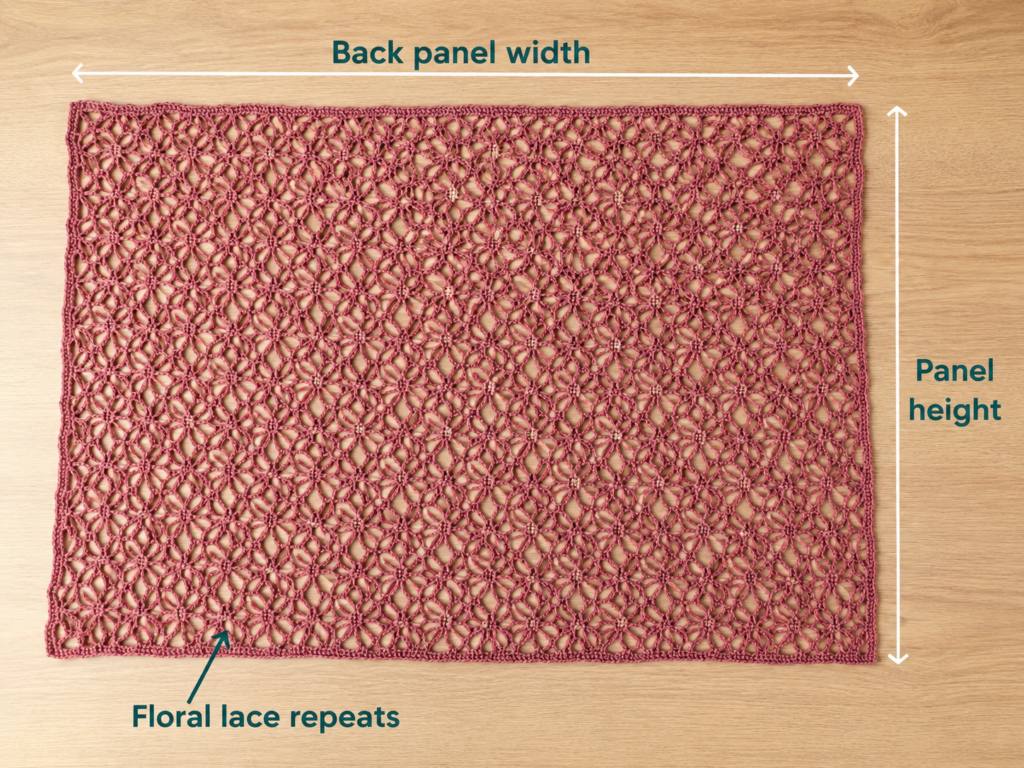
Continue repeating Row 2 until the rectangle measures:
- S/M: 24 inches high
- L/XL: 27 inches high
- 2XL/3XL: 30 inches high
Measure the fabric while it rests flat and unstretched.
Check the side edges every six to eight rows. They should remain parallel. If one side begins leaning, count the V-stitches and check that both edge double crochets are present.
The lace may appear slightly gathered before blocking. That is normal as long as the foundation edge is not dramatically shorter than the working edge.
Before fastening off, place the rectangle around your shoulders or compare it with a well-fitting cardigan. Adding rows increases the garment’s body depth and the amount of fabric that falls below the arms.
Beginner tip:
Measure in three places: the left side, center, and right side. Continue until all three measurements are reasonably consistent.
Common mistake to avoid:
Do not add height based only on the row count from your swatch. Small tension changes over a large piece can affect the final measurement.
Step 6: Add the Border and Block the Rectangle
After reaching the correct height, do not begin seaming immediately. First stabilize and block the rectangle.
Simple border
Chain 1 and work one round of single crochet around the rectangle:
- Work one single crochet in each stitch across the top and foundation edges.
- Along the row ends, distribute approximately two single crochets for every double-crochet row.
- Place three single crochets in each corner.
- Join with a slip stitch to the first single crochet.
The border should lie flat. If it ruffles, you added too many stitches. If it pulls inward, add a few more stitches along the row-end edges.
Fasten off and weave in the border ends.
Blocking
Soak the rectangle according to the yarn-label instructions or spray it evenly with water. Press out moisture without wringing.
Place it on blocking mats and gently shape it to the finished measurements. Pin the corners first, followed by the centers of each side. Add more pins until the edges are straight and the lace openings look even.
Allow the rectangle to dry completely.
Blocking is particularly important for this project because it opens the lace and gives you accurate measurements before the armholes are formed.
Beginner tip:
Shape the fabric rather than stretching it aggressively. Overstretching can make the V-stitches thin and unstable.
Common mistake to avoid:
Do not seam the rectangle and then attempt to correct uneven dimensions. Blocking is easier and more accurate while the fabric is still flat.
Step 7: Fold and Seam the Armholes
Once the rectangle is dry, remove the pins.
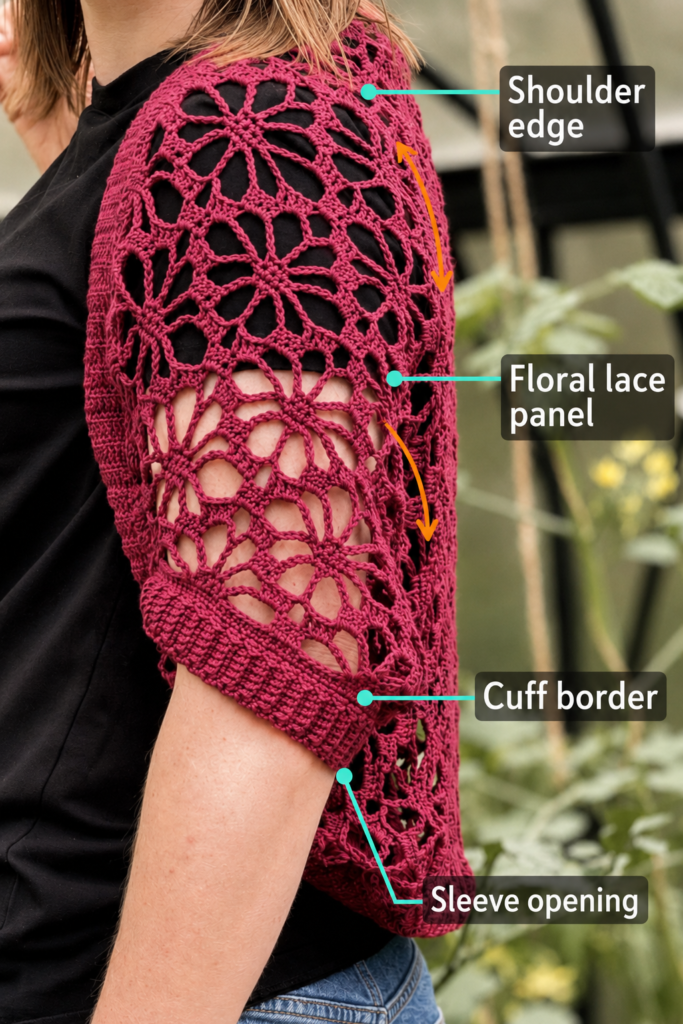
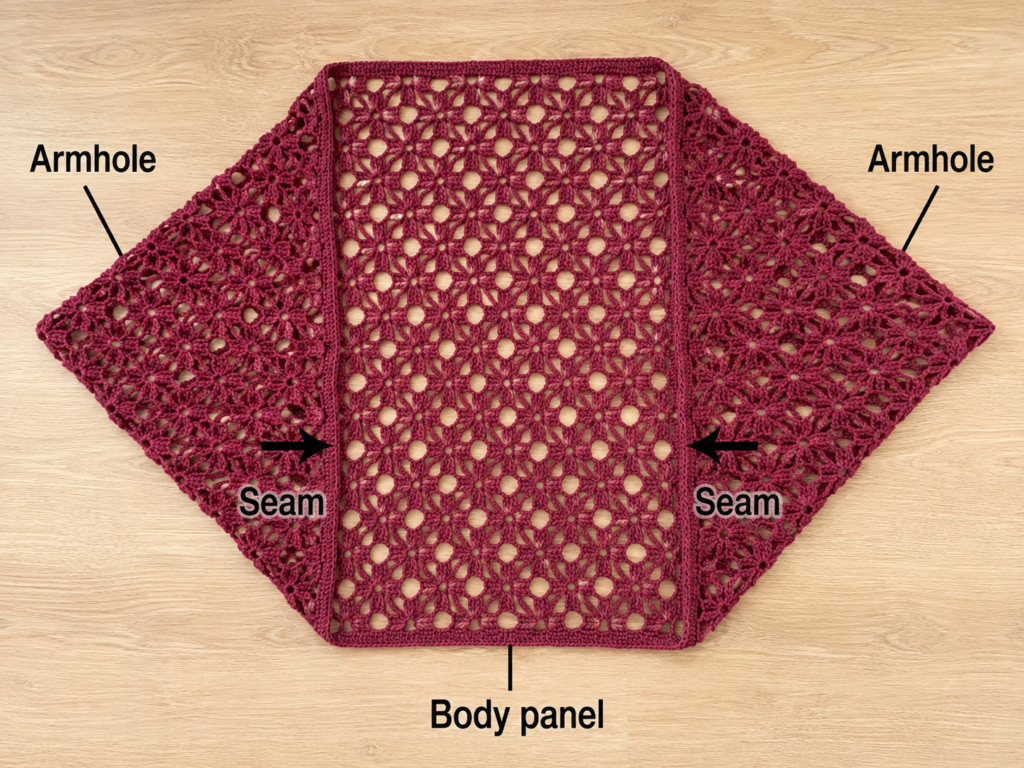
Lay the rectangle horizontally with the wrong side facing upward. Bring the upper long edge down to meet the lower long edge. The rectangle is now folded in half lengthwise.
The fold forms the upper part of the shrug, while the aligned long edges form the large body opening.
At each short side, measure from the fold toward the open edge:
- S/M: 7–7.5 inches
- L/XL: 8–8.5 inches
- 2XL/3XL: 9–9.5 inches
Place a marker at that measurement. The section between the fold and marker remains unseamed and becomes the armhole.
Thread a tapestry needle with matching yarn. Beginning at the open edge, seam the two layers of the short side together until you reach the marker. Repeat on the other side.
Use a whip stitch or mattress-style seam. Keep the seam firm but flexible.
Turn the shrug right side out and try it on before securing the seam ends permanently. Move the marker to enlarge or reduce the armhole as needed.
Beginner tip:
Make both seams the same measured length rather than relying on the same number of lace openings. The two sides may have minor stitch-distribution differences.
Common mistake to avoid:
Do not sew all the way to the fold. The unseamed section beside the fold is the armhole.
Step 8: Crochet the Armhole Cuffs
The cuffs stabilize the armholes and give the shrug a polished finish.
Join yarn at the bottom of one armhole, close to the underarm seam.
Cuff Round 1
Chain 1. Work single crochet stitches evenly around the complete armhole.
As a starting point, place:
- One single crochet in each clear border stitch
- One or two single crochets around wider row-end spaces
Join with a slip stitch.
Check the opening before continuing. The round should lie flat without tightening the armhole.
Cuff Round 2
Chain 2. Work one half double crochet in the back loop only of every stitch around. Join with a slip stitch.
Cuff Rounds 3–4
Repeat Round 2.
Fasten off and repeat around the second armhole.
For a deeper cuff, continue repeating the back-loop round. For a softer edge, work regular half double crochet through both loops.
Beginner tip:
Count the stitches in the first cuff and use the same number for the second cuff.
Common mistake to avoid:
Picking up too few stitches makes the armhole feel tight. Picking up too many causes the cuff to flare. Remove the first round and redistribute the stitches when necessary.
Step 9: Add the Front and Collar Band
The large opening around the body can be left with only the single crochet border, but a deeper band gives the shrug more structure.
Join yarn near one lower side seam.
Band Round 1
Chain 1 and work single crochet evenly around the complete body opening. Join with a slip stitch.
The stitches should be distributed smoothly around the foundation edge, final row, and row-end sections.
Band Round 2
Chain 2. Work one half double crochet in the back loop only of each stitch around. Join.
Band Rounds 3–5
Repeat Round 2.
Try the shrug on after each round. Stop when the band has the depth and drape you prefer.
For a modest collar, work three rounds. For a more visible shawl-style band, work five to eight rounds.
If the lower front edge begins rippling, reduce a few stitches evenly in the following round. If the collar pulls inward, add a few evenly distributed increases.
Beginner tip:
Lay the shrug flat after every round. A band that looks slightly uneven while held in your hands may relax correctly on a flat surface.
Common mistake to avoid:
Do not work two stitches into every row end automatically. The correct pickup rate depends on your row height and tension.
Step 10: Finish and Inspect the Shrug
Fasten off and weave every yarn end through several stitches on the wrong side. Change direction at least once before trimming the yarn.
Check:
- Both cuffs are the same depth
- Both armholes feel equally comfortable
- The side seams finish at the same height
- The front band lies flat
- No yarn tails remain visible through the lace
- The V-stitch columns run evenly across the back
Lightly steam or damp-block the cuffs and band if they need smoothing. Do not press an iron directly onto the yarn.
Try the shrug over the type of top or dress you expect to wear with it. Lace garments can fit differently over a sleeveless top than over a thick shirt.
Pattern Notes and Stitch Notes
Turning chain
The beginning chain 3 counts as the first double crochet in every repeated body row.
Place a marker in its top chain when necessary. This makes the final stitch easier to identify on the next row.
Stitch count
Every body row contains:
- One edge double crochet at the beginning
- The same number of V-stitches as the previous row
- One edge double crochet at the end
Count the chain-one spaces to check the repeat.
Repeat pattern
After the setup row, repeat Row 2 until the rectangle reaches the required height.
Right side and wrong side
The V-stitch fabric is nearly reversible. Choose the side with the tidiest edge stitches as the right side before seaming.
Size adjustments
To change the rectangle width, add or remove foundation chains in multiples of four.
To change the rectangle height, work more or fewer repeated rows.
To deepen the body without making it wider, add rows only.
To increase wrist-to-wrist coverage, increase the foundation-chain length.
Armhole adjustment
The recommended armhole measurements are starting points. Before permanently securing the seams, try on the folded rectangle and move the markers until the opening is comfortable.
Common Beginner Mistakes
1. The rectangle becomes narrower
Cause: The final edge double crochet was missed.
Fix: Mark the top of every turning chain and count the V-stitches after each row.
2. The foundation edge pulls inward
Cause: The starting chain was made too tightly.
Fix: Remake the chain with looser tension or use a hook 0.5–1 mm larger for the chain only.
3. The V-stitch columns lean
Cause: Some V-stitches were worked into a double crochet instead of the chain-one space.
Fix: Insert the hook through the visible opening at the center of each V.
4. The lace looks small and crowded
Cause: The piece has not been blocked, or the hook is too small.
Fix: Block the gauge swatch before judging the fabric. Increase the hook size when the blocked swatch remains dense.
5. One armhole is smaller
Cause: The side seams were made to different lengths.
Fix: Measure both seams from the open edge before securing them.
6. The cuff flares
Cause: Too many stitches were picked up around the armhole.
Fix: Remove the first cuff round and reduce the pickup count evenly.
7. The cuff feels restrictive
Cause: Too few stitches were picked up or the joining slip stitches were made too tightly.
Fix: Add more stitches around the armhole and keep the joins relaxed.
8. The front band ripples
Cause: The pickup rate is too high.
Fix: Reduce a few stitches evenly around the next round or remake the first band round with fewer stitches.
How to Customize This Crochet Project
Change the yarn
For a warm-weather shrug, use cotton-bamboo, cotton-linen, or a smooth cotton blend.
For a transitional autumn shrug, choose a light wool blend or acrylic with good drape.
Avoid substituting yarn based only on its weight-category number. Yarns in the same category can behave differently in softness, elasticity, and drape, so a blocked gauge swatch remains necessary.
Use two colors
Crochet the body in one color and use a contrast color for the cuffs and front band.
Other options include:
- One contrast stripe every eight rows
- A gradient body with a solid border
- Neutral body with metallic edging
- Tonal stripes using two nearby shades
Make longer sleeves
The basic construction creates short or elbow-adjacent sleeves depending on the rectangle width.
For longer sleeves:
- Complete the standard cuff pickup round.
- Work half double crochet rounds without increasing.
- Try the shrug on regularly.
- Decrease two stitches near the underarm every few rounds when a tapered sleeve is preferred.
- Finish with several back-loop-only rounds.
Make the shrug longer
Add more body rows before blocking. Each added row increases the rectangle height and creates more fabric below the armholes.
Remember that a deeper rectangle also creates a larger folded body opening.
Make it less open
Replace each V-stitch with three double crochets worked in the same chain-one space. This produces a denser shell-like texture.
You may also use light DK yarn with a slightly smaller hook, but test the drape before starting the full rectangle.
Add a decorative edge
Finish the final band round with:
- Reverse single crochet
- Small picots
- A simple shell edging
- Alternating single crochet and chain-three loops
Keep the decorative edge restrained so it does not compete with the main lace fabric.
Gift and styling ideas
A lace shrug can be made as:
- A bridal or bridesmaid cover-up
- A lightweight summer layer
- A handmade birthday gift
- A modest shoulder covering for a sleeveless dress
- A transitional layer for early fall
- A coordinated accessory in wedding or event colors
Finishing Instructions
Weave in all ends on the wrong side. Because the fabric is open, weave each end through several solid stitches rather than across chain spaces.
Wash the shrug according to the yarn label. Support the garment fully when lifting it from the water because wet lace can stretch.
Lay it flat to dry. Reshape the collar, cuffs, and lower edge while damp.
Avoid hanging the shrug for long-term storage. The weight of the fabric may stretch the neckline and shoulders. Fold it loosely and store it flat.
Quick Printable-Style Summary
Skill level: Confident beginner
Construction: One lace rectangle, folded and seamed
Yarn: Sport-weight or light DK cotton-blend yarn
Hook: 3.75 mm or size needed for gauge
Starting chains:
- S/M: 144
- L/XL: 160
- 2XL/3XL: 176
V-stitch: (dc, ch 1, dc) in the same stitch or space
Body repeat: Work one V-stitch in every chain-one space, with one edge double crochet at each side.
Rectangle height:
- S/M: 24 inches
- L/XL: 27 inches
- 2XL/3XL: 30 inches
Assembly: Fold lengthwise and seam each short side, leaving an opening near the fold for each armhole.
Finishing: Add back-loop half double crochet cuffs and a matching band around the body opening.
FAQ
Is this crochet lace shrug pattern suitable for a complete beginner?
It is best for a confident beginner. The body repeat is simple, but the project requires a long foundation chain, consistent stitch counting, garment measurement, seaming, and stitches picked up around openings.
Practice the V-stitch on a small swatch before beginning the full rectangle.
What yarn is best for a crochet lace shrug?
A smooth sport-weight or light DK yarn with good drape is the safest choice. Cotton-bamboo and cotton-acrylic blends create visible lace while remaining softer than many firm cotton yarns.
A fuzzy yarn can obscure the stitch pattern, while a heavy yarn may make the finished shrug sag.
Can I make the shrug with worsted-weight yarn?
Yes, but you will need fewer foundation chains and fewer rows. Do not use the provided chain counts with a substantially thicker yarn.
Make a blocked swatch, calculate how many four-chain repeats are needed for your desired rectangle width, and work to the finished measurements.
How do I make the shrug larger?
Increase the foundation chain in multiples of four to create more width. Add repeated rows to create more height and body depth.
Compare your planned dimensions with a garment that fits you. Standard body measurements and garment schematics can also help you choose appropriate finished dimensions.
Why is my lace shrug curling?
Minor curling before blocking is normal. Severe curling usually indicates:
- A foundation chain that is too tight
- Uneven edge-stitch placement
- A border with too few stitches
- Excessively tight tension
Block the swatch first. When the foundation edge still pulls inward after blocking, remake it with a larger hook.
Do I have to block the shrug?
Blocking is strongly recommended. It opens the V-stitches, evens the rectangle, reveals the true finished measurements, and makes the folding and seaming stages more accurate.
At minimum, lightly wet the rectangle and shape it flat before assembly.
Can I add full-length sleeves?
Yes. After completing the basic armhole round, continue crocheting around the arm in half double crochet or another compatible stitch.
Decrease gradually near the underarm to taper the sleeve. Finish with a ribbed cuff after reaching the desired length.
Conclusion
This crochet lace shrug is built from the simplest possible garment shape: one rectangle. The repeating V-stitch provides an airy lace effect, while the cuffs and front band give the finished piece enough structure for regular wear.
Take time with the blocked measurements and temporary armhole markers. Those two stages have a greater effect on the fit than working quickly through the seam.
Save the tutorial with your yarn notes and blocked gauge so you can make future versions in different colors, sleeve lengths, and border styles.





