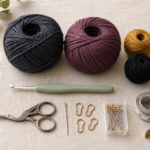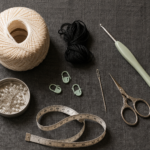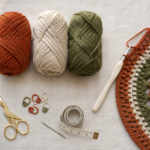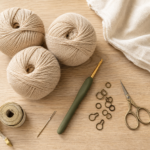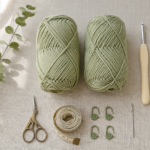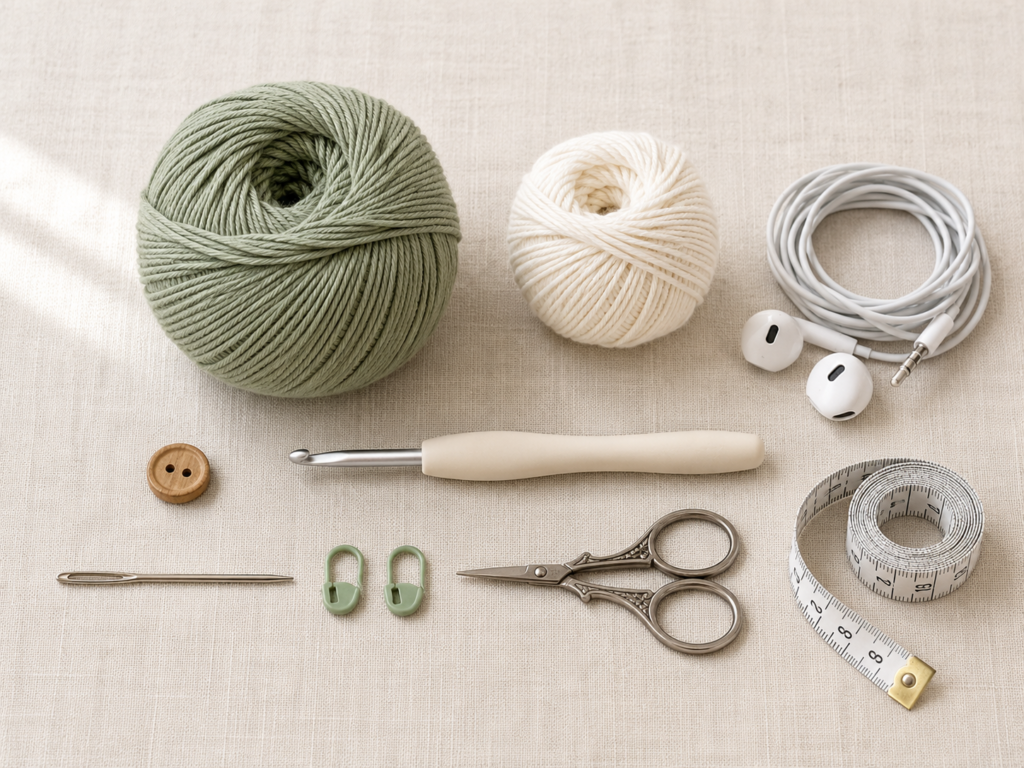
Earbuds have a habit of becoming tangled at the bottom of a bag exactly when you need them. This small crochet headphone case gives them a dedicated home while also making an excellent beginner crochet project.
Instead of complicated shaping, zippers, lining, or advanced stitches, this version is built from two simple single-crochet circles. You crochet the circles, add a button-and-loop closure, stack them together, and join most of the edge while leaving an opening at the top.
The result is a compact crochet pouch that works especially well for coiled wired earbuds and many small wireless-earbud charging cases. Because every brand of headphones is slightly different, I’ll also show you how to adjust the diameter before assembly.
This is a useful project for practicing increases, working in the round, stitch counting, joining two crochet pieces, and finishing neatly—all without committing to a large project.
What You’ll Learn
- How to start a flat crochet circle with a magic ring
- How to make evenly spaced single crochet increases
- How to tell whether a crochet circle is staying flat
- How to make two panels exactly the same size
- How to add a simple crochet button loop
- How to join two pieces using single crochet
- How to leave a functional opening for your headphones
- How to adjust the case for different headphone sizes
- How to weave in ends securely on a small accessory
Materials You’ll Need
For one headphone case:
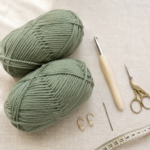
- Approximately 25–35 g DK/light-worsted cotton or cotton-blend yarn in sage green
- Approximately 5–10 g contrasting DK cotton yarn in warm cream
- 3.5 mm crochet hook
- One button measuring about 15–18 mm
- Tapestry needle
- Scissors
- Stitch marker
- Measuring tape
- Your headphones or earbud charging case for sizing
Cotton is particularly useful for this project because it produces a defined, relatively firm fabric. Acrylic can also work, but very stretchy yarn may produce a looser case.
The Craft Yarn Council classifies DK yarn in the light-weight family and emphasizes that published hook ranges are guidelines rather than rigid rules. For this project, the smaller 3.5 mm hook is intentional because a headphone case benefits from dense stitches rather than open fabric.
Crochet Abbreviations Used
This tutorial uses US crochet terminology.
- ch = chain
- sc = single crochet
- inc = increase; work 2 sc into the same stitch
- sl st = slip stitch
- st/sts = stitch/stitches
- rep = repeat
- MR = magic ring
These abbreviations follow commonly used US crochet terminology. The Craft Yarn Council also notes an important US/UK difference: US single crochet corresponds to UK double crochet.
Before You Start
Gauge and tension
Exact gauge is not as critical here as it would be for a sweater, but your fabric should be dense enough that earbud wires cannot easily poke between stitches.
A useful target is approximately:
18–20 sc = 4 in / 10 cm
If your fabric feels loose and floppy, try a 3.25 mm hook. If the circle becomes extremely stiff or your hands feel strained, move to 3.75 mm.
How to count your stitches
This pattern is worked in continuous rounds. Place a stitch marker in the first stitch of every round and move it upward as you work.
Do not count the loop currently sitting on your hook as a stitch.
How to keep the circle flat
A flat single-crochet circle needs regularly distributed increases.
If the circle forms a bowl, you probably have too few stitches or missed an increase.
If the edge begins forming ripples, you probably have too many stitches or made an extra increase.
Choosing colors
A single-color case is easiest. For clearer tutorial photographs, however, this version uses:
- sage green for both main panels
- cream for the closure and joining seam
The contrast makes the assembly stitches easier for beginners to see.
Step-by-Step Crochet Tutorial
Step 1: Make the Center Ring
Using sage-green yarn, make a magic ring.
Work 6 sc into the ring.
Pull the yarn tail gently until the center closes completely.
Place a stitch marker into the first single crochet so you always know where the round begins.
You now have:
Round 1: 6 sts
Beginner tip:
Do not pull the magic ring as tight as possible until all six stitches have been worked. Keeping it slightly open while crocheting makes inserting the hook much easier.
Common mistake to avoid:
Do not accidentally work into the yarn tail instead of around the magic-ring loop. Your stitches should slide along the adjustable ring before you tighten it.
Step 2: Expand the First Few Rounds
You will now increase evenly around the circle.
Continue working in a spiral.
Round 2: Inc in every st around.
12 sts
For Round 3, alternate one normal stitch with one increase.
Round 3: Sc in next st, inc in next st; rep around.
18 sts
Move your stitch marker after finishing each round.
At this point, the center should look like a small flat disk.
Beginner tip:
After each increase, look at the top edge. An increase creates two separate V-shaped stitch tops coming from one stitch below. Learning to recognize that shape makes counting much easier.
Common mistake to avoid:
Do not assume you completed a round just because you have reached the marker. Count your stitches before beginning the next round.
Step 3: Continue Increasing the Circle
Continue the standard increase rhythm by placing one additional regular single crochet between increases on every new round.
Round 4: Sc in next 2 sts, inc in next st; rep around.
24 sts
Round 5: Sc in next 3 sts, inc in next st; rep around.
30 sts
Round 6: Sc in next 4 sts, inc in next st; rep around.
36 sts
Round 7: Sc in next 5 sts, inc in next st; rep around.
42 sts
Stop briefly and lay the circle on the table.
It should sit flat without needing to be stretched.
Beginner tip:
Think of each new round as adding one normal single crochet before the next increase:
- Round 3: 1 sc, increase
- Round 4: 2 sc, increase
- Round 5: 3 sc, increase
That makes the sequence easier to remember than memorizing every round independently.
Common mistake to avoid:
If your circle becomes wavy, check the previous round before continuing. Fixing an extra increase now is much easier than correcting several rounds later.
Step 4: Finish the First Circle
Continue:
Round 8: Sc in next 6 sts, inc in next st; rep around.
48 sts
Round 9: Sc in next 7 sts, inc in next st; rep around.
54 sts
Round 10: Sc in next 8 sts, inc in next st; rep around.
60 sts
After the final stitch, sl st into the next stitch to soften the end of the spiral.
Fasten off, leaving a tail approximately 6 in / 15 cm long.
Your finished circle should measure roughly 4–4.25 in / 10–11 cm.
Before going farther, place your coiled headphones or charging case over the circle.
You want approximately 0.25–0.5 in / 0.5–1.25 cm of crochet visible beyond the item on most sides.
Need a larger case?
Add another round:
Sc in next 9 sts, inc; rep around.
Continue following the same increase principle until the circle is large enough.
Step 5: Crochet the Second Circle
Make a second circle following Steps 1–4 exactly.
The second piece should have the same number of rounds and stitches as the first.
Lay the two circles directly on top of each other.
If one is noticeably larger, check your stitch counts first. If the counts match, your tension changed while crocheting.
A small variation can usually be corrected with gentle blocking, but a large difference is better corrected before assembly.
Beginner tip:
Use the same hook for both pieces and, if possible, make the second circle during the same crochet session. That helps keep your tension consistent.
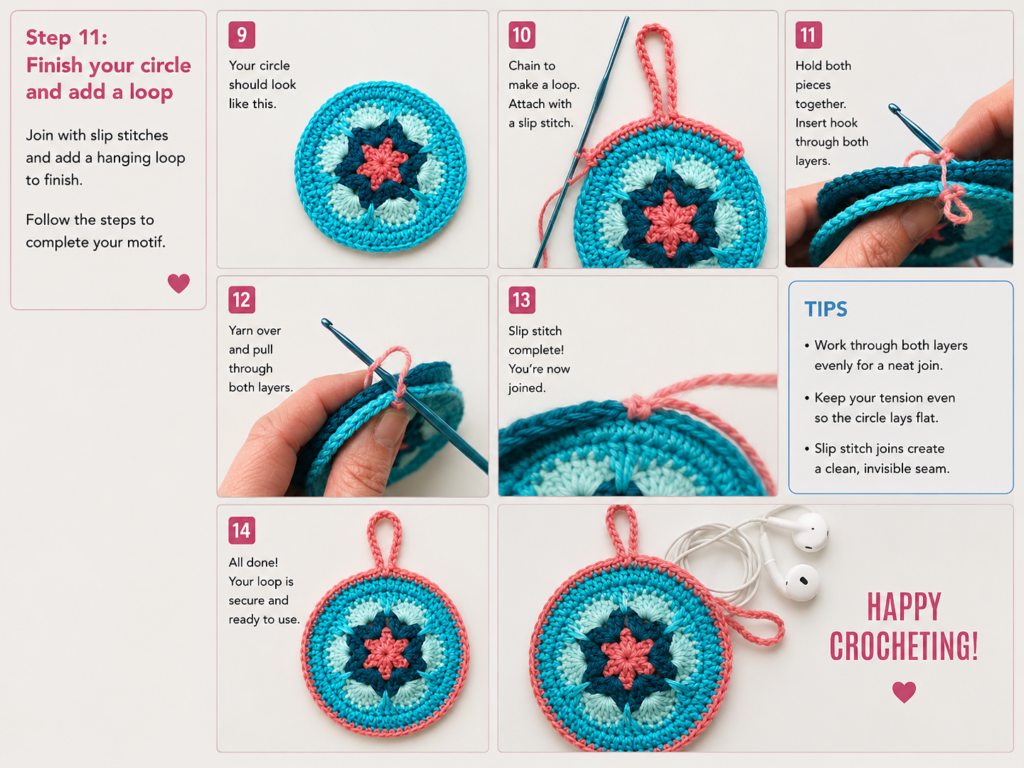
Step 6: Add the Button and Crochet Closure Loop
Choose one circle as the back panel.
Sew the button approximately 0.75–1 in / 2–2.5 cm below the top edge. Secure it firmly, but do not pull so tightly that the crochet fabric puckers.
Take the other circle, which will become the front panel.
Join cream yarn near the center of its top edge.
Chain approximately 16–20 chains, depending on your button size.
Without twisting the chain, slip stitch back into the same attachment point to form a loop.
Fasten off temporarily and test the closure.
The loop should slide over the button easily but should not hang loosely once buttoned.
Beginner tip:
Test the loop before weaving in the yarn tails. Adding or removing two chains takes only a moment now.
Common mistake to avoid:
Do not make the loop extremely tight. Cotton has limited stretch, and a tiny loop becomes frustrating to fasten.
Step 7: Stack and Align the Panels
Place the two circles together with their wrong sides facing inward and their nicer sides facing outward.
Align:
- the center points
- the final-round stitches
- the top opening
- the closure loop
- the button
Use two stitch markers to mark the edges of the opening.
For a 60-stitch circle, leaving approximately 14–16 stitches unjoined across the upper edge usually creates a practical opening.
Place your headphones between the panels before joining anything permanently.
Make sure they can enter and leave the pouch comfortably.
Step 8: Crochet the Panels Together
Join the cream yarn at one stitch marker.
Insert your hook through the corresponding stitch on both circles.
Work one sc through both layers.
Continue around the side and bottom of the case, working one sc through each matching pair of stitches.
Stop when you reach the second stitch marker.
Leave the section between the markers open.
You should now have a neat contrasting seam wrapping around most of the circumference while the upper portion remains accessible.
Beginner tip:
Count a few stitches on both panels before you begin joining. If one edge appears to advance faster than the other, stop and realign them rather than forcing the pieces together.
Common mistake to avoid:
Make sure the hook passes through both pieces every time. Accidentally catching only the front panel creates an unsecured section of seam.
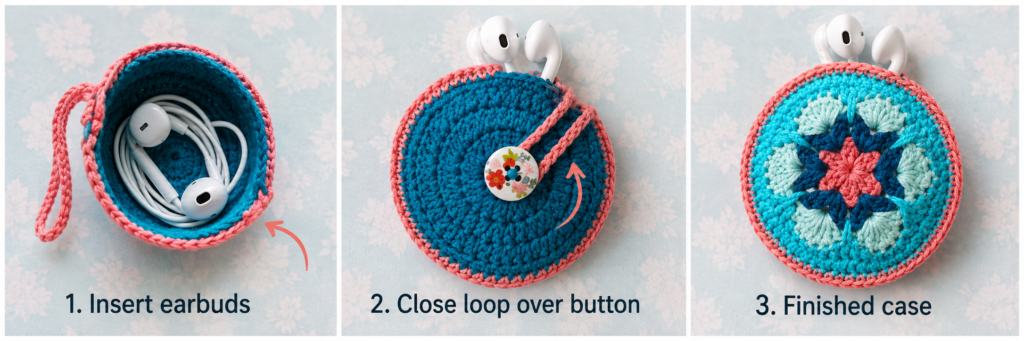
Step 9: Test the Opening and Closure
Before weaving in any remaining tails, put your headphones inside.
Check three things:
- The headphones slide through the opening without excessive stretching.
- They cannot easily fall through the opening when the button is closed.
- The button loop reaches comfortably without pulling the top edge out of shape.
If the opening feels too wide, use cream yarn to add one or two more joining stitches at each side.
If it feels too narrow, carefully undo a few joining stitches.
For a wireless charging case, also check that bulky corners do not push the crochet panels apart.
Step 10: Finish the Edges
Fasten off the joining yarn.
Thread the tail onto your tapestry needle.
Weave the tail horizontally through several cream joining stitches, change direction, and weave through a few more stitches.
Trim only after the yarn feels secure.
Repeat for the magic-ring tails and closure-loop ends.
Your crochet headphone case is now complete.
Pattern Notes and Stitch Notes
Turning chain
There is no turning chain in the two main circles because they are worked continuously in the round.
Stitch counts
The standard version progresses:
- Round 1: 6
- Round 2: 12
- Round 3: 18
- Round 4: 24
- Round 5: 30
- Round 6: 36
- Round 7: 42
- Round 8: 48
- Round 9: 54
- Round 10: 60
Each round adds six stitches.
Repeat rule
Each new increase round places one additional ordinary sc between increases.
Right side / wrong side
With single crochet worked continuously in the round, one face generally looks slightly smoother. Choose whichever face you prefer as the outside, but use the same orientation on both panels.
Size adjustment
For a smaller case, stop after Round 8 or 9.
For a larger case, continue increasing with the same six-increase rhythm.
Always make both panels identical.
Common Beginner Mistakes
1. Losing the beginning of the round
Problem: The stitch count gradually becomes confusing.
Fix: Move your stitch marker into the first stitch immediately after you make it.
2. Adding too many increases
Problem: The circle becomes ruffled.
Fix: Check the pattern repeat and count the total stitches at the end of the round. Frog back to the last correct round if necessary.
3. Missing increases
Problem: The circle curves into a bowl.
Fix: Recount. A steadily cupping disk usually means you have fewer stitches than required.
4. Making the two panels different sizes
Problem: The joining edge puckers.
Fix: Confirm that both circles contain the same number of rounds and stitches before assembly.
5. Making the fabric too loose
Problem: Earbud wires poke through the stitches.
Fix: Move down one hook size or deliberately tighten your tension slightly.
6. Joining the entire circumference
Problem: You finish a beautiful crochet circle—with no way to put your headphones inside.
Fix: Mark the top opening before joining.
7. Making the button loop before choosing a button
Problem: The loop is either too small or much too loose.
Fix: Attach the button first, then crochet and test the loop directly against it.
How to Customize This Crochet Project
Change the yarn
Cotton creates a crisp, durable case.
Cotton-acrylic blends are a little softer.
Wool works, but it may stretch or felt with repeated friction.
Avoid fluffy yarn if you are a beginner because fuzzy fibers hide the stitch tops.
Change the colors
Try:
- terracotta + cream
- dusty rose + oatmeal
- denim blue + ivory
- forest green + mustard
- black + bright neon edging
You can also make each circle a different color.
Change the size
The pattern is easy to adapt because the panels are worked from the center outward.
Stop once each circle is roughly 1–2 cm wider than the item you want to carry.
Add a different border
Instead of a plain contrasting sc seam, advanced beginners can experiment with:
- reverse single crochet/crab stitch
- slip-stitch edging
- tiny picots around the joined lower edge
Avoid bulky borders around the opening because they can make the case difficult to close.
Add texture
Once you understand the basic construction, try making future versions with:
- BLO single crochet accents
- alternating stripes
- small surface-crochet lines
- embroidered stars
- a simple crochet flower sewn to the front
Add a carrying loop
Before fastening off the joining yarn at one side, chain 25–35, then slip stitch back at the attachment point.
That creates a small wrist or bag loop.
For something that will carry significant weight, use a metal clasp rather than relying on a long crochet chain alone.
Gift ideas
A small headphone pouch works well as:
- a back-to-school gift
- stocking filler
- teacher gift
- travel accessory
- handmade gift for teens
- small craft-fair item
- scrap-yarn project
Finishing Instructions
Once the case is assembled, check every yarn tail.
For cotton yarn, weave each tail through several stitches, reverse direction, then weave through a second section. Simply trimming the yarn close to the final knot can allow it to work loose during regular use.
Light blocking is optional.
If the circles look slightly uneven:
- Remove the headphones.
- Lightly dampen the crochet.
- Shape the case with your fingers.
- Lay it flat to dry.
Do not aggressively stretch the opening.
Washing and care
Hand washing is the safest general approach unless your yarn label states otherwise.
Remove headphones and electronics before cleaning the crochet case.
Wash gently in cool or lukewarm water, reshape, and dry completely before returning electronics to the pouch.
Quick Printable-Style Summary
Skill level: Beginner
Finished size: Approximately 10–11 cm / 4–4.25 in across
Yarn: DK cotton or cotton blend
Hook: 3.5 mm
Other materials: Button, tapestry needle, stitch marker, scissors
Stitches: MR, ch, sc, inc, sl st
Starting method: 6 sc in magic ring
Main circle progression:
6 → 12 → 18 → 24 → 30 → 36 → 42 → 48 → 54 → 60 sts
Make: Two identical circles
Closure: Crochet chain loop + button
Assembly: Place panels together and single crochet through both layers around most of the circumference, leaving approximately 14–16 top stitches open.
Finishing: Fasten off, weave in all ends securely, shape lightly if necessary.
FAQ
Can a beginner make this crochet headphone case?
Yes. The project uses primarily single crochet and increases. The main skills to practice are counting rounds and joining two pieces.
Can I use worsted-weight yarn?
Yes. Your case will become larger and thicker. Try approximately a 4–4.5 mm hook for a dense fabric, then stop increasing once the circle fits your headphones instead of relying strictly on the suggested round count.
Can I use this pattern for AirPods or other wireless earbuds?
The pouch can accommodate many small wireless charging cases, but dimensions vary significantly between brands and models. Crochet one circle first and compare it directly with your charging case before making the second panel.
How do I make the headphone case smaller?
Stop the circle earlier. For example, Round 8 has 48 stitches and Round 9 has 54. Make two circles with the same final stitch count.
Why is my crochet circle curling?
Curling usually indicates insufficient increases, very tight tension, or both. Verify the stitch count. If the count is correct but the fabric still cups sharply, try a slightly larger hook.
Why is my circle becoming wavy?
Too many stitches usually create waves or ruffles. Recount the last completed round and check that you made only six increases.
Do I need to block the finished case?
Usually not. Small variations disappear once the case is used. Blocking is useful only when one panel is slightly uneven or the edge needs gentle reshaping.
Conclusion
A crochet headphone case is one of those small projects that teaches several useful techniques without requiring much yarn or time. By making two simple circles, you practice increasing, stitch counting, matching pieces, joining edges, creating an opening, and adding a functional closure in one compact project.
Once you have made the basic sage-and-cream version, the construction is easy to reuse for different sizes, colors, yarn weights, or decorative details.
Keep your first version simple enough to understand the structure. Then the next one can become the colorful one.
Save the pattern for your next scrap-yarn session, or make a second case as a quick handmade gift.