A crochet wall hanging is a satisfying first home-décor project because it does not have to fit a person, hold weight, or match an exact garment gauge. You can focus on making even stitches, recognizing the first and last stitch of each row, and watching a simple shape develop beneath your hook.
This beginner wall hanging starts with only five stitches at the bottom point. You will increase at both edges until the panel becomes a symmetrical triangle. Three back-loop rows create raised cream ridges, while a short straight band at the top gives you a firm edge for mounting the piece to a wooden dowel.
The construction is deliberately simpler than many textured wall-hanging patterns. There are no complicated charts, post stitches, sewn motifs, or long special-stitch repeats. Each shaping row follows the same basic rule: place two stitches in the first stitch, work across, and place two stitches in the final stitch.
The result is a lightweight handmade decoration suitable for a bedroom, dorm room, craft area, nursery, hallway, or small gallery wall.
What You’ll Learn
- How to begin a triangular crochet panel
- How to increase at both ends of a row
- How to identify the first and last stitch
- How to work half double crochet through the back loop
- How to make raised color ridges
- How to maintain a predictable stitch count
- How to create a firm top mounting band
- How to sew crochet fabric to a wooden dowel
- How to add a hanging cord
- How to block the finished wall hanging
Project Details
Skill level: Beginner to advanced beginner
Finished panel size: Approximately 11 inches wide and 9 inches deep
Finished hanging length: Approximately 14–16 inches, depending on the cord and optional tassels
Estimated time: 4–6 hours
Construction: Worked in turned rows from the lower point upward
Terminology: US crochet terms
Materials You’ll Need
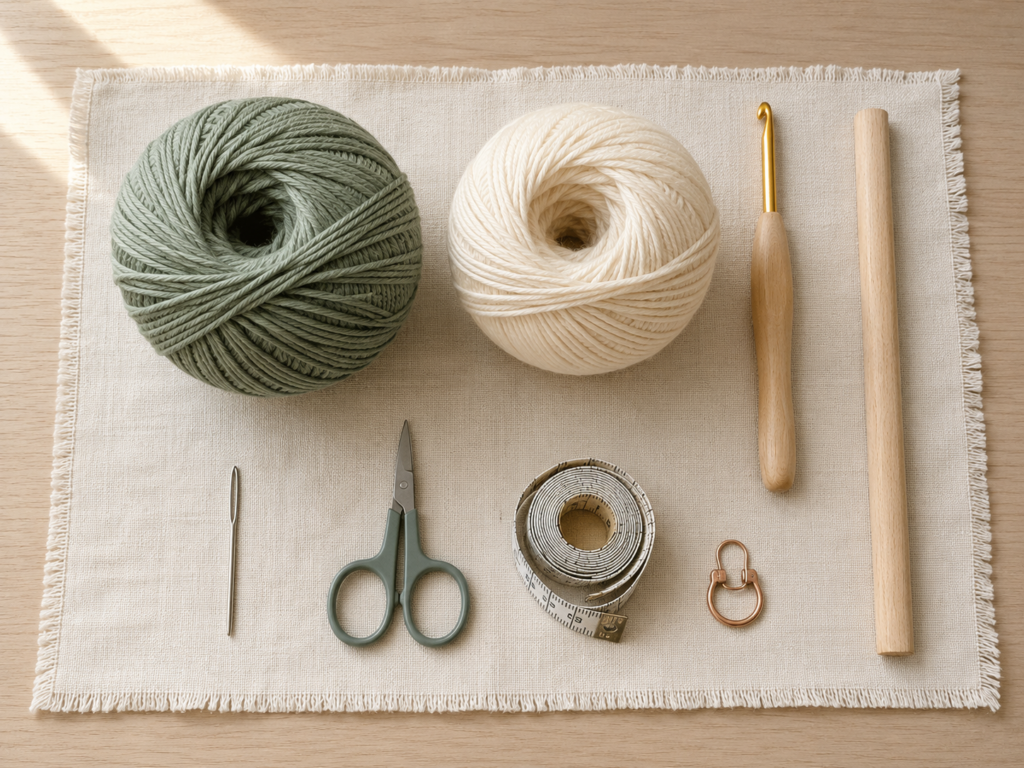
- Approximately 150 yards of medium-weight number 4 yarn in dusty sage, Color A
- Approximately 50–70 yards of medium-weight number 4 yarn in warm cream, Color B
- 5.0 mm crochet hook
- One 14-inch wooden dowel, approximately ⅜–½ inch thick
- Scissors
- Blunt yarn needle
- Measuring tape
- One or two locking stitch markers
- Rustproof blocking pins
- Foam blocking mat or folded towel
- Garment steamer or spray bottle, optional
- Additional yarn for the hanging cord
- Additional cream yarn for optional tassels or fringe
A smooth yarn is easier for a beginner to read than a heavily brushed, eyelash, boucle, or loosely spun yarn. Medium number 4 yarn is commonly described as worsted, afghan, or aran weight. The Craft Yarn Council’s general hook range for this yarn category is approximately 5.5–6.5 mm, but those figures are guidelines rather than fixed rules. This project intentionally uses a slightly smaller 5.0 mm hook to make a stable decorative fabric; switch to 5.5 mm when your stitches feel uncomfortably tight.
Crochet Abbreviations Used
- ch = chain
- hdc = half double crochet
- sc = single crochet
- sl st = slip stitch
- st/sts = stitch/stitches
- rep = repeat
- BLO = back loop only
- inc = increase
- RS = right side
- WS = wrong side
The abbreviations in this tutorial follow common US crochet usage. The Craft Yarn Council maintains a broader standardized abbreviation list and a comparison of US and UK terminology.
Special Techniques
Half Double Crochet
Yarn over, insert the hook into the indicated stitch, yarn over, and pull up a loop. You should have three loops on the hook. Yarn over and pull through all three loops.
Half Double Crochet Increase
Work two half double crochet stitches into the same stitch.
Back Loop Only Half Double Crochet
Look at the top of the next stitch. You will see two strands forming a small V. The strand closest to you is the front loop; the strand farther away is the back loop.
Insert the hook under the back loop only and complete a normal half double crochet. The unused front loop remains visible and forms a horizontal ridge.
Before You Start
Gauge and tension
A practical target is approximately 13 half double crochet stitches and 10 rows per 4 inches after light blocking. Exact gauge is not critical unless you need the panel to fit a dowel of a specific length.
Your widest row should be at least 1½–2 inches shorter than the dowel. That leaves enough exposed wood at both ends for the hanging cord.
When your triangle becomes wider than planned, use a smaller hook or stop the increasing section earlier. When it is too narrow, add more increase rows before beginning the straight top band.
How to count stitches
Do not count the turning chain as a stitch in this pattern.
After turning, identify the first real stitch immediately below the hook. Place a locking marker in that stitch until you become comfortable finding it.
Count the V shapes across the top of the row. Because every shaping row adds one stitch at each end, your count increases by two:
5, 7, 9, 11, 13, and so on.
How to keep the triangle symmetrical
Every increase row must contain:
- Two hdc in the first stitch
- One hdc in each middle stitch
- Two hdc in the last stitch
Missing the final increase causes one side to rise more vertically than the other. Adding an accidental increase in the middle produces a bump.
How to avoid curling
Do not make the foundation chain too tightly. Keep the turning chain relaxed, and avoid tightening BLO rows more firmly than the plain rows.
The finished panel may still look slightly wavy before blocking. That is normal. Blocking allows the stitches and edges to settle into their intended position.
Choosing colors
For the photographed sample:
- Color A is dusty sage.
- Color B is warm cream.
- Rows 5, 9, and 13 are worked in Color B.
- All remaining rows are worked in Color A.
A one-color version is even easier. The BLO ridges remain visible because the texture comes from the unused front loops, not only from the color change.
US and UK terminology note
This article uses US terms. US half double crochet is called half treble crochet in UK terminology. US single crochet is called double crochet in UK terminology. The Craft Yarn Council’s terminology list can help readers compare common pattern terms.
Step-by-Step Crochet Tutorial
Step 1: Make the Foundation and Bottom Point
Using Color A, make a slip knot and chain 4.
Row 1, RS: Beginning in the second chain from the hook, work 2 hdc in the first chain. Work 1 hdc in the next chain. Work 2 hdc in the last chain. Turn.
Stitch count: 5 hdc
The two stitches at each end begin opening the fabric into a small triangle. The single middle stitch establishes the center of the point.
Place a locking stitch marker on the side facing you. This is the right side of the project.
Beginner tip:
Work into the back bump of each foundation chain when possible. It produces a tidy lower point and leaves a cleaner chain edge.
Common mistake to avoid:
Do not work into the chain directly beneath the hook. Start in the second chain from the hook.
Step 2: Work the First Increase Rows
The next three rows use the same simple shaping formula.
Row 2, WS: Ch 1 and turn. Work 2 hdc in the first stitch. Work 1 hdc in each stitch until one stitch remains. Work 2 hdc in the last stitch.
Stitch count: 7 hdc
Row 3, RS: Repeat the increase row.
Stitch count: 9 hdc
Row 4, WS: Repeat the increase row.
Stitch count: 11 hdc
At the end of Row 4, change to Color B while completing the final hdc. On the final yarn over, pull Color B through the three loops instead of Color A. Leave a 6-inch tail in each color.
Beginner tip:
Count before turning. It is much easier to correct a missed increase while the row is still in front of you.
Common mistake to avoid:
The ch 1 turning chain does not count as a stitch. Place the first increase into the first actual hdc.
Step 3: Make the First Textured Ridge
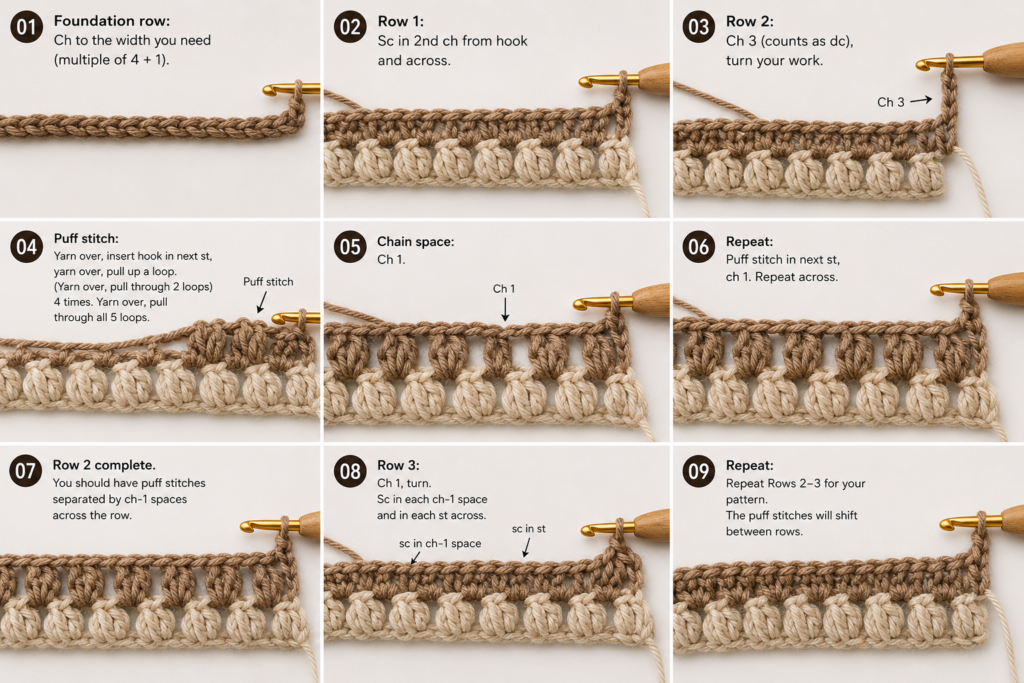
Row 5, RS: Ch 1 and turn. Work 2 hdc through both loops of the first stitch. Work 1 hdc in the BLO of every stitch until one stitch remains. Work 2 hdc through both loops of the last stitch.
Stitch count: 13 hdc
Change back to Color A while completing the final stitch.
Working both edge increases through both loops helps keep the outer edges stable. Only the middle stitches are worked through the back loop.
After turning for the next row, a cream horizontal ridge should be visible on the right side.
Beginner tip:
Tilt the row slightly toward you. The back loop is the strand farther away from your body.
Common mistake to avoid:
Do not insert the hook under the horizontal bar behind the stitch. Insert it under the back strand of the top V.
Step 4: Continue Increasing to the Second Ridge
Using Color A:
Row 6, WS: Repeat the standard increase row.
Stitch count: 15 hdc
Row 7, RS: Repeat the standard increase row.
Stitch count: 17 hdc
Row 8, WS: Repeat the standard increase row.
Stitch count: 19 hdc
Change to Color B in the final stitch of Row 8.
Row 9, RS: Work 2 hdc through both loops of the first stitch. Work hdc in the BLO of each stitch until one remains. Work 2 hdc through both loops of the last stitch.
Stitch count: 21 hdc
Change back to Color A in the final stitch.
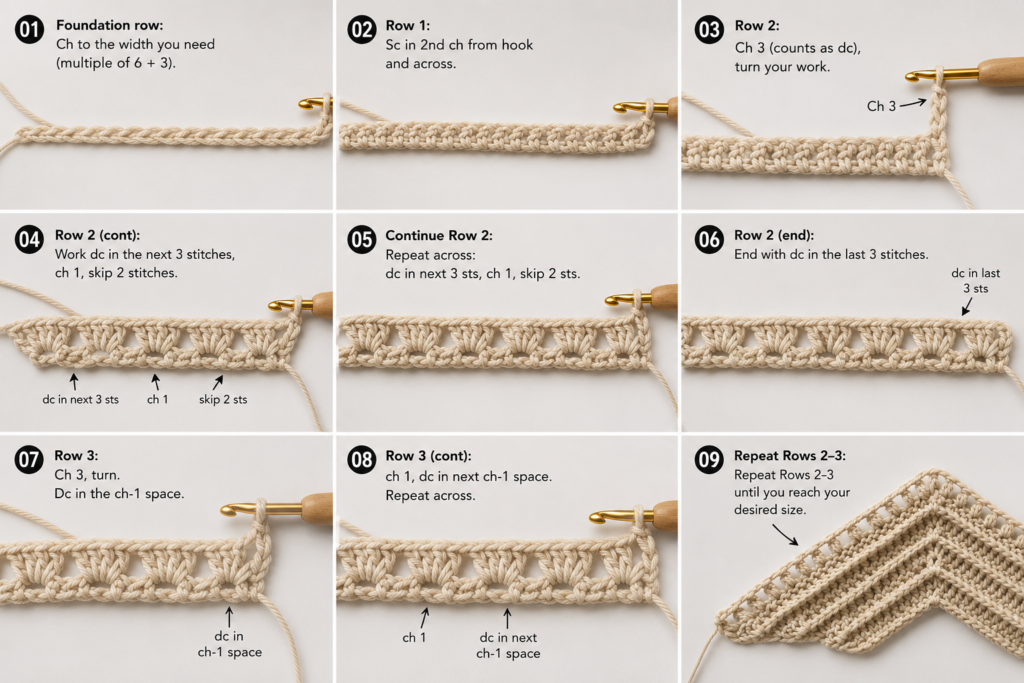
You should now have two cream ridges separated by three plain sage rows.
Beginner tip:
Lay the piece flat after Row 9. The lower point should sit beneath the approximate center of the widest row.
Common mistake to avoid:
Do not pull the cream yarn tightly across the back when changing color. Tight carried yarn can shorten one edge. For the simplest result, cut the cream yarn after each ridge and weave in the tails later.
Step 5: Add the Third Ridge
Using Color A:
Row 10, WS: Repeat the standard increase row.
Stitch count: 23 hdc
Row 11, RS: Repeat the standard increase row.
Stitch count: 25 hdc
Row 12, WS: Repeat the standard increase row.
Stitch count: 27 hdc
Change to Color B in the last stitch.
Row 13, RS: Work 2 hdc through both loops of the first stitch. Work hdc in the BLO of each stitch until one remains. Work 2 hdc through both loops of the last stitch.
Stitch count: 29 hdc
Change back to Color A.
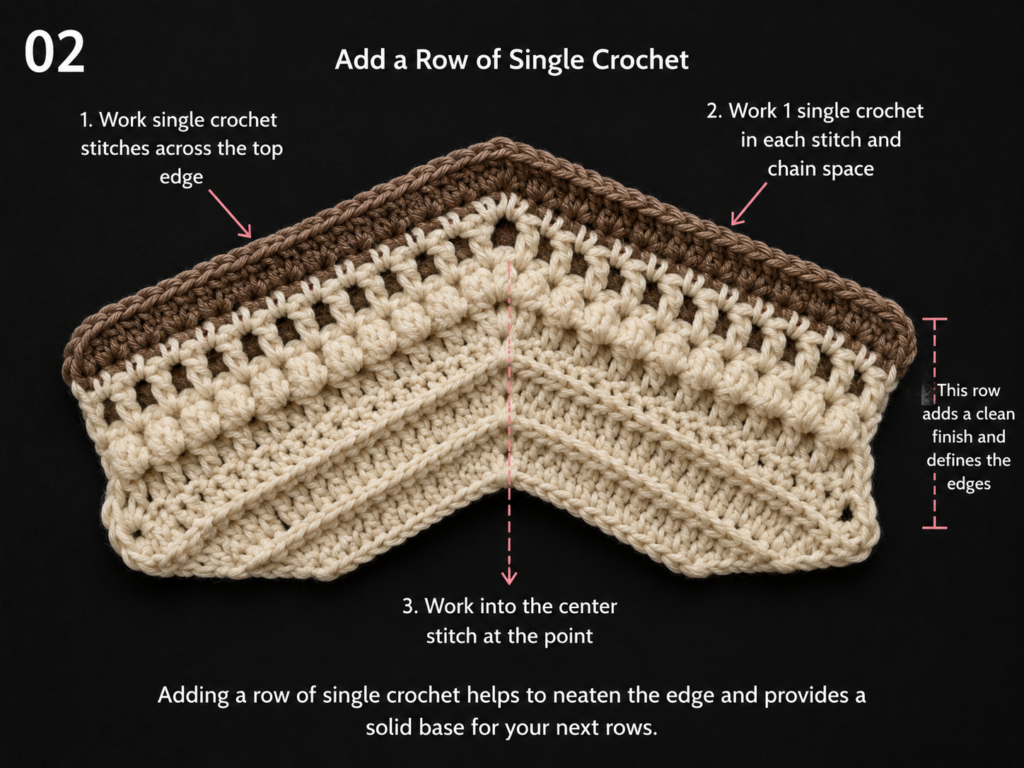
The three cream ridges form the visual structure of the wall hanging. They should be separated by equal numbers of sage rows.
Beginner tip:
Place a removable marker in each edge increase before working across. When you reach the second marker, you know you are at the last stitch.
Common mistake to avoid:
Avoid adding the second increase one stitch too early. Your final two hdc must be placed together in the actual last stitch.
Edge-Checking Tip
Before continuing, inspect the first and last stitch of each row.
A correct edge has a regular staircase appearance. One edge should not suddenly lose a step or become noticeably steeper.
When a stitch is missing:
- Remove the hook from the active loop.
- Pull the yarn back to the row containing the mistake.
- Replace the hook.
- Rework the row with the correct first and last increases.
Correcting the error now is faster than trying to disguise an uneven mounting edge later.
Step 6: Complete the Triangular Section
Using Color A:
Row 14, WS: Repeat the standard increase row.
Stitch count: 31 hdc
Row 15, RS: Repeat the standard increase row.
Stitch count: 33 hdc
Row 16, WS: Repeat the standard increase row.
Stitch count: 35 hdc
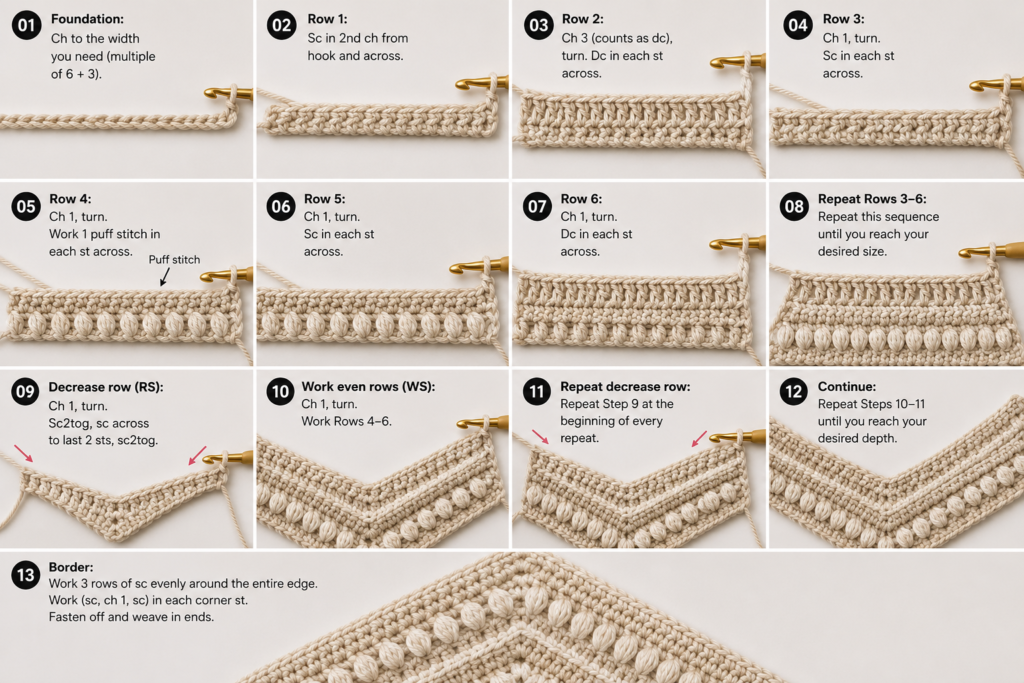
Your triangle should now measure approximately 10½–11½ inches across. Minor variation is acceptable.
When using a shorter dowel, stop after Row 14 or Row 15. When using a longer dowel, add more increase rows. Remember that every additional increase row adds two stitches.
Beginner tip:
Measure the fabric without stretching it. A wall hanging should remain comfortably narrower than the dowel.
Common mistake to avoid:
Do not continue increasing during the next section. The top band must remain at 35 stitches so its sides rise vertically.
Step 7: Crochet the Straight Top Band
The mounting band is worked without increases.
Row 17, RS: Ch 1 and turn. Work 1 hdc in every stitch across.
Stitch count: 35 hdc
Row 18, WS: Ch 1 and turn. Work 1 hdc in every stitch across.
Stitch count: 35 hdc
Row 19, RS: Ch 1 and turn. Work 1 hdc in every stitch across.
Stitch count: 35 hdc
Row 20, WS: Ch 1 and turn. Work 1 sc in every stitch across.
Stitch count: 35 sc
The final single crochet row produces a firm upper edge that is easy to sew against the dowel.
Fasten off, leaving a 10-inch tail. Pull the tail through the final loop and tighten gently.
Beginner tip:
Count each top-band row. An accidental increase or skipped edge stitch can cause the band to flare or pull inward.
Common mistake to avoid:
Do not place two stitches in the first and final stitches during Rows 17–20. The increasing section is complete.
Step 8: Weave in the Ends and Attach the Dowel
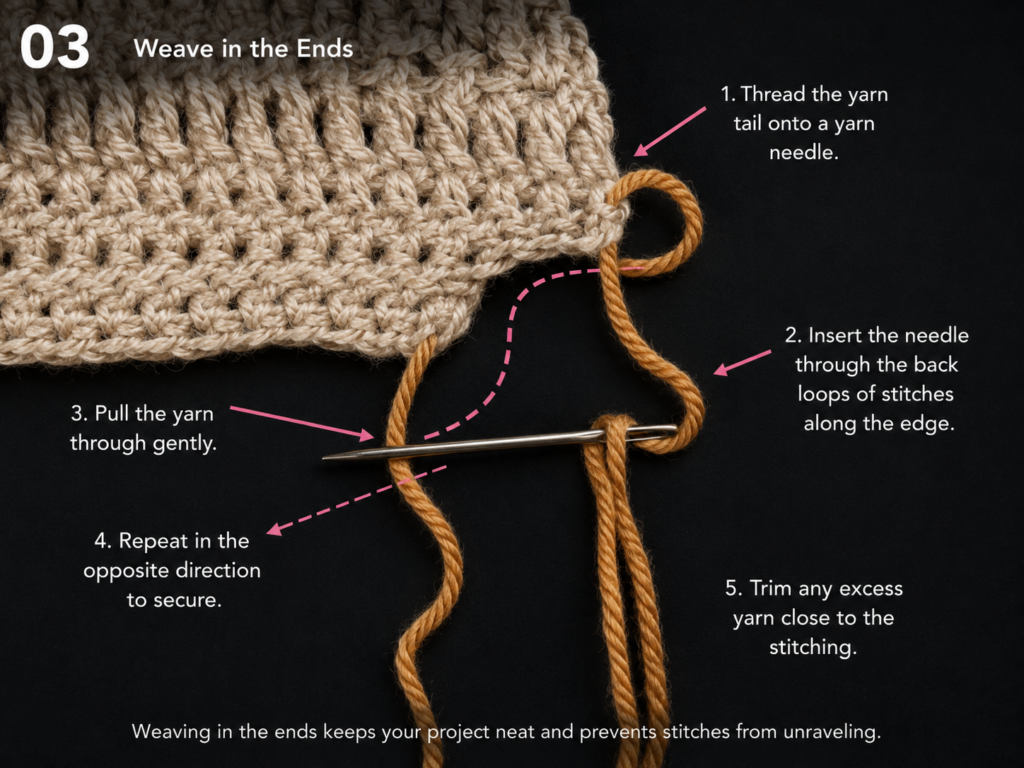
Thread each yarn tail onto the blunt yarn needle.
On the wrong side, weave the tail through the bases of four or five stitches. Reverse direction and pass it through several nearby stitches again. Trim the excess without cutting the fabric.
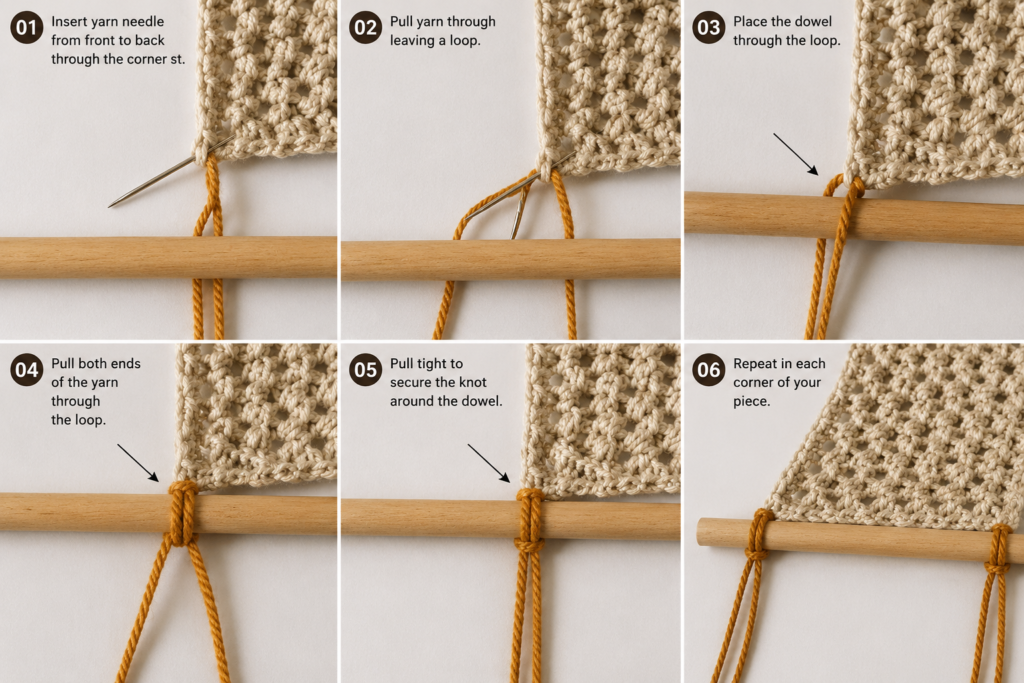
To mount the panel:
- Cut a strand of Color A approximately 48 inches long.
- Thread the yarn needle.
- Center the crochet panel beneath the wooden dowel.
- Begin at the upper-left corner.
- Pass the needle through the first top stitch from back to front.
- Bring the yarn over and around the dowel.
- Insert the needle through the next top stitch.
- Continue across the entire upper edge.
- Keep each wrap vertical and equally tensioned.
- Secure the yarn at the back and weave in the remaining tail.
The crochet edge should sit directly below the dowel. Do not pull the sewing yarn so tightly that the top band gathers.
Beginner tip:
Secure the center stitch to the center of the dowel first with a temporary yarn loop. This keeps the panel centered while you sew from left to right.
Common mistake to avoid:
Do not allow the dowel wraps to angle sharply. Angled loops pull the panel sideways.
Step 9: Add the Hanging Cord
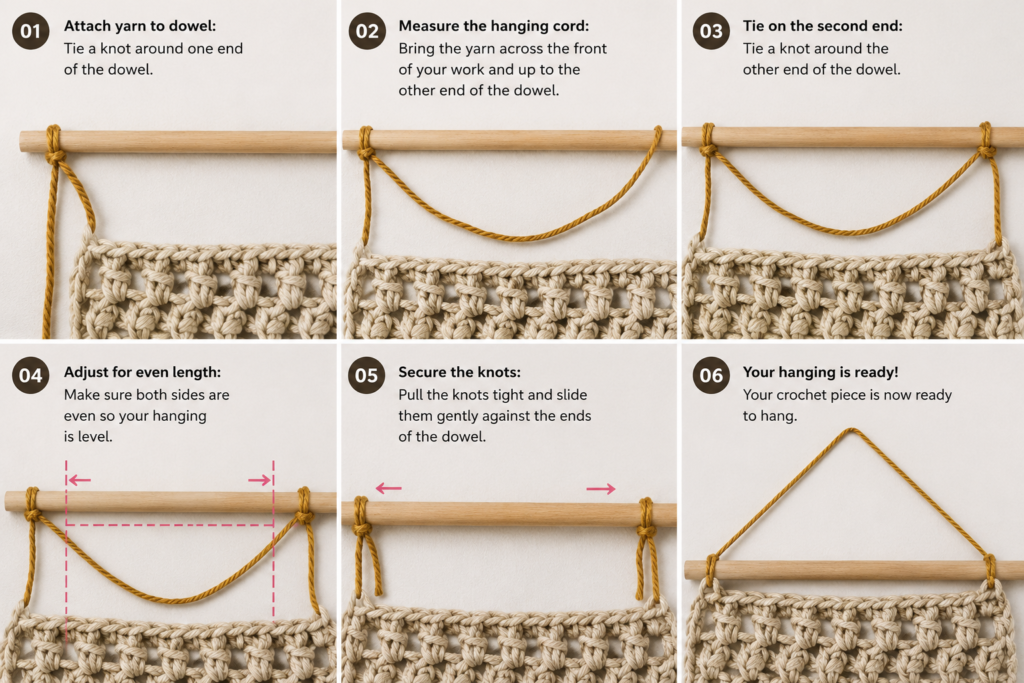
Cut a 24-inch strand of Color B.
Tie one end around the dowel approximately ¾ inch from the left end. Use a secure double knot.
Tie the opposite end the same distance from the right end. Before tightening the second knot, lift the dowel and check the hanging height.
A shorter cord places the dowel closer to the wall hook. A longer cord creates a taller visible triangle above the dowel.
Trim the cord ends evenly or weave them around the cord knots with a yarn needle.
Beginner tip:
Place the hanging cord knots inside the dowel ends rather than directly at the tips. This reduces the chance of the cord slipping off.
Common mistake to avoid:
Do not tie one cord end noticeably closer to the center than the other. Uneven placement causes the dowel to tilt.
Step 10: Block and Shape the Wall Hanging
Blocking improves the symmetry of the triangle, opens the ridge texture, and helps the top band sit flat.
Always check the yarn label before applying water or heat.
Spray-blocking method
- Place the wall hanging on a blocking mat or folded towel.
- Straighten the top edge.
- Center the lower point.
- Pin the two upper corners.
- Add pins along both sloping edges.
- Lightly mist the fabric with clean water.
- Allow it to dry completely before removing the pins.
Steam-blocking method
- Pin the wall hanging into shape.
- Hold the steamer above the fabric.
- Keep the steamer moving.
- Do not press the hot plate against the yarn.
- Allow the panel to cool and dry before unpinning.
The appropriate blocking method depends on the fiber. High heat can damage or flatten some synthetic yarns. Follow the care instructions supplied by the yarn manufacturer. The Craft Yarn Council also recommends retaining yarn-label information so the correct care method remains available.
Beginner tip:
Measure from the upper-left corner to the lower point and from the upper-right corner to the lower point. Similar measurements indicate that the point is centered.
Common mistake to avoid:
Do not pull the panel aggressively to reach a predetermined size. Blocking should refine the shape, not permanently overstretch loose stitches.
Pattern Notes or Stitch Notes
Turning-chain rule
The ch 1 at the beginning of every row raises the hook to the correct height. It does not count as a stitch.
Always place the first hdc in the first actual stitch directly below the hook.
Stitch counts
- Row 1: 5
- Row 2: 7
- Row 3: 9
- Row 4: 11
- Row 5: 13
- Row 6: 15
- Row 7: 17
- Row 8: 19
- Row 9: 21
- Row 10: 23
- Row 11: 25
- Row 12: 27
- Row 13: 29
- Row 14: 31
- Row 15: 33
- Row 16: 35
- Rows 17–20: 35
Increase repeat
For Rows 2–16:
- Work 2 hdc in the first stitch.
- Work 1 hdc in each middle stitch.
- Work 2 hdc in the final stitch.
Each row gains two stitches.
Texture-row repeat
Rows 5, 9, and 13 are ridge rows.
Work the first and last increases through both loops. Work all middle stitches through the back loop only.
Right and wrong sides
Odd-numbered rows face the right side. Even-numbered rows face the wrong side.
Place a removable marker on the right side after completing Row 1.
Size adjustments
To make a narrower wall hanging, stop increasing when the panel is 1½–2 inches narrower than the dowel.
To make it wider, repeat the increase row until the desired width is reached.
To make the top band deeper, add more straight rows without increases.
To lengthen the hanging without widening it, add tassels or fringe rather than continuing the triangle increases.
Common Beginner Mistakes
1. Counting the turning chain as a stitch
Problem: The stitch count increases incorrectly or a gap forms at the edge.
Fix: Ignore the ch 1. Insert the hook into the first actual stitch directly below it.
2. Missing the final stitch
Problem: One side becomes steeper and the stitch count is one short.
Fix: Mark the final stitch immediately after turning. Remove the marker only after working the two-stitch increase into it.
3. Increasing in the middle accidentally
Problem: A bulge appears in the center of the triangle.
Fix: Use two stitches in the same stitch only at the first and final stitch of Rows 2–16.
4. Working under the wrong strand during a BLO row
Problem: The ridge disappears or the stitch becomes twisted.
Fix: Identify the top V. Insert the hook under the strand farther away from you.
5. Pulling the cream rows too tightly
Problem: The ridge rows draw inward and make the panel cup.
Fix: Relax the working yarn and allow each loop to slide onto the wider part of the hook shaft before completing the stitch.
6. Forgetting to stop increasing
Problem: The top band continues flaring outward.
Fix: From Row 17 onward, work only one stitch in each stitch across.
7. Sewing the panel off-center
Problem: One exposed dowel end is longer than the other.
Fix: Mark the center of the dowel and the center stitch of the top band before sewing.
8. Pulling the mounting loops too tightly
Problem: The top band gathers and the panel looks narrower at the top.
Fix: Keep each wrap snug enough to hold the panel but loose enough to preserve the original width.
9. Blocking with excessive heat
Problem: Synthetic fibers flatten, shine, or partially melt.
Fix: Read the yarn label and keep heat above the fabric rather than pressing directly onto it.
How to Customize This Crochet Project
Use one yarn color
Make every row in the same shade for a quiet, minimalist wall hanging. The three BLO rows still produce subtle horizontal ridges.
Create a stronger color contrast
Try charcoal with cream, navy with natural white, terracotta with blush, or forest green with oatmeal.
Use a light color for the ridge rows when you want the texture to remain easy to photograph.
Add more texture rows
Replace Rows 3, 7, 11, and 15 with additional BLO rows. This creates closer horizontal ridges.
Keep the first and last increases through both loops to protect the edge structure.
Change the size
For a mini wall hanging, stop increasing at 21 or 23 stitches and use an 8-inch dowel.
For a larger version, continue increasing beyond 35 stitches and mount the panel on an 18–20-inch dowel.
Add tassels
Cut six strands approximately 12 inches long. Fold them together, pull the folded center through the bottom-point stitch, and bring all loose ends through the folded loop.
Trim the tassel after the piece is hanging.
Add side fringe
Cut equal yarn lengths by wrapping yarn around a book and cutting along one edge.
Attach small groups to every second row-end space along both sloping sides. Stop below the top band so the fringe does not crowd the dowel.
Add wooden beads
Slide one or two large-hole wooden beads onto the hanging cord before tying the second end.
Keep beads securely above the dowel and away from young children or pets.
Add surface crochet
Use cream yarn and a slip stitch to trace a vertical line from the top center toward the lower point.
Surface crochet should remain relaxed so it does not pucker the panel.
Gift and use ideas
- Dorm-room wall décor
- Housewarming gift
- Nursery decoration
- Craft-room accent
- Small hallway feature
- Boho bedroom decoration
- Handmade holiday gift
- Market-stall home décor item
Finishing Instructions
Fastening off
After the final single crochet row, cut the yarn with a 10-inch tail. Pull the tail completely through the active loop and tighten it gently.
Weaving in ends
Weave every tail through several stitches on the wrong side. Change direction at least once before trimming.
Do not knot every color-change tail directly at the edge. Bulky knots can remain visible when the wall hanging is mounted.
Shaping
Lay the finished piece on a flat surface. Align the top band horizontally and position the lower point beneath its center.
Pin only after confirming that both sloping edges have a similar angle.
Blocking
Choose wet, spray, or steam blocking according to the fiber content and care label. Blocking is especially useful for decorative panels because the project remains visible in a fixed hanging position.
Washing and care
The wall hanging should rarely require full washing. Dust it gently, use a low-suction upholstery attachment with care, or hand wash only when the yarn label permits it.
Remove wooden components before soaking whenever the mounting method allows. Dry the panel flat and reshape it while damp.
Optional tassel trimming
Hang the finished project before trimming tassels. Gravity changes the way the strands settle, so trimming them on a table can produce an uneven result once displayed.
Quick Printable-Style Summary
Project: Easy Textured Triangle Wall Hanging
Skill level: Beginner to advanced beginner
Yarn: Medium number 4 yarn in dusty sage and warm cream
Hook: 5.0 mm
Dowel: 14 inches
Stitches: Ch, sc, hdc, BLO hdc
Starting method: Ch 4; work 5 hdc across the foundation
Increase repeat: 2 hdc in first stitch, hdc across, 2 hdc in last stitch
Texture rows: Rows 5, 9, and 13 in Color B and BLO
Final triangle count: 35 stitches after Row 16
Top band: Three hdc rows and one sc row without increases
Mounting: Sew the top edge to a wooden dowel with evenly spaced wraps
Finishing: Add hanging cord, weave in ends, block, and add optional tassels
FAQ
Is this crochet wall hanging pattern suitable for an absolute beginner?
It is suitable after you can make a chain and half double crochet. The shaping is repetitive, but you must be able to identify the first and last stitch of each row.
Practice a small half double crochet swatch first when you have never worked in turned rows.
Can I make the wall hanging with one color?
Yes. Complete every row with the same yarn. The back-loop rows will still create visible raised lines.
A one-color version also eliminates most color-change tails.
What yarn is best for a crochet wall hanging?
A smooth medium-weight yarn is the easiest choice for this tutorial. Cotton produces defined stitches, acrylic is widely available, and a cotton-acrylic blend can offer both definition and easy handling.
Avoid highly elastic or fuzzy yarn for your first version because it can make the stitch tops harder to identify.
Why is my triangle leaning to one side?
The most likely cause is a missed increase at one edge or an accidental increase elsewhere.
Count the current row and compare it with the stitch-count list. Also check that both the first and final stitches contain two hdc on every increase row.
Why are the cream ridge rows tighter than the sage rows?
You may be holding the cream yarn more tightly or using a slightly different yarn thickness.
Relax your tension, make sure both yarns are in the same weight category, and use a larger hook for the ridge rows only when necessary.
Do I have to block the finished wall hanging?
Blocking is strongly recommended because it helps center the point, straighten the mounting edge, and relax small differences in tension.
Use the blocking method appropriate for the yarn fiber and follow its care label.
Can I use a tree branch instead of a dowel?
Yes. Choose a dry, clean branch without loose bark, resin, sharp points, or insects.
Measure the usable straight section before deciding how wide to make the crochet panel.
Conclusion
This beginner crochet wall hanging uses a small set of skills but gives you practice with several techniques that will be valuable in future projects: turned rows, predictable increases, back-loop texture, color changes, edge counting, assembly, and blocking.
Once you understand the shaping sequence, the design is easy to personalize. Make a compact one-color version for a gallery wall, widen it for a bedroom focal point, add fringe for a boho finish, or use school colors for dorm-room décor.
Save the stitch-count list before beginning, count every row, and take time to center the panel on the dowel. Those three habits will make the finished wall hanging look balanced and carefully made.





